
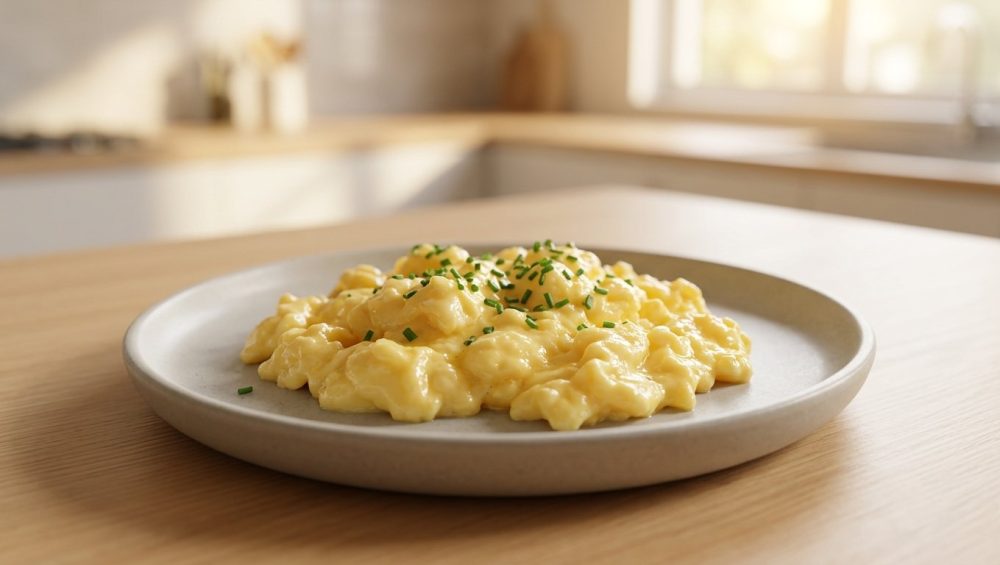
The Breakfast Betrayal: Why Your Morning Scramble is Weeping
Look, I get it. You haven’t had your coffee yet, the sun is barely up, and you just want a decent, comforting breakfast before you have to face the chaos of the day. You crack a few eggs into a bowl, give them a half-hearted whisk, dump them into a hot pan, and push them around until they look done. You slide them onto your plate, grab your toast, and sit down. But by the time you take your first bite, a tragic, watery puddle has seeped out from the eggs, completely ruining your toast and turning your morning into a soggy disappointment.
If this sounds familiar, take a deep breath. You are not alone. Turning a beautiful, protein-packed ingredient into a weeping, rubbery sponge is one of the most common beginner cooking mistakes in the culinary world. But here is the good news: you do not need a culinary degree from Le Cordon Bleu to fix it. You just need a basic understanding of kitchen thermodynamics and a willingness to change your habits.
I have zero patience for pretentious chef-speak, but we do need to talk about the actual science of what is happening in your skillet. Your eggs are not plotting against you; they are simply reacting to the environment you put them in. When you understand the basic food science of protein coagulation, you will never have to eat a sad, watery breakfast again. Let’s roll up our sleeves, ditch the bad habits, and master the definitive art of the scramble.
The Food Science of a Sad Puddle: Meet Syneresis
To stop your eggs from weeping, you need to understand what an egg actually is. We tend to think of eggs as a single, uniform ingredient, but they are incredibly complex little marvels of biology and chemistry.
The Anatomy of an Egg
An average chicken egg is composed of roughly 74 percent water, 12 percent protein, and 11 percent fat, with a few trace vitamins and minerals thrown in for good measure. The yolk is where you find almost all of the fat, while the egg white (the albumen) is mostly water and a complex matrix of over 40 different types of proteins.
For the home cook, there are two primary proteins in the egg white that you need to care about: ovotransferrin and ovalbumin. In their raw state, these proteins look like microscopic, tightly wound balls of yarn floating peacefully in water. Because they are folded up so tightly, the raw egg remains fluid and runny.
Protein Coagulation and the Sponge Effect
When you apply heat to these proteins, everything changes. As the temperature in your frying pan rises, those tightly wound balls of yarn begin to violently shake and uncoil—a process scientists call denaturing. Once uncoiled, these long protein strands start bumping into each other and bonding together, forming a vast, three-dimensional web. This web traps the water molecules inside it, transforming your liquid egg into a soft, solid mass. This magical process is called coagulation.
But here is where things go horribly wrong for most weekend culinary hobbyists. If you continue to apply heat, those protein strands don’t just hold hands; they start gripping each other tighter and tighter. Imagine a wet kitchen sponge. If you hold it gently, it retains all its moisture. If you squeeze it with all your might, the water comes gushing out.
When you overcook your eggs, the protein network acts exactly like that tightly squeezed sponge. The proteins bind so aggressively that they literally wring the trapped water right out of the matrix. This specific chemical reaction—the weeping of liquid from an over-coagulated protein structure—is called syneresis. It is the exact scientific reason why your scrambled eggs leak water all over your plate.
The Usual Suspects: What’s Actually Ruining Your Scramble
Now that we know the enemy is syneresis, we need to identify the kitchen crimes that are causing it. Spoiler alert: it usually comes down to impatience and poor temperature control.
Heat Abuse: The Number One Offender
The dial on your stovetop is not a race to the finish line. Eggs are incredibly sensitive to temperature changes. Let’s look at the hard data: ovotransferrin, the more delicate protein in the egg white, begins to set at around 140°F (60°C). The yolk proteins begin to thicken and coagulate between 150°F and 158°F (65°C to 70°C). Finally, the stubborn ovalbumin requires a temperature of about 180°F to 184°F (80°C to 84°C) to fully set.
Water boils at 212°F (100°C). A skillet set to “Medium-High” can easily exceed 350°F (175°C). When you drop delicate eggs into a blazing hot pan, you are blasting them hundreds of degrees past their ideal coagulation point in a matter of seconds. The proteins panic, seize up instantly, and aggressively squeeze out every drop of moisture they hold. If you want tender eggs, you must respect their thermal limits.
The Carryover Cooking Trap
Let’s say you actually listened to me and cooked your eggs over gentle, medium-low heat. You stir them until they look perfectly fluffy and fully set in the pan, and then you turn off the burner. Congratulations, you just ruined them anyway.
Skillets—especially heavy cast iron or multi-clad stainless steel—retain a massive amount of thermal energy. Even after you kill the flame, the pan continues to pump heat into your breakfast. Furthermore, the eggs themselves hold internal heat. If you wait until they look perfectly done in the pan to plate them, they will be overcooked and weeping by the time they hit the table. You need to pull them off the heat when they are about 80 percent done, and rely on the magic of residual heat to gently carry them over the finish line.
The Great Dairy Debate: Milk, Cream, or Water?
Many home cooks add a splash of milk, heavy cream, or even water to their beaten eggs, claiming it makes them fluffier. Scientifically, adding liquid dilutes the protein concentration. This dilution actually raises the temperature required for coagulation, buying you a little bit of an insurance policy against overcooking.
However, this is a double-edged sword. While the added fat from heavy cream coats the proteins and helps prevent them from binding too tightly, adding plain water or skim milk just introduces more loose liquid into the equation. If you overcook a diluted egg mixture even slightly, you now have extra water waiting to be squeezed out via syneresis. If you are going to add dairy, use something with fat, like whole milk or heavy cream, and use it sparingly.
Sabotage by Vegetables: The Moisture Bombs
We all love a good veggie scramble to pretend we are being healthy on a Sunday morning. But raw vegetables like tomatoes, bell peppers, spinach, and mushrooms are essentially just water balloons masquerading as produce. If you toss raw mushrooms directly into your raw eggs and cook them together, the vegetables will release their internal water content straight into the eggs as they heat up. Always sauté your vegetables thoroughly first, cook off their excess moisture, and then add your beaten eggs.
The Salt Controversy: When Should You Actually Season?
If you have ever watched traditional cooking shows, you have likely heard a very famous, very angry British chef loudly proclaim that salting your eggs before cooking them will break them down and turn them into a watery, gray mess.
The Myth of Tough Eggs
For decades, the culinary dogma has been that salt draws out moisture and destroys the texture of raw eggs. Home cooks have been terrified into seasoning their breakfast only at the very last second before eating. But here is the brutal truth: that old wives’ tale is completely backwards. If you want a tender, flawless scramble, you need to stop salting them last.
The 15-Minute Rule for Perfect Texture
Food science icon Kenji Lopez-Alt conducted exhaustive testing on this exact subject and proved that salting your eggs well in advance is actually the secret to preventing syneresis. When you add salt to raw, beaten eggs and let them rest, the salt slowly dissolves and alters the electrical charge of the proteins.
This chemical reaction acts as a buffer. The dissolved salt literally prevents the proteins from binding too tightly to one another when they are heated. Because the proteins cannot form a vice-like grip, they cannot squeeze the water out of the matrix. The result? A remarkably tender, moist curd that refuses to weep. For the absolute best results, try salting them early—about 15 minutes before you plan to cook. You will notice the raw eggs turn a slightly deeper, more translucent yellow as the proteins relax. That is the visual cue that your eggs are perfectly primed for the pan.
Gear Check: Ditch the Toxic Pans
Before we get to the actual cooking techniques, we need to have a serious intervention about your kitchen equipment. I have built my entire philosophy on empowering the home cook, which means I am fiercely dedicated to banishing toxic kitchen gear from your life forever.
Why Cheap Non-Stick is Ruining Your Life
If you are currently cooking your breakfast in a lightweight, ten-dollar aluminum skillet with a scratched, peeling Teflon coating, throw it in the trash immediately. Not only are you consuming microscopic flakes of mystery chemicals with your morning coffee, but those cheap pans have atrocious thermal conductivity. They heat unevenly, creating aggressive hot spots that will instantly overcook portions of your eggs while leaving the rest raw.
Furthermore, you must realize that aerosol cooking spray is the enemy of any cookware. Those convenient little cans contain chemical propellants and emulsifiers (like soy lecithin) that polymerize under heat, baking onto the surface of your pan as an invincible, sticky brown residue that eventually ruins the non-stick properties entirely. Use real butter, ghee, or high-quality oil.
The Only Skillets You Actually Need
You do not need toxic non-stick to cook eggs. A well-seasoned carbon steel skillet or a high-quality enameled cast iron pan will release eggs beautifully. If you are using a heavy-bottomed, tri-ply stainless steel skillet, you simply need to manage your heat correctly. Pre-heat the stainless steel pan gently, and use the water drop test—flicking a tiny amount of water into the pan to see if it beads up and glides across the surface (the Leidenfrost effect)—before adding your butter and eggs. When the temperature is right, stainless steel acts like a dream.
The Sassy Sous-Chef’s Blueprint for Flawless, Puddle-Free Eggs
We have covered the biology, the chemistry, and the hardware. Now it is time to execute. This is my definitive, foolproof method for traditional, low-and-slow scrambled eggs designed for a lazy weekend morning.
Step 1: The Pre-Game (Whisking and Resting)
Crack three large, high-quality eggs into a mixing bowl. Do not crack them directly on the edge of the bowl, which drives shards of shell into the liquid; crack them on a flat countertop. Add a generous pinch of kosher salt right now.
Take a proper balloon whisk or a fork and beat the eggs vigorously. You do not want lazy streaks of clear egg white floating around. You need to completely homogenize the yolks and the whites into a uniform, pale yellow liquid. If you want to add a tablespoon of heavy cream or whole milk, do it now. Let the bowl sit on the counter for 10 to 15 minutes to let the salt work its magic on the proteins.
Step 2: The Pan and the Fat
Place your skillet over medium-low heat. Patience is mandatory here. Let the pan warm up gently. Add a generous tablespoon of unsalted butter. You want the butter to melt and foam slightly, but you absolutely do not want it to brown. If the butter turns brown and smells nutty, your pan is too hot for soft scrambled eggs. Pull it off the heat for a minute to cool down.
Step 3: The Low and Slow Dance
Pour your rested, salted eggs into the center of the warm pan. Do not touch them immediately. Let them sit for just a few seconds until you see a very thin, opaque layer of cooked egg begin to form around the edges.
Now, take a heat-resistant silicone spatula and gently push the eggs from the outside edge of the pan directly toward the center. This action creates large, sweeping curds. Liquid egg will rush in to fill the empty space you just created. Rotate the pan and repeat. You are not aggressively chopping or stirring; you are gently folding the proteins.
Step 4: The Bailout
This is the most critical moment. As the eggs begin to pile up in the center, they will still look incredibly wet and slightly runny. When they look like they need about thirty more seconds of cooking, take them off the burner immediately.
Grab a slotted fish turner or your silicone spatula, give them one final, gentle fold in the warm pan, and immediately transfer them to a warm plate. The residual heat trapped in the curds will finish cooking them to absolute perfection on the plate, leaving you with a glistening, tender, and entirely puddle-free breakfast.
Advanced Egg Hacks for the Weekday Warrior and Weekend Perfectionist
The low-and-slow method is beautiful for a lazy Sunday, but let’s be brutally honest: time is money. On a chaotic Tuesday morning when you are trying to get out the door, you do not have ten minutes to stand over a stove whispering sweet nothings to a skillet. You need a shortcut that doesn’t compromise on quality.
The 15-Second Weekday Miracle (The Cornstarch Slurry)
This is a brilliant, modern food science hack popularized by culinary blogger Mandy Lee (Lady & Pups) and validated by Kenji Lopez-Alt. If you want to cook eggs rapidly over high heat without triggering syneresis, you need to employ the magic of a little cornstarch.
Here is how it works: starch molecules act as a physical barrier and a sponge. When you mix a tiny amount of starch into your eggs, the starch gelatinizes as it hits the heat, binding the water tightly. Simultaneously, the starch molecules physically get in the way of the egg proteins, preventing them from linking up too tightly.
The Execution:
- In a small cup, whisk together 1.5 tablespoons of whole milk and a scant 1.5 teaspoons of cornstarch (or potato starch) until perfectly smooth.
- Crack three eggs into a bowl, add your salt, and whisk in the starch slurry until homogenous.
- Place your skillet over high heat—yes, you read that right. Add a generous knob of butter.
- As soon as the butter is violently bubbling (but before it browns), dump the eggs in.
- Count to three. The edges will bubble up instantly. Pull the pan completely off the heat.
- Stir rapidly for about 12 seconds.
The starch protects the proteins from the intense heat, resulting in a rich, custardy, impossibly creamy scramble in literally 15 seconds flat. It is a weeknight dinner or weekday breakfast game-changer.
The Double Boiler Method (For the Truly Obsessed)
On the opposite end of the spectrum, if you have thirty minutes to kill and want to experience the most luxurious, velvety eggs of your life, try the classic French double boiler (bain-marie) method.
Place a heat-proof glass or stainless steel bowl over a saucepan of gently simmering water (ensure the bottom of the bowl does not touch the water). Add a tablespoon of butter and your beaten, salted eggs to the bowl. Grab a whisk and stir continuously. Because the ambient steam provides an incredibly gentle, indirect heat, it is physically impossible for the eggs to exceed the boiling point of water. It will take 15 to 20 minutes of constant stirring, but the eggs will eventually thicken into a luscious, spreadable, ricotta-like texture that belongs on a piece of toasted brioche in a Parisian café.
Rescuing a Ruined Scramble (Because We All Mess Up)
I firmly believe that anyone can cook, but I also know that distractions happen. The dog barks, your phone rings, and suddenly your beautifully managed eggs have turned into dry, weeping rubber pellets.
You cannot reverse protein coagulation. Once the moisture is squeezed out, you cannot simply stir it back in. But you can pivot to save your meal. If you have overcooked your scramble, immediately remove it from the heat and aggressively stir in a tablespoon of cold butter, a spoonful of crème fraîche, or a dollop of cream cheese. The cold fat will instantly drop the temperature of the pan, halting the cooking process, while the dairy will artificially coat the dry curds, masking the rubbery texture.
If they are truly beyond saving as a standalone dish, pivot entirely. Throw a tortilla in a dry pan, melt some sharp cheddar cheese on it, add a spoonful of salsa, and fold your overcooked eggs into a breakfast burrito. The fat from the cheese and the acidity of the salsa will hide your culinary sins perfectly.
Conclusion: Reclaiming Your Morning Glory
Cooking is not magic; it is applied physics and chemistry mixed with a little bit of intuition. The watery puddle ruining your breakfast plate is not a reflection of your worth as a home cook. It is simply the inevitable result of proteins reacting to excessive heat and improper seasoning.
By understanding the mechanics of syneresis, respecting the delicate coagulation temperatures of ovalbumin and ovotransferrin, and deploying smart, science-backed tricks like pre-salting and starch slurries, you can effortlessly conquer the kitchen. You now have the exact blueprint to produce rich, tender, restaurant-quality eggs every single time you fire up the stove.
So ditch the toxic pans, turn down the heat, salt your eggs early, and take back your morning. You’ve got this.






