Welcome to the masterclass, my fellow weekend culinary warriors. Grab a coffee, or better yet, pour yourself a glass of wine, because we are about to solve the single most infuriating problem in the modern home kitchen.
You know the exact scenario I am talking about. You went out and spent your hard-earned money on a gorgeous, heavy-bottomed, professional-grade stainless steel skillet. You brought it home, feeling like an absolute culinary god, ready to sear a chicken breast that would make a Michelin-starred chef weep. You placed the meat in the pan, waited five minutes, went to flip it, and—disaster. Half the chicken stayed glued to the metal, your dinner was reduced to shredded poultry confetti, and you spent the next forty-five minutes angrily scrubbing the pan while questioning your life choices.
It is a kitchen rite of passage. But I am here to tell you that it does not have to be your permanent reality. If your meat sticks to stainless steel on a regular basis, it is not because the pan is defective, and it is certainly not because you lack some innate cooking talent. It is simply because you are treating a high-performance culinary engine like a cheap, disposable toy.
Stainless steel does not come with a toxic, synthetic slip-and-slide coating to save you from your own bad technique. It demands respect. It demands heat. And most importantly, it demands a basic understanding of physics. Today, we are going to dive deep into the exact science of why food sticks, the absolute magic of the Leidenfrost effect, and the foolproof water drop test that will permanently banish the scrubbing sponge from your evening routine.
The Anatomy of Stainless Steel: Why We Love It (and Hate It)
Before we can master the pan, we have to understand what it actually is. Professional chefs do not use stainless steel because they enjoy scrubbing; they use it because it is virtually indestructible and offers unparalleled temperature control.
The 18/10 Secret and The Metal Sandwich
If you flip your high-quality skillet over, you will likely see the numbers “18/10” stamped on the bottom. This is not a secret code; it is a metallurgical recipe. It means the steel alloy contains 18% chromium and 10% nickel. The chromium is the superhero here. It reacts with oxygen in the air to form a microscopic, self-healing “passivation layer” that prevents the iron in the pan from rusting. The nickel adds a beautiful, polished luster and provides additional corrosion resistance.
However, stainless steel on its own is actually a remarkably terrible conductor of heat. If you were to cook on a pan made of pure stainless steel, you would end up with aggressive hot spots that would burn the center of your food while leaving the edges completely raw. This is why good stainless steel cookware is “clad.” Manufacturers create a metal sandwich, bonding layers of highly conductive aluminum or copper between the durable sheets of stainless steel. This tri-ply or 5-ply construction gives you the best of both worlds: the rapid, even heat distribution of aluminum or copper, paired with the indestructible, non-reactive surface of stainless steel.
The Culprit: Why Does Food Stick in the First Place?
To understand how to prevent sticking, you have to understand the microscopic battlefield of your cookware. To the naked human eye, the surface of your stainless steel skillet looks as smooth as a mirror. But if you were to look at that exact same surface under a high-powered microscope, you would see a rugged, jagged landscape full of deep valleys, sharp peaks, and microscopic pores.
The Chemical Velcro
When you heat a pan, the metal expands. Those microscopic pores open up. If you throw cold, protein-rich food into a pan that has not been properly heated, the food—which is full of moisture and complex chains of amino acids—seeps right down into those jagged microscopic valleys.
But it gets worse. As the heat hits the protein, the protein begins to denature. Its intricate, three-dimensional structure unwinds, exposing highly reactive amino and carboxylate groups. These newly exposed groups are desperately looking for something to grab onto, and they find the perfect partner in the metallic atoms (specifically iron) sitting on the surface of your pan.
Your food literally undergoes a chemical reaction with the pan. It forms weak van der Waals forces and incredibly strong covalent bonds with the metal. You are no longer just cooking; you are chemically welding your dinner to your cookware. This is exactly why your fish always falls apart when you try to flip it prematurely. You are fighting a literal molecular bond, and the delicate flesh of the fish is going to lose that battle every single time.
Enter the Leidenfrost Effect: The Science of the Hovercraft
So, if the pan is full of jagged microscopic pores, and our food desperately wants to chemically bond with the metal, how on earth do we stop it? We use thermodynamics. Specifically, we harness the power of the Leidenfrost effect.
A Brief History of Boiling Water
This phenomenon is named after Johann Gottlob Leidenfrost, an 18th-century German doctor and theologian. In 1756, Leidenfrost published a highly detailed treatise titled A Tract About Some Qualities of Common Water. While the title sounds like a cure for insomnia, the science inside was revolutionary for modern cooking.
Leidenfrost observed that when a liquid comes into contact with a surface that is significantly hotter than the liquid’s boiling point, it does not instantly evaporate into nothingness. Instead, something almost magical happens. The very bottom layer of the liquid droplet vaporizes instantaneously upon hitting the scorching metal. Because steam has a much lower thermal conductivity than liquid water, this instantly formed layer of steam acts as an insulating cushion.
The Culinary Hovercraft
The rest of the water droplet is suddenly suspended, floating on its own vapor barrier. It levitates above the microscopic peaks and valleys of the metal, gliding around the pan like a frictionless puck on an air hockey table.
How does this apply to your Tuesday night dinner? Almost all of the food we cook—be it a steak, a chicken breast, or a piece of tofu—is packed with water. When you place food into a pan that has achieved the optimal temperature for the Leidenfrost effect, the moisture on the very surface of the food instantly vaporizes. This creates a microscopic steam barrier between the protein and the metal.
Because the food is literally hovering on a cushion of steam, it cannot physically sink into the pores of the metal. If it cannot touch the metal, it cannot form those disastrous covalent bonds. It is the ultimate, natural, chemical-free non-stick surface. When you master this, you can stop ruining your salmon and start achieving restaurant-quality sears with zero anxiety.
The Water Drop Test: Your Foolproof Stovetop Heat-Check
You do not need to buy an expensive infrared laser thermometer to figure out when your pan has reached the magical Leidenfrost zone. (Though, if you are a kitchen gear nerd like me, you probably want one anyway). The Leidenfrost effect on a standard stainless steel pan typically occurs between 370°F and 450°F (roughly 190°C to 230°C).
To find this exact temperature window, all you need is a teaspoon of tap water and a little bit of patience. This is the Water Drop Test, and it is about to change your life.
Phase 1: The Evaporation Zone (Too Cold)
Place your clean, dry, empty stainless steel skillet on the stove over medium heat. Do not add oil yet. Wait a minute or two, wet your fingers under the faucet, and flick a few drops of water into the center of the pan.
If the water just sits there, slowly bubbles, and evaporates into steam, your pan is way too cold. If you add food now, it will sink into the pores, bond with the metal, and stick like superglue. Wipe the pan dry and keep waiting.
Phase 2: The Sizzle and Spit Zone (Getting Closer, But Still Too Cold)
Wait another minute and flick a few more drops of water. If the water hits the pan, aggressively sizzles, spits, and rapidly boils away in a matter of seconds, you are getting closer, but you are not there yet. The pan is above the boiling point of water (212°F / 100°C), but it is not hot enough to instantly flash-vaporize the bottom layer of the droplet to create the hovercraft effect. Keep waiting.
Phase 3: The Leidenfrost Zone (Absolute Perfection)
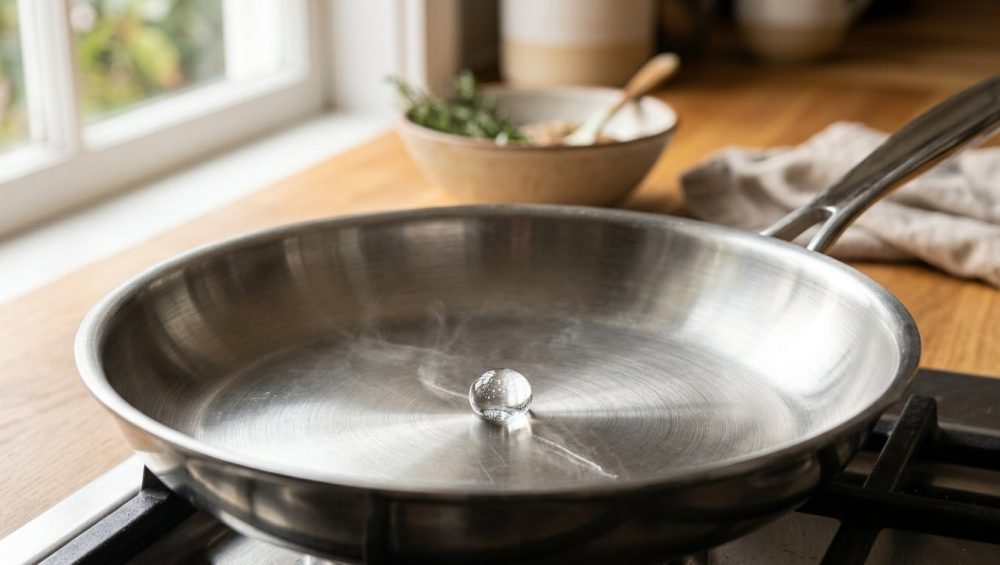
Give it another thirty to sixty seconds and flick water into the pan again. This time, the water will not sizzle out. It will not evaporate. Instead, the droplets will immediately pull together into a perfect, shimmering sphere—often referred to as a mercury ball.
This bead of water will effortlessly glide and dance across the surface of the pan in a single, cohesive unit. It will look like it is defying gravity. Congratulations, you have achieved the Leidenfrost effect. Your pan is now temporarily non-stick and ready for action.
Phase 4: The Shatter Zone (Dangerously Overheated)
What happens if you get distracted by a text message and leave the pan on the heat too long? If you flick water into an overheated pan, the droplet will not form a single, elegant dancing bead. Instead, the thermal shock will cause the water to violently shatter into dozens of tiny, aggressive micro-beads that scatter frantically across the metal.
If you see this, your pan is dangerously hot. If you pour cooking oil into a pan at this temperature, the oil will instantly vaporize, billow acrid smoke into your kitchen, and potentially ignite into a grease fire. If you hit the shatter zone, turn off the heat, pull the pan off the burner, and let it cool down for a minute before testing again.
The Great Oil Debate: When and How to Add Fat
Now that you have your perfect, dancing mercury ball of water, what is the next step? First and foremost: take a dry paper towel and carefully wipe the water bead out of the pan. Do not ever pour cooking oil directly onto a bead of water, unless you enjoy the sensation of boiling grease splattering all over your forearms.
Once the pan is completely dry and sitting perfectly in the Leidenfrost temperature zone, it is time to add your fat.
The “Hot Pan, Cold Oil” Rule
In the culinary world, there is an ancient proverb: Hot pan, cold oil, food won’t stick. This is not just an old wives’ tale; it is rooted in fluid dynamics.
When you pour room-temperature oil into a pan that is already screaming hot, the oil heats up in a matter of seconds. As oil heats, its viscosity drops dramatically. It becomes incredibly thin and fluid, almost like water. This super-heated, highly fluid oil instantly rushes into all of those microscopic valleys and crevices on the surface of the pan, filling them in and creating a smooth, slick, temporary barrier.
Furthermore, when the oil hits the hot metal, it undergoes a very mild thermal cracking process, leaving behind microscopic carbon molecules that interact with the iron to form a temporary, slick patina.
Respect the Smoke Point
Because we are working with high heat (upwards of 400°F), your choice of fat is absolutely critical. If you drop expensive, unrefined extra virgin olive oil or whole butter into a pan at this temperature, the milk solids and volatile compounds will instantly burn, turning black and imparting a harsh, bitter, acrid flavor to your food.
You must use an oil with a high smoke point. Avocado oil, refined grapeseed oil, clarified butter (ghee), or even standard canola oil are your best friends here. You want an oil that can take the heat without breaking down and smoking you out of your own kitchen.
Protein Prep: Setting Yourself Up for Success
You can execute the water drop test flawlessly, add the perfect high-smoke-point oil, and still end up with a sticky, disastrous mess if you screw up the preparation of your ingredients. The pan can only do so much; you have to meet it halfway.
The Moisture Problem
As we discussed, the Leidenfrost effect relies on a microscopic layer of steam to keep the food hovering above the metal. However, if there is too much surface moisture on your food, the thermodynamics of the pan will completely collapse.
Water requires an enormous amount of thermal energy to evaporate (this is known as the latent heat of vaporization). If you take a steak out of a vacuum-sealed plastic package, dripping with red myoglobin and water, and drop it directly into your beautifully heated pan, the temperature of the metal will plummet instantaneously.
The pan will expend all of its stored heat energy trying to boil off that excess surface water. The Leidenfrost barrier will break, the pores of the metal will clamp down on the protein, and your meat will steam instead of sear. This is exactly why your steak won’t sear properly. Before any protein touches the pan, you must aggressively pat it bone-dry with paper towels.
The Thermal Shock of the Fridge
The second massive mistake home cooks make is throwing fridge-cold meat directly into a hot pan. When 35°F (1°C) meat hits a 400°F (200°C) pan, it causes a massive thermal shock. The temperature of the pan crashes so severely that it falls completely out of the Leidenfrost zone.
Because stainless steel is a dense metal, it takes time to recover that lost heat. By the time the pan finally gets back up to searing temperature, the inside of your food has already overcooked. This prolonged exposure to the wrong temperature is precisely why your chicken breast turns out dry and chalky in the center while the outside remains a pale, unappetizing beige.
Always temper your proteins. Take your meat out of the refrigerator 20 to 30 minutes before you plan to cook. Letting it take the chill off ensures that your pan retains its heat and your vapor barrier remains intact.
The “Patience, Grasshopper” Phase: Letting the Pan Do the Work
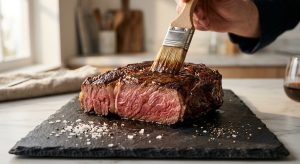
Okay, your pan is hot, your oil is shimmering, your meat is dry and tempered. You gently lay the protein into the pan, laying it away from you so the oil doesn’t splash back. Now comes the hardest part for the modern, easily distracted home cook:
Put the tongs down. Step away from the stove. Do not touch it.
The Magic of the Maillard Reaction
Human beings are fidgety. We want to poke, prod, peek, and flip. But the moment that dry protein hits the hot oil, a magnificent scientific symphony begins. It is called the Maillard reaction.
Discovered in 1912 by French chemist Louis Camille Maillard, this is a highly complex form of non-enzymatic browning. When subjected to temperatures between 140°C and 165°C (280°F to 330°F), the reactive carbonyl group of the natural reducing sugars in the food reacts with the nucleophilic amino groups of the proteins.
This initial reaction creates unstable intermediate compounds like glycosylamine and ketosamine, which rapidly break down and recombine to form hundreds, if not thousands, of entirely new, highly complex flavor compounds. These are the melanoidins that give seared meat, roasted coffee, and baked bread their rich, savory, umami-packed flavor and deep golden-brown color.
The Natural Release
As the Maillard reaction violently progresses on the surface of your food, the physical structure of the proteins changes. They dehydrate, harden, and form a rigid crust.
Here is the ultimate secret of stainless steel cooking: The pan will let go of the food when the food is ready.
Once that rigid, polymerized crust has fully formed, the chemical bonds between the food and the pan will naturally break. The food will literally release itself. If you grab your tongs, try to lift the edge of the chicken, and feel resistance, stop pulling. It is not ready. If you force it, you will rip the crust off, leaving all of those beautiful, hard-earned Maillard flavor compounds glued to the metal.
This rule applies to everything, not just meat. If your roasted veggies are soggy and sticking to your stainless baking sheet, it is because you crowded the pan, trapped the steam, and didn’t allow the heat enough time to evaporate the moisture and trigger that natural Maillard release. Patience is not just a virtue; in the kitchen, it is a strict requirement.
Troubleshooting: When Things Go Wrong
Look, we are all human. Sometimes you misjudge the heat, or you get impatient, or you try to sear a piece of fish that was a little too wet. You go to flip your dinner, and it is stubbornly, aggressively stuck.
(By the way, if your pork chops curl up into little bowls while they are sticking, it is because the band of fat on the edge is contracting faster than the meat—you need to score the fat cap with a knife before cooking, but that is a lesson for another day).
If your food is stuck, do not panic, and do not start hacking at it with a spatula. First, try lowering the heat just a fraction and waiting another 60 to 90 seconds. Often, the crust just needs a little more time to fully dehydrate and release.
If it is truly welded on, take the pan completely off the heat for a minute. As the stainless steel cools slightly, the metal will contract. This microscopic shifting of the metal is often just enough to break the bond, allowing you to slide a thin metal spatula under the food and rescue it.
The Glory of the Fond
Whatever you do, do not view the stuck-on brown bits at the bottom of your pan as a failure. In the culinary world, those caramelized, concentrated bits of protein and sugar are called the fond (from the French word for “base” or “foundation”).
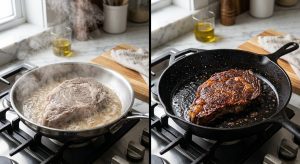
The fond is culinary gold. While your meat is resting on a cutting board, place that dirty pan back over medium heat. Throw in a handful of minced shallots, let them soften, and then pour in a generous splash of dry white wine, chicken stock, or even just water. The liquid will instantly boil, releasing all of those browned bits from the metal. Scrape the bottom of the pan with a flat-edged wooden spoon, let the liquid reduce by half, swirl in a knob of cold butter, and you have just created an exquisite pan sauce.
Not only did you just elevate your Tuesday night dinner to a restaurant-quality meal, but you also deglazed and cleaned your pan in the process. Work smarter, not harder.
Why You Need to Ditch Toxic Non-Stick for Good
If you have read this far, you might be thinking to yourself, “This sounds like a whole lot of thermodynamics, fluid dynamics, and patience. I think I will just stick to my cheap, slick Teflon pan.”
Absolutely not. We do not do that here. I have zero patience for toxic kitchen gear in my house, and you should not tolerate it in yours either. The convenience of a cheap non-stick pan is a dangerous illusion, and it comes at a steep cost to your health and your wallet.
Let’s talk about why ruining your nonstick pans is actually the best thing that could happen to your culinary journey. Traditional non-stick coatings are manufactured using PTFE (polytetrafluoroethylene), which is part of a massive family of synthetic “forever chemicals” collectively known as PFAS (per- and polyfluoroalkyl substances). These chemicals are infamous because the carbon-fluorine bonds that hold them together are some of the strongest in organic chemistry; they do not break down in the environment, and they accumulate in human tissue over time.
The 500-Degree Danger Zone
While manufacturers claim that modern PTFE coatings are perfectly safe under “normal” cooking conditions, the reality of a home kitchen is far less controlled. When a non-stick pan is heated above 500°F (260°C), the chemical structure of the PTFE coating begins to rapidly break down and degrade.
To put that into perspective, if you place an empty, lightweight non-stick skillet on a gas burner over high heat while you turn around to chop an onion, that pan can easily exceed 500°F in just two to three minutes.
When the coating breaks down, it releases invisible, toxic fluorocarbon gases and ultrafine particulate matter into the air. Inhaling these highly toxic fumes causes a medical condition officially known as “polymer fume fever,” though it is more commonly referred to as the “Teflon flu”. The symptoms hit you a few hours later: severe chills, spiking fevers, chest tightness, coughing, and throbbing headaches.
Oh, and if you happen to own a pet bird? A bird’s respiratory system is so highly efficient and sensitive that these exact same fumes—at levels that might only give a human a mild headache—can be lethal to a parrot or canary in a matter of minutes. If your cookware possesses the chemical capability to assassinate a small animal from across the kitchen, you probably should not be using it to sear the food you feed your family.
The Myth of Durability
Beyond the chemical hazards, non-stick pans are an atrocious financial investment. They are disposable by design. Even if you baby them, use only silicone spatulas, and hand-wash them with the tears of angels, the synthetic coating will inevitably blister, scratch, and wear away. When that happens, those microplastics and chemical flakes end up directly in your scrambled eggs. You are forced to throw the pan into a landfill every one to two years and buy a replacement.
Stainless steel, by stark contrast, is a generational heirloom. It is virtually indestructible. You can blast it with a blowtorch, scrape it with metal spatulas, and scrub it with abrasive steel wool. If you are worried about ruining your cast iron by accidentally leaving it soaking in a sink full of soapy water, stainless steel is your low-maintenance savior. It will not rust, it will not pit, and it will outlive you.
The Final Sizzle
Cooking with uncoated stainless steel is not an exclusive skill reserved for pretentious chefs with culinary degrees and forearm tattoos. It is simply about understanding the basic rules of engagement.
Your pan is a tool, not a magic wand. It requires you to pay attention. It requires you to respect the science of heat transfer, to manage your moisture, and to let the thermodynamics of the Leidenfrost effect do the heavy lifting.
You do not need a kitchen full of toxic, peeling, synthetic chemicals to make incredible food. You just need a little bit of patience, a splash of tap water, and the confidence to let your cookware do exactly what it was engineered to do. So go preheat your skillet, run the water drop test, and stop eating sad, torn, boiled-in-its-own-juices chicken. You, and your dinner, deserve so much better.