
Welcome to the thermodynamic thunderdome, folks. I’m your resident Sassy Sous-Chef, and today we’re having a brutally honest conversation about why your Sunday roast tastes like a boiled work boot. According to recent 2024 American Time Use Survey statistics on home cooking habits, over 52% of modern home cooks are desperate for “low-effort, high-reward” meals. You want the shortcut. You want to dump a mountain of ingredients into a pot, crank the burner to high, and walk away to binge-watch your favorite show. But when it comes to braising tough cuts of meat, physics simply does not care about your schedule. If you think boiling a stew aggressively is going to speed up the cooking process, you are fundamentally misunderstanding the molecular biology of a cow.
I have set off my smoke detector enough times to know that you cannot bully a chuck roast into submission. You have to coax it. If you are exhausted from ruining your dinners with dry, stringy, gray lumps of meat floating in a watery broth, it is time to put down the wooden spoon and learn the actual science of cooking. This masterclass is going to arm you with the exact thermal mechanics of collagen-to-gelatin conversion. We are going to dive deep into the cellular structure of actin and myosin, the chemical cascades of the Maillard reaction, and why a gentle, controlled simmer is the only thing standing between you and melt-in-your-mouth culinary perfection. No culinary degree required—just a basic grasp of thermodynamics and the willingness to respect the ingredients.
The Anatomy of a Tough Cut: Why Chuck Roast is Your Best Friend
Before we even turn on the stove, we need to talk about what exactly you are putting into your pot. Not all beef is created equal, and treating a chuck roast the same way you would treat a prime beef tenderloin is a one-way ticket to a culinary disaster.
The Architecture of Bovine Muscle
Meat is essentially muscle, and muscle is incredibly complex. A muscle is made up of bundles of fibers called fascicles. These bundles are held together by a biological scaffolding known as connective tissue. There are three main layers of this connective tissue: the endomysium (which surrounds individual muscle fibers), the perimysium (which bundles the fibers into fascicles), and the epimysium (which wraps the entire muscle group).
In cuts of meat that come from highly active parts of the animal—like the shoulder (chuck), the chest (brisket), or the legs (shank)—this connective tissue is incredibly thick and robust. The animal uses these muscles constantly to walk, stand, and support its massive weight. As a result, a standard beef chuck roast contains roughly 18% to 22% intramuscular collagen.
The Collagen Conundrum
Collagen is a rigid, triple-helix protein that acts like biological rubber bands. In its raw state, it is incredibly tough. If you were to take a heavily marbled piece of chuck roast and quickly sear it to a beautiful medium-rare (an internal temperature of about 130°F or 54°C), you would literally be chewing on it for days. The muscle fibers themselves might be cooked perfectly, but that intricate web of raw collagen would remain entirely intact, making the meat unyielding and rubbery.
Conversely, cuts like the tenderloin or the New York strip come from the relatively lazy muscles along the cow’s back. They contain very little collagen. They thrive on quick, high-heat cooking. But if you take a lean, tender cut and try to stew it for three hours, it will turn into absolute dust in your mouth. Tough cuts require a completely different thermal approach, which is exactly why your beef stew is tough when you treat a chuck roast like a cheap steak.
The Protein Battlefield: Actin, Myosin, and the 212°F Disaster
To understand why boiling your stew is a catastrophic mistake, we have to zoom in on the specific proteins inside the muscle fibers: actin and myosin. These two myofibrillar proteins are responsible for muscle contraction in the living animal, and they are the primary dictators of texture in your cooked meal.
The Gentle Denaturation of Myosin
When you apply heat to raw meat, the proteins begin to denature, meaning their tightly folded structures start to unwind and change shape. Myosin is the first major protein to tap out. It begins to denature at relatively low temperatures, typically between 120°F and 130°F (50°C – 54°C). This is a highly desirable reaction. When myosin denatures, the meat turns from translucent and squishy to opaque and firm. Crucially, at this temperature, the muscle fibers have not yet begun to aggressively squeeze out their internal moisture. The meat remains incredibly juicy.
The Aggressive Seizing of Actin
Actin, however, is the stubborn heavyweight champion of the muscle fiber. Actin does not begin to denature until the internal temperature of the meat reaches somewhere between 150°F and 165°F (66°C – 73°C). When actin denatures, the protein chains shrink and contract violently. Imagine taking a soaking wet sponge and wringing it out with both hands. That is exactly what actin does to the muscle fiber. It aggressively squeezes out the bound water, expelling it directly into your cooking liquid.
The Rolling Boil Catastrophe
Now, let’s talk about the boiling point of water: 212°F (100°C). When you impatiently crank your stove to high and let your stew aggressively bubble and boil, you are instantly driving the internal temperature of your beef well past the actin denaturation threshold.
At 212°F, the actin seizes so violently that the muscle fibers collapse entirely. The meat rapidly expels its internal moisture, losing up to 38% of its soluble protein and over 50% of its water-soluble B-vitamins in the process. This is the tragic paradox of the boiled stew: the meat is literally submerged in a pot of liquid, yet it tastes incredibly dry and chalky on your palate. Even if you boil the meat long enough that the connective tissue finally breaks down and the chunks “fall apart,” the individual muscle fibers left behind will feel like chewing on wet sawdust. You cannot boil moisture back into a seized muscle fiber.
The Magic of Collagen-to-Gelatin Conversion
So, if heating meat past 150°F causes the actin to squeeze out all the moisture, how on earth do we make a chuck roast tender? The answer lies in the magical, highly specific thermal mechanics of collagen hydrolysis.
The 160°F to 180°F Sweet Spot
While actin is busy wringing out the muscle fibers, the tough collagen we discussed earlier requires sustained, elevated heat to break down. The thermal sweet spot for converting tough collagen into luscious, silky gelatin occurs precisely between 160°F and 180°F (71°C – 82°C).
This conversion is an endothermic, time-dependent process. You cannot rush it by increasing the heat. Turning the burner up to 212°F does not make the collagen melt faster; it just ruins the actin. When you maintain a gentle, barely-there simmer (where the liquid is just lazily bubbling around 180°F), the triple-helix structure of the collagen slowly unwinds. Over the course of two to four hours, it hydrolyzes and melts into gelatin.
The Gelatin Lubrication Effect
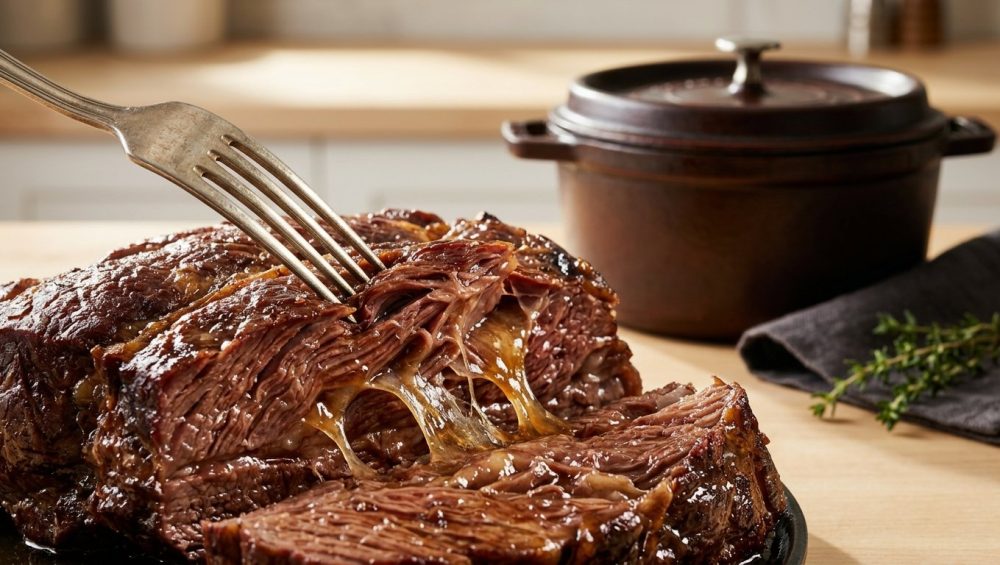
Why is gelatin so important? Gelatin has the miraculous ability to hold up to five times its own weight in water. As the collagen melts into gelatin, it coats the individual muscle fibers. Remember how the actin squeezed all the water out of the meat? The newly formed gelatin swoops in to save the day, artificially lubricating those dried-out muscle fibers. When you take a bite of perfectly braised chuck roast, your brain perceives the sticky, rich gelatin as “juiciness,” completely masking the fact that the muscle fiber itself lost its internal water hours ago.
The Hidden Heroes: Calpain Proteases
There is another biological trick happening in the background during a slow, controlled heat-up phase. Raw meat contains endogenous enzymes called calpain proteases (specifically calpain-1 and calpain-2). These enzymes naturally break down the Z-disks of the myofibrils, tenderizing the meat from the inside out. Calpains operate at peak efficiency in warm temperatures, but they completely denature and die off once the meat hits about 135°F (57°C). By bringing your stew up to temperature slowly, you give these natural enzymes a window of opportunity to do some free tenderizing work before the heat permanently shuts them down.
The Maillard Reaction: Searing Before the Simmer
Before we can even think about adding liquid to our pot to start the collagen conversion, we have to establish our foundational flavor base. If you just drop raw, gray cubes of beef into a pot of beef broth, you are going to end up with a sad, one-dimensional bowl of brown water. We need the Maillard reaction.
The Chemistry of the Crust
The Maillard reaction is a highly complex cascade of chemical reactions that occurs between amino acids and reducing sugars when they are exposed to high heat. This reaction is the undisputed king of culinary flavor generation. It produces hundreds of distinct volatile aroma compounds.
When you properly sear beef, the Maillard reaction generates pyrazines (which provide deep, roasted, nutty notes), furans (which offer a caramel-like sweetness), and thiophenes (which deliver that rich, savory, mouth-watering meaty depth). Without these compounds, your stew will taste flat and uninspired.
The Enemy of Browning: Surface Moisture
Here is the catch: the Maillard reaction requires temperatures well above the boiling point of water—typically between 280°F and 330°F (138°C – 165°C). If you take your beef straight out of the vacuum-sealed plastic and drop it into a hot pan, the surface of the meat is covered in water.
Because water cannot exceed 212°F before turning into steam, all the thermal energy from your pan will be wasted on evaporating that surface moisture rather than browning the proteins. Your meat will steam, turn a depressing shade of gray, and completely miss out on the Maillard reaction. This is exactly why skipping the paper towel is a cardinal culinary sin. You must pat your beef cubes bone-dry before they ever touch the heat.
Equipment Check: Banish the Toxic Gear
Listen to me very carefully: you cannot execute a flawless, temperature-controlled sear and simmer if you are using cheap, flimsy, toxic cookware. I have zero patience for the mystery-metal, peeling non-stick garbage that floods the market today.
The Problem with Cheap Non-Stick
When you drop a pound of cold beef into a thin aluminum pan coated in a synthetic polymer, the thermal mass of the pan is instantly overpowered by the cold meat. The temperature of the pan plummets. Instead of searing, the meat begins to boil in its own extracted juices. Furthermore, heating non-stick pans to the extreme temperatures required for a proper Maillard sear can cause the chemical coatings to degrade and release toxic fumes. I am a massive, unapologetic advocate for banishing toxic kitchen gear from your home permanently.
The Power of Enameled Cast Iron
For a stew, your undisputed champion is the enameled cast iron Dutch oven (think Le Creuset or Staub). Cast iron has a relatively high specific heat capacity (approximately 0.49 J/g·°C) and an incredible amount of physical mass. This means it acts like a thermal battery. It takes a while to heat up, but once it is hot, it holds onto that heat with an iron grip. When you drop cold beef into a hot cast iron pot, the temperature barely dips, ensuring an aggressive, uninterrupted sear.
Furthermore, the thermal emissivity of cast iron is around 0.95. This means it radiates heat incredibly efficiently into the food, creating a stable, enveloping thermal environment that is absolutely perfect for holding a steady 180°F simmer for hours on end.
Mastering Stainless Steel
If you do not own enameled cast iron, heavy, multi-clad stainless steel pans or pots are a fantastic alternative. However, stainless steel requires technique. Because it lacks a synthetic non-stick coating, you must rely on physics to prevent your meat from permanently fusing to the bottom of the pot.
To do this, you must master the water drop test, also known as the Leidenfrost effect. Heat the dry pan over medium heat, then flick a few drops of water into it. If the water instantly sizzles and evaporates, the pan is too cold. If the water forms a cohesive mercury-like bead that glides effortlessly across the surface, the pan is at the perfect searing temperature (around 350°F). Only then do you add your high-smoke-point oil and your dry meat. Always remember that preheating the pan is an absolute, non-negotiable requirement for success.
The Masterclass: Step-by-Step Thermal Control for Perfect Stew
We have covered the biology, the chemistry, and the physics. Now it is time to put it all together. Here is your definitive, no-nonsense roadmap to executing the perfect beef stew.
Step 1: The Dry Brine
Cut your chuck roast into large, uniform 2-inch cubes. Do not cut them too small, or they will overcook instantly. Toss the cubes generously with kosher salt and let them sit uncovered in the refrigerator for at least an hour, or ideally overnight. This dry brine process allows the salt to penetrate deep into the muscle tissue, seasoning it from the inside out while simultaneously drawing out surface moisture to guarantee a better sear.
Step 2: The Sear
Remove the beef from the fridge and thoroughly pat it dry with paper towels. Heat your enameled cast iron Dutch oven over medium-high heat. Add a high-smoke-point fat, like beef tallow or avocado oil. Sear the beef in batches. If you crowd the pan, the moisture escaping from the meat will become trapped, dropping the temperature and steaming the beef. You want a deeply browned, crusty exterior on all sides. Once seared, remove the beef and set it aside.
Step 3: Aromatics and Deglazing
Lower the heat to medium. Toss in your mirepoix (diced onions, carrots, and celery). The moisture from the vegetables will begin to loosen the fond—the gorgeous, caramelized brown bits stuck to the bottom of the pot. Sauté until the onions are translucent. Next, add a splash of dry red wine or beef stock to fully deglaze the pot, scraping up every last bit of that flavor-packed fond with a wooden spoon.
Step 4: The Liquid Level
Return the beef (and its rested juices) to the pot. Add your braising liquid. Here is a crucial rule: do not drown the meat. You are making a stew, not a soup. The liquid should just barely cover the tops of the beef cubes. Too much liquid will dilute the gelatin that is about to be released, resulting in a thin, watery gravy instead of a rich, velvety sauce.
Step 5: The Oven Simmer
Bring the liquid to a bare, gentle simmer on the stovetop—just a few lazy bubbles breaking the surface. Once you hit that simmer, put the lid on the Dutch oven and immediately transfer the entire pot to a preheated oven set between 275°F and 300°F (135°C – 150°C).
Why the oven and not the stovetop? The stovetop provides harsh, directional heat strictly from the bottom. It is incredibly easy for the bottom of the pot to cross the 212°F threshold, scorching the stew and boiling the meat while you aren’t looking. The oven, however, provides ambient, omnidirectional heat. It envelops the heavy cast iron pot, ensuring that the internal liquid temperature stays locked right in that magical 160°F to 180°F collagen-melting sweet spot. Leave it alone for 2.5 to 3 hours, checking occasionally to ensure it hasn’t escalated to a boil.
Step 6: Food Safety and Proper Cooling
If you are meal-prepping this masterpiece for the week, you must respect the laws of food microbiology. Stews have a very high water activity (aw), usually well above 0.95. This makes them an absolute playground for dangerous pathogens, particularly Clostridium perfringens, which thrives in large, slowly cooling vats of meat and gravy.
Do not leave a massive pot of hot stew sitting on your counter for five hours to cool. The FDA explicitly warns against this. Divide the stew into smaller, shallow containers to rapidly drop the temperature through the “danger zone” (135°F to 41°F) within two hours, then immediately transfer them to the refrigerator.
Troubleshooting and Flavor Pacing
Even with perfect thermal control, a stew can sometimes taste a little heavy or flat right out of the oven. This is because the massive influx of rendered fat and dissolved gelatin coats your palate, muting the perception of other flavors.
The Acid Adjustment
If you taste your finished stew and feel like it is missing something, your first instinct will probably be to reach for the salt shaker. Stop. You don’t need more sodium; you actually need vinegar. A splash of high-quality apple cider vinegar, a squeeze of fresh lemon juice, or a dash of balsamic vinegar stirred in at the very end will cut through the heavy lipid layer. The acid brightens the dish, balancing the rich umami notes and making the flavors pop.
The Emergency Rescue
Let’s say you ignored my advice, left the pot on the stovetop on high heat, and boiled the living daylights out of your chuck roast. The actin has seized, the moisture is gone, and the meat is dry. You cannot un-denature the protein, but you can rescue a ruined dinner with a bit of mechanical intervention. Remove the dry chunks of beef, use two forks to shred them as finely as possible, and fold the shredded meat back into the rich gravy. The shredded fibers will act like a mop, soaking up the external liquid and mimicking the texture of a proper braise.
The Overnight Rest
Finally, if you have the patience, the absolute best thing you can do for a stew is put it in the fridge and eat it the next day. As the stew cools, the gelatin sets, and the complex Maillard compounds, aromatics, and acids have time to mingle and mature. Reheating it gently the next day results in a vastly superior depth of flavor.
Cooking is not about blind luck, and it certainly isn’t about following a viral thirty-second internet hack. It is about understanding the fundamental physics of the food in front of you. Mastering temperature control, respecting the cellular structure of your ingredients, and refusing to compromise on your equipment—that is the true art of the kitchen. Now get in there, turn down the heat, and make a stew that actually tastes like it was cooked by a professional.






