
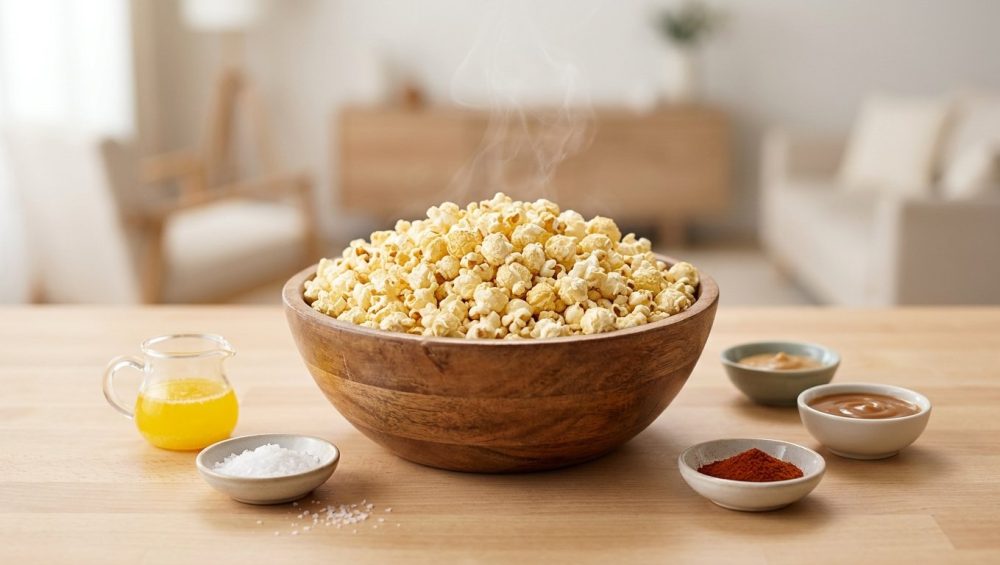
Listen to me. There is absolutely no reason for you to be gnawing on squeaky, rubbery, styrofoam-textured popcorn while trying to enjoy your hard-earned weekend movie night. You are better than that. Your jaw muscles are better than that. And frankly, your precious downtime is entirely too valuable to waste on subpar snacks.
As a busy professional who has set off the kitchen smoke detector more times than I care to admit, I rely heavily on weeknight shortcuts. But when the weekend rolls around, I believe in taking the time to elevate simple pleasures. Popcorn is the ultimate blank canvas. It is cheap, it is universally beloved, and when executed correctly, it is a culinary masterpiece. Yet, somehow, millions of well-intentioned home cooks manage to ruin it every single Friday night, resigning themselves to a bowl of chewy disappointment.
You do not need a culinary degree to make mind-blowing food. You just need to understand a little bit of basic physics, banish the terrible equipment lurking in your cabinets, and master the fundamental techniques of temperature control. Today, we are going to dive deep into the science of the pop, eradicate the chewy popcorn epidemic once and for all, and teach you how to set up an interactive, fail-proof snack station that will make you the undisputed champion of weekend entertaining.
The Science of the Pop: What Actually Happens Inside That Kernel
Before we can fix your chewy popcorn problem, we need to talk about what is actually happening when a kernel explodes. I promise to spare you the pretentious chef-speak, but a little bit of food science is non-negotiable here.
A popcorn kernel is essentially a tiny, perfectly engineered pressure cooker. It consists of three main parts: the pericarp (the hard outer hull), the germ (the seed embryo), and the endosperm (which contains hard and soft starch granules, along with trapped water).
For a kernel to pop properly, it requires a highly specific internal moisture content—ideally between 13.5% and 15%. When you apply heat to the kernel, the trapped water inside the endosperm begins to turn into steam. Because the pericarp of a popcorn kernel is extraordinarily tough, it traps that steam inside, causing the internal pressure to skyrocket to a staggering 135 psi (or about 9.2 atmospheres).
Under this intense pressure and heat, the hard starch inside the kernel melts into a thick, gelatinous goo. Finally, the hull reaches its breaking point and ruptures. The sudden drop in pressure causes the super-heated steam to expand rapidly, inflating that gelatinous starch like a microscopic balloon. As it hits the cooler air outside the kernel, the starch instantly solidifies into the airy, fluffy white foam we know and love.
If you want to truly decode pretentious recipe jargon and understand the mechanics of cooking, you have to respect this delicate balance of moisture and pressure. If the moisture content is too low (below 13%), the pressure never builds, and you get an unpopped “old maid”. If the moisture is too high, the kernel pops too early into a dense, sad little sphere.
The Villain of the Story: Why Your Popcorn Gets Chewy
Now that you understand the majestic physics of the pop, we can address the elephant in the room: why your homemade popcorn ends up tasting like packing peanuts.
The primary villain ruining your snack is trapped steam.
Think back to the popping process. Every single kernel releases a tiny puff of steam when it bursts. If you are popping a half-cup of kernels in a covered pot on your stove, you are generating a massive amount of water vapor in a very short amount of time.
If you leave the lid tightly clamped down on your pot—which is one of the seven rookie kitchen mistakes I see constantly—that steam has absolutely nowhere to go. It hits the relatively cooler underside of your pot lid, condensates into water droplets, and rains right back down onto your freshly popped, delicate starch clouds.
Condensation is the mortal enemy of crunch. When those fluffy starch matrices absorb the trapped moisture, their structure collapses. The result is a bowl of rubbery, chewy popcorn that sticks to your molars and squeaks against your teeth. Preventing this tragedy is incredibly simple, but before we get to the technique, we need to have a serious conversation about your equipment.
The “No-Go” Rule: Burn Your Microwave Bags and Toxic Pots
I have a strict, zero-tolerance policy when it comes to cheap, toxic kitchenware. If you want to cook like an expert, you have to stop sabotaging yourself with hazardous gear.
First on the chopping block: microwave popcorn bags. Do not even think about putting one of those chemical-laden envelopes into your microwave. For years, the grease-proofing agents used on the inside of these bags contained PFAS (per- and polyfluoroalkyl substances), commonly known as “forever chemicals”. These synthetic compounds repel oil and water, but they also accumulate in your body and never break down.
Studies have linked PFAS exposure to a terrifying laundry list of health issues, including elevated cholesterol, thyroid disruption, immune system suppression, reproductive issues, and certain cancers. While the FDA announced a voluntary phase-out of some of these specific PFAS in U.S. food packaging in early 2024, this was not a blanket ban. Old stock, imported packaging, and even recycled paper products can still harbor these toxic compounds. Furthermore, the artificial butter flavorings (like diacetyl) used in many of these bags are notorious for causing respiratory issues when inhaled in large quantities. Throw the bags away. We are making real food today.
Second on my hit list: cheap, scratched non-stick pots. If you are blasting a flimsy Teflon pot with high heat to pop corn, you are doing it wrong. Non-stick coatings degrade and release toxic fumes at high temperatures, and peeling flakes of mystery metal have no business in your food. Understanding why your food always sticks is a matter of heat control, not a mandate to buy toxic pans.
What You Should Be Using Instead
To achieve professional-level results in a standard home kitchen, you need equipment with proper thermal mass.
- The Heavy-Bottomed Pot: A high-quality stainless steel pot, a heavy enameled cast-iron Dutch oven, or a well-seasoned carbon steel pan are your best friends here. They distribute heat evenly and prevent hot spots that scorch kernels. If you want to dive into the thermodynamics of carbon steel pans, you will quickly learn why their heat retention makes them elite popping vessels.
- The Whirley Pop: If you are serious about your popcorn game, invest in a stovetop crank popper (like a Whirley Pop) with metal gears. (The plastic gears melt and strip over time). These pots have a built-in stirring mechanism that keeps the kernels moving, preventing burning while allowing steam to escape through the vented lid.
- The Splatter Screen: If you are using a standard pot, a fine-mesh stainless steel splatter screen is the ultimate secret weapon. It keeps the popping oil inside the pot while allowing 100% of the steam to vent into the air.
If you are committed to banishing toxic kitchen gear from your life, upgrading your popping vessel is the perfect place to start.
The Masterclass: The Foolproof Stovetop Method
Now that we have exorcised the demons of toxic cookware and trapped steam, it is time to actually cook. This method is fast, efficient, and will yield perfectly crisp popcorn every single time. Consider this your essential kitchen survival guide to the ultimate snack.
Step 1: Choose the Right Fat
Popcorn pops best at temperatures between 380°F and 460°F (193°C to 237°C). This means you cannot pop corn in standard butter. Butter contains milk solids and water, and it has a smoke point of around 350°F. If you try to pop corn in raw butter, it will burn into a bitter, acrid mess before the kernels even think about exploding.
Instead, you need a fat with a high smoke point. Clarified butter (or ghee) is phenomenal because the milk solids have been removed, raising the smoke point to 450°F while retaining that rich, buttery flavor. Refined coconut oil is the industry standard for movie theaters, offering a clean, crisp pop. Avocado oil is another excellent, heart-healthy option with a massive smoke point of 520°F.
Step 2: The “Test Kernel” Temperature Check
Place your heavy-bottomed pot on the stove over medium-high heat. Add just enough of your chosen oil to coat the bottom of the pan (about 2 to 3 tablespoons for a half-cup of kernels).
Do not dump all your kernels in yet! Drop exactly three “test kernels” into the cold oil and put the lid on. Wait. Listen. When you hear all three kernels pop, you know that the oil has reached the precise thermal threshold required for popping.
Step 3: The Equalization Phase
Once the three test kernels pop, remove the pot from the heat entirely. Pour in the rest of your kernels (a half-cup is usually perfect for a standard 3-quart pot). Give the pot a gentle shake so every single kernel is coated in the hot oil.
Now, wait for exactly 30 seconds off the heat. This is a brilliant culinary hack. It allows the oil to bring all the unpopped kernels up to a near-popping temperature simultaneously. When you put the pot back on the heat, they will all pop at the exact same time, preventing the tragedy of burnt kernels at the bottom and unpopped kernels at the top.
Step 4: Venting the Steam (The Most Important Step)
Return the pot to the medium-high heat. As the popping begins in earnest, you must release the steam. If you are using a splatter screen, simply place it over the pot and let the steam billow out.
If you are using a standard lid, you must leave it slightly ajar. Crack it open just a sliver—enough to let the steam escape, but not enough to let the flying kernels weaponize your kitchen. As the corn pops, gently shake the pot back and forth over the burner. This keeps the unpopped kernels falling to the bottom where the heat is, while the lighter, popped corn rises to the top.
Step 5: Immediate Evacuation
Listen closely. When the frantic popping slows down to about 2 to 3 seconds between pops, your batch is done. Turn off the heat immediately.
Do not leave the popcorn in the hot pot! Even with the heat off, the residual thermal mass of the pot will scorch the bottom layer and trap whatever steam is left. Immediately dump the glorious, crisp popcorn into a massive, wide bowl to let it breathe and cool slightly.
Butterfly vs. Mushroom: Know Your Kernels
Before we build our snack station, we need to talk about the star of the show. If you want to master the simple steps to culinary artistry, you have to understand your ingredients. Not all popcorn is created equal. There are two primary shapes of popcorn kernels, and choosing the right one dictates how you should season it.
Butterfly Popcorn
This is the classic kernel you find in most grocery stores and movie theaters. When it pops, it explodes into an irregular, delicate shape with fragile “wings” protruding in every direction.
The Culinary Advantage: Butterfly popcorn is light, airy, and incredibly tender. Those weird little wings create a massive amount of surface area, forming tiny nooks and crannies that are absolutely perfect for catching and holding fine salt, powdered seasonings, and melted butter.
The Downside: It is fragile. If you try to toss butterfly popcorn in a heavy, wet caramel sauce, it will shatter into a million sad, soggy pieces.
Mushroom Popcorn
Mushroom popcorn kernels pop into dense, compact, round spheres that look remarkably like the cap of a mushroom. Because they require a tougher hull to force the explosion into a uniform ball, they tend to have a slightly more substantial, crunchy texture.
The Culinary Advantage: Mushroom popcorn is built like a tank. It is sturdy, durable, and resists crumbling. This makes it the undisputed king of gourmet coatings. If you are making heavy caramel corn, chocolate-drizzled popcorn, or thick, wet cheese glazes, you absolutely must use mushroom kernels.
The Downside: Because it lacks the intricate wings of the butterfly variety, fine dry seasonings tend to bounce right off its smooth, round surface unless you use a very effective binder.
Building the Ultimate Mindful Popcorn Bar
Now that you have a massive bowl of perfectly popped, steam-free, ultra-crispy popcorn, it is time to entertain. Hosting a gathering should never involve you sweating over a hot stove while your guests have all the fun in the living room.
The concept of the Popcorn Bar is the ultimate hack for the art of effortless hosting. It is budget-friendly, inherently interactive, highly customizable for various dietary restrictions, and completely fail-proof. You provide the crispy canvas, and your guests become the artists.
The Base Station and Holding Strategy
If you are popping multiple batches for a crowd, you need to hold the popcorn properly. Do not put warm popcorn into plastic bowls or Tupperware. Plastic traps moisture, and we have already established that moisture is the enemy.
Instead, use large wooden salad bowls, wide ceramic basins, or even classic brown paper bags rolled down at the edges. Wood and paper can absorb trace amounts of residual steam, keeping the popcorn pristine. If you want to utilize scientific food staging techniques, keep your base popcorn completely unseasoned. This prevents the salt from drawing out moisture prematurely and allows guests to customize their own portions.
The Binders: Making the Flavor Stick
Here is the biggest mistake people make at a popcorn bar: they dump dry spices onto dry popcorn, and all the expensive seasonings fall straight to the bottom of the bowl. You need a binder—a liquid agent that acts as an edible glue.
However, if you pour standard melted butter directly over the bowl, the water content in the butter will instantly turn your crisp popcorn into a soggy, shrinking sponge.
The Solution:
- Clarified Butter / Ghee: Melted ghee is pure butterfat with zero water content. It provides incredible flavor and acts as a perfect adhesive without sacrificing the crunch. Keep it warm in a small fondue pot or a heat-safe liquid dispenser.
- The Oil Spritz: Fill a continuous-spray mister (do not use aerosol cans with chemical propellants) with avocado oil or a high-quality extra virgin olive oil. A quick mist over the popcorn creates a microscopic, even layer of sticky fat that grabs hold of dry spices instantly.
- The Acid Mist: For guests who want a tangy, salt-and-vinegar vibe without the fat, put apple cider vinegar, malt vinegar, or even strained pickle juice into a fine-mist spray bottle. A very light spritz provides the necessary moisture for salt to stick, while the sharp acid wakes up the palate.
The Flavor Zones
Set up your Popcorn Bar in distinct flavor zones to encourage culinary experimentation. Provide small, individual paper bags or wide, shallow bowls for your guests to mix their creations. Remember to tell them the golden rule of the Popcorn Bar: Mist first, toss, then season.
Zone 1: The Truffle & Herb (Savory & Elegant)
- White truffle oil (in a dropper bottle for precise application)
- Finely grated Pecorino Romano or Parmesan cheese (use a microplane so it is light enough to stick)
- Finely minced fresh rosemary
- Flaky sea salt and freshly cracked black pepper
Zone 2: The Umami Bomb (Deep & Savory)
- Nutritional yeast (the vegan secret weapon for a cheesy, nutty flavor)
- Garlic powder and onion powder
- Smoked paprika
- MSG (Yes, MSG. It is a completely safe, naturally occurring amino acid that makes savory food taste incredible. Stop fearing it.)
- Toasted sesame seeds
Zone 3: The Sweet Tooth (For the Mushroom Kernels)
- Cinnamon and coconut sugar mixture
- Dark chocolate shavings
- Crushed freeze-dried strawberries or raspberries
- Miniature marshmallows and crushed graham crackers
Zone 4: The Spicy Kick (Bold & Vibrant)
- Tajín (a Mexican seasoning blend of chili peppers, lime, and sea salt)
- Sriracha powder
- Lime zest
- Smoked chipotle powder
Troubleshooting Your Popcorn Disasters
Even with the best intentions, things can occasionally go sideways. Here is how to troubleshoot common popcorn catastrophes so you can maintain a permanently organized kitchen and a stress-free mind.
Problem: Half the kernels didn’t pop.
The Fix: Your kernels have likely dried out and lost that crucial 13.5% moisture content. Do not throw them away! You can actually rehydrate them. Place the unpopped kernels in a glass mason jar. Add exactly one teaspoon of water for every cup of kernels. Shake the jar vigorously, seal it tightly, and leave it on your counter for two to three days. The kernels will absorb the water, restoring their internal pressure capabilities.
Problem: The popcorn is burnt on the bottom.
The Fix: You either used an oil with a smoke point that was too low (like raw butter), your stove was cranked to maximum heat instead of medium-high, or you failed to shake the pot during the popping process. Next time, use avocado oil, respect the medium-high setting, and keep that pot moving.
Problem: The popcorn is still chewy, even though I vented the lid!
The Fix: You left the popcorn in the hot pot after the heat was turned off. The residual heat from the heavy metal pot continued to toast the bottom layer, and the remaining steam in the pot settled into the starch. The second the popping slows, you must immediately evacuate the popcorn into a large, open bowl.
The Final Pop
Cooking beautiful, memorable food for yourself and your friends does not require expensive takeout, toxic microwave bags, or a stressful, multi-course dinner menu. It requires a little bit of mindfulness, a basic respect for the ingredients, and the willingness to learn from your mistakes.
By taking control of the temperature, properly venting the steam, and setting up an interactive Popcorn Bar, you are transforming a mundane, everyday snack into a culinary event. You are protecting your guests from cheap, forever-chemical packaging, and you are empowering them to get creative with their food.
So this weekend, leave the sad, chewy popcorn in the past. Grab a heavy pot, heat up some quality oil, and listen for that beautiful, explosive crackle. You’ve got this.






