
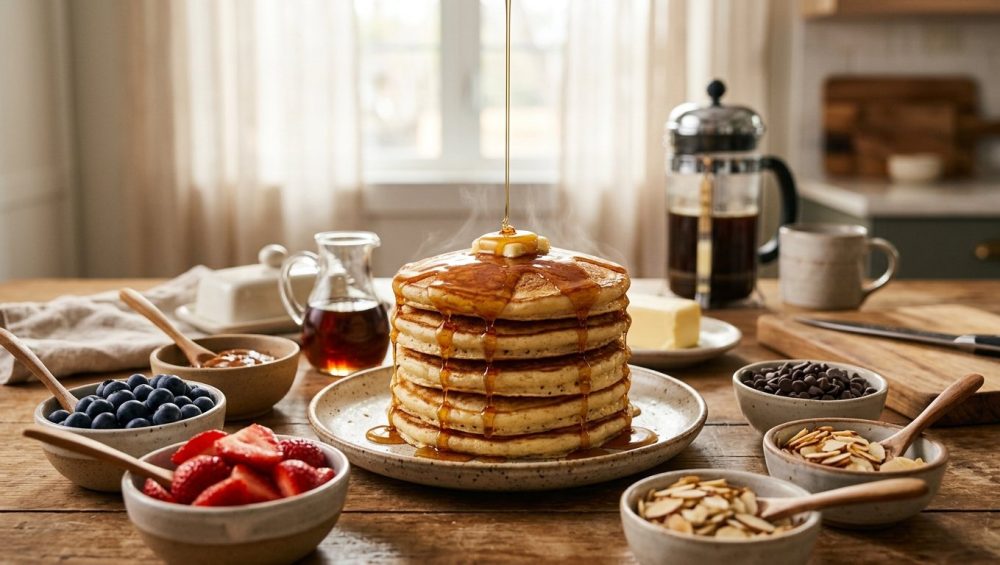
Listen, weekend warriors. I know exactly how your Sunday morning usually plays out. You wake up feeling ambitious, promising your family or friends a towering, diner-style stack of glorious flapjacks. You pull out a dusty box of mix or hastily throw together some flour and milk, whisk it like it owes you money, and pour it into a scratched-up pan. Twenty minutes later, you are staring at a plate of dense, rubbery discs that look more like drink coasters than breakfast. Your kitchen is covered in flour, you are sweating over a hot stove while everyone else is already eating, and you are quietly wondering why you did not just order takeout.
Take a deep breath and pour yourself a cup of coffee. As a home cook who has set off the smoke detector more times than I care to admit, I am here to tell you that you do not need a culinary degree to make mind-blowing food. What you need is a basic understanding of kitchen chemistry, a little bit of heat control, and the right gear.
The era of the stressful, chaotic weekend breakfast is over. Today, we are going to completely deconstruct the science of why your batter loses its lift, banish the toxic cookware ruining your food, and teach you how to host a relaxed, interactive morning gathering that actually allows you to sit down and eat with your guests. Welcome to the definitive masterclass on pancake perfection.
The Kitchen Science of Flat Pancakes
Let us get one thing straight: cooking is just chemistry for hungry people. When your breakfast falls flat, it is not because the universe hates you; it is because you violated a few fundamental rules of molecular biology. American-style pancakes are celebrated worldwide for their impressive, airy height, and that structure relies entirely on how you manage your proteins and your leaveners.
The Gluten Trap: Why You Must Step Away from the Whisk
The single most common mistake rookie cooks make is treating their batter like a sworn enemy that must be beaten into submission. Wheat flour contains two specific proteins: glutenin and gliadin. When these proteins are dry, they sit there doing absolutely nothing. However, the exact second you introduce a liquid—like milk, water, or eggs—these proteins wake up, link together, and form an elastic web called gluten.
Gluten is fantastic if you are baking a chewy artisan sourdough bread or tossing a pizza crust. It provides structure and resistance. But in a pancake? Gluten is your absolute worst nightmare. We want our breakfast to be tender, soft, and cloud-like. When you aggressively whisk your bowl, you are mechanically encouraging those gluten strands to stretch, tighten, and coil. The more you mix, the stronger the elastic web becomes.
When your leavening agents release carbon dioxide gas to lift the batter, an overdeveloped gluten network will actually resist that expansion. Instead of rising beautifully, the bubbles burst, the structure tightens, and the resulting disc deflates into a chewy, tough puck. When a recipe tells you to mix until “just combined,” it is not a polite suggestion; it is a strict molecular boundary. You have to fight the urge to stir out the lumps because those tiny, dry pockets of flour will naturally hydrate on their own. Leave the lumps alone, put the whisk down, and step away from the bowl.
The Leavener Lifespan: Is Your Baking Powder Dead?
If you are treating your batter gently but your pancakes still look like deflated tires, the culprit is almost certainly hiding in the back of your pantry. Baking powder is the chemical engine that drives the fluffiness of your breakfast, but it does not live forever.
Most home cooks do not realize that almost all modern commercial baking powder is “double-acting.” This means it relies on a brilliant two-stage chemical reaction to create lift. The powder contains a base (sodium bicarbonate) and two different types of powdered acids. The first acid, usually monocalcium phosphate, reacts the moment it touches a liquid at room temperature. This creates the initial tiny bubbles you see forming in your mixing bowl.
The second acid, typically sodium aluminum sulfate or sodium acid pyrophosphate, is heat-activated. It requires a temperature of around 140°F (60°C) to dissolve and react. This second reaction happens inside the pan, forcing the batter to dramatically puff up just as the starches begin to set.
However, because baking powder is highly sensitive to ambient humidity, it steadily degrades over time. If that plastic container has been sitting in your cupboard since the last presidential election, it is completely dead. To test your leavener, drop a spoonful into a small bowl of hot water. If it immediately fizzes and bubbles violently, you are good to go. If it just sits there looking like cloudy water, throw it in the trash immediately.
The Waiting Game: Hydration and Resting
We are all busy, and the modern “snackification” of breakfast—a major 2026 consumer trend where people swap sit-down meals for quick bites—has conditioned us to rush. But weekend cooking is about mindfulness, and science demands patience.
Once your wet and dry ingredients are gently folded together, you cannot just immediately ladle the mixture onto a hot griddle. This is exactly why your batter needs to rest for at least ten to fifteen minutes. During this crucial window, two magical things happen. First, the starches in the flour absorb the liquid, swelling and thickening the consistency. A thicker batter holds its shape on the pan instead of spreading out into a sad, thin crepe. Second, resting gives the minimal gluten strands you accidentally formed time to relax, ensuring the final texture is melt-in-your-mouth tender. Use this time to prep your toppings or sip your coffee.
Heat Control and the Pan Problem
You can have the most scientifically perfect, rested, well-leavened batter in the world, but if you drop it onto the wrong surface at the wrong temperature, you are going to ruin it. The pan you use is just as important as the ingredients you buy, and I have absolutely zero patience for the toxic garbage most people cook with.
The Toxic Truth About Your Non-Stick Skillet
Let us have a brutally honest conversation about that cheap, scratched-up non-stick pan you bought at a big-box store five years ago. Traditional non-stick coatings are made of polytetrafluoroethylene (PTFE), a synthetic polymer belonging to the PFAS family of “forever chemicals.”
For years, manufacturers swore these coatings were perfectly safe, but the regulatory landscape of 2026 tells a very different story. As of this year, states like Colorado, Maine, and Minnesota have enacted strict, enforceable bans on the sale of cookware containing intentionally added PFAS. Why? Because when these pans are heated above 500°F (which happens shockingly fast on a residential gas burner), the coating begins to break down, releasing invisible, toxic fumes. Worse, as the surface inevitably scratches, you end up eating microscopic flakes of synthetic chemicals with your breakfast.
Furthermore, the thermal properties of cheap aluminum non-stick pans are abysmal. They heat unevenly, creating massive hot spots that scorch your food. If you are wondering about the sneaky reason your pans keep losing their slip after just a few months of use, it is because the microscopic polymer bonds are degrading from heat cycling. Throw that peeling, toxic hazard in the recycling bin where it belongs.
Upgrading Your Gear: The Only Pans You Need
If you want professional-level results, you need to cook on materials that offer immense thermal mass and safe, natural non-stick properties. Thermal mass refers to a material’s ability to absorb, store, and radiate heat evenly. When you pour cold batter onto a flimsy pan, the surface temperature plummets, resulting in a pale, greasy finish. When you pour batter onto a heavy pan, the temperature barely drops, guaranteeing a golden, crispy edge.
Cast iron griddles are the traditional heavyweight champions of the breakfast world. They take a while to heat up, but once they do, they hold a perfectly steady temperature. Alternatively, the superior thermodynamics of carbon steel pans make them the absolute best choice for the modern home cook. Carbon steel is lighter than cast iron, highly responsive to heat changes, and when properly seasoned with polymerized oil, it is naturally incredibly slick.
If you prefer to cook on heavy-bottomed, multi-clad stainless steel, you absolutely can. You just need to manage your heat properly. If you rely on the water drop test to gauge your surface—where a drop of water beads up and dances across the metal—you will know exactly when the pan is hot enough to create a natural vapor barrier (the Leidenfrost effect) that prevents the batter from cementing itself to the steel.
Temperature Management: Avoiding the “First Pancake” Myth
There is a pervasive kitchen myth that the first pancake of the batch is always a sacrificial dud. This is utter nonsense. The only reason your first one turns out pale and weird is because you were too impatient to let your pan properly preheat.
You should preheat your heavy skillet over medium-low heat for at least five full minutes. You are aiming for a surface temperature of around 350°F to 375°F. This is the optimal zone for the Maillard reaction—the complex chemical process where amino acids and reducing sugars brown and create deep, rich flavor compounds.
If your heat is too high, the outside of the batter will quickly scorch and burn before the heat can penetrate the center. This is exactly why your flapjacks burn on the outside while the interior remains a gooey, raw mess.
When greasing the pan, do not use standard butter. The milk solids in regular butter burn at 302°F, meaning your pan will start smoking before it is even hot enough to cook. Instead, use clarified butter (ghee), which has a smoke point of 482°F, or a neutral oil like avocado oil. Wipe the fat into the pan with a paper towel so it leaves a microscopically thin film. Pools of oil will effectively deep-fry the edges of your batter, making them greasy rather than light.
Essential Gear for Flawless Flipping
You do not need a kitchen full of expensive gadgets to cook like a pro, but you do need a few highly functional, purposeful tools. Cooking is about efficiency, and fighting with the wrong equipment is a surefire way to ruin your weekend mood.
The Spatula Situation
Stop trying to flip delicate batter with a thick, blunt, silicone spatula designed for scraping bowls. A thick edge acts like a bulldozer, pushing the raw batter forward and ruining the perfect circular shape you worked so hard to achieve.
You need a stainless steel, flexible slotted fish spatula. Yes, it is called a fish spatula, but it is the unsung hero of the breakfast station. The razor-thin, beveled edge slides effortlessly underneath the delicate crust without disturbing the structure. The flexibility allows you to leverage the weight of the food, and the slots reduce drag. Once you switch to a fish turner, you will never tear a breakfast item again.
Precision and Consistency
If you want your stack to look like it came out of a high-end brunch kitchen, you need to abandon the chaotic “pour from the bowl” method. Eyeballing your measurements results in wildly different sizes, which means they will all finish cooking at different times.
Use a large spring-loaded cookie scoop or a dedicated measuring cup (a 1/4 cup measure is usually perfect) to drop exact, uniform portions onto the griddle. Not only does this look aesthetically pleasing, but it also allows you to time your flips perfectly since every portion requires the exact same thermal energy to cook.
Between batches, your pan will accumulate tiny, burnt crumbs of stray batter. If you leave them there, they will stick to the next batch and impart a bitter, acrid flavor. To quickly clear away burnt bits, you need a bench scraper handy by the stove. A quick scrape across your carbon steel or cast iron griddle resets the surface instantly, keeping your cooking environment pristine.
The Secret to a Mindful Pancake Bar
Now that we have mastered the hard science of leavening, gluten, and thermodynamics, it is time to talk about the actual execution of your weekend gathering.
According to 2026 culinary market analytics, the traditional, rigid sit-down brunch is rapidly being replaced by flexible, interactive, “snackified” social spaces. People do not want to be served a stiff, formal plate; they want to customize, share, and interact with their food. Hosting a DIY pancake bar is the ultimate way to feed a crowd without losing your mind, provided you stage it correctly.
Prep Without the Panic
The golden rule of entertaining is that you should never be doing math or measuring flour while your guests are in the kitchen. If you want to master the art of effortless hosting, you have to shift your prep work to the night before.
Create your own premium dry mixes by measuring your flour, sugar, salt, and baking powder into large glass mason jars on Friday night. In the morning, all you have to do is whisk your wet ingredients (buttermilk, eggs, melted butter, and a splash of vanilla extract) in a separate bowl, dump the dry jar in, fold gently, and let it rest. This entirely eliminates the messy flour explosions and frantic measuring that usually accompany morning cooking.
Holding Temperatures and Eliminating Bottlenecks
The biggest logistical nightmare of making pancakes for a group is that you can only cook a few at a time. If you stack them on a ceramic plate as they come off the griddle, the trapped steam will immediately destroy their crisp edges, turning them into a soggy, unified block of mush.
To maintain the perfect texture, set your oven to 200°F (93°C). Place a wire cooling rack inside a bare aluminum baking sheet, and put it in the oven. As each batch finishes cooking, transfer them in a single layer onto the wire rack. The ambient heat keeps them piping hot, while the elevated rack allows air to circulate underneath, preventing condensation from ruining the crust. Whether you are setting up a crispy brunch bar or a towering pancake station, managing your holding temperatures with wire racks is a non-negotiable professional technique.
The Topping Station Architecture
An interactive food bar is only as good as its weakest topping. Do not just throw a plastic bottle of fake corn syrup on the table and call it a day. You want to curate a spread that offers contrasting temperatures, textures, and flavor profiles to cut through the heavy, carb-rich base.
The Sweet and Acidic:
Real, 100% pure maple syrup is mandatory. Warm it up in a small saucepan before serving; pouring cold syrup over hot food drops the temperature of the entire dish instantly. To balance the intense sweetness, offer an acidic element. A quick berry compote—made by simmering frozen blueberries or raspberries with a squeeze of lemon juice and a pinch of salt—adds a bright, tart contrast that elevates the entire meal.
The Textural Crunch:
Fluffy foods desperately need a textural counterpoint. Set out small bowls of toasted pecans, sliced almonds, or cacao nibs. Toasting nuts in a dry skillet for three minutes releases their essential oils and drastically amplifies their flavor.
The Savory Anchor:
You cannot serve a sweet brunch without a salty, savory anchor to prevent palate fatigue. Thick-cut bacon is the undisputed king here. Do not fry it in a hot pan where it will curl and splatter aggressively. Instead, place the bacon strips in a cold cast iron skillet and turn the heat to medium-low. Slowly rendering fat demonstrates the power of a cold pan for perfect bacon, ensuring it cooks evenly, stays flat, and becomes shatteringly crisp. Alternatively, bake it on a foil-lined sheet in a 400°F oven for twenty minutes for a completely hands-off, mess-free savory side.
Bringing It All Together
Cooking beautiful food at home is not a mystical talent reserved for people in white chef coats. It is simply a matter of respecting the ingredients, understanding the basic chemistry of your batter, and refusing to compromise on the quality of your cookware.
When you stop overmixing your flour, properly test your baking powder, and ditch the toxic, peeling non-stick pans for heavy carbon steel, you take complete control of your kitchen. You transform a stressful, chaotic morning chore into a mindful, creative weekend ritual.
So this weekend, leave the whisk alone, let the batter rest, and set up a beautiful, interactive spread. Pour the coffee, invite your friends into the kitchen, and show them that the absolute best brunch in town isn’t at a trendy restaurant with a two-hour waitlist. It is right there, at your kitchen island. Now get cooking.






