
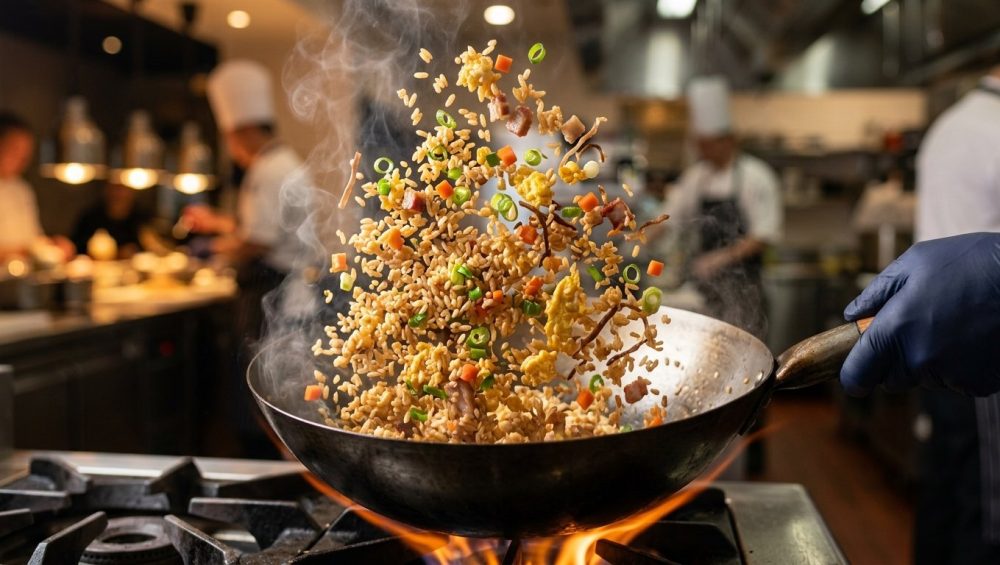
The Tragedy of the Tuesday Night Stir-Fry
Picture this: It is a rainy Tuesday evening here in Germany. You have just walked through the door after a soul-crushing day at the office, and your stomach is demanding immediate satisfaction. You briefly consider ordering takeout, but you are a responsible adult on a budget, and you have half a head of cabbage, some leftover chicken, and a bag of rice in the pantry. “I’ll just whip up some quick fried rice,” you tell yourself. “How hard can it be?”
Thirty minutes later, you are staring into a skillet full of a sticky, gummy, clumped-together disaster that looks less like a vibrant Asian street food masterpiece and more like a savory rice pudding. The grains have fused into a solid block of starch. Your vegetables are weeping sadly into the gluey abyss. You eat it anyway because you are starving, but every bite is a tragic reminder of your culinary failure.
Listen to me carefully: you are not a bad cook. You do not lack some mystical culinary gene, and you certainly do not need a degree from Le Cordon Bleu to make restaurant-quality food in your own home. The reason your dinner turned into spackling paste is simply that you tripped over a few basic laws of food chemistry. When it comes to fried rice, enthusiasm and a hot pan are not enough. You have to understand the science of the grain.
As your resident Sassy Sous-Chef, I am here to tell you that flawless, distinct, chewy, wok-kissed fried rice is entirely within your grasp. But to get there, we need to have a little chat about starch molecules, moisture management, and why your peeling, scratched-up non-stick pan belongs in the garbage bin. We are going to break down the exact common rookie kitchen mistakes that lead to mushy rice, and I am going to give you the ultimate, no-nonsense blueprint for fixing them.
The Science of the Mush: Starch Retrogradation Explained
To understand why your fried rice failed, we have to zoom in on a microscopic level. A grain of raw rice is essentially a tightly packed crystal of starch. When you boil or steam that rice, it absorbs water and heat. The starch granules swell, the crystalline structure breaks down, and the rice undergoes a process called gelatinization. This is what makes fresh, hot rice so beautifully fluffy, soft, and sticky enough to easily pick up with chopsticks.
However, that exact same gelatinized state is the ultimate enemy of fried rice.
Amylose vs. Amylopectin
Rice starch is primarily composed of two different molecules: amylose and amylopectin.
- Amylose is a long, straight-chain molecule. It does not gelatinize easily, and it sets up firm when it cools. Grains with high amylose content tend to cook up dry, distinct, and separate.
- Amylopectin is a highly branched molecule. It loves water, and when heated, it breaks down and becomes incredibly sticky.
When you take freshly cooked, hot rice—which is swollen with water and coated in sticky, gelatinized amylopectin—and throw it directly into a hot frying pan, you are committing a culinary crime. The intense heat of the pan causes the residual water inside the fresh rice to rapidly turn into steam. This steam essentially continues to cook the rice in the pan, causing the delicate cell walls of the swollen grains to rupture. The sticky starches spill out, acting like literal glue, fusing the grains together into a mushy paste.
The Magic of Starch Retrogradation
So, how do we fix this? We rely on a beautiful, testable scientific phenomenon known as starch retrogradation.
When gelatinized, cooked starch is allowed to cool down, it does not just get cold—it fundamentally changes its physical structure. The starch molecules, which were chaotic and swollen during cooking, begin to realign and recrystallize into a more rigid, ordered structure. This crystallization process expels water from the starch matrix. According to a recent May 2026 study published in Springer Science, chilling cooked rice for 12 hours at 4°C (standard refrigerator temperature) significantly increases the relative crystallinity of the starch, leading to higher hardness and chewiness, while drastically reducing the grain’s adhesiveness (stickiness).
In layman’s terms: chilling your rice turns it from a soft, sticky sponge into a firm, resilient little pebble. When this retrograded rice hits a hot pan, it is tough enough to withstand vigorous tossing and high heat without shattering or turning into mush.
The Golden Rule: Chilled, Day-Old Rice
If there is only one thing you take away from this masterclass, let it be this: day-old rice changes everything. It is the non-negotiable foundation of good fried rice.
But it is not just about the internal starch structure; it is also about surface moisture. Your refrigerator is essentially a giant, cold dehydrator. The ambient air inside a fridge is incredibly dry. When you leave cooked rice in the fridge overnight, that dry air pulls the excess surface moisture right off the grains.
Why does surface moisture matter? Because water is the ultimate enemy of high-heat searing. If your rice is coated in a microscopic layer of water, that water will instantly vaporize when it hits the hot oil in your pan. This rapid evaporation aggressively suppresses the temperature of your cooking surface. Instead of frying and blistering, your rice ends up steaming in its own liquid.
The Weeknight Cheat Code: The Freezer Method
I can already hear you complaining. “But Chef, it’s Tuesday! I didn’t plan ahead yesterday! I want fried rice right now!”
I get it. Time is money, and weeknights are chaotic. If you absolutely must make fried rice on the same day you cook the grains, you can force rapid retrogradation and evaporation using your freezer.
Here is the cheat code: Cook your rice. While it is still piping hot, spread it out in a very thin, even layer (no more than an inch deep) on a large, rimmed bare aluminum baking sheet. Do not cover it. Place the entire baking sheet directly into your freezer for 15 to 20 minutes. The intense cold and the circulating air of the freezer will rapidly halt the cooking process, flash-evaporate the surface moisture (you will see a massive plume of steam rising off the pan initially), and kickstart the starch crystallization. Take it out, break up any minor clumps with wet hands, and you are ready to fry.
The Myth of the “Quick Cold Water Rinse”
I have seen well-meaning home cooks try to take a shortcut by dumping freshly cooked, hot rice into a strainer and running it under freezing cold tap water to “cool it down quickly.” Please, for the love of all things culinary, never do this.
While running cold water over the rice will indeed drop its temperature, it simultaneously waterlogs the grains. You are actively adding heavy surface moisture back into a dish where moisture is the primary villain. You will end up with a soggy, diluted mess that will instantly stick to your pan and boil instead of fry.
Choosing and Prepping the Right Grain
Not all rice is created equal, and if you are using the wrong variety, you are fighting an uphill battle before you even turn on the stove.
The Cultivars
Remember our friends amylose and amylopectin? The ratio of these two starches varies wildly depending on the cultivar of rice you buy.
- Long-Grain White Rice (Standard): A reliable middle-ground. It has enough amylose to stay separate, but lacks the floral aroma of premium grains.
- Jasmine Rice: The absolute king of fried rice. It has a beautiful, subtle floral aroma and a perfect starch balance that yields a slightly chewy, distinct grain when retrograded. This is what you will find in most Southeast Asian kitchens.
- Basmati Rice: This long-grain Indian variety contains roughly 25% amylose. Because of this high amylose content, it cooks up incredibly dry and fluffy. It makes a fantastic, highly separated fried rice, though the flavor profile is distinctly nutty and earthy.
- Short-Grain / Sushi Rice: Proceed with extreme caution. Short-grain rice contains around 18% amylose and a whopping 82% amylopectin. It is genetically designed to be cohesive and sticky. While you can make fried rice with it (Japanese chahan often uses medium or short-grain), it requires flawless moisture management and heat control to prevent it from turning into a gummy disaster.
The Mandatory Rinse
Do not even think about skipping this step before you boil your grains. When rice is milled and polished before packaging, the grains rub against each other, creating a fine dust of pure starch that coats the outside of every single grain. If you do not wash this dust off, it will instantly turn into a sticky paste the second it touches boiling water.
You must rinse your raw rice under cold water until the water runs completely clear. I highly recommend using a Japanese wash bowl for this, as the specialized drainage slits make it effortless to aggressively agitate the grains and pour off the milky, starchy water without losing half your dinner down the sink drain.
The Gear: Throw Away Your Toxic Pans
We need to have a serious intervention about your cookware. If you are trying to make fried rice in a lightweight, aluminum non-stick skillet that you bought for $15 at a big-box store three years ago, you are setting yourself up for failure.
I have a strict “no-go” rule when it comes to cheap, degraded Teflon. Not only is it a health hazard once that coating starts peeling and flaking into your food, but it is also thermodynamically incapable of doing what we need it to do. Traditional non-stick pans cannot handle high heat. If you push them past 260°C (500°F), the PTFE coating begins to break down and release toxic fumes. Because you have to baby them over medium heat, they are physically incapable of searing rice; they can only gently warm it, which leads to—you guessed it—mush.
It is time to start banishing toxic kitchen gear from your life.
The Case for Carbon Steel
If you want to cook like a pro, you need to invest in a carbon steel wok. Carbon steel is the undisputed champion of the Asian kitchen. It is relatively lightweight, it responds to temperature changes almost instantly, and when properly seasoned, it develops a naturally non-stick patina that will outlast you. More importantly, it can withstand the blistering, screaming-hot temperatures required for a proper stir-fry. Look for a flat-bottomed wok (so it sits securely on a standard home stove) with a gauge thickness of around 1.6mm to 2.0mm.
If you do not have a wok, your next best option is a massive, heavy-bottomed cast-iron skillet or a high-quality, thick multi-clad stainless steel frying pan. These pans have immense thermal mass, meaning once they get hot, they stay hot, even when you dump a mountain of cold rice into them. (If you use stainless steel, you will need to master the magic of the water drop test—the Leidenfrost effect—to ensure your rice doesn’t cement itself to the bottom of the pan).
Thermodynamics and the Elusive “Wok Hei”
If you have ever eaten at a great Cantonese restaurant, you know that distinct, smoky, singed, almost savory aroma that clings to the food. That is Wok Hei, which poetically translates to the “breath of the wok”.
Many home cooks believe Wok Hei is some mystical, unattainable culinary magic. It is not. It is pure, violent physics.
The Physics of High-Heat Cooking
In a commercial kitchen, a wok burner outputs upwards of 100,000 BTUs of heat. It sounds like a jet engine. At these extreme temperatures (often exceeding 300°C / 570°F), several things happen simultaneously:
- The Maillard Reaction: The proteins and sugars in the food rapidly brown, creating hundreds of new, complex flavor compounds.
- Pyrolysis & Lipid Oxidation: As the chef tosses the food into the air, microscopic droplets of oil catch the edge of the intense heat and partially combust. This aerosolized oil falls back onto the food, coating it in a smoky, charred essence without actually burning the meal.
Faking Wok Hei on a Home Stove
Your home stove—whether gas, electric, or induction—likely maxes out between 7,000 and 15,000 BTUs. You are never going to perfectly replicate a commercial jet-engine burner. However, you can absolutely simulate the effects of Wok Hei if you respect the limits of your equipment.
The biggest mistake you can make is overcrowding the pan. When you dump four cups of cold rice and a pound of vegetables into a home skillet, the temperature of the pan plummets instantly. Your stove simply does not have the horsepower to recover that lost heat quickly. The food stops frying and begins to boil in its own trapped juices.
The Solution: Batch Cooking.
If you are cooking for more than two people, you must cook in batches. Sear your proteins first, then remove them from the pan. Cook your aromatics and vegetables, then remove them. Finally, get the pan smoking hot again, add a generous amount of high-smoke-point oil, and fry the rice by itself. Give the rice the space and the heat it needs to toast and blister. Only when the rice is perfectly fried should you return the rest of the ingredients to the pan to toss everything together.
Moisture is the Enemy: Managing Add-Ins
Even if you use perfectly retrograded, day-old rice and a screaming hot carbon steel wok, you can still ruin the dish in the final minutes by introducing too much water through your mix-ins.
The Vegetable Trap
Raw vegetables are essentially just crunchy water balloons. Onions, bell peppers, zucchini, and mushrooms contain massive amounts of internal moisture. If you toss raw vegetables in with your rice, they will release that water as they cook, instantly turning your beautiful, dry grains into a soggy swamp.
You must pre-cook your vegetables. Stir-fry them vigorously in a hot pan until their moisture has evaporated and they have developed a nice char, then remove them to a holding plate. Alternatively, use ingredients that have a naturally low moisture content, like frozen peas and carrots (which thaw almost instantly in the wok without pooling water) or finely diced scallions.
The Sauce Strategy
A great fried rice does not need to be drowned in a heavy, gloopy sauce. The flavor should come from the aromatics (garlic, ginger, scallions), the rendered fat (like sesame oil or pork lard), and the toasted flavor of the rice itself.
When you do add liquid seasonings—like soy sauce, oyster sauce, or Shaoxing wine—do not pour them directly onto the mountain of rice. Doing so will simply cause the rice to absorb the liquid and turn mushy. Instead, push the rice to the center of the pan and pour your liquid seasonings directly onto the exposed, smoking-hot bare metal around the perimeter of the wok.
This technique does two things:
- It instantly flash-boils and caramelizes the soy sauce, intensifying its umami flavor and burning off the excess water before it can soak into the rice.
- It creates a beautiful, savory steam that gently coats the grains as you toss them, distributing the flavor evenly without compromising the texture.
(A quick sidebar on fats: Do not use aerosol cooking sprays for this. They contain soy lecithin and propellants that will build up and polymerize into a sticky, impossible-to-remove residue on your pan. Use real, high-smoke-point liquid oils like peanut, canola, or avocado oil.)
The Ultimate Blueprint for Flawless Fried Rice
We have covered the chemistry, the thermodynamics, and the gear. Now it is time to put it all together. Here is your step-by-step masterclass workflow for perfect weeknight fried rice.
Phase 1: The Setup (Mise en Place)
Stir-frying happens in a matter of minutes. Once the oil starts smoking, you do not have time to chop an onion or search your pantry for the soy sauce. Everything must be prepped and within arm’s reach.
- The Rice: Have your chilled, day-old (or freezer-flashed) rice ready in a bowl. Wet your hands slightly and gently rub the rice between your fingers to break apart any large, stubborn clumps.
- The Aromatics: Finely mince your garlic, ginger, and the white parts of your scallions. (Keep the green parts separate for garnish).
- The Protein: Dice your chicken, pork, or tofu into small, uniform pieces.
- The Sauce: Mix your soy sauce, a dash of toasted sesame oil, and a pinch of white pepper in a small ramekin.
Phase 2: The Sear
- Place your wok or heavy skillet over the highest heat your stove can produce. Let it heat up until you see faint wisps of smoke rising from the metal.
- Add a tablespoon of high-smoke-point oil (peanut or avocado). Swirl it to coat the pan.
- Add your protein. Spread it out into a single layer and leave it alone for a minute to develop a crust. Toss it until cooked through, then immediately remove it to a clean plate.
Phase 3: The Aromatics and The Egg
- If the pan is dry, add another teaspoon of oil. Toss in your minced aromatics. Stir them frantically for about 15 seconds until they are wildly fragrant. Be careful here—you must keep them moving. Understanding why your garlic always burns is crucial; it happens when you leave it sitting in hot oil for too long without agitation.
- Push the aromatics to one side of the pan. Crack two beaten eggs into the empty space. Let them bubble and set for a few seconds, then scramble them roughly with your spatula. Before they are fully hard, proceed to the next step.
Phase 4: The Main Event (Frying the Rice)
- Dump your chilled, clump-free rice directly on top of the eggs and aromatics.
- Now, you work. Use your spatula to press the rice down into the hot metal, maximizing surface contact to toast the grains. Then, scrape the bottom, lift, and toss. Press, scrape, lift, toss. (If you are using cheap utensils, you will quickly learn why wooden spoons keep cracking under this kind of aggressive high-heat pressure. Use a proper metal wok spatula or a heat-resistant silicone turner).
- Keep tossing until the rice is heated all the way through and you can see individual grains dancing and popping slightly in the pan.
Phase 5: The Flavor Finish
- Return your cooked protein and any pre-cooked vegetables to the pan. Toss to combine.
- Push the entire mixture to the center of the wok.
- Pour your sauce mixture around the bare, screaming-hot perimeter of the pan. Listen to it sizzle and caramelize.
- Immediately toss the rice into the reducing sauce, coating every grain evenly.
- Turn off the heat. Toss in the green parts of your scallions. Serve immediately.
Elevating the Flavor: A Note on Spices
If you want to take your fried rice in a different direction—perhaps a spicy curry fried rice or a vibrant turmeric-laced Indonesian Nasi Goreng—you need to understand how to treat dried spices.
Do not just dump raw curry powder over the top of your finished rice. Spices contain volatile essential oils that need heat to unlock their full flavor profile. If you skip this step, your dish will taste dusty and gritty. You must activate these compounds by blooming them in oil. Add your dry spices to the hot oil right after your aromatics (garlic and ginger) but just before you add the rice. Frying the spices for a mere ten seconds in the fat will completely transform the depth and complexity of your final dish.
Rescue Missions: What If It Is Already Mushy?
Let us say you ignored my advice, or you stumbled upon this article too late, and you are currently staring at a wok full of irreparably mushy, gluey rice. Do not throw it away. Food waste is a sin in my kitchen.
You cannot reverse starch gelatinization once the cell walls have ruptured, but you can pivot. If your rice is a sticky mess, add some chicken broth, extra ginger, and a dash of soy sauce, and boil it down into a comforting congee (rice porridge). Alternatively, let the mushy rice cool completely, mix it with an egg, some grated parmesan, and a spoonful of flour, and pan-fry them into crispy rice fritters. You might not have achieved fried rice, but you still salvaged a fantastic dinner.
The Final Word
Cooking is not magic; it is applied science. The difference between a stressful, chaotic kitchen disaster and a plate of beautiful, restaurant-quality food usually comes down to understanding a few basic physical laws.
When you respect the chemistry of starch retrogradation, when you manage your moisture levels with ruthless efficiency, and when you harness the thermodynamic power of a heavy, pre-heated pan, you take total control of your food. You will never have to settle for a plate of sad, mushy, gluey rice again.
So the next time it is a rainy Tuesday night and you are staring down a container of leftover white rice, do not panic. Grab your wok, crank up the heat, and show that rice who is boss. You have got this. Now go cook something amazing.
(And seriously, throw away that peeling non-stick pan. I am begging you.)






