
The Frustrating Reality of Rubber-Band Pizza Dough
Picture this: It is a beautiful Friday evening. You have poured yourself a generous glass of wine, put on a killer playlist, and decided that tonight is the night you are going to master homemade pizza. You have your toppings prepped, your oven preheating to blazing hot temperatures, and a beautiful ball of dough sitting on your counter. You press into it, expecting it to yield like a fluffy cloud. Instead, it fights back. You pull it, and it immediately snaps back into a stubborn, lumpy circle. You stretch it again, pulling harder this time, and—rip—you have just torn a massive hole right in the center of your would-be masterpiece.
Congratulations, you are officially in a wrestling match with your dinner, and currently, the dough is winning.
If this scenario raises your blood pressure, take a deep breath. You are not alone, and you do not need to be a Naples-trained pizzaiolo with a wood-fired oven in your backyard to fix this. The home pizza-making market is absolutely exploding right now. Recent industry data from 2026 shows that an astonishing 86 percent of Americans are eating pizza weekly, and the demand for home pizza ovens and artisanal ingredients has never been higher. People are tired of stagnant, cardboard-tasting frozen pizzas and are taking matters into their own hands. But the transition from ordering takeout to slinging your own pies comes with a learning curve, especially when it comes to dough mechanics.
The good news? The solution to your stubbornly elastic dough requires absolutely zero culinary skill, zero extra ingredients, and zero physical effort. If you want to cure cooking anxiety when it comes to weekend baking projects, you only need to understand one incredibly simple, scientifically backed concept: the magic of a quick rest.
In this comprehensive masterclass, we are going to ditch the pretentious chef-speak and break down exactly why your dough is throwing a temper tantrum. We will explore the microscopic world of gluten networks, the brilliance of the autolyse method, and the step-by-step techniques that will have you stretching dough like a seasoned pro. Grab your apron, top off that wine, and let’s get to work.
The Science of Gluten: Why Your Dough Hates You
To understand why your dough is acting like a giant, edible rubber band, we have to take a brief detour into the science of baking. Do not panic; there will not be a test at the end. But if you want to master the art of the kitchen, you need to know what is actually happening in your mixing bowl.
Meet the Culprits: Gliadin and Glutenin
Wheat flour contains two primary proteins: gliadin and glutenin. When flour is sitting dry in its bag, these proteins are completely inactive. They are just hanging out, minding their own business. But the second you introduce water into the mix, a chemical reaction occurs. The gliadin and glutenin bind together to form a complex, web-like matrix known as gluten.
Gluten is the architectural foundation of your pizza dough. It is what traps the carbon dioxide gasses produced by your yeast, allowing the dough to rise and form those beautiful, airy bubbles in the crust. But gliadin and glutenin play two very different roles in this structural network:
- Gliadin is responsible for extensibility. This is the property that allows the dough to be stretched out thin without breaking. Think of gliadin as the relaxed, flexible yoga instructor of the dough world.
- Glutenin is responsible for elasticity. This is the property that gives dough its strength and causes it to snap back into its original shape. Think of glutenin as the tightly wound, high-strung personal trainer.
For a perfect pizza crust, you need a harmonious balance of both. You need enough extensibility (gliadin) to stretch the dough into a wide, thin circle, but you also need enough elasticity (glutenin) so that the dough has the structural integrity to hold your sauce and cheese without disintegrating into a soggy mess.
The Kneading Paradox
When you knead dough—whether by hand or in a stand mixer—you are mechanically organizing that gluten network. You are taking those tangled, chaotic protein strands and aligning them into a strong, tight, orderly web.
Here is the paradox: kneading is essential for building strength, but the more you knead, the tighter and more elastic the gluten network becomes. Every time you fold, push, and pull the dough, you are winding up the glutenin tighter and tighter. If you try to stretch the dough immediately after kneading it, or immediately after aggressively rolling it into a tight little ball, the glutenin is fully activated and highly stressed. It will aggressively fight your attempts to stretch it out.
This is the exact moment when most beginner cooks panic, reach for a rolling pin, and forcefully crush the dough into submission. Please, I am begging you, put the rolling pin down. Rolling out pizza dough crushes all the delicate gas bubbles your yeast worked so hard to create, leaving you with a dense, cracker-like crust. Instead of fighting the dough with brute force, you need to work smarter. You need to let it rest.
The Magic of the Quick Rest (Or, Why Doing Nothing Works)
When your dough keeps snapping back, the absolute best thing you can do is walk away. Seriously. Wash your hands, go check your email, pour another drink, and leave the dough alone for 15 to 30 minutes. This hands-off period is known in baking circles as a “bench rest” or, if done at the very beginning of the mixing process, an “autolyse.”
The Autolyse Method Explained
The autolyse (pronounced auto-leese) technique was developed in the 1970s by a brilliant French baking professor named Raymond Calvel. Professor Calvel noticed that mechanical mixers were over-oxidizing bread dough, resulting in a loss of flavor and a tight, difficult-to-manage texture. His solution was elegantly simple: mix only the flour and water together first, and let it sit for 20 to 60 minutes before adding the yeast, salt, or oil.
During this resting period, the flour fully hydrates. But more importantly, the rest activates naturally occurring enzymes in the flour that completely transform the dough’s texture without you having to lift a finger.
Protease Enzymes: Nature’s Meat Tenderizer
When you let hydrated dough rest, an enzyme called protease gets to work. Protease enzymes act like microscopic scissors—or a natural meat tenderizer—snipping away at some of the tight gluten bonds you just created.
By breaking down a fraction of the protein strands, protease dramatically increases the dough’s extensibility (the stretchy gliadin property) while slightly reducing its elasticity (the snap-back glutenin property). This enzymatic relaxation is the scientific secret to dough that practically stretches itself.
Simultaneously, another enzyme called amylase is busy breaking down the complex starches in the flour into simpler sugars. These sugars not only provide an all-you-can-eat buffet for your yeast (resulting in a better rise), but they also caramelize beautifully in the oven, giving your crust that gorgeous, deeply browned, blistered finish.
Bench Resting: The Mid-Prep Pause
While a true autolyse happens before you add yeast and salt, the concept of enzymatic relaxation applies anytime the dough is resting. If you are using a store-bought dough ball, or if you have already fully mixed and proofed your homemade dough, you will utilize a “bench rest.”
When you take a ball of dough out of the fridge, or after you have divided a large batch into individual pizza portions, the gluten is tense from being handled. By covering the dough balls with a damp towel or plastic wrap and letting them sit on the counter for 30 to 60 minutes, you are giving those protease enzymes time to relax the network. The result? A supple, cooperative dough that stretches effortlessly.
Step-by-Step: Stretching Dough Without Losing Your Mind
Now that we understand the microscopic chemistry happening on your countertop, let’s translate that science into practical, weeknight-friendly action. Here is my foolproof, step-by-step masterclass on how to stretch pizza dough perfectly every single time, ensuring you can host a mindful pizza party without tearing your hair out.
Step 1: The Temperature Check
Time is money, and I know you want dinner on the table an hour ago, but you cannot rush temperature. Cold dough is stiff, stubborn dough. The gluten network tightens up significantly at lower temperatures. If you are using store-bought dough or dough that has been cold-fermenting in your refrigerator, you must let it sit at room temperature for at least 1 to 2 hours before you even look at it.
Do not try to stretch cold dough. It will fight you, it will tear, and it will ruin your night. Let it warm up until it feels soft, relaxed, and slightly puffy.
Step 2: The Initial Press
Once your dough is at room temperature, dust your work surface and your hands with a little flour (or semolina flour for extra crunch). Place the dough ball down and use your fingertips to gently press into the center, working your way outward.
Leave a one-inch border untouched around the edge—this will become your puffy crust (the cornicione, if you want to sound fancy). You are gently dimpling the dough to push the gasses outward into the crust, not crushing the life out of it.
Step 3: The Snap-Back Test and The Bench Rest
After your initial press, try to gently stretch the dough outward. This is where the rubber meets the road.
If the dough stretches easily and holds its shape, proceed to Step 4.
If the dough aggressively snaps back like a rubber band, STOP.
Do not force it. Do not stretch it harder. You have agitated the glutenin, and the dough needs a time-out. Cover the dough with a lightweight kitchen towel or an inverted bowl so it doesn’t dry out, and walk away. Give it a 10 to 15-minute quick rest. When you return, the protease enzymes will have relaxed the gluten strands, and the dough will be infinitely more cooperative. You can repeat this 10-minute rest as many times as necessary until the dough yields.
Step 4: The Final Gravity Stretch
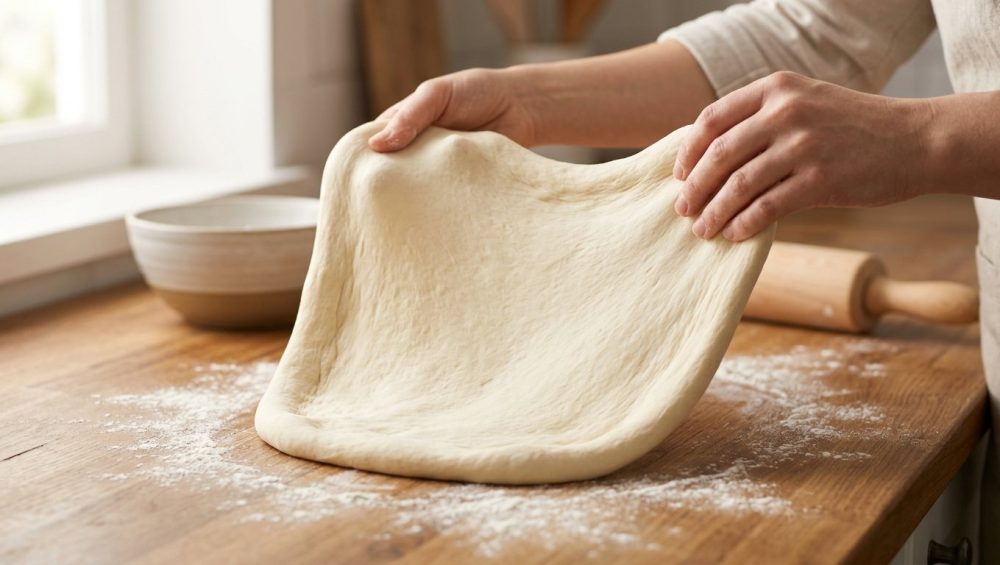
Once the dough is relaxed, pick it up. Let gravity do the hard work for you. Hold the dough near the top edge, letting the bottom hang down. Gently pass the dough from hand to hand, rotating it like a steering wheel. The weight of the dough will naturally pull it downward, stretching it into a thin, even circle without tearing the delicate gluten structure.
If you notice a spot getting too thin, lay it back down on the floured counter and gently adjust it. Remember, homemade pizza is supposed to look rustic. If it is a perfect circle, people will think you bought it frozen. Embrace the abstract shapes.
The “No-Go” Rule: Banishing Toxic Pizza Gear
We need to have a very serious conversation about the equipment you are using to bake this beautifully stretched dough. As your resident sassy sous-chef, I have a strict, non-negotiable rule: I absolutely despise cheap, toxic kitchenware. If you are going through the effort of making artisanal pizza at home, you cannot bake it on garbage.
The Danger of Peeling Non-Stick Pans
Walk into any big-box store, and you will see shelves lined with cheap, dark-colored, non-stick pizza crisper pans. Do not buy them. If you own one, throw it in the recycling bin immediately.
These cheap pans are coated with PTFE (polytetrafluoroethylene), a synthetic polymer from the PFAS family of “forever chemicals”. While these coatings might keep your eggs from sticking at low temperatures, they have absolutely no business being used for pizza.
Great pizza requires blistering high heat. You should be baking your pizzas at 500°F (260°C) or higher. At these extreme temperatures, traditional non-stick PTFE coatings begin to rapidly break down, off-gas toxic fumes, and degrade. Over time, that non-stick coating will start to blister, flake, and peel directly into your food. I don’t know about you, but I prefer my pepperoni pizza without a side of synthetic microplastics and forever chemicals.
When it comes to banishing toxic kitchen gear, non-stick bakeware is public enemy number one. It is cheap, it is disposable, and it is entirely counterproductive to achieving a crispy pizza crust.
What to Use Instead: Steels and Stones
If you want a mind-blowing, pizzeria-quality crust in a standard home oven, you need equipment with high thermal mass. You need a surface that gets screaming hot and stays screaming hot the moment the cool dough hits it.
Your best investment is a Baking Steel (a heavy slab of highly conductive carbon steel) or a thick cordierite baking stone. These materials are 100% non-toxic, practically indestructible, and capable of transferring massive amounts of heat into the bottom of your pizza dough instantly. This intense bottom-heat causes rapid “oven spring,” forcing the trapped gasses in the dough to expand rapidly before the crust sets, giving you a light, airy, blistered crust.
Once you experience the magic of a baking steel, you will never look at a cheap aluminum pan again. To launch your pizza onto the hot steel, use a wooden pizza peel lightly dusted with semolina. And whatever you do, never spray your baking stones or steels with aerosol cooking sprays. The propellants in those cans polymerize into a sticky, impossible-to-clean residue; truly, cooking spray is the enemy of high-quality cookware.
Advanced Dough Nerdery: Hydration and Fermentation
If you are ready to graduate from beginner dough handling to advanced pizza nerdery, there are two more factors that heavily influence how much your dough shrinks: hydration and fermentation.
Why High Hydration Matters
In baking, ingredient ratios are calculated using “baker’s percentages,” where the weight of the flour is always 100%, and everything else is a percentage of that weight.
Hydration refers to the amount of water in the dough. If a recipe calls for 1,000 grams of flour and 600 grams of water, that is a 60% hydration dough.
Water is the lubricant of the gluten network. A low-hydration dough (50-55%) is going to be stiff, dense, and highly elastic. It will fight your stretching attempts vigorously. A higher-hydration dough (65-70%+) is going to be incredibly extensible, loose, and easy to stretch. The trade-off is that high-hydration doughs are sticky and harder to handle without making a mess.
If your dough is consistently too stiff to stretch, try finding a recipe with a slightly higher hydration percentage. That extra water will give the gluten strands the mobility they need to relax.
Cold Fermentation vs. Room Temperature
How long you let your dough rise also impacts its stretchiness. A “same-day” dough that rises on the counter for two hours is going to be relatively tight.
If you want the ultimate, relaxed, flavorful dough, you need to embrace cold fermentation. After mixing and briefly kneading your dough, pop it into the refrigerator for 24 to 72 hours. The cold temperature drastically slows down the yeast activity, allowing the dough to rise at a snail’s pace.
During this extended cold rest, those glorious protease enzymes we talked about earlier have days—not minutes—to gently break down the gluten network. The result is a dough that is incredibly extensible, easy to stretch, and packed with complex, tangy flavors that a quick two-hour dough could never dream of achieving. Just remember to let it come fully to room temperature before stretching so you can host a stress-free, mindful pizza night with friends.
Troubleshooting Common Pizza Dough Disasters
Even armed with the knowledge of autolyse, bench resting, and hydration, things can occasionally go sideways. Let’s troubleshoot a few common scenarios where the quick rest doesn’t seem to be fixing the problem.
When the Rest Isn’t Enough: Over-Kneading
If you have let your dough rest for 45 minutes and it is still snapping back like a heavy-duty bungee cord, you may have severely over-kneaded it.
This usually happens when home cooks use a stand mixer on a high speed for too long, or use a food processor to mix their dough. The intense mechanical action hyper-aligns the glutenin proteins until they are virtually locked in place. While protease enzymes can relax normal dough, they cannot undo the damage of extreme mechanical over-mixing in a short timeframe.
If you find yourself with an impossibly tight dough, your only option is time. Put it in the fridge overnight and pray the enzymes can do their job by tomorrow. Next time, mix the dough until it just comes together, let it autolyse, and finish with a few gentle hand-folds.
Choosing the Right Flour
Not all flour is created equal, and the type of flour you use drastically impacts the elasticity of your dough.
- All-Purpose Flour: Usually sits around 10-11% protein. It makes a decent, soft pizza crust but lacks the chew and structural integrity of professional pizzas.
- Bread Flour: Clocks in around 12-14% protein. Higher protein means more gluten, which means a stronger, chewier crust. However, bread flour doughs are highly elastic and will require longer resting times to relax.
- Tipo 00 Flour: This is the gold standard for Neapolitan pizza. “00” refers to how finely the flour is milled, not its protein content (though it usually sits around 11-12%). It is specifically formulated to absorb water beautifully and withstand the blistering 900°F heat of a wood-fired oven without burning.
If you are using bread flour and struggling with snap-back, try blending it 50/50 with all-purpose flour to lower the overall protein content and increase extensibility.
Handling Sticky Situations
Sometimes, a well-rested, high-hydration dough is so relaxed that it becomes a sticky nightmare on your countertop. Do not panic and dump a cup of raw flour onto it—that will ruin your hydration ratio and make the baked crust taste like raw dust.
Instead, ensure your hands are lightly floured, work quickly, and use the right tools. If the dough sticks to the counter, you need a bench scraper. A simple stainless steel bench scraper allows you to cleanly lift and fold sticky dough without tearing the gluten structure or coating your fingers in a gluey mess.
Conclusion: Master Your Dough, Master Your Weekend
Making incredible pizza at home is not about having a culinary degree or buying a five-thousand-dollar imported Italian brick oven. It is about understanding the basic, underlying science of your ingredients and knowing when to get out of your own way.
The next time your dough decides to throw a tantrum and snap back into a stubborn little ball, do not fight it. Do not reach for the rolling pin. Do not let it ruin your Friday night. Recognize that the gluten network is stressed out, and apply the simplest, most effective technique in the culinary world: do absolutely nothing.
Cover it up, walk away, and let nature’s enzymes do the heavy lifting for you. By learning to work with the dough rather than against it, you can easily avoid the most frustrating beginner cooking mistakes and start producing pizzeria-quality pies right in your own kitchen.
Now, go preheat that baking steel, pour yourself another glass of wine, and get ready to stretch some dough. You’ve got this.






