
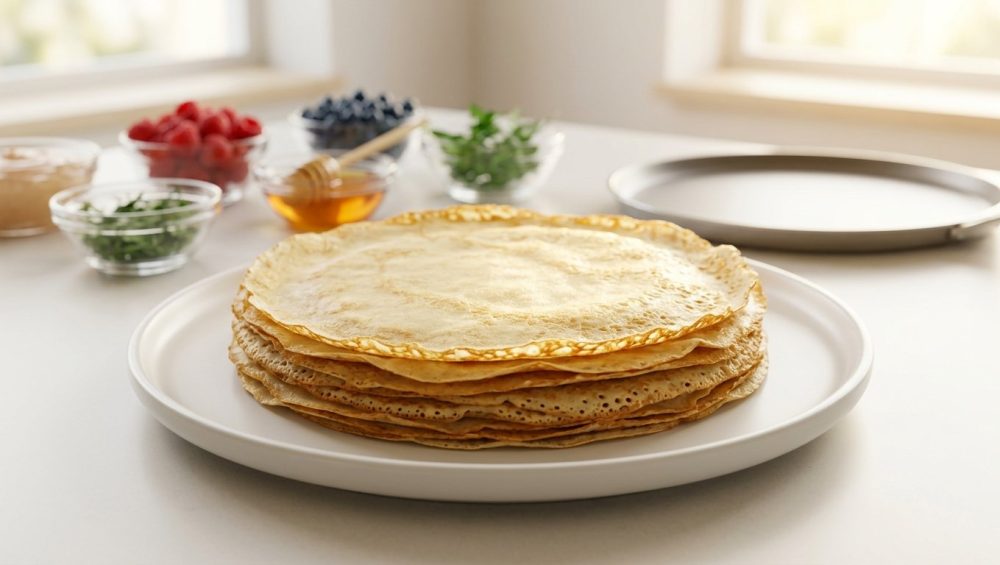
Listen, weekend warriors. We need to have a serious talk about your Sunday brunch game. You have invited your friends over, you have curated the perfect playlist, and you have grand visions of an interactive, Parisian-style morning where everyone is laughing over mimosas while effortlessly flipping delicate, lace-thin French pancakes. But then reality hits. You pour the batter into the pan, you try to flip it, and the entire thing disintegrates into a crumpled, tearing, rubbery mess. Suddenly, you are sweating over the stove, furiously scraping burnt bits of dough into the trash, and wondering why you didn’t just order bagels.
Let’s get one thing straight right out of the gate: making professional-quality crepes at home does not require a culinary degree from Le Cordon Bleu. It does not require a commercial gas range, and it certainly does not require you to be a stressed-out short-order cook at your own gathering. The reason your crepes are tearing, sticking, and ruining your weekend is simply that you are ignoring the fundamental food science of batter hydration, pan thermodynamics, and proper equipment.
Today, we are stripping away the pretentious chef-speak and diving deep into the exact mechanics of why your batter fails. We are going to explore the critical importance of resting your dough, the absolute necessity of ditching toxic kitchenware, and the precise temperature control required to achieve that perfect golden-brown finish. By the time we are done here, you will be fully equipped to execute a flawless, interactive crepe bar that leaves your guests mind-blown and leaves you actually enjoying your own party.
The Science of the Tear: Why Your Batter is Sabotaging You
If you are mixing your flour, eggs, and milk and immediately pouring that liquid into a hot skillet, you are committing the ultimate culinary sin. You are setting yourself up for failure before the stove is even turned on. To understand why your crepes are ripping, we have to take a microscopic look at what is actually happening inside your mixing bowl. It all comes down to two dueling scientific forces: gluten development and starch hydration.
When you whisk flour and liquid together, two distinct proteins found in wheat—gliadin and glutenin—bond together to form a complex, elastic network known as gluten. This elasticity is exactly what you want when you are kneading a sturdy loaf of sourdough bread or tossing a pizza crust. But in the delicate world of crepes, elasticity is your absolute worst enemy. When you aggressively whisk your batter, you are tightening those gluten strands into microscopic rubber bands. If you cook that batter immediately, those tight protein networks will seize up the second they hit the heat. This is exactly why your pancakes are rubbery and why your crepes shrink, curl, and violently tear when you try to slide a spatula underneath them.
But gluten is only half of the equation. The other critical factor is starch hydration. Flour is packed with tightly coiled starch granules (amylose and amylopectin). In their dry state, these granules are hard and unyielding. When you introduce wet ingredients like milk and eggs, the starch needs adequate time to absorb that moisture, swell, and create a stable, viscous gel network. If you rush the process and cook unhydrated batter, the liquid will rapidly evaporate as soon as it hits the hot pan. What you are left with is a fragile, dry, chalky matrix of unhydrated flour that possesses zero structural integrity. The moment you attempt a flip, the crepe shatters.
To eliminate the tearing, you must respect the science of the soak. You are not just mixing ingredients; you are initiating a chemical reaction that requires a specific duration to mature.
The Magic of Resting: A Masterclass in Batter Patience
The single most effective secret to a foolproof, tear-free crepe is doing absolutely nothing. Seriously. You need to mix your batter and then walk away. Resting the batter is the non-negotiable step that separates amateur hour from a professional patisserie.
When you place your freshly blended batter into the refrigerator for a minimum of thirty minutes—though ideally, you should leave it overnight—magic happens on a molecular level. First, those tightly wound gluten strands that you agitated during the mixing process finally get a chance to relax. As the proteins rest, they lose their elastic tension, ensuring that your final crepe will be incredibly tender rather than chewy.
Simultaneously, the starch granules are doing the heavy lifting of hydration. Over the course of a few hours, the flour fully absorbs the milk and eggs. The granules swell and pop, thickening the batter naturally without the need for additional dry ingredients. This fully hydrated starch creates a robust, cohesive structure that can withstand the intense heat of the pan and the mechanical stress of being flipped. A well-rested batter will look noticeably different than a freshly mixed one; it will be smoother, slightly thicker, and free of those tiny, stubborn air bubbles that cause pockmarks and weak spots in your finished dish.
Furthermore, resting the batter in the refrigerator introduces a crucial temperature differential. When cold batter hits a properly preheated pan, the stark contrast in temperature helps to immediately set the structure of the crepe’s bottom layer. This rapid setting prevents the batter from sinking into the microscopic pores of your cookware, which is the primary culprit behind sticking.
For the ultimate weekend host, this scientific necessity is actually a massive logistical advantage. It means you can—and absolutely should—whip up your batter on a Friday night, toss it in the fridge, and wake up on Saturday morning with the messy prep work already completely finished.
The Gear: Ditch the Toxic Pans and Cook Like You Mean It
We need to have a brutally honest conversation about the equipment you are using. If you are trying to make delicate French crepes in a cheap, scratched, peeling non-stick pan that you bought at a big-box store five years ago, you are not only setting yourself up for culinary failure, but you are also actively exposing your family to hazardous chemicals.
The culinary world has seen a massive shift in 2025 and 2026 regarding the regulation of PFAS (per- and polyfluoroalkyl substances), commonly known as “forever chemicals.” These synthetic compounds, which have historically been the backbone of traditional Teflon and non-stick coatings, are facing strict state-level bans across the United States due to their links to severe health risks, including hormone disruption and environmental bioaccumulation. When cheap non-stick pans are overheated or scratched by metal utensils, they can leach these toxic particles directly into your food. I have zero patience for mystery metals in my kitchen, and banishing toxic kitchen gear is the very first step to elevating your home cooking.
Furthermore, those aerosol cans of pressurized oil you are spraying onto your peeling pans are making the problem worse. The chemical propellants in those cans burn at low temperatures, leaving a sticky, polymerized residue that ruins the pan’s surface over time, proving that cooking spray is the enemy of good cookware.
So, what is the holy grail for flawless crepes? The carbon steel crepe pan.
Carbon steel is the undisputed champion of the professional kitchen, and it is entirely accessible for the home cook. It possesses a lower thermal conductivity than aluminum, meaning it doesn’t heat up in a violent flash, but rather it absorbs heat steadily and radiates it with beautiful, even consistency. This eliminates the dreaded “hot spots” that cause one side of your crepe to burn while the other remains raw batter.
More importantly, carbon steel is virtually indestructible and completely free of synthetic chemical coatings. Through the simple process of seasoning—baking thin layers of high-smoke-point oil onto the surface—the oil polymerizes, creating a slick, naturally non-stick patina that actually improves every single time you use it.
To execute the perfect flip, you also need the right tools. A standard, clunky plastic spatula is going to clumsily tear your delicate work of art. You need a long, thin, flexible metal offset spatula or a traditional wooden crepe turner. Just as you need a bench scraper to handle sticky bread dough with precision, you need a specialized, thin-edged tool to seamlessly slide under a millimeter-thick pancake without causing a catastrophic rip.
Temperature Control: The Goldilocks Zone of Crepe Making
You can have the most perfectly rested batter and the finest carbon steel pan imported directly from France, but if you do not understand pan thermodynamics, you are still going to fail. Temperature control is the invisible ingredient in crepe making. It is the Goldilocks zone: too hot, and your batter will instantly seize, cook unevenly, and burn before you can even swirl it; too cold, and your crepe will turn into a pale, greasy, rubbery disc that permanently welds itself to your pan.
Preheating your carbon steel pan is absolutely non-negotiable. You must place the pan on medium heat and let it sit for several minutes until the metal has fully and evenly absorbed the thermal energy. But how do you know when it is truly ready? You rely on visual and auditory cues.
Many home cooks rely on the water drop test to check if a pan has reached the Leidenfrost point, where water beads up and dances across the surface. While this is brilliant for searing a steak in stainless steel, it actually indicates a temperature that is slightly too aggressive for delicate crepes. Instead, you want to use the butter sizzle test.
Take a small dab of cold butter and touch it to the center of the pan. It should immediately melt and sizzle gently, foaming up with a pleasant sound. If the butter sits there melting sadly in a quiet puddle, the pan is too cold. If the butter instantly smokes, aggressively spits, and turns dark brown in two seconds, the pan is vastly overheated, which explains why your butter always burns and leaves a bitter taste on your food.
Once you have achieved that perfect, gentle sizzle, lightly wipe the excess butter out with a paper towel. You only need a microscopic layer of fat on a well-seasoned carbon steel pan.
Now comes the pour and swirl. Lift the hot pan off the burner with your non-dominant hand. Pour a scant quarter-cup of cold, rested batter into the center of the pan. Immediately—and I mean within milliseconds—begin tilting and rotating your wrist in a fluid, circular motion. The goal is to encourage the batter to race around the perimeter of the pan, coating the entire surface in a paper-thin layer before the heat sets the structure.
Return the pan to the heat. Do not touch it. Do not poke it. Watch the edges. After about 45 to 60 seconds, you will see the edges of the crepe begin to turn a beautiful golden brown and slightly curl away from the sides of the pan. The surface of the batter will lose its wet, glossy sheen and turn matte. This is your cue. Slide your thin offset spatula under the edge, lift gently, grab the edge with your fingertips (yes, use your hands, you are a cook now), and confidently flip it over. The second side only needs about 15 to 20 seconds to finish cooking.
Building the Mindful Crepe Bar: Hosting Without the Hysterics
Now that we have conquered the science and the technique, we need to talk about the logistics of entertaining. The entire point of hosting a weekend brunch is to actually spend time with the people you invited. If you are standing with your back to your guests, frantically pouring batter and sweating over a hot stove for two hours while everyone else eats, you have entirely missed the point of hospitality. Mastering the art of effortless hosting requires strategic staging and a deep understanding of how to hold food at the proper temperature.
This is where the concept of the mindful crepe bar comes into play. A crepe bar is a highly interactive, customizable dining experience where the host provides a massive stack of pre-cooked, warm crepes alongside an array of beautifully curated sweet and savory fillings. The guests do the assembling, which takes the pressure completely off your shoulders.
To pull this off, you are going to batch-cook your crepes before anyone even rings the doorbell. But how do you keep a stack of fifty delicate, paper-thin pancakes warm for a crowd without them drying out into brittle, inedible crackers?
Do not, under any circumstances, put them in a hot oven on a bare metal tray. The dry ambient heat of an oven will rapidly evaporate the residual moisture in the crepes. It is the same harsh environment that explains why cheap baking sheets keep warping and ruining your delicate pastries.
Instead, we are going to borrow a brilliant trick from culinary legend Julia Child, combined with a modern hack from Alton Brown. As you cook your crepes, you need to protect them from the air. The most effective method is to place a sheet of wax paper or parchment paper between every single crepe as you stack them. This prevents the dreaded sticking, especially if your batter has a higher sugar content.
To keep that stack warm, create a gentle, indirect heat source. You can use a standard electric heating pad set to “low.” Place the heating pad on your counter, place an inverted sheet pan over the heating pad to diffuse the heat, and drape a clean, dry kitchen towel over the metal. Place your parchment-layered stack of crepes on the towel, and cover the entire stack with another clean towel or a large glass dome. This creates a cozy, insulated environment that gently maintains a serving temperature without actively cooking or drying out the food. Alternatively, a ceramic tortilla warmer works absolute wonders for smaller batches.
When you set up your stations, physical flow is everything, especially if you are trying to host a relaxed dinner party in a cramped apartment kitchen. Create a linear progression. Start with the warm plates and the crepe stack. Move into the savory fillings, follow up with the sweet fillings, and end with the garnishes and utensils. This prevents traffic jams and allows your guests to seamlessly build their masterpieces.
The Anatomy of Perfect Fillings: Sweet, Savory, and Structural Integrity
A perfectly executed crepe is a blank canvas, but you can easily destroy that canvas if you do not understand moisture control in your fillings. Wet, sloppy ingredients will instantly turn your beautifully rested, perfectly cooked crepe into a soggy, disintegrating mess.
If you are offering a savory station, you must aggressively manage the water content of your vegetables. If you are serving sautéed mushrooms or spinach, you must cook them down completely and squeeze out the excess liquid before they ever hit the serving bowl. Nobody wants a puddle of grey mushroom water leaking out of their brunch.
For the savory spread, focus on high-impact, low-moisture ingredients. Think finely grated Gruyère or sharp white cheddar cheese, which melts beautifully from the residual heat of the crepe. Offer delicate ribbons of salty prosciutto, deeply caramelized onions (which have had all their water cooked out), and perhaps a small bowl of crème fraîche laced with fresh chives.
For the sweet station, the classics remain undefeated for a reason. You do not need overly complicated, heavy syrups. A simple station featuring freshly squeezed lemon juice and a shaker of granulated sugar provides a bright, acidic, and texturally satisfying crunch that cuts through the richness of the batter. If you are serving berries, macerate them lightly in a bit of sugar and orange liqueur, but use a slotted spoon to serve them so you leave the excess juice in the bowl. Offer high-quality hazelnut spread, lightly toasted sliced almonds for crunch, and a bowl of softly whipped cream stabilized with a tiny pinch of confectioners’ sugar.
Troubleshooting the Crepe Catastrophes
Even with the best preparation, the kitchen can occasionally throw you a curveball. When things go wrong, you need to know how to pivot immediately without throwing the entire batch into the garbage.
The Problem: Your batter is full of stubborn flour lumps.
The Fix: You whisked too aggressively trying to incorporate dry into wet, or you added all your liquid at once. Do not try to press the lumps out against the side of the bowl; you will just overwork the gluten. Simply pour the entire batter through a fine-mesh sieve, or better yet, dump it into a blender and pulse it for five seconds. The blender emulsifies the batter perfectly. Just remember to let it rest afterward so the bubbles dissipate.
The Problem: The edges of your crepes are brittle, dry, and shattering.
The Fix: Your pan is entirely too hot, causing the moisture at the thin edges to flash-evaporate instantly. Turn your burner down. Alternatively, your batter might be lacking fat. A tablespoon of melted butter whisked into the batter before resting coats the flour proteins and provides a softer, more pliable edge.
The Problem: The first crepe is always a disaster.
The Fix: Accept it. The first crepe is universally known as the “chef’s tax.” It is the sacrificial pancake that tests the temperature of the pan and the consistency of the fat layer. Eat it over the sink, adjust your heat dial based on how it cooked, and proceed with confidence for the rest of the batch.
Cooking is not about achieving rigid perfection on the first try; it is about understanding the mechanics of your ingredients so you can adapt, adjust, and conquer. When you respect the science of starch hydration, invest in safe, high-quality carbon steel cookware, and stage your party with intelligent temperature control, you elevate yourself from a stressed-out cook to a masterful host. Take a breath, let that batter rest, and embrace the beautiful art of the kitchen. Your weekend brunch will never be the same.






