We’ve all been there. It’s Friday night, your friends are hovering around the kitchen island with glasses of cheap Chianti, and you are locked in a sweaty, desperate wrestling match with a ball of pizza dough. You pull it, stretch it, and try to coax it into a beautiful, rustic circle. But the moment you let go, it violently snaps back into a dense, stubborn little puck. You pull it again; it shrinks again. You start sweating. Your guests pretend not to notice your rising panic. Eventually, you give up, reach for a rolling pin, and crush the life out of it, resulting in a pizza crust that has the exact culinary appeal of a seasoned cardboard box.
Welcome to the dreaded dough snap-back. It is the single most common frustration for home cooks attempting a DIY pizza night, and it is the fastest way to turn a joyful, communal gathering into a stressful, expletive-laden disaster.
But here is the good news: you do not need a culinary degree from a pretentious institute in Florence to fix this. You don’t need to be a seasoned pizzaiolo who throws dough in the air for tourists. You just need a basic understanding of food science, a little bit of patience, and the willingness to let microscopic enzymes do the heavy lifting for you. As a home cook, your kitchen is your laboratory. Once you understand the biomechanics of gluten and the thermodynamic realities of your dough, that stubborn ball of flour and water will transform into a supple, extensible canvas ready for your favorite toppings.
Today, we are leaving no stone unturned. We are going to dive deep into the molecular structure of wheat proteins, the enzymatic activity that dictates dough relaxation, and the exact temperature thresholds you need to hit before you even think about stretching that dough. We will also cover how to structure your evening so that the dough’s resting phase perfectly aligns with a relaxed pizza night, turning a prep bottleneck into an interactive experience.
The Biomechanics of the Snap-Back: What Is Gluten, Really?
To understand why your pizza dough is fighting you, we first have to understand what it is made of. The enemy here isn’t the recipe, the humidity, or your lack of upper body strength. The culprit is a microscopic network of proteins that you, ironically, worked very hard to create.
Wheat flour contains two primary proteins: glutenin and gliadin. When flour sits dry in a bag, these proteins are completely isolated and inactive. However, the moment you introduce water (hydration) and physical agitation (kneading), these two proteins link together to form a complex, web-like matrix called gluten.
Each of these proteins brings a very specific characteristic to the party. Gliadin is responsible for the dough’s extensibility—its ability to stretch out without tearing. Glutenin, on the other hand, is responsible for the dough’s elasticity—its strength, structure, and its underlying desire to bounce back to its original shape. When you are making pizza, you are constantly walking a tightrope between these two forces. You need enough elasticity (glutenin) so that the dough can trap the carbon dioxide gases produced by the yeast, giving you that beautiful, airy, bubbly crust. But you also need enough extensibility (gliadin) so that you can actually stretch the dough out into a 12-inch pie.
Think of gluten development like a rubber band. When you first start mixing your dough, the rubber band is loose and slack. As you knead, you are essentially twisting and tightening that rubber band. The more you knead, the tighter the network becomes. This is a good thing initially, because a strong gluten network is what gives pizza its signature chew and prevents it from tearing when loaded with heavy tomato sauce and fresh mozzarella.
However, if you try to stretch the dough immediately after kneading it, or immediately after tightly shaping it into a ball (a process bakers call “balling up”), that rubber band is wound to its absolute maximum tension. It has zero give. If you force it, one of two things will happen: the dough will stubbornly snap back to its tightest form, or the rubber band will snap entirely, resulting in a torn dough. You cannot bully gluten into submission. You have to wait it out.
The Science of Dough Relaxation: Enter Protease Enzymes
So, how do we untwist the rubber band? How do we convince this highly tense, tightly wound matrix of proteins to chill out and let us make dinner? The answer lies in the magical, invisible world of enzymes—specifically, protease enzymes.
While yeast is busy eating sugars and burping out carbon dioxide to make your dough rise, protease enzymes are quietly performing an equally important job. Protease is a naturally occurring enzyme in flour that acts as a biological pair of scissors. Its sole purpose in life is to catalyze the hydrolysis of proteins, meaning it actively seeks out those long, tight gluten strands and snips them into smaller pieces, breaking them down into simpler peptides and amino acids.
This enzymatic activity is the literal definition of dough relaxation. As the protease snips away at the gluten network, the overall tension of the dough decreases. The elasticity (the snap-back) diminishes, and the extensibility (the stretch) increases.
But here is the catch: protease enzymes work slowly. They cannot be rushed. You cannot turn up the heat or mix the dough faster to make them do their job. They require time. This is why resting your dough is not just a polite suggestion in a recipe; it is a non-negotiable biological requirement. If you skip the resting phase, you are trying to stretch a protein network that hasn’t been properly hydrolyzed.
When you are planning a dinner party, this resting period should be built into your timeline. Instead of frantically wrestling with tight dough while your guests watch, you can master the art of effortless hosting by simply letting the dough sit on the counter. While the protease enzymes are doing the hard work of relaxing the gluten, you can be pouring wine, arranging a charcuterie board, and actually enjoying the company of your friends.
Temperature Dynamics: Why Cold Dough is Your Worst Enemy
If you have ever bought a ball of pre-made pizza dough from the grocery store, brought it home, and immediately tried to stretch it out for dinner, you already know the profound misery of cold dough. It is virtually impossible to work with. It feels like trying to stretch a piece of cold leather.
Temperature plays a massive, dictating role in the behavior of gluten. When dough is cold—whether it just came out of your refrigerator after a 72-hour cold fermentation, or you just brought it home from the supermarket—the protein structures contract and tighten up. The cold temperature physically restricts the extensibility of the gliadin. Furthermore, the cold environment drastically slows down the activity of those helpful protease enzymes we just talked about.
To get a supple, cooperative dough, it must be brought to room temperature before you even think about touching it. So, what is the ideal resting time?
According to baking science and professional pizzaiolos, a cold ball of dough needs to rest at room temperature (ideally between 68°F and 72°F) for a minimum of 2 to 4 hours before stretching. This window of time accomplishes two critical things:
- It allows the physical temperature of the dough mass to rise, physically loosening the tight protein structures.
- It gives the protease enzymes enough time in a warm environment to actively hydrolyze the gluten network, restoring the dough’s extensibility.
If your kitchen is particularly cold during the winter months, this process might take closer to 4 hours. If you are baking in the middle of a sweltering summer, 2 hours might be plenty. The key is to look for visual and tactile cues. A properly relaxed dough ball will have spread out slightly, losing its tight, dome-like shape. If you gently poke the dough with your finger, the indentation should remain or bounce back very slowly. If the dough immediately springs back and fills the indentation, it is still too tight and needs more time.
Do not try to rush this process by putting the dough in the microwave, setting it on a hot radiator, or using any other chaotic beginner hacks. Forcing rapid heat into the dough will cause the yeast to hyper-ferment, blowing out the structure of your crust and creating a sour, over-proofed mess. Just like when you are making breakfast and your pancake batter needs to rest to hydrate the starches, patience is your only tool here.
The Mindful Pizza Gathering: Turning the Waiting Game into a Party
Let’s be brutally honest for a second: the reason most home cooks hate making pizza from scratch is because they view the dough’s resting time as an annoying bottleneck. They want to cook now. But if you shift your perspective, this mandatory 2-to-4-hour resting window is actually the ultimate hosting hack. It forces you to slow down and embrace a more intentional, relaxed pace.
Instead of hiding in the kitchen stressing over a hot stove, you can use the dough’s resting period to structure a highly interactive, communal dining experience. This is the core philosophy behind mindful entertaining. You are not a short-order cook catering to your friends; you are a facilitator of a shared culinary experience.
Here is a foolproof timeline for a stress-free pizza night:
4:00 PM: Pull your cold fermented dough balls out of the refrigerator. Place them on a lightly floured surface or in a proofing box, cover them with a damp towel or an airtight lid to prevent a dry skin from forming, and walk away. Do not touch them.
5:00 PM: Prep your toppings. This is where you can get incredibly organized. Slice your fresh mozzarella, tear your basil, cook down your tomato sauce, and arrange your cured meats. Place everything into small, aesthetic bowls. If you are struggling with prep efficiency, you absolutely need a bench scraper to quickly scoop and transfer chopped ingredients from your cutting board to your bowls without making a massive mess.
6:00 PM: Your guests arrive. The dough is still resting. This is the perfect time to serve a simple appetizer, pour some drinks, and catch up. Because all your toppings are already prepped and your dough is quietly relaxing on the counter, you have zero active cooking duties. You can actually sit down and be present.
7:00 PM: It is time to make pizza. By now, the dough has been resting at room temperature for three hours. The protease enzymes have done their job. The gluten is relaxed, extensible, and ready to be shaped. You invite your guests into the kitchen, point them to the topping bar you created, and let everyone customize their own pie.
By understanding the science of the dough, you have eliminated the panic and transformed a chaotic dinner into a beautifully paced, interactive evening.
The Gravity Stretch: How to Open Dough Like a Pro (Without a Rolling Pin)
Okay, the dough has rested. It is at room temperature. The gluten is relaxed. Now comes the moment of truth: stretching the dough.
Before we get into the proper technique, we need to establish one absolute, non-negotiable rule in my kitchen: Put the rolling pin away.
I cannot stress this enough. If you take a heavy wooden rolling pin to a beautifully fermented ball of pizza dough, you are committing a culinary crime. Remember all that time you spent letting the yeast ferment and produce precious carbon dioxide gas? Remember those beautiful, airy bubbles trapped inside the gluten network? A rolling pin will ruthlessly crush every single one of them, forcing the gas out of the dough and leaving you with a dense, flat, cracker-like crust. We want a crust with a dynamic, airy “cornicione” (the puffy outer edge of the pizza). To get that, we have to use our hands.
Here is the step-by-step method for stretching relaxed dough:
- The Flour Dredge: Gently lift your relaxed dough ball using a floured spatula. Drop it into a shallow bowl filled with a mixture of finely milled flour and semolina. Coat both sides generously. This prevents sticking and gives the crust a beautiful, rustic texture.
- The Dimple: Transfer the coated dough to your clean, dry countertop. Using the pads of your fingers (never your fingernails), gently press straight down into the center of the dough. Work your way outward, leaving about a half-inch border untouched around the perimeter. This untouched border will become your puffy crust. You are gently pushing the gas from the center of the dough out toward the edges.
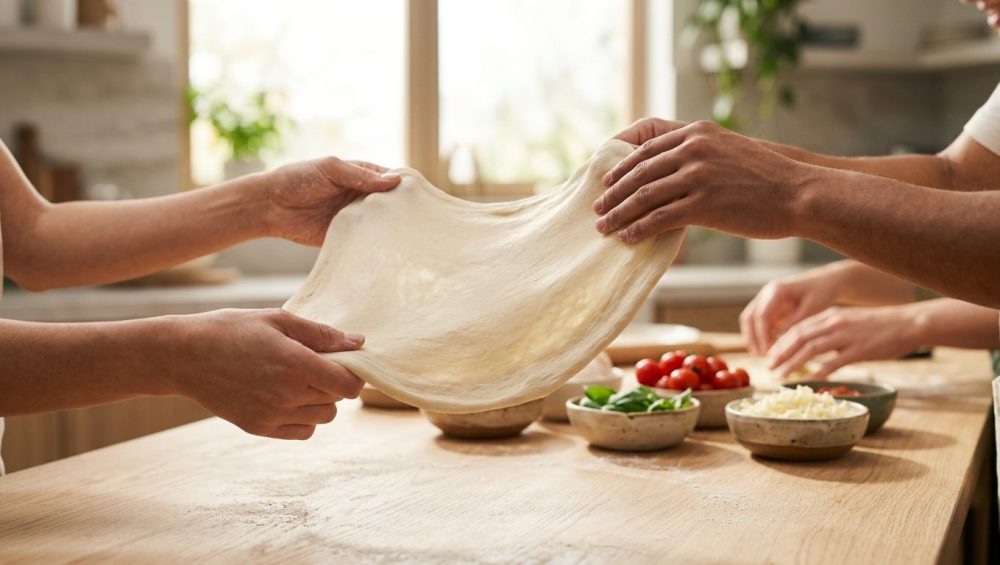
- The Steering Wheel: Pick the dough up and hold it vertically in front of you, pinching the very top edge lightly with your fingers. Let gravity do the work. The weight of the dough will naturally pull it downward, stretching it out. Slowly rotate the dough through your hands, like you are turning a steering wheel, allowing gravity to evenly stretch the circle.
- The Knuckle Drape: If the dough needs a little more stretching, make two loose fists. Drape the dough over your knuckles and gently pull your hands apart, rotating the dough as you go. Keep your knuckles near the outer edge of the dough to avoid tearing the delicate center.
If you followed the resting rules, the dough will easily yield to these gentle movements. It will stretch into a beautiful, thin circle without fighting you.
Toxic Gear and Cheap Tools: What NOT to Use on Pizza Night
We need to have a serious talk about your kitchen equipment. You can spend 72 hours carefully fermenting the perfect dough, sourcing the most expensive San Marzano tomatoes, and buying imported buffalo mozzarella, but if you bake that pizza on cheap, toxic garbage, you are wasting your time.
I have zero patience for the flimsy, dark-coated, non-stick pizza pans sold at big-box stores. You know the ones I’m talking about. They are practically weightless, they warp the second they hit a hot oven, and worst of all, they are coated in cheap chemical non-stick layers that cannot withstand the high heat required for good pizza. Pizza needs to be baked at the absolute maximum temperature your home oven can reach—usually 500°F to 550°F. At those temperatures, cheap non-stick coatings begin to degrade, off-gas, and eventually peel directly into your food. If you are wondering why you are ruining your nonstick pans so quickly, it is because you are exposing them to blistering heat they were never designed to handle.
Similarly, do not ever attempt to bake a pizza in a glass casserole dish. Glass cannot handle the rapid thermal shock of high-heat baking, and you will eventually find yourself Googling why your glass baking dish shattered halfway through dinner. If you notice that your thin metal baking sheets keep warping violently with a loud “pop” in a 500°F oven, that is your cue to upgrade your gear.
If you want professional, pizzeria-quality results at home, you need to discover the magic of a baking steel or a high-quality ceramic pizza stone. A baking steel is a heavy, solid slab of highly conductive metal. You place it in your oven and preheat it for an hour at 550°F. It absorbs and holds a massive amount of thermal energy. When you slide your raw pizza onto that blazing hot steel, the heat transfer is instantaneous. The moisture in the dough rapidly turns to steam, causing the crust to puff up dramatically (a phenomenon known as oven spring) while simultaneously charring the bottom into a crispy, leopard-spotted masterpiece.
You will also need a wooden pizza peel to launch the raw pie into the oven, and perhaps a metal peel to retrieve it. And please, invest in quality utensils; if your cheap wooden spoons keep cracking while you stir your tomato sauce, or if your kitchen knives get dull after slicing just a few pepperoni logs, it is time to throw them out and buy durable tools that actually respect your time and effort.
Troubleshooting the Stubborn Dough: A Quick-Fix Guide
Even with the best preparation, food science can occasionally throw you a curveball. Humidity, slight mismeasurements in flour, or an unexpectedly cold draft in your kitchen can all affect how your dough behaves. If you find yourself in a bind, here are the smart fixes to save your pizza night.
The 15-Minute Walk-Away Rule
Problem: The dough rested for 3 hours, but it is STILL snapping back.
The Fix: You likely over-kneaded the dough initially, or you handled it too aggressively when you transferred it to the counter, re-tightening the gluten network. Do not force it. If you try to stretch it now, it will tear. Instead, invoke the 15-minute walk-away rule. Cover the dough with an upside-down bowl to prevent it from drying out, and literally walk away for 15 to 20 minutes. This brief intermission gives the protease enzymes a final chance to relax the strands you just aggravated. Pour yourself a glass of wine. When you come back, the dough will be significantly more cooperative.
Fixing a Torn Crust
Problem: The dough is stretching, but it keeps tearing in the middle.
The Fix: You are either pulling the dough too thin, or your flour doesn’t have a high enough protein content to support a strong gluten network. Standard all-purpose flour sits at around 10-11% protein, which can sometimes lead to tearing if stretched too aggressively. For the best results, use a high-protein bread flour or Italian Tipo 00 flour, which sits around 12-13% protein and provides the perfect balance of strength and stretch. If you already have a tear, don’t panic. Gently pinch the hole closed with your fingers. Do not roll it back into a ball and start over—if you do that, you will completely reset the gluten tension, and you will have to wait another two hours before you can stretch it again.
Taming Sticky Dough
Problem: The dough is incredibly sticky and impossible to handle.
The Fix: Your hydration level (the ratio of water to flour) is likely too high for the specific brand of flour you are using, or your kitchen is incredibly humid. Do not dump a cup of raw flour onto the dough to fix it; this will ruin the hydration ratio and leave you with a dry, heavy crust. Instead, lightly coat your hands in olive oil or dust them with a very fine layer of semolina flour before handling the dough.
Preventing the Soggy Center
Problem: My toppings keep sliding off, and the center of the pizza is a soggy mess.
The Fix: You are overloading the pizza. Home cooks have a terrible habit of treating pizza like a deep-dish casserole. A traditional Neapolitan or New York-style pizza is an exercise in restraint. You need a thin layer of sauce, a modest scattering of cheese, and just a few toppings. If you pile on a pound of raw vegetables and fresh mozzarella, they will release a massive amount of water as they cook, pooling in the center of your pie and destroying the structural integrity of the crust.
Conclusion
Mastering homemade pizza dough does not require magic, and it certainly doesn’t require decades of professional apprenticeship. It simply requires you to stop fighting the ingredients and start understanding them. When you respect the biomechanics of gluten, acknowledge the power of protease enzymes, and give the dough the time and temperature it needs to naturally relax, the entire process transforms from a stressful chore into a deeply satisfying craft.
The next time you host a pizza night, don’t rush the prep. Let the dough sit on the counter. Let the enzymes do the heavy lifting. Embrace the waiting period as an opportunity to actually connect with your guests, rather than sweating over a cutting board. Cooking for people should be a joy, not a performance. So put away the rolling pin, ditch the toxic non-stick pans, and let science help you make the best pizza of your life. You’ve got this.


