
It is a universal kitchen tragedy that plays out in homes across the country every single weekend. You go to the grocery store, carefully inspect the produce aisle, and pay an exorbitant amount of money for a perfectly ripe, gently yielding Hass avocado. You bring it home, slice it open to reveal that glorious, buttery green center, and use exactly half of it for your Tuesday morning breakfast. You turn your back for what feels like five minutes, and suddenly, the remaining half has morphed into a sad, unappetizing pile of brown mush.
I have zero patience for pretentious chef-speak, but I have even less patience for ruining perfectly good food. As home cooks, our time and our grocery budgets are far too valuable to be tossing out half-eaten produce just because nature decided to run its course. Today, we are tearing down the actual hard science of why your avocados turn brown, and we are going to learn how to aggressively outsmart biology using foolproof, non-toxic methods. Once we have mastered the preservation of this finicky fruit, we are going to take that knowledge and use it to build a flawless, interactive, and highly aesthetic avocado toast bar for your next weekend brunch.
We are fixing this common culinary annoyance once and for all, so you can host an epic, stress-free gathering without being trapped behind a hot stove.
The Chemistry of the Brown Avocado: Meet Polyphenol Oxidase
Let’s get one thing straight: cooking is just applied chemistry, and your kitchen is the laboratory. When you drag your chef’s knife through an avocado, you aren’t just prepping breakfast; you are actively initiating a microscopic chemical reaction. The culprit behind your ruined brunch is an enzyme called polyphenol oxidase, or PPO for short.
In a pristine, uncut avocado, PPO lives happily inside the cytoplasm of the plant cells. It is completely separated from the phenolic compounds, which reside safely inside the cell’s vacuoles. In nature, this setup acts as a brilliant defense mechanism. If a pest or an insect bites into the fruit and damages the cells, the PPO and the phenols are forced to mix. But the real catalyst for disaster is the air in your kitchen.
When PPO, phenolic compounds, and oxygen meet, they throw a terrible little chemical party called enzymatic browning. The PPO converts the phenolic compounds into another class of molecules called quinones. These quinones are highly reactive, and they immediately begin to link together in long chains—a process called polymerization. The end result of this polymerization is a brown pigment known as melanin. Yes, it is the exact same class of pigment that gives human skin its color, and it is the same reaction that causes apples, pears, and potatoes to turn brown when bruised. Avocados just happen to brown exceptionally fast because they contain a massive concentration of PPO compared to other fruits.
Why do we care so much about this specific enzymatic reaction? Because Americans are eating a staggering amount of this fruit. According to recent data from the USDA and the Hass Avocado Board, per capita avocado consumption in the United States skyrocketed from just 1.5 pounds in 1998 to over 9 pounds per person in 2023. The U.S. now imports billions of pounds of avocados annually. That is a massive volume of produce, and if you are consistently throwing away oxidized, brown halves, you are literally throwing your hard-earned money straight into the compost bin.
Debunking the Internet’s Most Ridiculous Avocado Hacks
Before we talk about the chemistry that actually works to halt oxidation, we need to aggressively dismantle the dangerous and ineffective nonsense that is currently circulating on social media. I am a firm believer in kitchen efficiency, but I am also a strict advocate for safe, non-toxic cooking practices.
The Infamous Pit Trick
You have undoubtedly heard this a million times from well-meaning friends: “Just leave the pit in the avocado half, and it won’t turn brown!” Let me be clear: this is scientifically illiterate garbage. The avocado pit does not emit a magical, invisible anti-browning forcefield. The only reason the flesh directly underneath the pit stays green is because the pit is acting as a physical barrier against oxygen. The remaining 90% of the exposed avocado flesh surrounding the pit will still oxidize and turn brown just as quickly as it would if the pit were removed.
The Plastic Wrap Suffocation
Wrapping your avocado tightly in cling film is another incredibly popular piece of advice. Let me be brutally honest: I absolutely despise cheap, flimsy plastics in the kitchen. Not only is it nearly impossible to get a perfect, airtight seal that actually blocks out all the oxygen from the uneven surface of an avocado, but you are also pressing mystery chemical plastics directly against the fats in your food. When you are finally ready to start banishing toxic kitchen gear from your home, flimsy single-use plastic wrap should be the very first thing you throw in the trash. There are much safer, far more effective ways to create an oxygen barrier.
The Viral Water Bath (And the FDA Warning)
A few years ago, a viral video circulated on TikTok claiming that submerging your cut avocado halves in a container of water and storing them in the fridge would keep them perfectly green for weeks. It sounds brilliant in theory, right? Water physically blocks oxygen from reaching the flesh.
It is not brilliant; it is actively dangerous. In 2022, the US Food and Drug Administration (FDA) had to step in and issue a formal, urgent warning against this exact practice. The FDA noted that the bumpy outer skin of avocados can harbor serious human pathogens, most notably Listeria monocytogenes and Salmonella. When you submerge the avocado in a bath of water, you create the ultimate breeding ground for these deadly bacteria to multiply rapidly. Even worse, FDA scientists conducted research showing that within 15 days of refrigerated water storage, Listeria can actually infiltrate and internalize deep into the avocado pulp. No amount of surface washing or peeling will save you at that point. Do not ever use the water bath method.
Foolproof, Science-Backed Methods to Stop Oxidation
Now that we have cleared out the hazardous waste and the old wives’ tales, let’s talk about the methods that actually work to halt enzymatic browning. We are going to manipulate the environment of the avocado using pH balancers, physical lipid barriers, and vapor-phase antioxidants.
Method 1: The Acid Shield
Enzymes are highly specific, delicate proteins, and they require a very precise environment to function properly. Polyphenol oxidase thrives in a neutral pH environment. If you drastically lower the pH of the avocado’s surface by introducing a strong acid, you denature the enzyme, effectively shutting down the browning process entirely.
A quick squeeze of fresh lemon or lime juice over the exposed flesh drops the pH instantly. Citrus fruits provide a brilliant one-two punch: they contain both citric acid (which lowers the pH) and ascorbic acid (Vitamin C). The ascorbic acid actually works to reverse the oxidation of quinones back into colorless diphenols, buying you precious hours of vibrant green color. Just brush the citrus juice lightly over the surface of the flesh. It is simple, it is natural, and it adds a bright, welcome flavor profile to the rich fruit.
Method 2: The Red Onion Vapor Chamber
This is my absolute favorite preservation trick. It sounds like absolute witchcraft, but it is pure, undeniable chemistry. If you store your cut avocado in an airtight container alongside a few chunks of roughly chopped raw red onion, the avocado will stay pristine and green for days on end.
Why does this work? When you chop a red onion, the cellular damage releases highly volatile sulfur compounds, including sulfur dioxide gas (the exact same gas that makes you cry when chopping them). In the confined space of a sealed container, this gas acts as a powerful vapor-phase antioxidant. The sulfur emissions directly inhibit the PPO enzyme without you ever having to touch or alter the avocado flesh. The best part? As long as the avocado isn’t physically touching the onion pieces, it will not absorb the pungent onion flavor. Make sure you use a high-quality glass storage container with a silicone lid for this method—because, as we know all too well, cheap plastic containers stay greasy and will absorb that onion odor for the rest of eternity.
Method 3: The Olive Oil Seal
If you do not have citrus or onions on hand, a thin layer of high-quality extra virgin olive oil brushed over the exposed flesh works wonders. Unlike the useless avocado pit, the oil conforms perfectly to every microscopic bump, groove, and knife mark on the avocado’s surface. This creates a flawless, airtight lipid barrier that oxygen simply cannot penetrate. When you are ready to eat the avocado the next day, the olive oil effortlessly blends into whatever you are making, adding a lovely complementary flavor.
Method 4: The Quick Blanch
If you are prepping a massive amount of avocado for a party, you can permanently deactivate the PPO enzyme using heat. Dropping whole, unpeeled avocados into boiling water for exactly 10 seconds, followed immediately by a plunge into an ice water bath, will denature the enzymes just under the skin without cooking the interior flesh. This is especially useful when prepping massive batches for a crowd and you are terrified your guacamole turns brown before the party even starts.
From Kitchen Hack to Weekend Masterpiece
Congratulations, you have officially conquered enzymatic browning. You now possess the scientific knowledge to keep your expensive produce vibrant and fresh. But what is the point of preserving a perfectly green avocado if you aren’t going to show it off to your friends? Weekdays are for ruthless efficiency and survival, but the weekends are when we get to slow down, play with our food, and create memorable experiences.
Hosting friends for brunch usually involves a chaotic, sweat-inducing scramble of flipping pancakes, whisking eggs, and stressing over a hot stove while everyone else is sipping mimosas and laughing in the living room. I refuse to live like that, and you should too. The ultimate secret to the art of effortless hosting is the interactive food station.
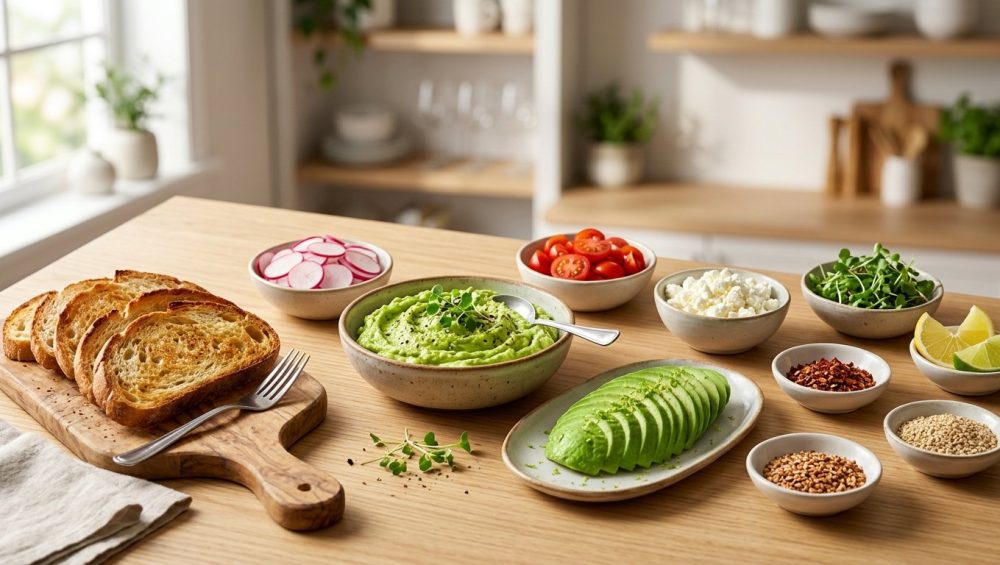
Enter the Mindful Toast Bar. It looks incredibly impressive, it requires zero active cooking while your guests are actually present, and it allows everyone to customize their own plate to their exact dietary preferences. It is the ultimate lazy-but-gorgeous weekend meal, and it relies heavily on your newly acquired avocado preservation skills.
The Blueprint for a Flawless Avocado Toast Bar
Setting up a phenomenal toast bar is not about complicated cooking techniques; it is about curating high-quality components and staging them beautifully. We are going to break this blueprint down into three distinct phases: the structural foundation, the avocado base, and the toppings matrix.
The Bread: Your Structural Foundation
Do not insult your perfectly preserved, vibrant green avocado by slathering it onto flimsy, mass-produced, sugar-filled sandwich bread. You need a structural foundation that can hold up to heavy, wet toppings without turning into a soggy, collapsing mess halfway to your mouth.
Source a high-quality, naturally leavened sourdough boule from a local bakery. You want a thick, sturdy crust and an open, airy crumb structure. Slice the bread roughly three-quarters of an inch thick. I have warned you before about how incredibly hard bamboo surfaces are ruining your knives on a daily basis, so make sure you are slicing your bread on a proper edge-grain wood or rubber cutting board. To get clean, even slices without crushing the delicate crumb of the loaf, you absolutely need a bench scraper to help portion and move the heavy bread efficiently, alongside a fiercely sharp serrated bread knife.
For the toasting process, skip the standard pop-up toaster. It dries the bread out without developing flavor. Instead, brush the sourdough slices lightly with extra virgin olive oil and toast them on a heavy carbon steel or cast iron griddle over medium heat. We want to trigger the Maillard reaction—the complex chemical browning of proteins and sugars—to create a deeply savory, shatteringly crisp exterior that yields to a soft, warm interior. Please, for the love of food, do not use a scratched, peeling, toxic non-stick pan for this.
The Avocado Base: Smashed vs. Sliced
When hosting a toast bar, you need to offer two styles of avocado to appease the masses: the rustic smash and the elegant slice.
For the smashed avocado, scoop the flesh of several ripe avocados into a large glass or ceramic mixing bowl. Add a generous squeeze of fresh lemon juice (which we now know chemically prevents browning), a heavy drizzle of extra virgin olive oil, and a substantial pinch of flaky sea salt. Mash it with a sturdy fork until it is creamy but still retains some chunky, rustic texture. If you ever wonder why restaurant food tastes so much more vibrant than yours, it is because chefs understand that your dinner actually needs acid to balance out heavy, rich fats. The lemon juice is non-negotiable here, both for color preservation and for flavor elevation.
For the sliced avocado, use a sharp paring knife to create perfect, thin fans of fruit. To keep these delicate slices pristine while they sit on the buffet table, use the citrus juice brushing technique we discussed earlier, or lightly mist them with olive oil.
The Toppings Matrix: Texture, Acid, Heat, and Umami
A masterful toast bar is all about contrasting textures and balancing extreme flavor profiles. Arrange your various toppings in small, beautiful ceramic, glass, or wooden bowls. Avoid cheap silicone bowls, especially if you have ever noticed that your silicone spatulas taste like soap; low-quality silicone leaches terrible chemical flavors into delicate ingredients, and you do not want your expensive brunch tasting like dish detergent.
Here is the ultimate toppings matrix to provide your guests, broken down by culinary function:
The Crunch
Avocado is inherently soft, creamy, and rich. You must introduce a sharp textural contrast to wake up the palate and keep the bite interesting.
- Watermelon Radishes: Thinly slice them on a mandoline and store them in a bowl of ice water until serving. The ice water shocks the cellular structure, causing them to curl up and become ultra-crisp.
- Toasted Seeds: A mix of toasted pepitas (pumpkin seeds) and sunflower seeds adds an earthy crunch.
- Crispy Fried Shallots: You can buy these at any Asian grocery store, and they add a massive hit of savory crunch.
- Everything Bagel Seasoning: The ultimate lazy-but-effective textural addition.
The Acid
Fat coats the tongue and dulls the taste buds over time; acid cuts right through it, refreshing the palate with every bite.
- Quick-Pickled Red Onions: The sharp acidity and bright neon pink color are absolutely non-negotiable for a beautiful toast bar. Simply boil equal parts water and white vinegar with a tablespoon of sugar and salt, and pour it over thinly sliced red onions. Let them sit for an hour.
- Citrus Wedges: Provide plenty of extra lemon and lime wedges for guests to squeeze over their final creations.
- Aged Balsamic Glaze: A sweet, syrupy, acidic drizzle that pairs beautifully with savory cheeses.
The Heat
A little capsaicin elevates the creamy avocado profile and adds a necessary background hum of warmth.
- Crushed Red Pepper Flakes: A classic staple.
- Fresh Chiles: Thinly sliced fresh jalapeños or serranos for those who want a serious kick.
- Hot Honey: A heavy drizzle of chili-infused honey over avocado and salty cheese is a mind-blowing flavor combination.
- Chili Crisp Oil: The savory, crunchy, spicy condiment that makes everything it touches taste infinitely better.
The Umami and Protein
To transform this from a light snack into a substantial, satisfying weekend meal, you need deep savory depth and protein.
- Salty Cheeses: Crumbled sheep’s milk feta or Mexican cotija cheese provide a briny, salty punch.
- Smoked Salmon: High-quality smoked salmon or gravlax turns a simple toast into a luxurious brunch.
- Soft-Boiled Eggs: Aim for exactly a 6.5-minute boil, followed immediately by an ice bath. This yields firm whites and a perfectly thick, jammy yolk that won’t run all over the table.
- Crispy Prosciutto: Pro-tip: lay ribbons of prosciutto on a wire rack over a baking sheet, preheating the pan first to ensure maximum, shatteringly crisp results in the oven.
Logistics, Staging, and Flow for a Stress-Free Gathering
The true beauty of the Mindful Toast Bar is the staging. You can prep 90% of this entire meal before your doorbell even rings, completely eliminating the frantic kitchen bottleneck that ruins most dinner parties.
The night before your gathering, you can quick-pickle your red onions, toast your seeds, bake your prosciutto, and boil your jammy eggs. You can even prep your avocado halves using the red onion vapor chamber trick, so they are perfectly preserved and ready to be sliced the next morning without any frantic rushing.
On the morning of the brunch, wash and prep your delicate greens, radishes, and fresh herbs (like cilantro and dill). Make sure they are thoroughly dried in a salad spinner; nobody likes it when their fresh herbs get slimy because they were left sitting in a puddle of water on the buffet table.
Set up the physical flow of the bar logically to prevent traffic jams. Start the line with the plates and the warm, griddled sourdough bread. Next, position the avocado bases (both the smashed bowl and the sliced platter). Follow this with the heavy proteins (salmon, eggs, prosciutto), then the crunchy textural bits, and finally, place the wet drizzles (hot honey, balsamic glaze, citrus wedges) at the very end of the line. This sequential architecture prevents a chaotic bottleneck of guests trying to build their masterpieces all at once.
The Final Word
You do not need a culinary degree to pull off an extraordinary, highly aesthetic weekend brunch. You just need a basic understanding of food science, a stubborn refusal to accept subpar, toxic kitchen gear, and a solid logistical game plan.
By mastering the science of enzymatic browning and learning how to manipulate polyphenol oxidase, you have unlocked the ability to prep your most finicky ingredients ahead of time. You will save money by never throwing away a brown avocado again, and you will save your sanity by hosting a stunning, interactive meal that requires zero active cooking while your friends are over.
Now, pour yourself a well-deserved mimosa, step away from the stove, and let your guests make their own breakfast. You’ve earned it.






