
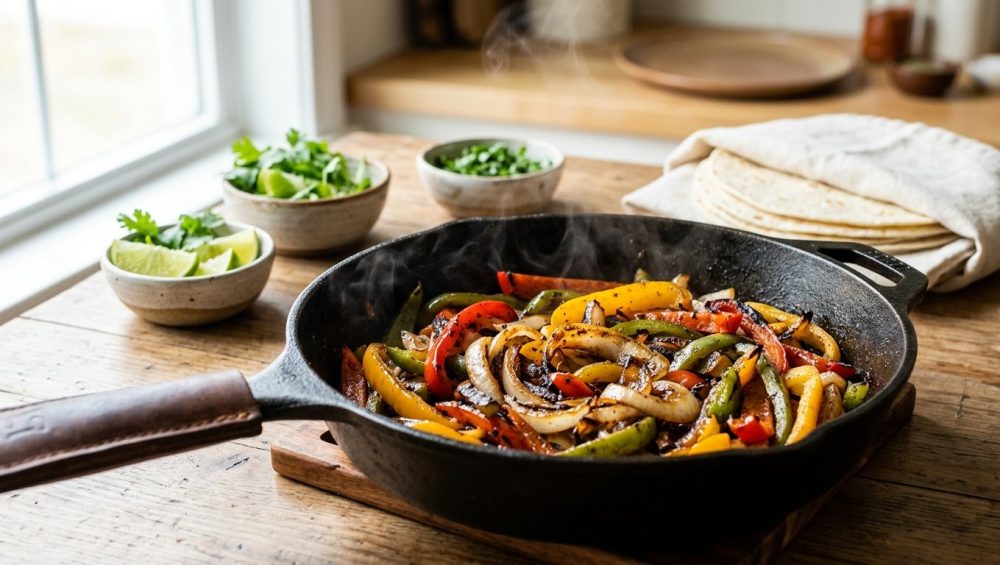
Listen, we need to have a serious, sit-down conversation about your fajita nights. You know exactly what scenario I am talking about. You invite a few of your favorite people over for the weekend, promising them a sizzling, vibrant, restaurant-quality Tex-Mex feast. You spend an hour meticulously slicing a mountain of beautiful, jewel-toned bell peppers and sharp, pungent onions. You toss that massive pile of produce into a skillet, crank the dial to high, and wait for that glorious, aggressive sizzle.
But instead of a sizzle, you hear a sad, bubbling hiss.
Fast forward fifteen minutes, and you are staring into a pan full of limp, grayish, weeping vegetables swimming in a puddle of their own despair. They have the structural integrity of wet tissue paper. Your friends are politely chewing through the soggy mess, telling you it “tastes great!” while you secretly vow to just order takeout next time.
Stop. Put down the takeout menu. You do not need a culinary degree from Le Cordon Bleu to fix this, and you certainly don’t need an industrial restaurant kitchen. If you want to stop eating mushy veggies and start serving up blistered, caramelized perfection, you just need a little bit of unapologetic food science. I am here to advocate for you, the everyday home cook. I firmly believe that you can pull off absolute culinary magic in a standard home kitchen, provided you stop breaking the fundamental laws of thermodynamics.
Today, we are going to dissect the exact thermal dynamics of your skillet, explore the cellular biology of your produce, and build a strategic, prep-ahead blueprint for a mindful fajita bar. My goal? To give you the exact heat-to-surface-area principles needed to prevent soggy vegetables, empowering you with a seamless gathering strategy that actually keeps you out of the kitchen during your own party.
Let’s get cooking.
The Anatomy of a Fajita Tragedy: Why Your Veggies Are Weeping
To understand how to fix the mush, we first have to understand what is actually happening inside your skillet on a molecular level. Most home cooks look at a bell pepper and see a solid object. As a sassy sous-chef who has ruined more dinners than I care to admit, I look at a bell pepper and see a ticking water bomb.
The Cellular Water Trap
Here is the brutal, scientific truth: bell peppers are composed of approximately 92% water. Onions are sitting right behind them at about 87% water. When you slice into these vegetables, you are essentially creating thousands of tiny, vulnerable water balloons. As soon as those vegetables hit a hot pan, the heat causes their cell walls to rupture, violently releasing all that trapped intracellular moisture into your skillet.
The Magic of the Maillard Reaction
In the culinary world, flavor is born in the flames. Specifically, it is born from the Maillard reaction. Named after the French chemist Louis-Camille Maillard who first described it in 1912, this is the complex chemical reaction between amino acids and reducing sugars that gives browned food its incredibly distinctive, savory flavor. It is the exact same process that makes seared steaks smell irresistible, turns bread crusts golden-brown, and gives roasted coffee its depth.
For vegetables, the Maillard reaction kicks into high gear only when the surface temperature reaches between 284°F and 330°F (140°C to 165°C). If your vegetables do not reach this temperature, they will not brown. They will not blister. They will not develop that sweet, complex, smoky flavor you associate with a high-end fajita platter.
The Pan-Crowding Phenomenon
This brings us to the ultimate rookie mistake: pan-crowding. When you dump two pounds of sliced, water-logged peppers and onions into a single skillet, you are setting yourself up for failure. The vegetables immediately release their water. Because the pan is crowded, there is no empty surface area for that water to rapidly evaporate.
Instead, the water pools at the bottom of the pan. Here is the kicker: liquid water cannot exceed 212°F (100°C) at sea level. As long as there is a puddle of liquid water in your skillet, the temperature of your food is physically capped at 212°F. Remember what temperature we need for the Maillard reaction? 284°F. Because the temperature is trapped below the boiling point, browning is scientifically impossible. You are no longer searing your fajita vegetables; you are boiling them. This is exactly why your roasted veggies turn mushy when you pile them on top of each other in the oven, too.
Thermal Dynamics 101: Your Skillet is Lying to You
You cannot fight physics, but you can certainly manipulate it. The secret to a blistering sear lies entirely in the thermal mass and heat capacity of your cookware.
The Heavyweights: Cast Iron vs. Carbon Steel
When cold, wet vegetables hit a hot pan, they instantly absorb the pan’s heat energy. If your pan is thin and flimsy, its temperature will plummet immediately, leading to that dreaded steaming effect. To prevent this, you need a pan with serious thermal mass—a pan that can store a massive amount of heat energy and transfer it rapidly into the food without cooling down.
Cast iron is the traditional heavyweight champion of the kitchen. A thick cast iron skillet has immense thermal mass. It takes a painfully long time to heat up—often 8 to 12 minutes over medium-high heat just to stabilize—but once it is screaming hot, it stays hot. When you drop a handful of peppers into a properly preheated cast iron pan, the temperature barely flinches. The water evaporates instantly upon contact, allowing the Maillard reaction to proceed uninterrupted.
On the other hand, we have carbon steel. Carbon steel is the darling of professional restaurant kitchens. It is thinner and lighter than cast iron, meaning it has slightly less overall thermal mass, but it boasts incredible thermal conductivity and responsiveness. It can reach searing temperatures in half the time of cast iron, and if the temperature does drop, it recovers almost instantly. Grasping the thermodynamics of carbon steel is a total game-changer for home cooks who want to replicate the intense, fast-paced wok cooking of a professional line cook.
The Absolute “No-Go” Rule on Toxic Gear
Let me be perfectly clear: I have zero patience for cheap, toxic kitchenware. If you are trying to sear fajita vegetables in a lightweight, bargain-bin aluminum pan coated in peeling Teflon, you are actively sabotaging your dinner.
Traditional non-stick coatings cannot hold heat. They have virtually zero thermal mass. Worse, they are incredibly dangerous at the temperatures required for a proper sear. Heating a dry Teflon pan past 500°F causes the chemical coating to break down, off-gassing toxic fumes that can literally cause flu-like symptoms (a phenomenon known as polymer fume fever). Furthermore, that peeling, flaking mystery metal coating is leaching directly into your food. I am fiercely passionate about banishing toxic kitchen gear from the home kitchen. You deserve better, and your health deserves better.
If you try to achieve a restaurant-quality blister on your peppers using one of these cheap pans, you will fail. You will also find yourself ruining your nonstick pans in the process, as the extreme heat destroys whatever fragile coating is left. Throw them away. Invest in bare cast iron, carbon steel, or high-quality multi-clad stainless steel.
The Sassy Sous-Chef’s Blueprint for Blistered Perfection
Now that we have the science and the equipment sorted out, it is time to talk technique. Weekday cooking is all about efficiency, but when you are hosting a weekend fajita bar, you need to be an absolute perfectionist with your prep.
Step 1: The Strategic Slice
How you cut your vegetables directly impacts how they behave in the pan. Let’s start with the onions. If you always cry chopping onions, it is likely because your knife is so dull that it is crushing and tearing the cell walls rather than slicing cleanly through them, releasing a massive cloud of irritating sulfur compounds.
First, sharpen your knife. Second, pay attention to your cutting board. Stop ruining your knives by aggressively chopping on glass, marble, or incredibly hard bamboo surfaces.
The extreme density of these trendy materials is exactly why your knives go dull so fast, leading to crushed vegetables that bleed moisture before they even hit the pan. Use a soft end-grain wood or high-quality rubberized plastic board instead.
When slicing your onions for fajitas, you must slice them “pole-to-pole” (with the grain, from the root to the stem) rather than orbitally (across the equator). Slicing with the grain keeps the vascular structure of the onion intact, allowing the slices to hold their shape and retain their crunch under intense heat. If you slice them against the grain, they will rapidly disintegrate into a mushy onion jam.
For the bell peppers, slice them into uniform, half-inch strips. If you slice them too thin, they will burn before they blister. If you slice them too thick, the outside will char while the inside remains raw and watery.
Step 2: Moisture Management
Before those beautifully sliced vegetables ever see the inside of a skillet, they need to be bone dry. Remember, surface moisture is the mortal enemy of the Maillard reaction. After washing your peppers, dry them aggressively with a clean kitchen towel or paper towels. If you are prepping ahead of time, leave the sliced vegetables uncovered in the refrigerator for an hour; the cold, circulating air of the fridge acts as a powerful dehydrator, wicking away excess surface moisture.
Step 3: Fat Selection and Smoke Points
You cannot sear vegetables at 450°F using a delicate extra-virgin olive oil or a pat of butter. The milk solids in butter will instantly burn, turning bitter and acrid, while low-smoke-point oils will break down and smoke out your entire kitchen.
You need a high-heat warrior. Avocado oil, beef tallow, or clarified butter (ghee) are your best friends here. They boast smoke points well north of 450°F, allowing you to crank the heat to the absolute maximum without setting off the smoke detector.
Step 4: The Batch-Cooking Mandate
This is the golden rule, the non-negotiable commandment of fajita night: You must cook in batches.
Do not dump all your vegetables into the pan at once. Divide your prepped peppers and onions into three or four separate batches. Add a small amount of high-heat oil to your preheated cast iron or carbon steel skillet. Wait until the oil is shimmering and just barely beginning to smoke. Add your first batch of vegetables in a single, even layer.
And then, step back. Do not touch them.
The urge to constantly stir and toss the vegetables is a nervous habit you need to break immediately. Let them sit undisturbed for a full two to three minutes. This sustained, direct contact with the screaming hot metal is what creates that beautiful, blackened blister. Once you see a deep char developing on the underside, give them a quick toss, let them cook for one more minute, and immediately remove them to a holding platter. Repeat with the remaining batches.
The Mindful Fajita Bar: Hosting Without the Kitchen Sweat
You have mastered the sear. You have conquered the mush. But what good is perfect food if you are trapped in the kitchen, sweating profusely over a hot stove, while your guests are in the living room laughing and enjoying the party without you?
The true art of effortless hosting is about front-loading your labor. A mindful fajita bar is the ultimate interactive dining experience, allowing guests to customize their plates while you actually get to sit down and enjoy the gathering you worked so hard to put together.
Thermodynamic Food Holding
The biggest challenge of batch-cooking is keeping the first batch hot and crispy while you finish the final batch. If you just pile the cooked vegetables onto a cold ceramic plate, they will rapidly lose their heat, and the steam rising from the bottom of the pile will turn the whole mound soggy.
Implementing proper food holding strategies is critical. Preheat your oven to its lowest setting (usually around 200°F or 90°C). Place a wire cooling rack inside a rimmed baking sheet, and put it in the oven. As each batch of blistered vegetables finishes cooking, transfer them to the wire rack in the warm oven. The wire rack allows air to circulate underneath the vegetables, preventing them from sitting in their own steam and getting mushy, while the gentle heat of the oven keeps them perfectly warm until you are ready to serve.
Staging the Spread
A successful fajita bar relies on visual abundance and logical flow. You want to guide your guests through the line seamlessly.
- The Foundation: Start with the plates and the tortillas. Keep your flour and corn tortillas wrapped in a slightly damp kitchen towel inside a dedicated tortilla warmer, or nestled in a low-temperature slow cooker to keep them pliable and steaming hot.
- The Main Event: Next in line should be your proteins (marinated skirt steak, spiced chicken, or chili-lime portobello mushrooms) and your perfectly blistered, batch-cooked peppers and onions. Serve these in heavy, pre-warmed cast iron serving dishes to retain their heat throughout the meal.
- The Cool Contrast: Follow the hot items with the cool, creamy elements. Guacamole, sour cream, and shredded cheese.
- The Acid and Crunch: Finish the line with the bright, acidic finishers. Fresh pico de gallo, pickled red onions, fiery jalapeños, fresh cilantro sprigs, and a massive bowl of lime wedges. Acid is the unsung hero of Mexican cuisine; a final squeeze of fresh lime juice over a loaded fajita cuts through the rich fats and elevates the entire flavor profile.
The Ultimate Timeline: From Chopping Board to Taco Stand
To ensure you are sipping a margarita when the doorbell rings, you need a militant prep schedule. Here is your definitive, stress-free timeline.
24 Hours Before
- Marinade the Proteins: Get your steak or chicken into its marinade. A blend of soy sauce, lime juice, cumin, garlic, and a neutral oil works wonders.
- Pickle the Onions: Thinly slice a red onion and submerge it in a bath of warm vinegar, salt, sugar, and oregano. Let it sit in the fridge overnight.
- Prep the Cold Toppings: Shred your cheese (do not buy the pre-shredded stuff in a bag; it is coated in anti-caking starches that ruin the texture). Chop your cilantro. Make your pico de gallo. Store everything in airtight containers in the fridge.
4 Hours Before
- The Big Chop: Sharpen your knife and slice all of your bell peppers and onions. Remember: pole-to-pole for the onions, half-inch strips for the peppers.
- Dehydrate: Lay the sliced vegetables out on a paper-towel-lined baking sheet and place them uncovered in the fridge to dry out.
1 Hour Before
- Set the Stage: Arrange your serving station. Lay out the bowls, the serving spoons, the napkins, and the plates.
- Warm the Oven: Preheat your oven to 200°F and set up your wire holding rack.
- Make the Guacamole: Mash your avocados with lime juice, salt, and a handful of pico de gallo. Press a piece of plastic wrap directly against the surface of the guacamole to prevent oxidation, and stash it in the fridge.
30 Minutes Before (Showtime)
- Sear the Proteins: Pull your meat from the marinade, pat it bone dry, and sear it in your preheated skillet. Rest the meat on a cutting board while you tackle the veggies.
- Blister the Veggies: Wipe out the skillet, crank the heat back up, and execute your batch-cooking strategy. Sear, blister, and transfer to the warm oven.
- Slice and Serve: Slice your rested proteins against the grain. Pull the holding rack of veggies from the oven. Transfer everything to your pre-warmed serving dishes. Pull the cold toppings from the fridge and place them on the bar.
Conclusion: You Are the Fajita Master Now
Cooking is not magic. It is just applied physics, a bit of chemistry, and the sheer, stubborn refusal to accept mediocre food. By understanding the cellular structure of your vegetables, respecting the thermal mass of your cookware, and refusing to crowd the pan, you have officially cracked the code to restaurant-quality fajitas.
You no longer have to apologize for soggy, weeping bell peppers. You no longer have to stress-sweat your way through a dinner party. Armed with this blueprint, you can confidently host a vibrant, interactive, and utterly delicious fajita bar that leaves your friends begging for your secrets.
Now, go pour yourself a drink. You’ve earned it.






