
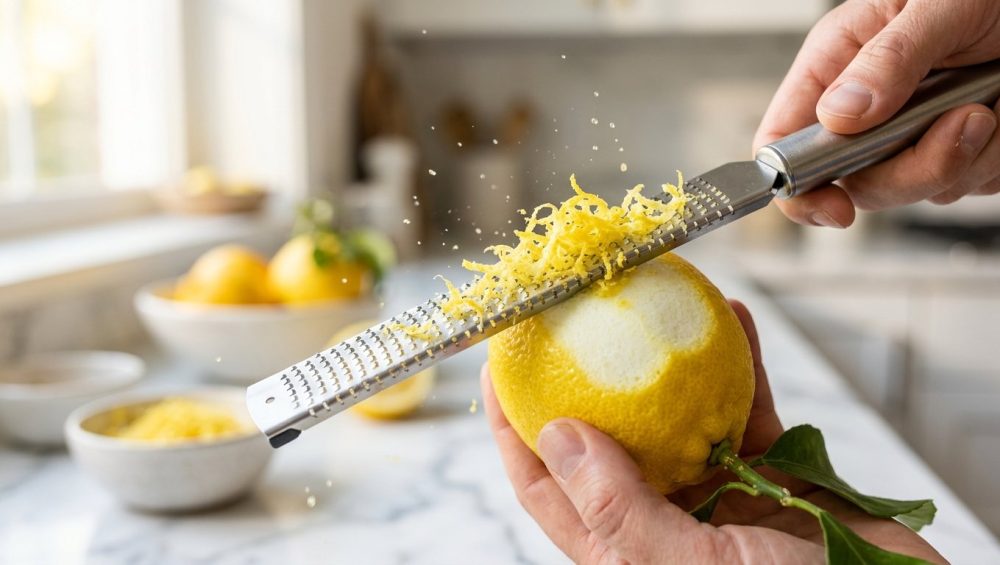
Picture this: It’s a beautiful Saturday afternoon. You’ve poured yourself a nice glass of wine, turned on your favorite playlist, and decided to tackle that gorgeous, intimidating lemon pound cake recipe you’ve had bookmarked for months. You meticulously measure your flour. You cream your butter and sugar until it’s light and fluffy. You zest three whole lemons into the batter, bake it to golden perfection, and proudly serve yourself a slice.
You take a bite, expecting a burst of bright, sunshine-y citrus. Instead, your mouth is assaulted by a harsh, astringent bitterness that makes your jaw clench and your tongue feel like it just licked a 9-volt battery.
What went wrong? You followed the recipe to the letter. You bought expensive, organic lemons. Yet, your dessert tastes like a bitter regret.
We have all been there. When I first started cooking—long before I figured out how to stop setting off my smoke detector on a weekly basis—I ruined more lemon bars, vinaigrettes, and marinades than I care to admit. I thought I hated lemon zest. But the truth was, I just didn’t understand the science of the fruit, and more importantly, I was using the completely wrong tool to process it.
It turns out that a bright, clean pop of citrus is a culinary magic trick. It can balance rich fats, elevate dull soups, and easily rescue a ruined dinner when you feel like all hope is lost. But to harness that magic, you have to extract the flavor correctly. The culprit behind your bitter baked goods isn’t your cooking skills. It’s that dull, rusty, knuckle-shredding metal box grater sitting in your kitchen drawer.
Let’s get nerdy for a minute, banish the bitter flavors for good, and talk about why upgrading to a photo-etched rasp grater will completely change your culinary life.
The Anatomy of a Citrus Peel: A Tiny Science Lesson (I Promise It’s Painless)
To understand why your lemon zest tastes like punishment, we first have to understand the lemon itself. As home cooks, we tend to look at a lemon peel as one uniform skin. But botanically speaking, a citrus rind is a highly complex, two-part biological packaging system. Each layer serves a radically different purpose for the fruit, and more importantly, each layer brings a radically different flavor profile to your cutting board.
The Flavedo: Where the Magic Happens
The outermost layer of a citrus fruit is called the flavedo (also known as the epicarp). This is the colorful part—the bright, vibrant yellow on a lemon, the deep orange on a mandarin, or the vivid green on a lime.
If you were to look at the flavedo under a microscope, you would see that its surface is covered in hundreds of tiny, fragile, balloon-like sacs. These sacs are completely filled with volatile essential oils. In lemons, the dominant aromatic compound inside these sacs is called limonene, a monoterpene that can make up anywhere from 60% to a staggering 95% of the volatile oil profile. Alongside limonene, you’ll find trace amounts of other highly fragrant compounds like beta-pinene and gamma-terpinene.
This layer is pure, concentrated culinary gold. It contains no acidity and no bitterness—just pure, unadulterated, floral citrus aroma. When a recipe calls for “lemon zest,” this is the only part of the fruit it is asking for. If you know how to fix your food using aromatic oils and bright flavors, you already know that the flavedo is your absolute best friend in the kitchen.
The Albedo: The Bitter Enemy Hiding in Plain Sight
Directly beneath that beautiful, oil-rich flavedo lies the albedo (also known as the mesocarp). This is the spongy, opaque, white pith that clings to the fruit.
In nature, the albedo serves two primary functions. First, it acts as a shock absorber. When a heavy lemon falls from the top of a tree, the spongy pith protects the delicate fruit inside from bursting upon impact with the ground. Second, it acts as a chemical defense mechanism against insects, birds, and other pests.
How does a lemon defend itself? Chemical warfare. The albedo is densely packed with highly astringent flavonoid compounds, most notably naringin and limonin. These compounds are intensely, aggressively bitter. They are literally designed by nature to taste terrible so that animals will stop eating the fruit.
When you accidentally grate the white albedo into your cake batter, your pasta dish, or your salad dressing, you are seasoning your food with a natural pest deterrent. It completely overpowers the delicate, floral notes of the limonene. It is the culinary equivalent of wondering why your stainless steel pan sticks when you throw cold meat into a cold skillet—you are fighting the fundamental laws of science and wondering why you are losing.
The Box Grater: Your Kitchen’s Biggest Bully
So, if the goal is to gently remove the flavedo without touching the albedo, why do we all grow up using a tool that violently destroys both?
Enter the traditional four-sided box grater. For decades, this clunky, medieval-looking tower of terror has been the default grating tool in home kitchens. And for decades, it has been secretly ruining our food.
Stamped Metal vs. Photo-Etched Precision
The fatal flaw of the traditional box grater lies in how it is manufactured. If you go to a big-box store and buy a standard five-dollar box grater, you are buying a piece of “stamped metal.”
In the stamped metal manufacturing process, factories take a sheet of cheap, low-carbon stainless steel (or worse, flimsy tin) and run it through a heavy mechanical press. The press violently punches holes through the metal. This blunt-force trauma pushes the metal outward, creating raised, jagged, unrefined rims around each hole.
These raised edges are not sharpened. They are not blades. They are just torn, jagged metal craters.
When you drag a delicate lemon across these blunt teeth, you are not slicing the fruit. You are bludgeoning it. The dull edges mash and crush the flavedo, violently rupturing the essential oil sacs. Instead of capturing that precious limonene in the zest, the blunt force causes the oils to spray out into the air (which is why your kitchen smells amazing, but your food tastes like nothing) or smear uselessly into a wet paste against the metal.
Worse yet, because the teeth are dull, you have to apply significant downward pressure to get the grater to bite into the fruit. This heavy pressure forces the jagged metal deep past the flavedo and straight into the spongy white albedo. You end up with a wet, mashed puddle of zest that is heavily contaminated with bitter naringin. Just as an abrasive, rock-hard glass cutting board is slowly ruining your knives, a stamped metal box grater is actively ruining your expensive ingredients.
The Knuckle-Shredding Reality of Cheap Gear
Beyond the culinary destruction, box graters are a physical menace. If you cook as often as I do, you know that time is money during the week. You do not have the time or the patience to slip and grate your own knuckles into a weeknight risotto.
Furthermore, I have a strict, non-negotiable “no-go” rule when it comes to cheap, toxic kitchen gear. Stamped metal graters are notoriously difficult to clean because food gets trapped in the jagged underside of the punched holes. They rust easily. The cheap metal bends and warps under pressure. Getting rid of this dangerous, inefficient unitasker is one of the fastest, easiest ways to eliminate kitchen chaos and streamline your cooking routine.
You deserve better. Your lemons deserve better.
Enter the Rasp Grater: The Tool That Will Change Your Culinary Life
If the box grater is the villain of this story, the photo-etched rasp grater is the knight in shining armor. It is, without a doubt, one of the most transformative tools you can own. It proves my core philosophy: you do not need a culinary degree to cook like a professional, but you do need the right tools.
What Exactly Is a Rasp Grater?
The history of the modern kitchen rasp grater is actually a fantastic accident. For decades, rasp tools were strictly used in woodshops. Carpenters used them to shave down wood, smooth out edges, and refine doorframes.
In 1994, a Canadian homemaker named Lorraine Lee was in her kitchen in Ottawa, trying to bake an Armenian orange cake. She was using an old, dull, stamped-metal box grater to zest her oranges, and she was miserable. The grater was mashing the fruit, tearing the peel, and creating a bitter, wet mess. Out of sheer frustration, she marched into her husband’s workshop, grabbed a woodworking rasp manufactured by Grace Manufacturing (a company that primarily made printer parts and carpentry tools), and brought it back to the kitchen.
She slid the orange across the long, narrow metal blade. To her absolute shock, the tool didn’t mash the fruit. It sheared it cleanly. Lacy, delicate shards of zest fell from the blade like fresh snowflakes. The zest was dry, fluffy, and completely free of the bitter white pith.
That single moment sparked a revolution. Grace Manufacturing realized what they had on their hands, pivoted their marketing, and the Microplane culinary grater was born. It is wild to think that one of the absolute most essential kitchen tools in modern gastronomy started its life in a hardware store.
The Magic of Photo-Etching Technology
So, what made that woodworking tool so vastly superior to a kitchen grater? The secret lies in a highly advanced manufacturing process called photo-etching.
Instead of using a heavy mechanical press to violently punch holes into cheap metal, manufacturers of high-quality rasp graters use a chemical process. They start with a sheet of premium, surgical-grade stainless steel. They apply a photographic mask to the steel—a film that outlines the exact, microscopic shape of the teeth they want to create.
The steel is then bathed in a highly corrosive chemical solution, typically ferric chloride. The chemicals slowly and precisely dissolve the unmasked areas of the metal. Because the metal is dissolved rather than punched, the edges that remain are incredibly thin and razor-sharp.
We are not talking about raised bumps; we are talking about hundreds of microscopic, ultra-sharp knives. Just as you need a bench scraper to cleanly divide and lift delicate bread dough without tearing the gluten strands, you need the surgical precision of photo-etched teeth to cleanly slice the flavedo without tearing into the cellular structure of the fruit.
The Science of Shearing vs. Tearing: Why Your Food Tastes Better
Upgrading from a stamped metal grater to a photo-etched rasp grater isn’t just about aesthetics or making your life slightly easier. It fundamentally alters the chemical composition of the food you are preparing. It is the difference between shearing and tearing.
Preserving Volatile Essential Oils
When you drag a lemon across the razor-sharp teeth of a rasp grater, those tiny knives slice cleanly through the flavedo. Because the cut is surgical, the microscopic oil sacs are sliced open precisely, rather than being crushed by blunt force.
This clean shear allows the curl of the zest to capture and hold onto the volatile limonene and pinene oils. The essential oils remain trapped within the physical structure of the zest until they hit your cake batter, your hot pasta, or your salad dressing. You aren’t leaving your flavor behind in a puddle on the cutting board; you are delivering 100% of that bright, floral aroma directly into your dish.
The Surface Area Equation for Maximum Flavor
Because a rasp grater shears the peel so finely, it produces a texture that is light, fluffy, and almost snow-like. In the culinary world, texture dictates surface area, and surface area dictates flavor extraction.
When you use a box grater, you get thick, heavy, wet clumps of peel. When you fold those clumps into a pound cake, they sink. When you bite into the cake, you get an unpleasant, chewy, localized burst of bitter lemon peel.
When you fold the fluffy, snow-like zest from a rasp grater into that same batter, the massive surface area allows the essential oils to rapidly infuse into the surrounding fats (like butter and eggs). The zest practically melts into the dish. You don’t get chewy chunks; you get a seamless, ethereal distribution of pure citrus flavor in every single bite. You actually need less zest to achieve a much stronger, brighter flavor profile.
How to Actually Use a Rasp Grater (Because You Might Be Doing It Wrong)
Okay, so you’ve thrown away your knuckle-shredder and bought a beautiful, photo-etched rasp grater. Now we need to talk about technique. Because if you are using it like a traditional grater, you are still leaving flavor on the table.
The “Grater Up” Method
If you watch a novice cook zest a lemon, they will inevitably hold the rasp grater at a 45-degree angle, rest the tip on the cutting board, and aggressively rub the lemon down the top of the blades.
Stop doing this.
When you grate this way, the tool blocks your line of sight. You cannot see the surface of the lemon that is making contact with the blades. Because you are flying blind, you will inevitably apply too much pressure, grate too deeply, and hit the bitter white albedo.
Instead, use the “Grater Up” method. Hold the lemon in your non-dominant hand. Hold the handle of the rasp grater in your dominant hand, but turn the grater upside down—so the metal channel (the back of the blades) is facing the ceiling.
Now, instead of moving the lemon, move the grater. Shave the grater across the top of the lemon, pulling it toward you.
This technique gives you total visual control. You can see exactly how much of the peel you are removing with every single swipe. You can ensure that you are only taking off the vibrant yellow flavedo, leaving the bitter white pith completely untouched on the fruit.
The Tap and Swipe Technique
The other massive benefit of the “Grater Up” method is containment. When you hold the grater upside down, the metal channel acts as a catch basin. As you shave the lemon, all of that precious, fluffy, oil-rich zest collects neatly inside the trough of the grater.
It doesn’t spray across your cutting board. It doesn’t stick to your fingers. It gathers in one perfect little pile.
When you have enough zest, simply hold the grater over your mixing bowl and tap the metal edge gently against the rim. The zest will fall right in. For any stubborn bits clinging to the metal, simply run your finger down the channel (safely, going with the direction of the blades, not against them) to swipe the remaining zest into your food. It is clean, efficient, and ensures zero waste.
Beyond Citrus: The Rasp Grater’s Weekday Side Hustles
I am a fierce advocate for the home cook, and I know that when it comes to weekday meals, time is money. I absolutely despise unitaskers that take up precious drawer space just to do one highly specific job. The beauty of a high-quality rasp grater is that it is an absolute workhorse. It will save you immense amounts of time and effort across a huge variety of ingredients.
Garlic and Ginger Without the Mincing Tears
Mincing garlic with a chef’s knife takes time, knife skills, and patience—three things that are usually in short supply at 6:30 PM on a Tuesday. And we all know that relying on a cheap garlic press makes food bitter because the blunt force crushes the cell walls of the garlic, releasing harsh, sulfurous allicin compounds.
A rasp grater is the ultimate garlic hack. Run a peeled clove of garlic across the razor-sharp teeth, and it instantly transforms into a fine, smooth puree. This puree melts seamlessly into salad dressings, pan sauces, and marinades without leaving raw, aggressive chunks of garlic in your food.
The same applies to ginger. If you find yourself constantly struggling with fresh ginger because of its tough, stringy fibers, the rasp grater is your savior. Here is my favorite weekday hack: keep a knob of fresh ginger in your freezer. When you are making a stir-fry, take the frozen ginger (no need to peel it) and run it directly over the rasp grater. The frozen fibers shear cleanly, giving you a perfect, fluffy ginger snow that dissolves instantly into hot oil or soy sauce.
Hard Cheeses and the Fluffy Snow Effect
If you want to feel like you are dining at a high-end Italian restaurant on a random Thursday night, use your rasp grater for hard cheeses like Parmigiano-Reggiano or Pecorino Romano.
Because the teeth are so fine, the grater shaves the dense cheese into microscopic, airy ribbons. This creates a massive mountain of cheese from a relatively small block. More importantly, because the cheese is so finely shaved, it melts on contact. When you drop a handful of rasp-grated Parmesan into a pan of hot pasta and starchy pasta water, it emulsifies instantly into a silky, luxurious sauce. A box grater, by contrast, gives you thick, heavy shreds that clump together and turn into a greasy, stringy mess at the bottom of the pan.
Nutmeg, Chocolate, and the Finishing Touches
For your elaborate weekend baking projects, the rasp grater is the ultimate finishing tool.
Pre-ground nutmeg tastes like dusty sawdust because the volatile oils evaporate sitting in a jar on a supermarket shelf. Buying whole nutmeg seeds and passing them over a rasp grater directly into your bechamel sauce or your pumpkin pie batter will release a warm, intoxicating aroma that pre-ground spices simply cannot match.
Want to make a homemade dessert look like it came from a professional patisserie? Take a block of dark chocolate (slightly chilled) and run it over the rasp grater directly onto a slice of cheesecake, a bowl of whipped cream, or a mug of hot cocoa. The tool produces delicate, curling chocolate dust that elevates the presentation of any dish with zero extra effort.
Ditch the Junk: How to Spot a Quality Rasp Grater
As I mentioned earlier, I have zero patience for toxic, poorly manufactured kitchenware. Because the rasp grater has become so popular, the market is currently flooded with cheap, knockoff garbage. You must know what to look for to ensure you are getting a tool that will actually perform.
Beware the Flimsy Knockoffs
If you are standing in the checkout aisle of a discount grocery store and you see a rasp grater for four dollars, put it down and walk away.
Cheap knockoffs cut corners in two ways. First, they do not use the expensive photo-etching process. They use the same terrible stamped-metal punching process as a box grater, but they shrink the holes down to make it look like a rasp. It will still tear your food; it will just do it on a smaller scale.
Second, they use cheap, low-carbon mystery metals. These metals are highly susceptible to rust. Furthermore, cheap graters will bend and warp the second you apply pressure to a block of hard cheese. In the worst-case scenarios, I have seen cheap graters with fake metallic coatings that literally flake off into your food as you grate. Do not feed your family peeling metal.
Invest in a genuine, high-quality, photo-etched grater made from surgical-grade stainless steel. A good one will cost you around fifteen to twenty dollars, and if you treat it right, it will last you for years. It is one of the highest returns on investment you can make in your kitchen.
Caring for Your New Best Friend
Once you have a high-quality photo-etched grater, you have to protect those microscopic razor blades.
Rule number one: keep it out of the dishwasher. Dishwasher detergents are highly alkaline and contain harsh abrasives designed to scrub baked-on food off of plates. When you blast those microscopic, razor-thin chemical-etched edges with abrasive detergent and high-pressure water for two hours, you will dull the blades prematurely. Understanding how harsh dishwasher environments degrade your tools is just as important as knowing why your spatula smells like garlic after you wash it with highly aromatic foods.
Instead, hand wash your rasp grater immediately after using it. Run it under warm water. Because it shears food cleanly, there shouldn’t be much stuck to it. If you grated something sticky, like ginger or cheese, use a handled kitchen brush to gently scrub the blades (always moving in the direction of the teeth, never against them).
Dry it thoroughly with a towel immediately to prevent any chance of corrosion.
Finally, never throw a naked rasp grater into a chaotic utensil drawer. If the razor-sharp teeth are constantly banging against metal whisks, heavy spatulas, and ceramic peelers every time you open the drawer, they will chip and dull. Always snap on the protective plastic sheath that came with the grater before storing it. Treat it like a high-end chef’s knife, because that is exactly how it functions.
Your Path to Zest-Level Perfection
Cooking doesn’t have to be a stressful chore, and it certainly shouldn’t result in bitter, disappointing meals when you have put in the time and effort to follow a recipe. The difference between a dish that tastes muddy and a dish that sings with vibrant, professional-level flavor often comes down to the simple science of how you treat your ingredients.
By ditching the blunt-force trauma of the traditional box grater and embracing the surgical precision of a photo-etched rasp grater, you are instantly upgrading the quality of your food. You are leaving the bitter, astringent albedo exactly where it belongs—in the compost bin—and capturing the pure, aromatic magic of the flavedo.
So pour yourself another glass of wine, grab a fresh lemon, and get back to baking. You’ve got this. Your weekend culinary projects are about to taste a whole lot brighter.






