
Avocados are the undisputed, high-maintenance divas of the produce aisle. You buy them rock-hard, wait three days staring at them like a hawk, and the second you turn your back to answer an email, they have turned to total mush. And if you actually manage to cut one open during its microscopic, thirty-minute window of perfect ripeness? Congratulations. You now have about ten minutes before that vibrant, creamy green flesh oxidizes into a sad, unappetizing shade of swamp brown.
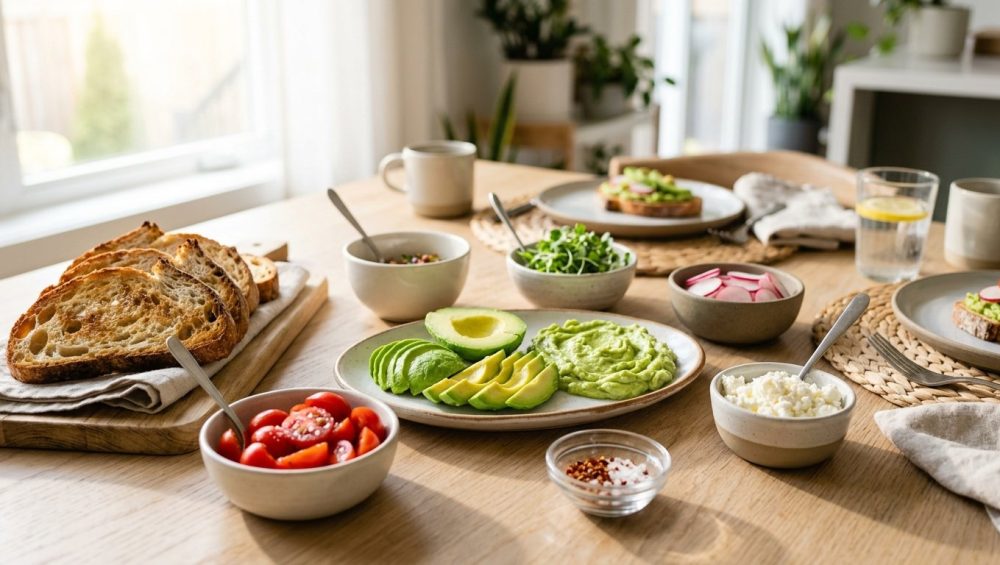
I have zero patience for pretentious chef-speak, but I have even less patience for ruining expensive groceries. As home cooks, we do not have a brigade of sous-chefs meticulously prepping our ingredients right before service. We survive the week by prioritizing efficiency, which buys us the time to be absolute perfectionists with our weekend culinary projects. We need practical, time-saving hacks that actually work in a real-world kitchen. We need to understand the basic food science behind our ingredients so we can manipulate them to our advantage. Today, we are going to dive deep into the molecular drama of the avocado. We are going to explore exactly why it turns brown, how to stop it using scientifically proven methods, and how to leverage this newfound superpower to host a stunning, interactive, and completely stress-free mindful toast bar.
The Global Drama of the Butter Fruit
Before we get into the kitchen chemistry, we need to talk about why preserving your avocados is actually a big deal. Avocado waste is a massive global issue. In major producing countries like Kenya, statistics show that out of 81,000 tonnes produced annually, up to 40,000 tonnes go to waste due to mishandling, bruising, and rapid oxidation. That is nearly fifty percent of the crop. Globally, millions of tons of avocados are tossed into landfills where they emit methane, simply because they got a little bruised or oxidized on the counter.
When we throw away half a brown avocado, we aren’t just wasting our grocery budget; we are contributing to a massive, systemic food waste crisis. Learning how to properly store and preserve highly perishable ingredients is the hallmark of a resourceful, intelligent home cook. You do not need a culinary degree to stop throwing your money in the compost bin. You just need a little bit of science.
The Science of the Sulk: Why Your Avocados Turn Brown
To defeat the enemy, you must first understand the enemy. The browning of an avocado is not rot, and it is not mold. It is a chemical reaction known as enzymatic browning.
Inside the cells of an avocado, there are microscopic compartments. The fruit’s phenolic compounds are stored safely inside the cell’s vacuole, acting like little chemical prisoners. Meanwhile, an enzyme called polyphenol oxidase (PPO) hangs out in the cytoplasm and chloroplasts. As long as the avocado remains whole and the cell walls remain intact, these two compounds never meet. They live in peaceful, separated harmony.
But the second you slice into that avocado with your chef’s knife, you rupture those cell walls. It is a microscopic jailbreak. The phenolic compounds and the PPO rush out, meet the oxygen in the kitchen air, and a rapid chain reaction begins. The PPO catalyzes the oxidation of the phenols into a new class of molecules called quinones. Quinones are highly reactive, and they rapidly polymerize—meaning they link together in long, complex chains—to form melanin.
Yes, melanin. The exact same brown pigment responsible for human skin color, the darkening of tea leaves, and the browning of apples and bananas.
Busting the Avocado Pit Myth
Let’s get this out of the way immediately: leaving the pit in the avocado does not magically stop the entire fruit from browning. I know your grandmother swore by it, but science says otherwise. The reason the flesh directly underneath the pit stays green is simply because the pit acts as a physical barrier, blocking oxygen from touching that specific area of the flesh. It is not emitting a magical anti-browning forcefield. You get the exact same result by pressing any physical barrier tightly against the flesh.
The “No-Go” Rule: Ditch the Toxic Gear
As your sassy sous-chef, I have to lay down the law before we proceed to the preservation methods. We do not spend our hard-earned money on premium, organic Hass avocados only to suffocate them in cheap, toxic PVC plastic wrap. I absolutely despise mystery plastics, flimsy containers, and peeling non-stick coatings. They leach endocrine-disrupting chemicals into our food and our environment.
If your non-stick pan is flaking into your scrambled eggs, or if you are wrapping your fresh produce in chemical-laden cling film, you are doing yourself a massive disservice. I am a fierce advocate for banishing toxic kitchen gear from your home permanently. We only use safe, durable, high-quality equipment that offers real value. When storing your avocados, you should be utilizing heavy glass storage containers with airtight silicone seals, medical-grade stainless steel, authentic ceramic, natural beeswax wraps, or reusable food-grade silicone huggers. Treat your ingredients with respect, and treat your body with even more.
Mastering the Art of Preservation: 5 Scientifically Proven Methods
Now that we know oxygen and the PPO enzyme are the culprits, we can use food science to shut them down. Here are the five most effective, rigorously tested ways to keep your avocados vibrantly green.
Method 1: The Acid Attack
Enzymes are incredibly picky about their environment. Polyphenol oxidase thrives in a neutral pH environment (around 6.5 to 7.0). If you dramatically lower the pH by introducing an acid, the enzyme denatures and stops working.
Squeezing fresh lemon or lime juice directly onto the exposed flesh of the avocado instantly lowers the pH, halting the browning process in its tracks. The ascorbic acid (Vitamin C) in the citrus also acts as a natural antioxidant, taking the hit from the oxygen before the avocado flesh does.
The Catch: Your avocado will taste like citrus. If you are making guacamole or a zesty avocado toast, this is perfect. If you are using the avocado in a chocolate smoothie, you might want to skip this one.
Method 2: The Water Submersion Technique
If oxygen is the enemy, water is the shield. By submerging a cut avocado half (or a batch of freshly made guacamole) in water, you create a total barrier against the air. The magic of a water seal is that it is completely flavorless and highly effective for short-term storage.
The Catch: The FDA has warned against storing whole, uncut avocados in water for long periods due to the risk of Listeria multiplying on the skin and seeping inside. However, for storing a tightly packed container of guacamole overnight in the fridge, pouring a half-inch of cold water gently over the top surface is a brilliant chef’s trick. Just pour the water off and give it a quick stir before serving.
Method 3: The Allium Armor
This is the weirdest, yet most scientifically fascinating method. Chop a quarter of a red onion and place it in the bottom of an airtight glass container. Place your cut avocado half, skin side down, directly on top of the onions, and seal the lid.
Onions naturally emit sulfur dioxide gas (the exact same volatile compound that makes you cry when you chop them). In a sealed container, this sulfur dioxide gas acts as a powerful natural preservative, aggressively inhibiting the PPO enzyme on the surface of the avocado.
The Catch: The avocado will absorb the aroma of the onion. Again, great for savory toast, terrible for baking.
Method 4: The Lipid Seal
If you don’t want to use water or acid, you can use fat. Using a pastry brush, lightly coat the exposed flesh of the avocado with a thin layer of olive oil or avocado oil. The oil creates a hydrophobic lipid barrier that prevents oxygen from penetrating the flesh. Place the oiled avocado in an airtight glass container in the fridge.
The Catch: It adds extra calories and a slight oily texture to the surface, but it preserves the pure avocado flavor beautifully.
Method 5: Thermal Shock (Blanching)
This is a high-level restaurant trick that sounds insane but works flawlessly. PPO is a protein, and like all proteins, it denatures (unravels and deactivates) when exposed to high heat.
Bring a pot of water to a rolling boil. Submerge the entire, uncut avocado into the boiling water for exactly 10 to 20 seconds. Remove it with a slotted spoon and immediately plunge it into a bowl of ice water to stop the cooking process. This brief thermal shock is just enough to denature the PPO enzyme residing in the outermost layers of the flesh right under the skin, without actually cooking the creamy interior. When you cut into it later, it will stay green significantly longer.
How to Host a Mindful Toast Bar (Without Losing Your Mind)
Now that you have conquered the science of the avocado, it is time to show off. You love the idea of hosting weekend brunches, but you feel anxious about managing highly perishable, time-sensitive ingredients. You are tired of being chained to the stove, flipping pancakes while your friends are in the dining room laughing and drinking mimosas without you.
Hosting should not be an endurance sport. The mindful toast bar is the ultimate weekend gathering hack. It shifts the labor of assembling the meal entirely onto your guests, under the brilliant guise of “interactive dining.” You prep everything in advance, set it out beautifully, and let them go to town. It is the absolute pinnacle of the art of effortless hosting.
The Bread Foundation: Your Edible Canvas
A toast bar lives and dies by the quality of its bread. If you serve your guests flimsy, mass-produced white sandwich bread, it will instantly disintegrate under the weight of a loaded avocado smash, and we will no longer be friends. You need structural integrity.
Head to your local bakery (or your own oven) and secure a massive loaf of thick-cut sourdough, a dense German rye, or a sturdy seeded multigrain. You want a crumb tight enough to hold spreads, but a crust rustic enough to provide a satisfying crunch.
If you bought the bread a day or two early and it has hardened, do not panic. You can easily revive it. Simply stop tossing stale bread into the trash; run the uncut loaf quickly under a cold kitchen faucet to dampen the crust, then pop it into a 350°F (175°C) oven for ten minutes. The water turns to steam, re-gelatinizing the starches inside and making the crumb soft and pillowy again, while crisping the crust beautifully.
Whatever you do, do not store your artisan bread in the refrigerator before the party. The cold temperature causes the starches to rapidly crystallize, meaning the bread goes stale faster in the fridge than it does sitting on your counter.
If you are an overachiever who insists on baking your own sourdough for the toast bar, remember the golden rule of baking: weigh your ingredients with a digital scale. Please, stop scooping your flour with a measuring cup. Compacting flour in a volume cup leads to dense, brick-like bread that will ruin your entire brunch aesthetic.
The Toasting Station
Do not try to pre-toast the bread. It will get cold and leathery before anyone takes a bite. Instead, set up a dedicated toasting station at the start of the buffet line. If you have a wide-slot toaster, place it on a wooden cutting board with a pair of bamboo tongs. If you have a large crowd, skip the toaster entirely. Set your oven to broil, place the sliced bread on heavy stainless steel baking sheets, and designate one trusted friend to keep an eye on the oven, pulling the trays out as they reach golden-brown perfection.
Curating the Spreads
The star of the show is, of course, the avocado. Since we now know how to prevent enzymatic browning, you can confidently mash a massive bowl of avocados an hour before your guests arrive. Use the acid method (a heavy squeeze of fresh lime juice) and fold in some flaky sea salt. Press a piece of reusable beeswax wrap directly against the surface of the mash to block out the oxygen until the first guest is ready to eat.
But a mindful toast bar needs variety. Offer two or three alternative spreads to cater to different dietary preferences:
- Whipped Ricotta: Whip whole milk ricotta in a food processor with a drizzle of honey and a pinch of salt until it is light and cloud-like.
- Cultured Butter: Splurge on a high-fat European butter. Let it come to room temperature so it spreads like a dream.
- Beetroot Hummus: For a vibrant pop of color, blend roasted beets into a classic hummus.
Prepping the Toppings
Avocado is incredibly rich and fatty. To build a balanced bite, it desperately needs acid, salt, and crunch. This is where your topping bowls come in.
- The Acid: Quick-pickled red onions, capers, a squeeze of fresh lemon, or a drizzle of balsamic glaze.
- The Salt: Crumbled feta cheese, smoked salmon, prosciutto, or everything bagel seasoning.
- The Crunch: Toasted pepitas, sesame seeds, thinly sliced radishes, or crispy chili oil.
Speaking of chili oil, if you are making your own spiced oils or seasoned nuts for the bar, blooming them in oil over low heat for two minutes before serving will exponentially amplify their flavor compounds. Raw spices taste dusty; bloomed spices taste like a professional kitchen.
When prepping all of these beautiful toppings, ensure you are using the right tools. Chopping endless garnishes on a rock-hard surface will destroy your chef’s knife. Avoid the bamboo cutting boards that are notoriously harsh on blade edges, and opt for a softer end-grain walnut or maple board. And when it is time to transfer those perfectly minced radishes and herbs from the board to your serving bowls, do not scrape the delicate edge of your knife across the wood. You absolutely need a bench scraper. It is a three-dollar piece of stainless steel that will save your two-hundred-dollar knife from premature dulling.
Staging and Thermodynamics: Keeping Food Safe and Appetizing
The final secret to a flawless mindful toast bar is the flow and the temperature control. You want to eliminate bottlenecks so your guests aren’t awkwardly bumping elbows while trying to spread ricotta.
Set the table in a logical, linear progression:
- Plates and napkins.
- The Bread and the Toasting Station.
- The Spreads (Avocado, Ricotta, Butter).
- The Heavy Toppings (Salmon, Eggs).
- The Light Garnishes (Microgreens, Seeds, Pickled Onions).
- The Finishing Oils and Salts.
Now, let’s talk about thermodynamics. You want your spreads to stay cool and fresh for the duration of the two-hour brunch without having to constantly run back and forth to the fridge. The secret is utilizing the safe serving ware you already own. Heavy ceramic, stoneware, and thick glass bowls have excellent thermal mass. Place your empty serving bowls in the refrigerator or freezer the night before the party. When you fill them with your chilled avocado mash and whipped ricotta the next morning, the heavy, cold walls of the bowls will actively retain that low temperature, keeping your dairy safe and your avocado vibrant while sitting on the buffet table.
The Sassy Sous-Chef’s Final Word
Cooking and hosting do not have to be exercises in anxiety. You do not need a culinary degree to understand that a little bit of lime juice and a physical barrier will stop polyphenol oxidase in its tracks. You do not need to be a Michelin-starred chef to realize that letting your guests build their own toast is actually a brilliant way to save yourself three hours of active cooking time.
Stop buying toxic plastic wrap, start treating your ingredients with a little bit of scientific respect, and remember that the whole point of gathering people in your home is to actually enjoy their company. Now go buy some avocados, watch them like a hawk, and throw a brunch that makes it look like you have your entire life together. Cheers.






