The Universal Tragedy of the Squeaky Fungi
Listen to me. I know exactly what you are doing on a Tuesday night. You are tired, you have been sitting in back-to-back virtual meetings that absolutely could have been emails, and you just want to get a decent, semi-nutritious dinner on the table before your household stages a full-blown mutiny. So, you grab a plastic-wrapped punnet of cremini mushrooms from the fridge, slice them up, and throw them into a hot pan with a generous glug of olive oil. You expect them to emerge deeply browned, nutty, and bursting with savory umami.
Instead, you watch in horror as they instantly absorb every single drop of your expensive oil, turn a depressing shade of gray, and begin to aggressively sweat out a massive puddle of murky liquid. Your pan temperature plummets. The sizzling stops. You are no longer searing; you are boiling your food in a greasy, unappetizing emulsion. When you finally plate them, you are left with oil-logged, rubbery little erasers that squeak against your teeth when you chew them.
It is a culinary tragedy, and it happens in millions of home kitchens every single night. But here is the good news: you do not need a culinary degree to fix this. You do not need a Michelin-starred kitchen, and you certainly do not need to subject your family to sad, spongy side dishes ever again. You just need a basic understanding of cellular biology and a willingness to completely abandon everything you thought you knew about cooking fungi. If you are tired of overcooking your produce until you are left with mushy veggies, it is time to look at the science of the skillet. We are going to break down exactly why your mushrooms are failing, and I am going to teach you the counterintuitive, foolproof method that will guarantee perfectly golden, deeply flavorful, tender results every single time.
Fungi Are Not Vegetables: The Biology of the Beast
The fundamental mistake most home cooks make is treating mushrooms like vegetables. They are not vegetables. They are not even plants. They belong to an entirely different biological kingdom, and if you want to cook them correctly, you have to respect their unique anatomy.
The Chitin Conundrum
Plants are held together by a structural carbohydrate called cellulose. When you apply heat to cellulose, it breaks down and softens. This is why a raw, crunchy carrot eventually turns into a soft, yielding component of a stew, and why boiling spinach for too long turns it into a sad, green paste.
Fungi, on the other hand, are built completely differently. Their cell walls are not made of cellulose; they are constructed from a tough, fibrous polysaccharide called chitin. If that word sounds vaguely familiar from your high school biology class, it is because chitin is the exact same biological material that makes up the exoskeletons of crabs, lobsters, shrimp, and insects.
Chitin is remarkably heat stable. It is a nitrogen-containing polymer organized in a dense meshwork that refuses to break down under standard cooking temperatures. This is a massive advantage for the home cook because it means that, unlike a zucchini or a potato, you literally cannot overcook a mushroom into mush. You could simmer a portobello for two straight hours, and it would still retain its structural integrity and remain fleshy. The problem is not that you are overcooking them; the problem is how you are handling their internal architecture.
The Anatomy of a Culinary Sponge
If chitin makes them indestructible, why do they turn into greasy, rubbery sponges? To understand this, we have to look closer at the physical structure of the mushroom cap.
The Air Pocket Problem
A raw mushroom is essentially a dense network of microscopic mycelial threads. Between these threads are millions of tiny air pockets. Furthermore, fresh mushrooms are composed of roughly 80 to 90 percent water. They are, quite literally, biological sponges filled with liquid and air.
When you heat a pan, coat it in oil, and toss in raw mushrooms, those microscopic air pockets do exactly what a dry sponge does when you drop it on a spill: they instantly drink up the liquid. The porous structure of the raw fungus acts as a vacuum, sucking your expensive extra virgin olive oil or clarified butter deep into its core.
The Inevitable Water Release
Once the fat is trapped inside the mushroom, the heat of the pan begins to take effect on the cellular structure. As the chitin matrix heats up, it begins to contract, and the cells rupture, releasing their massive payload of internal water.
Now, look at your skillet. The mushroom has absorbed your cooking fat, and in return, it has expelled cold water into the pan. Water and oil do not mix, and water boils at 212°F (100°C). The temperature of your pan, which needs to be well over 285°F (140°C) to achieve any sort of browning, instantly drops. Your mushrooms are now trapped in a vicious cycle: they are full of oil, sitting in a pool of boiling water, steaming themselves into a rubbery oblivion.
The Oil-First Fallacy: Why Your Current Method is Failing
Let us walk through the exact anatomy of a weeknight cooking failure so you can recognize the error of your ways. You read a recipe that says “sauté the mushrooms in two tablespoons of oil.” You follow the instructions. You preheat the pan, add the oil, and drop in the sliced creminis.
For the first ten seconds, it sounds great. There is a satisfying sizzle. But almost immediately, the pan goes dry. The mushrooms have greedily swallowed every drop of oil. Panic sets in. You think, “Oh no, the pan is dry, they are going to burn!” So, what do you do? You add more oil. The mushrooms drink that up, too.
Then, the water release begins. The pan floods with murky, gray liquid. The sizzling stops, replaced by the depressing, hollow sound of boiling water. You grab your spatula and start stirring frantically, hoping to evaporate the liquid. You turn the heat up, but it takes forever. In your haste, you toss in your aromatics. Because the pan is fluctuating wildly in temperature, your garlic always burns to a bitter crisp while the mushrooms remain pale and sad.
By the time the water finally cooks off, the mushrooms are saturated with the massive amount of oil you kept adding. They are heavy, greasy, and texturally identical to a pencil eraser. This is the oil-first fallacy, and it ends today.
The Counterintuitive Cure: The Science of the Water Hack
If starting with oil leads to disaster, what is the solution? A few years ago, the brilliant food scientists and culinary experts at America’s Test Kitchen, including Dan Souza, popularized a method that completely flips the traditional script. It is a technique that feels entirely wrong the first time you do it, but it is backed by flawless thermodynamics.
The secret is to boil them first.
Yes, you read that correctly. We are going to intentionally add water to the skillet. I know, I just spent three paragraphs explaining why water ruins the browning process, but stay with me. We are going to use water strategically to alter the physical structure of the mushroom before we attempt to sear it.
The Boiling Phase
When you place your raw, sliced mushrooms into a skillet and add a small amount of water (about a quarter cup for a pound of mushrooms), you create a highly controlled steam environment. As you bring that water to a rapid boil over high heat, the mushrooms cook quickly and evenly.
As they boil, two critical things happen. First, the heat forces the mushrooms to release their own internal moisture much faster than they would in a dry pan. Second, and most importantly, the heat causes those porous, oil-absorbing air pockets within the chitin structure to physically collapse.
The Structural Lockdown
This cellular collapse is the magic bullet. Once those air pockets shrink and collapse, the mushroom loses its sponge-like properties. It is structurally locked. It physically cannot absorb massive amounts of liquid or fat anymore. You have effectively sealed the exterior of the fungus.
The Evaporation Phase
As the mushrooms simmer, the added water—along with the water released by the mushrooms themselves—begins to evaporate. Because you are using high heat, this happens relatively quickly. You simply let the pan boil until every single drop of moisture has vanished into the atmosphere.
What are you left with? A pan full of fully cooked, deeply tender, structurally sound mushrooms sitting in a bone-dry skillet.
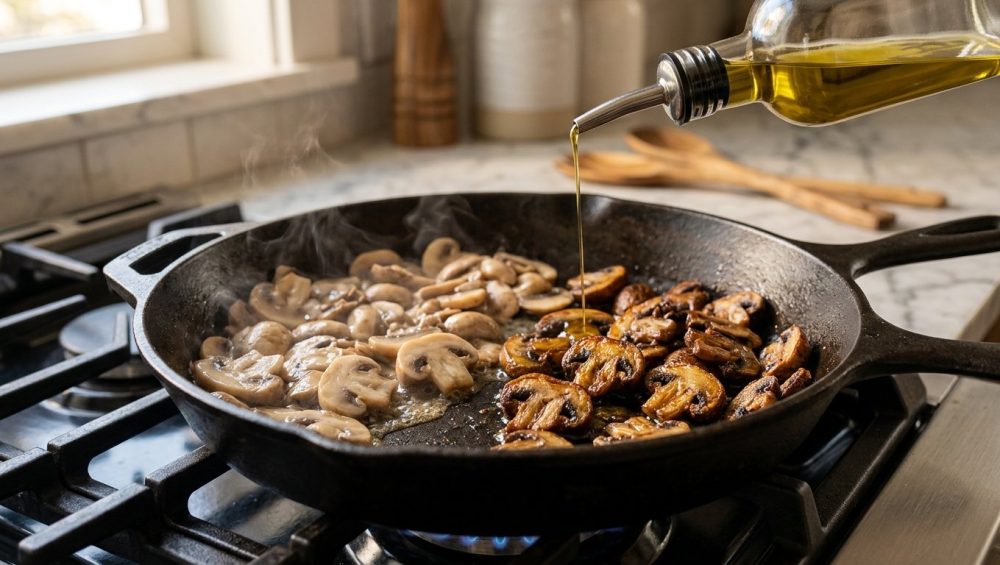
The Fat and the Sear
Now, and only now, do you add your cooking fat. You drizzle in a small amount of oil or drop in a knob of butter. Because the mushrooms have lost their ability to act like sponges, the fat does not get absorbed into their cores. Instead, it coats the outside of the mushrooms and the surface of the hot pan.
With the water entirely gone, the temperature of the pan immediately skyrockets past the 285°F (140°C) threshold required for the Maillard reaction. The fat fries the exterior of the collapsed mushrooms, creating a gorgeous, deeply golden, crispy crust in a matter of minutes. You get all the rich, savory browning of a perfect sauté, but the interior remains tender and juicy, completely free of grease.
The Sassy Sous-Chef’s Masterclass: Step-by-Step Perfection
Understanding the science is only half the battle. Executing it on a chaotic weeknight requires precision. Here is my rigorous, no-nonsense, step-by-step masterclass on executing the water-sear method flawlessly.
Step 1: The Great Washing Debate and Prep
Let us immediately address the most pretentious myth in the culinary world: the idea that you should never wash a mushroom. For decades, chefs have insisted that you must gently wipe each individual cap with a damp paper towel or a specialized boar-bristle brush to avoid waterlogging them.
I do not have time for that, and neither do you. Remember, mushrooms are already up to 90 percent water. A quick rinse under the tap is not going to ruin them, especially since our entire cooking method relies on adding water to the pan anyway.
There is one caveat: the gills. The exterior of a closed-cap mushroom (like a standard white button or cremini) contains hydrophobins, which are proteins that naturally repel water. You can submerge these briefly without issue. However, mushrooms with large, exposed gills (like oyster or portobello) act a bit differently and can trap surface water. For those, a quick, aggressive rinse or a wipe is fine, but do not leave them soaking in a bowl of water.
Slice your mushrooms uniformly. If you slice them haphazardly, they will cook unevenly. Once chopped, slide your trusty bench scraper under the pile, lift them off the cutting board, and drop them into your skillet.
Step 2: The Cold Water Start
Place your skillet on the stove. Do not turn the heat on yet. Add your sliced mushrooms. For every 8 to 16 ounces (about half a pound to a pound) of mushrooms, pour in exactly one-quarter cup of cold tap water. Do not add salt yet. Do not add oil. Just mushrooms and water.
Step 3: The High-Heat Boil
Turn your burner to high. You want aggressive, unapologetic heat. As the water comes to a boil, you will hear a loud, bubbling roar. Let it happen. Give the pan an occasional stir to ensure the mushrooms on top make their way down to the bubbling water.
Watch closely. You will see the mushrooms begin to shrink. They will darken slightly in color and take on a glossy, cooked appearance. The water in the pan will turn a murky, dark brown as the mushrooms release their own juices into the mix. This is exactly what you want. You are forcing the structural collapse of the chitin matrix.
Step 4: The Evaporation Watch
Do not walk away. This is not a slow braise; this is an active weeknight hack. Keep the heat on high and wait for the auditory cue. The loud, rolling boil of the water will suddenly begin to quiet down. The bubbles will get smaller and more viscous.
You must wait until the pan is completely, totally, unequivocally dry. If you drag your spatula across the bottom of the skillet, it should leave a dry trail. If there is even a tablespoon of water left, do not proceed to the next step.
Step 5: The Fat Application
Once the pan is bone dry, the heat will start to rise exponentially. Now is the time to strike. Add your fat. Because we are no longer fighting the sponge effect, you do not need much. One to two tablespoons of a high-heat oil (like avocado, grapeseed, or clarified butter) is more than enough for a whole pound of mushrooms.
Toss the mushrooms to coat them in the fat. Spread them out into a single, even layer across the surface of the pan. And then—and this is crucial—stop touching them.
Step 6: The Maillard Miracle
Let them sit undisturbed for at least one to two full minutes. The Maillard reaction takes time. The amino acids and natural sugars on the surface of the mushroom are currently undergoing a complex chemical transformation, creating hundreds of new flavor compounds and that beautiful golden-brown crust.
If you constantly stir them, you continuously break the thermal contact with the pan, and they will never brown. Let them sear. After a minute or two, give the pan a toss. You will be greeted by deeply caramelized, gorgeous fungi.
Once they are fully browned, you can easily deglaze the hot skillet with a splash of dry white wine or chicken stock, effortlessly turning burnt bits into sauce and ensuring you capture every last drop of flavor.
The “No-Go” Rule: Stop Ruining Good Food with Toxic Gear
We need to pause the cooking lesson for a moment because none of this science matters if you are executing it in garbage cookware. As your Sassy Sous-Chef, I have a strict, non-negotiable rule in my kitchen, and I am enforcing it in yours right now.
I will say this until I am blue in the face: throw away your toxic kitchen gear.
If you are trying to sear mushrooms in a lightweight, aluminum non-stick pan that you bought at a discount store five years ago, you are setting yourself up for failure and potentially poisoning your family. Traditional non-stick coatings (like Teflon/PTFE) are not designed for the high-heat applications required to properly sear food. When you crank your burner to high to evaporate the water and sear the mushrooms, you are pushing that cheap pan past its safe thermal limits. The coating begins to degrade, releasing toxic fumes and shedding forever chemicals directly into your dinner. Furthermore, cheap pans warp, creating hot and cold spots that guarantee your food will cook unevenly.
The Right Tools for the Job
You do not need a culinary degree, but you do need equipment that respects the physics of cooking. For a high-heat sear, you should be relying on high-quality carbon steel pans, a heavy-bottomed cast iron skillet, or a thick, multi-clad stainless steel pan.
These materials possess the thermal mass required to hold onto heat. When the water evaporates and you add your cold oil and begin the searing phase, a cheap pan will instantly drop in temperature, ruining the crust. A heavy carbon steel or cast iron pan will barely flinch. It will maintain that aggressive heat, driving the Maillard reaction forward.
And do not complain to me about food sticking. If you preheat a stainless skillet correctly and manage your temperature, you are naturally preventing protein adhesion without relying on mystery chemical coatings that peel off into your food. Invest in good gear. It will outlive you, and it will fundamentally change the way you cook.
Elevating Your Sauté: Flavor Pairings and Finishing Touches
Now that you have perfectly seared, tender, structurally flawless mushrooms, it is time to build a flavor profile. The beauty of the water-sear method is that it leaves you with a blank, deeply savory canvas. Because you have not waterlogged the pan with excess grease, you have total control over the final dish.
The Aromatic Addition
Do not add your aromatics at the beginning of the cooking process. Garlic, shallots, and fresh herbs will burn to a bitter ash long before the mushrooms finish evaporating their water and searing.
Instead, wait until the very end. Once the mushrooms are deeply browned and crispy, lower the heat to medium-low. Push the mushrooms to the perimeter of the pan, creating a clear space in the center. Drop in a small pat of butter, let it melt, and add your finely minced garlic, minced shallots, and a sprig of fresh thyme or rosemary. Sauté the aromatics in that center pool of butter for just 30 to 60 seconds until they are fragrant, then toss them together with the mushrooms.
The Umami Boosters
Mushrooms are naturally packed with glutamates, the amino acids responsible for the savory “umami” flavor. You can amplify this exponentially by adding complementary ingredients. A splash of high-quality soy sauce, a dash of Worcestershire, or even a tiny spoonful of white miso paste stirred in at the very end will make the mushrooms taste impossibly meaty and rich. If you are building a pan sauce from the fond left behind, using a homemade stock will give you incredible body, which completely eliminates the risk of those sad, watery pan sauces that plague so many weeknight dinners.
The Acid Finish
This is the step that separates the weekend hobbyist from the confident home cook. Mushrooms are heavy, earthy, and deeply savory. If you only season them with salt and fat, the dish will taste flat and heavy on the palate.
Before you pull them off the heat, remember that your dinner actually needs acid to balance out that heavy, earthy umami. A squeeze of fresh lemon juice, a splash of sherry vinegar, or a few drops of balsamic vinegar tossed in at the very last second will cut through the richness, brighten the entire flavor profile, and make the dish taste professionally balanced.
Troubleshooting Your Fungi Failures
Even with a foolproof scientific method, the chaos of a home kitchen can sometimes introduce user error. If your mushrooms are still not turning out like the glossy, golden-brown beauties you see in food magazines, check yourself against these common mistakes.
1. You Overcrowded the Pan
Yes, the water method helps mitigate the disastrous effects of overcrowding, but it is not a miracle worker. If you pile two pounds of mushrooms into a tiny ten-inch skillet, they will be stacked on top of each other. During the searing phase, the mushrooms on top will not have contact with the hot metal, and the mushrooms on the bottom will be trapped under a blanket of insulating fungi. Use a large, 12-inch skillet, or cook them in batches. They need physical space to sear.
2. You Sliced Them Too Thin
Remember that mushrooms are going to shrink significantly as they release their water and their air pockets collapse. If you slice them paper-thin when they are raw, they will practically disintegrate into nothingness by the time the water evaporates. Cut them into thick, meaty quarters, or slice them at least a quarter-inch thick so they have enough structural integrity left to provide a satisfying bite.
3. You Got Impatient During the Evaporation
I know you are hungry, but you cannot rush physics. If you add your oil before the water has completely evaporated from the pan, you are immediately reverting back to boiling your food. The pan must be aggressively, completely dry before the fat hits the metal. Listen to the sound of the pan; the bubbly, hollow sound of boiling must be replaced by silence before you proceed.
4. You Salted Too Early
Salt draws moisture out of ingredients through osmosis. While we do want the moisture drawn out of the mushrooms, salting them at the very beginning of the water boil can sometimes toughen the exterior slightly and interfere with the initial browning phase. Hold your kosher salt until the water has evaporated and you are adding your searing fat. This ensures the salt crystals adhere to the oil-coated exterior, providing a perfectly seasoned crust.
The Final Verdict
Cooking should not be a stressful chore, and it certainly should not be a guessing game where you hope for the best and settle for rubbery side dishes. By understanding the unique, heat-stable chitin structure of fungi, and by leveraging the simple thermodynamics of boiling water to collapse their spongy air pockets, you take total control of the skillet.
You no longer have to fear the squeaky, oil-logged eraser. You do not need to drown your vegetables in half a bottle of olive oil, and you do not need to stand over the stove frantically stirring a gray, boiling mess. Start with water. Let it evaporate. Sear with confidence.
You now possess the scientific knowledge to master one of the most notoriously frustrating ingredients in the modern kitchen. Go forth, banish the bad pans, embrace the high heat, and show those mushrooms exactly who is in charge.


