
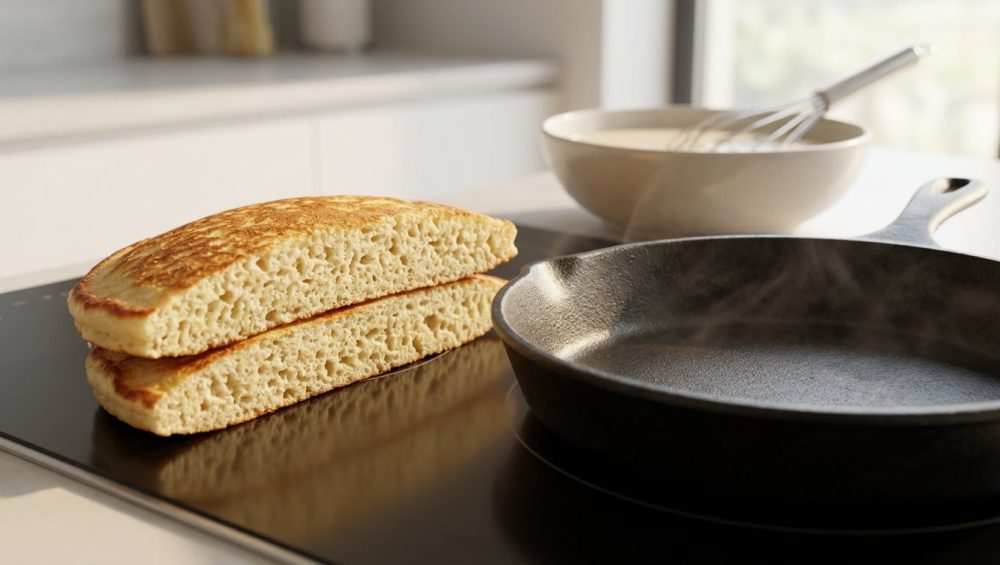
The Deceptive Golden Crust (And the Gooey Betrayal Beneath)
We have all been there. It is a slow Sunday morning, you have poured yourself a generous cup of coffee, and you decide to treat yourself to a towering stack of homemade pancakes. You mix the batter, you heat the pan, and you pour. After a few minutes, you execute a flawless, chef-worthy flip, revealing a stunningly beautiful, golden-brown surface. You plate it up, drizzle it with entirely too much expensive maple syrup, and take a bite.
And then, tragedy strikes.
Instead of a light, fluffy, cloud-like crumb, your teeth sink into a dense, wet, lukewarm paste. It is a betrayal of the highest order. Your pancakes burn on the outside while remaining entirely raw and gooey in the center. You are left chewing on a mouthful of wet flour, wondering where it all went wrong.
As a culinary blogger who has set off the smoke detector more times than I care to admit, I can tell you right now: you are not a bad cook. You simply do not understand the physics of your frying pan. Making pancakes is not just a whimsical morning activity; it is a highly volatile, fast-paced exercise in thermodynamics, heat transfer, and molecular biology.
Anyone can cook like an absolute expert and make mind-blowing food without a pretentious culinary degree, provided they understand the basic rules of engagement. Today, we are going to strip away the fluff, banish the confusing chef-speak, and dive deep into the definitive, highly-researched science of why your pancakes are raw in the middle—and exactly how to fix it.
The Science of a Pancake: A Tiny, Edible Thermodynamics Lab
To stop ruining your breakfast, you have to stop looking at a pancake as just a mixture of flour, eggs, and milk. The moment that liquid batter hits a hot skillet, it becomes a tiny, edible thermodynamics lab. You are simultaneously managing three distinct chemical and physical reactions, all of which require entirely different temperature thresholds to succeed.
The Maillard Reaction vs. Heat Penetration
The beautiful, golden-brown crust on a perfect pancake is the result of two distinct chemical processes: sugar caramelization and the Maillard reaction.
Caramelization is the pyrolysis (thermal decomposition) of the sugars in your batter—usually the granulated sugar you added, plus the lactose from the milk. Depending on the exact sugar, this process generally begins around 320°F (160°C).
The Maillard reaction, on the other hand, is a complex chemical dance between amino acids (from the proteins in your flour, milk, and eggs) and reducing sugars. This reaction is responsible for the deep, complex, savory-sweet flavor compounds that make a pancake taste like a pancake and not just a hot piece of bread. The Maillard reaction begins slowly at lower temperatures but accelerates rapidly once the surface temperature of the food exceeds 285°F (140°C), and it goes into absolute overdrive at 300°F and above.
Here is the problem: these browning reactions happen strictly on the surface of the batter where it makes direct contact with the hot metal of your skillet. While the surface is rapidly reaching 300°F and browning, the gooey center of your pancake is still sitting at a chilly room temperature. Heat must travel from the hot metal, through the cooked crust, and into the wet batter via conduction. If your pan is too hot, the surface will speed past the Maillard stage and straight into bitter, charred carbon before the heat has had enough time to physically penetrate the center of the batter.
Starch Gelatinization and Protein Coagulation Explained (Simply)
So, what exactly needs to happen in the center of the pancake for it to be considered “cooked”? Two vital structural transformations must occur: starch gelatinization and protein coagulation.
First, let us talk about the flour. Wheat flour is composed of roughly 70% starch. In its raw form, starch tastes like chalk and feels like paste. But when starch granules are exposed to water (from your milk and eggs) and heat, they begin to absorb moisture, swell up, and eventually burst, forming a stable, viscous gel. This process is called starch gelatinization. For standard wheat flour, this gelatinization process kicks off around 130°F (55°C) and is fully complete by the time the internal temperature reaches 190°F (85°C).
Simultaneously, the proteins from your eggs are undergoing coagulation. Raw egg proteins are folded up like tiny balls of yarn. As heat penetrates the batter, these proteins denature (unfold) and then coagulate (link together), forming a firm, structural web that gives the pancake its fluffy, cake-like texture. The primary protein in egg whites, ovalbumin, begins to set at 144°F (62°C) and becomes a tender solid by 150°F (65°C). The egg yolk proteins follow closely behind, fully setting around 158°F (70°C).
Therefore, to achieve a perfectly cooked pancake, the absolute dead-center core of your batter must reach approximately 160°F to 165°F (71°C to 74°C) to ensure the starches have gelatinized and the egg proteins have set.
If your pan is blazing hot, the outside hits 350°F in thirty seconds, but the inside is only at 110°F. The crust burns, you panic, you pull the pancake off the heat, and you are left with raw, ungelatinized starch and uncoagulated egg proteins. Science is ruthless, my friends.
Why Your Pancakes Are Failing: The Usual Suspects
Now that we understand the thermal physics at play, let us look at the common, everyday rookie mistakes that are sabotaging your weekend brunch.
The “Impatient Cook” Syndrome (Heat Too High)
I see this constantly. You are hungry, you are uncaffeinated, and you want food now. So, you place your skillet on the stove, crank the burner dial all the way up to “High,” and wait for the pan to start smoking.
This is the single fastest way to guarantee a raw-centered pancake. Pancake batter is actually a remarkably poor conductor of heat. Why? Because a good pancake batter is filled with thousands of tiny carbon dioxide bubbles created by your baking powder and baking soda. Air is a fantastic thermal insulator. Those little bubbles that make your pancake light and fluffy also actively slow down the transfer of heat from the crust to the core.
Because of this built-in insulation, pancakes require a moderate, steady, sustained heat source. You need to give the thermal energy enough time to slowly migrate through the insulating air pockets to reach the center before the surface sugars burn. Cranking the heat to high is a fundamental misunderstanding of how heat transfer works in aerated batters.
The Batter Density Dilemma (Overmixing and Leavening)
Sometimes, the pan temperature is perfectly fine, but the pancake still turns out gooey and raw. If this happens, your batter density is likely the culprit.
When you mix flour with water, two proteins in the wheat (glutenin and gliadin) combine to form gluten. Gluten is an incredibly strong, elastic network. In bread baking, we love gluten. We knead dough for ten minutes specifically to develop it. But in pancakes, gluten is your absolute worst enemy.
If you aggressively stir out the lumps in your batter with a whisk until it is perfectly smooth, you are developing massive amounts of gluten. This creates a dense, rubbery, heavy batter. A dense batter traps moisture and resists expansion. When a batter cannot expand, it forms a thick, solid puck in the pan. The thicker and denser the puck, the harder it is for heat to penetrate the center.
Furthermore, if you are blindly scooping flour straight out of the bag with a measuring cup, you are packing the flour down and adding up to 30% more flour than the recipe intended. You must stop scooping your flour by volume. Investing in a cheap digital kitchen scale will instantly cure your dense batter issues by ensuring your hydration ratios are mathematically perfect every single time.
The Cold Pan Catastrophe
On the opposite end of the spectrum from the Impatient Cook is the Cold Pan Catastrophe. If you pour your batter into a skillet that has not been properly preheated, the batter will sit there, slowly warming up.
Without an immediate blast of adequate heat (around 350°F), the baking powder in your batter will activate and release its carbon dioxide gas, but the egg proteins will not coagulate fast enough to trap those bubbles. The gas will simply escape into the air, the pancake will fall flat, and you will be left with a dense, gummy crepe that takes forever to cook through. Furthermore, without a hot surface to immediately initiate the Maillard reaction, the proteins in the batter will chemically bond with the metal of the pan, causing the pancake to stick violently.
Ditch the Toxic Skillets: Choosing the Right Cookware
We need to have a very serious conversation about your kitchen gear. I have a strict, uncompromising rule in my kitchen, and I expect you to adopt it: we do not cook on cheap, scratched, toxic mystery metals.
The “No-Go” Rule on Mystery Metals and Peeling Teflon
If you are currently cooking your pancakes on a ten-dollar aluminum non-stick pan that you bought at a discount store five years ago, and the Teflon coating is flaking off into your food, throw it in the trash immediately. I have zero patience for toxic gear. Not only are you ingesting forever chemicals, but cheap, thin aluminum pans are completely incapable of holding steady heat.
Thin pans suffer from wild temperature swings. The moment you pour a cup of cold, wet batter onto a thin aluminum skillet, the temperature of the metal plummets. Your pan drops from 350°F down to 250°F in an instant. Suddenly, your pancake is steaming instead of searing. The pan then has to struggle to heat back up, leading to uneven cooking, pale crusts, and gooey centers. I strongly advocate banishing toxic kitchen gear from your home and upgrading to cookware that actually respects the laws of thermodynamics.
Cast Iron and Heavy-Gauge Carbon Steel: The Heavyweights of Heat Retention
For flawless, evenly cooked pancakes, you need cookware with high thermal mass. Thermal mass refers to a material’s ability to absorb, store, and release heat energy at a steady rate.
Cast iron and heavy-gauge carbon steel are the undisputed champions of the breakfast griddle. While they are relatively poor conductors of heat (meaning they take a long time to heat up evenly), they have immense thermal mass. Once a thick cast iron skillet or a carbon steel griddle reaches 350°F, it holds onto that heat with an iron grip.
When you pour cold batter onto a preheated cast iron skillet, the temperature of the pan barely drops. The pan has so much stored energy that it immediately begins driving heat into the batter, kickstarting the Maillard reaction and pushing thermal energy into the core of the pancake without missing a beat. This steady, relentless heat transfer is the absolute secret to a pancake that is beautifully browned on the outside and perfectly gelatinized and fluffy on the inside.
The Definitive Guide to Thermal Management (350°F to 375°F)
So, we know we need a heavy pan, and we know we need a moderate temperature. But what exactly is that temperature, and how do we maintain it?
Extensive culinary testing and thermodynamic analysis dictate that the absolute ideal surface temperature for cooking standard pancakes is between 350°F and 375°F (175°C to 190°C).
At 350°F, the heat is high enough to rapidly trigger the Maillard reaction and caramelize the sugars, creating a non-stick crust. However, it is low enough that it will take about two to three minutes for that crust to risk burning. Those two to three minutes provide the exact window of time required for the heat to conduct through the aerated batter and raise the internal core temperature to the magic 160°F mark.
Preheating: The Slow and Steady Rule
Because we are using heavy cast iron or carbon steel, you cannot just turn the burner to medium and start cooking a minute later. Cast iron heats unevenly. If you rush it, you will have a pan with a 400°F hot spot in the center and 200°F dead zones on the edges.
You must preheat your skillet low and slow. Place your heavy pan on the burner and turn the heat to medium-low. Let it sit there for at least 8 to 10 minutes. This allows the thermal energy to slowly conduct outward from the burner, saturating the entire mass of the metal until the pan is a uniform, edge-to-edge heat source.
The Infrared Thermometer: Your New Best Friend
If you are serious about upgrading your weekend cooking game, you need to buy an infrared surface thermometer. They are incredibly cheap and take all the guesswork out of pan-heating. Simply point the laser at your preheated skillet. If it reads 320°F, give it a few more minutes. If it reads 420°F, turn the burner down and wait for the pan to cool. You are looking for that perfect 350°F to 375°F window. Once you hit it, you are ready to cook.
The Water Drop Test (When You Don’t Have a Thermometer)
If you do not have an infrared thermometer, you can rely on the Leidenfrost effect to gauge your pan’s temperature. The Leidenfrost effect occurs when a liquid comes into contact with a mass significantly hotter than its boiling point, creating an insulating layer of vapor that keeps the liquid from boiling rapidly.
Flick a few drops of water onto your preheated skillet. If the water just sits there and slowly bubbles away, the pan is too cold (under 212°F). If the water aggressively violently explodes into steam and vanishes instantly, the pan is getting very hot, but might not be at the pancake sweet spot yet.
What you are looking for is the water drop test sweet spot: when the water droplets instantly form into tight little spheres that skitter, dance, and glide rapidly across the surface of the pan like tiny mercury beads. This dancing effect generally begins just above 320°F and is very prominent around 350°F to 375°F. When your water drops dance, your pan is perfectly primed for pancakes.
The Perfect Batter: Formulation for Even Cooking
Thermal management is only half the battle. If your batter is formulated incorrectly, even the most perfectly heated cast iron skillet will not save you.
The Magic of Resting Your Batter
Remember earlier when we discussed how starch gelatinization requires water? When you first mix your wet and dry ingredients, the flour starches have not yet had time to fully absorb the liquid. If you cook the batter immediately, the starches will struggle to gelatinize properly in the pan, leading to a gritty or raw texture in the center.
This is exactly why your batter needs to rest for at least 15 to 30 minutes at room temperature before you cook it. During this resting period, the flour undergoes hydration. The starches soak up the milk and eggs, swelling and softening. This allows for a much faster and more even gelatinization process once the batter hits the heat. Furthermore, resting allows the dreaded gluten network you accidentally created during mixing to relax. A relaxed gluten network means a tender, cakey pancake instead of a chewy, dense one.
Baking Powder, Baking Soda, and the Acid Reaction
To ensure heat can penetrate the batter evenly, the pancake must rise. A dense puddle of batter will stay raw in the middle. We achieve this rise through chemical leaveners: baking powder and baking soda.
Baking soda requires an acidic ingredient (like buttermilk, yogurt, or a squeeze of lemon juice) to activate. When the alkaline baking soda meets the acid, it immediately produces carbon dioxide gas. Baking powder, on the other hand, contains both an acid and a base, and it is usually “double-acting.” This means it releases a little bit of gas when it gets wet, and a massive burst of gas when it gets hot.
When you pour your well-rested batter onto a 350°F skillet, the heat triggers the second action of the baking powder. The batter rapidly expands, filling with steam and carbon dioxide. This upward expansion stretches the egg proteins just as they reach 144°F and begin to coagulate. The proteins set around the gas bubbles, locking the fluffy structure in place. If your leaveners are expired, this expansion never happens, the proteins set in a dense, flat matrix, and the core remains a gummy nightmare. Always check the expiration date on your baking powder.
Step-by-Step: Cooking the Flawless Pancake
You have your heavy pan holding steady at 350°F. Your batter is perfectly scaled, gently mixed, and fully rested. Now, it is time for the execution.
The Pour and the Spread
Wipe a very thin layer of neutral oil or clarified butter (ghee) onto your skillet. Do not use standard whole butter for the initial greasing; the milk solids in whole butter will burn and turn black at 350°F before your pancake even finishes cooking.
Use a quarter-cup measure to pour the batter. Do not make massive, plate-sized pancakes. The larger the surface area of the pancake, the harder it is for the heat to evenly distribute, and the more likely the center will remain undercooked while the edges burn. Keep them to a modest four to five inches in diameter.
The Bubble Indicator (When to Actually Flip)
Once the batter is in the pan, do not touch it. Do not shake the pan. Just watch.
As the heat conducts upward from the pan, the baking powder activates, and bubbles will begin to rise to the surface of the wet batter. Many amateur cooks flip the pancake the second they see a bubble. This is a fatal mistake.
When the first bubbles appear, the internal temperature of the pancake is still far too low. The starches have not gelatinized. You must wait until the bubbles rise to the surface, pop, and stay open. If a bubble pops and wet batter immediately rushes in to fill the hole, the batter is still entirely liquid. When the bubbles pop and form little craters that hold their shape, it means the egg proteins in the batter have reached 144°F to 150°F and have coagulated enough to provide structural integrity.
Simultaneously, look at the edges of the pancake. They should look dull, set, and slightly dry, not shiny and wet. When the edges are set and the surface is covered in open craters, the bottom is perfectly browned, and the core is warm enough to survive the flip.
The Flip and the Finish
When it is time to flip, you need the right tool. A thick, blunt plastic spatula will just bulldoze the delicate edges of your pancake. You need to invest in a thin, flexible fish spatula. The thin metal edge easily glides under the delicate crust without tearing it.
Slide the spatula confidently under the center of the pancake and flip it quickly and gently.
Now, listen to me very carefully: Do not press down on the pancake with your spatula.
I do not know who taught the general public to smash their pancakes, burgers, and grilled cheeses with a spatula, but it has to stop. When you press down on a cooking pancake, you are literally crushing the delicate air pockets that you just spent 30 minutes trying to create with your resting and chemical leavening. You are forcing the gelatinizing starches into a dense, compressed layer, guaranteeing a gummy, raw-tasting texture.
The second side will only need about half the time of the first side—usually just 60 to 90 seconds. Because the core of the pancake is already significantly warmed from the first side’s cooking time, the second side just needs to quickly brown the surface and push the final bit of thermal energy into the center to reach that crucial 160°F finish line.
Troubleshooting Other Common Pancake Disasters
If you have followed the thermal management rules perfectly and you are still running into texture issues, let us look at a few edge-case variables.
The Sugar Content: If your recipe calls for an excessive amount of sugar (more than two tablespoons per cup of flour), you have fundamentally altered the caramelization threshold. High-sugar batters will burn on the outside much faster than standard batters. If you insist on making super-sweet dessert pancakes, you must drop your pan temperature down to 325°F and accept a slightly longer cooking time to prevent the sugars from scorching before the core cooks.
Cold Eggs and Milk: If you pull your eggs and milk straight from the back of a 34°F refrigerator and immediately mix them into your batter, you are starting at a massive thermal disadvantage. Cold batter takes significantly longer to reach the 160°F core temperature. While the center is struggling to warm up, the outside crust is sitting on a 350°F pan, ticking closer and closer to burning. Letting your eggs and milk sit on the counter for 20 minutes to take the chill off will drastically improve your cooking times and prevent raw centers.
Utensils Matter: I mentioned the fish spatula, but the rest of your gear matters too. If you notice your food tasting off, check your tools. If you are using cheap silicone spatulas that have absorbed the flavors of last week’s curry, your pancakes will taste like cumin. Upgrade to high-quality, odor-free silicone or classic wooden spoons for mixing.
The Rubbery Texture: Finally, if your pancakes are fully cooked in the center but feel tough to chew, you either overmixed the batter, or you skipped the resting phase entirely. If you find that your pancakes are rubbery, review your gluten management. Mix only until the dry streaks of flour disappear. Lumps are fine. Lumps are your friends. They will hydrate and cook out in the pan.
Conclusion: Your Weekend Breakfast, Mastered
Cooking is not magic. It is simply applied physics and chemistry, disguised as art. The reason your pancakes have been raw in the middle is not because you lack talent; it is because you were fighting a losing battle against thermal dynamics, wildly fluctuating pan temperatures, and ungelatinized starches.
By taking a step back, respecting the science, and utilizing proper thermal management, you can completely eliminate the heartbreak of a gooey pancake. Ditch the toxic, paper-thin non-stick pans. Embrace the heavy, heat-retaining power of cast iron or carbon steel. Give your heavy skillet the time it needs to preheat to a steady, relentless 350°F. Let your batter rest so the starches can hydrate, and wait for those bubbles to form open craters before you even think about reaching for your spatula.
You do not need a culinary degree to make a perfect breakfast. You just need patience, a decent thermometer, and the willingness to let the thermodynamics do the heavy lifting for you. Now go fire up that skillet, treat your batter with some respect, and reclaim your Sunday morning. You’ve got this.






