
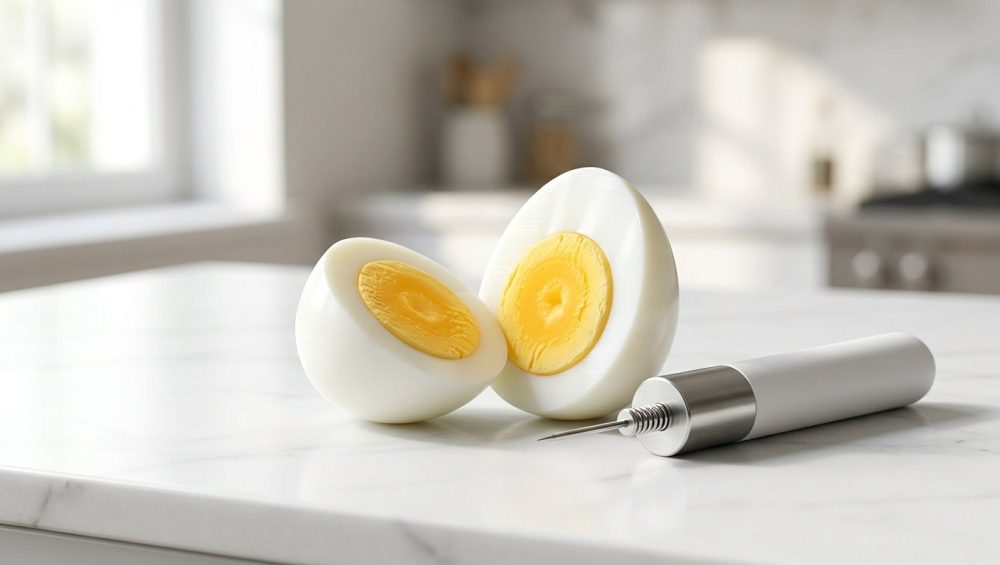
Listen up, weekend culinary warriors and deviled-egg enthusiasts. We need to have a serious talk about one of the most universally infuriating kitchen tasks known to humanity. You know exactly what I am talking about. You spend your precious Sunday afternoon meal-prepping, looking forward to a week of healthy, protein-packed snacks. You boil your eggs, you cool them down, and then you stand over the sink, gently tapping the shell, only to watch in sheer horror as half of the egg white violently rips away with the shell. There is nothing quite as infuriating as when your hard-boiled eggs refuse to peel, leaving you with a bowl of mangled, pockmarked, frankly embarrassing whites that look like they were chewed on by a small rodent.
You aren’t alone. This is a universal kitchen nightmare. But here is the brutal, honest truth: your mangled eggs are not the result of a lack of culinary skill. You don’t need a degree from Le Cordon Bleu to make a smooth egg. Your failure is simply a lack of applied physics. Today, we are stripping away the pretentious chef-speak, throwing out the old wives’ tales, and diving deep into the absolute masterclass of egg thermodynamics. We are going to explore the magic of a tiny, inexpensive piece of hardware called an egg piercer, and I am going to teach you exactly how to conquer this chore so you never have to throw a ruined egg into the compost bin again.
The Anatomy of an Egg: What You’re Actually Boiling
To defeat your enemy, you must first understand your enemy. An egg is not just a blob of protein wrapped in a calcium shell; it is a highly complex, brilliantly engineered biological vessel. If you don’t understand what is happening inside that shell when it hits the heat, you are cooking blind. It’s the same sinking feeling you get when your scrambled eggs leak water all over your plate—if you don’t know the science of the proteins, you can’t fix the problem.
The Albumen and the Inner Keratin Membrane
Let’s start with the layers. On the outside, you have the rigid shell, which is made almost entirely of calcium carbonate. It feels solid, but it is actually semi-permeable, covered in anywhere from 7,000 to 17,000 microscopic pores.
Directly beneath that hard shell lie two crucial layers: the outer shell membrane and the inner shell membrane. These membranes are made of keratin—the exact same tough, structural protein that makes up your hair and fingernails. Their biological job is to defend the egg against bacterial invasion.
Inside those membranes is the albumen, which we commonly call the egg white. The albumen is a water-rich matrix packed with proteins like ovalbumin, conalbumin, and lysozyme. When an egg is freshly laid, the albumen is highly acidic, boasting a pH level of around 7.6. Here is the critical piece of information that dictates your peeling success: at a lower, more acidic pH, the keratin membrane acts like industrial-strength superglue, bonding aggressively to the proteins in the albumen.
As an egg ages in your refrigerator, carbon dioxide slowly escapes through the microscopic pores in the shell, and oxygen seeps in. This gas exchange causes the pH of the albumen to rise, eventually reaching a more alkaline 9.2. At this higher pH, the chemical bond between the inner keratin membrane and the egg white weakens significantly. This is the scientific reason why older eggs are generally easier to peel. But let’s be real—we are busy people. We do not have the time or the refrigerator space to age our eggs for three weeks just to make a decent potato salad. We need a method that works on fresh eggs, right now.
The Air Cell: The Hidden Enemy at the Base
Now, let’s look at the wide base of the egg. If you inspect a raw egg, you will notice one end is pointy and the other end is broader and flatter. Trapped between the inner and outer keratin membranes at that wide base is a small pocket of gas known as the air cell.
Biologically, this air cell exists so that a developing chick has a tiny reservoir of oxygen to take its first breath before it pecks its way out of the shell. As the egg ages and loses moisture through its pores, this air cell physically grows larger. When you drop an egg into boiling water, this seemingly innocent little pocket of air becomes a thermodynamic time bomb.
Thermodynamics of the Boil: Why Your Eggs Explode or Stick
Cooking is just applied physics and chemistry. When you apply rapid thermal energy (boiling water) to an enclosed biological system (an egg), you trigger a chaotic chain reaction of expanding gases and denaturing proteins. Unlike a piece of meat that sticks to stainless steel if the pan isn’t hot enough, an egg sticks to its shell entirely because of internal pressure and temperature gradients.
Rapid Heat, Expanding Gas, and Pressure Cookers
Let’s dust off our high school chemistry and talk about the Ideal Gas Law (PV=nRT). When a gas is heated, it wants to expand. When you take a cold egg straight from your 38°F (3°C) refrigerator and plunge it into 212°F (100°C) boiling water, the temperature of the air inside that basal air cell skyrockets in a matter of seconds.
Because the air is trapped inside the rigid calcium carbonate shell, it has nowhere to go. The expanding gas creates immense internal pressure. If the pressure builds up too violently, the shell simply cannot withstand the structural stress, and it shatters. This is why you often see a white geyser of raw egg erupting into your boiling water, leaving you with a grotesque, watery, rubbery mess.
The Protein Fusion Disaster
But what happens if the shell is thick enough to withstand the pressure and doesn’t crack? The expanding air still needs to push against something. So, it pushes inward. It forces the inner keratin membrane aggressively against the outermost layer of the albumen.
Simultaneously, the intense heat of the water is conducting through the shell, causing the proteins in the albumen to denature (unravel) and coagulate (clump together and solidify). If the expanding air is violently pressing the membrane into the albumen at the exact microscopic moment that those proteins are solidifying, the membrane and the egg white literally fuse together into a single, inseparable matrix.
This protein fusion is exactly what makes them impossible to peel without tearing chunks of the white away. You aren’t just fighting a sticky shell; you are trying to separate two biological layers that have been thermally welded together under pressure.
Debunking the Myths: Why Baking Soda and Vinegar Are Wasting Your Time
Because this is a universal problem, the internet is absolutely overflowing with garbage “hacks” and old wives’ tales promising to deliver perfectly peeling eggs. As a home cook who prioritizes efficiency, I have zero patience for culinary myths that waste my time and ruin my food. Let’s systematically destroy the most common nonsense you’ll read on food blogs.
The Baking Soda Delusion
The most pervasive myth is that adding a teaspoon of baking soda (sodium bicarbonate) to your boiling water will magically make the eggs peel easily. The pseudo-scientific theory behind this is that the alkaline baking soda will permeate the eggshell, raise the internal pH of the albumen, and loosen the membrane’s grip.
Here is the brutal reality: it is complete fiction. Yes, eggshells are porous, but water and dissolved minerals do not rapidly flow into an egg while it is boiling. Remember the thermodynamics we just discussed? The internal pressure of the egg is pushing outward. Furthermore, a standard 9-to-12-minute boil is nowhere near enough time for a baking soda solution to penetrate the shell and fundamentally alter the chemical pH of the egg white.
What actually happens? The baking soda does absolutely nothing to help you peel the egg. Instead, if any of it does manage to seep through a micro-crack, it leaves your egg tasting highly alkaline and metallic. Just like using cheap silicone that makes your spatulas taste like soap, adding baking soda leaves an unpleasant, soapy residue on your beautiful breakfast. Skip it.
The Vinegar Fallacy
Myth number two: adding a heavy splash of white vinegar to the boiling water will dissolve the shell and make it slide right off.
The science here is half-baked. Yes, acetic acid (vinegar) reacts with calcium carbonate (the shell) to create calcium acetate, water, and carbon dioxide gas. If you soak a raw egg in a jar of pure vinegar for 48 hours, the shell will indeed dissolve completely, leaving you with a bouncy, naked egg.
However, adding a tablespoon of vinegar to a massive pot of boiling water dilutes the acid so severely that it has almost zero structural impact on the shell during a brief 10-minute boil. The acid might slightly weaken the outermost layer of calcium, but it does absolutely nothing to prevent the inner keratin membrane from fusing to the egg white.
The only actual benefit of vinegar is that if your egg does crack during the boil, the acidic water will help coagulate the leaking egg white faster, sealing the crack before the whole egg empties into the pot. But as a peeling aid? It’s a waste of good vinegar. This is why starting them in cold water is a massive mistake that no amount of vinegar can fix.
The “Old Eggs” Myth
We already discussed that older eggs have a higher pH and a looser membrane. Many pretentious chefs will tell you to simply plan ahead and buy your eggs two weeks before you intend to boil them.
Let me be clear: I am a busy professional. You are a busy professional. We do not have the luxury of curating a vintage egg collection in the back of our refrigerators. When I want an egg salad sandwich on a Tuesday night, I am using the eggs I bought on Sunday. We need a hardware solution that forces fresh eggs to behave, and relying on the “old egg” trick is a cop-out for people who don’t understand the physics of pressure.
The Magic of the Egg Piercer: Your New Secret Weapon
If chemical additives don’t work, and aging eggs takes too long, what is the definitive, foolproof solution? It is a mechanical one. Enter the unsung hero of the modern kitchen: the egg piercer.
What Exactly is an Egg Piercer?
An egg piercer is a remarkably simple, inexpensive kitchen gadget that will permanently change your life. It usually consists of a small plastic or stainless steel base with a spring-loaded platform. Hidden beneath the platform is a tiny, razor-sharp stainless steel needle, usually about 1 to 1.5 millimeters in diameter.
When you press the wide end of an egg down onto the platform, the needle extends just far enough to puncture a microscopic hole through the hard calcium carbonate shell, but—and this is the genius part—it does not penetrate deep enough to pierce the inner membrane holding the raw egg white. You can buy one for less than the cost of a fancy latte, and it takes up roughly the same amount of space in your drawer as a shot glass.
The Physics of the Prick: Venting the Air Cell
Why does poking a tiny hole in the shell solve all of our problems? It is pure, elegant thermodynamics.
When you pierce the wide base of the egg, you are creating an exhaust vent directly into the air cell. When you subsequently plunge that pierced egg into boiling water, the trapped air inside the cell still heats up and expands rapidly. But this time, it doesn’t build up internal pressure. It doesn’t shatter the shell, and most importantly, it doesn’t force the keratin membrane inward against the coagulating egg white.
Instead, the expanding air safely escapes through the tiny puncture hole. If you watch closely when you drop a pierced egg into hot water, you will see a delicate, steady stream of tiny bubbles escaping from the base. You are actively venting the pressure.
Because the pressure is equalized, the inner membrane stays exactly where it belongs—relaxed and attached to the shell, not fused to the albumen. Furthermore, because the air cell has been evacuated, the egg white flows into that empty space as it cooks, resulting in a perfectly round, symmetrical hard-boiled egg without that ugly, flat, indented bottom. It’s just as appetizing as when your scrambled eggs are rubbery from being cooked to death—a flat-bottomed egg is a culinary failure we can easily avoid.
The Sassy Sous-Chef’s Foolproof, Science-Backed Hard-Boiled Egg Method
Now that you are armed with the thermodynamic knowledge of why eggs fail and the hardware to fix it, it is time to execute. This is my definitive, no-nonsense, rigorously tested method for boiling and peeling eggs perfectly every single time, regardless of how fresh they are.
Step 1: The Right Gear (And a Warning on Toxic Pots)
First things first, grab a proper pot. I am a massive advocate for banishing toxic kitchen gear, so please, do not boil your water in a scratched, peeling non-stick pot where mystery chemical flakes are floating around. You deserve better. Use a high-quality, heavy-bottomed stainless steel saucepan or an enameled cast iron Dutch oven.
Fill the pot with enough water to submerge the eggs by at least one inch. Do not add baking soda. Do not add vinegar. Do not add salt. Just clean, pure water. Place it on the stove and bring it to a rolling, aggressive boil.
Chef’s Shortcut: If you want to be even more efficient, use a steamer basket. Steaming eggs is actually vastly superior to boiling them. Steam carries more thermal energy than liquid water, it cooks the eggs more gently (because they aren’t violently bouncing against each other and cracking), and it requires boiling only an inch of water, which saves you 10 minutes of waiting for a large pot to boil.
Step 2: The Pierce and the Plunge
While your water is coming to a boil, take your eggs straight from the cold fridge. Do not let them sit on the counter to come to room temperature; we want them cold to maximize the thermal shock.
Take your egg piercer, unlock the safety dial, and gently press the wide, flatter base of each egg onto the needle until you hear a satisfying little click or crunch. You have now vented the air cell.
Once your water is boiling, lower the heat just slightly so it is at a vigorous simmer, not a violent, chaotic boil that will smash the eggs against the walls of the pot. Use a slotted spoon or a spider skimmer to gently lower them in—you want to stop breaking your eggs before the cooking even begins.
Lowering cold eggs into hot water is the second critical secret to peeling success. When the cold egg hits the hot environment, the outermost layer of the albumen denatures almost instantly. This rapid thermal shock causes the egg white to quickly shrink and pull away from the inner keratin membrane before it has a chance to fuse. If you start your eggs in cold water and slowly bring them to a boil, the proteins heat up gradually, slowly intertwining with the membrane and gluing themselves to the shell. Hot starts only.
Set your timer. Time is highly dependent on your preference:
- 6 Minutes: A liquid, jammy yolk with soft whites. Perfect for ramen.
- 7 Minutes: A sticky, custard-like yolk. Ideal for salads.
- 8 Minutes: A firm but creamy yolk.
- 9 to 10 Minutes: A fully hard-boiled egg with a pale yellow yolk. The absolute standard for deviled eggs. Do not exceed 11 minutes, or you will trigger the sulfur reaction and get that disgusting, chalky green ring around the yolk.
Step 3: The Ice Bath Shock
While the eggs are cooking, prepare a large bowl filled with cold water and a massive handful of ice cubes. Do not skimp on the ice.
The second your timer goes off, you must act with urgency. Use your slotted spoon to immediately transfer the eggs from the boiling water directly into the ice bath.
This step serves two critical functions. First, it instantly halts the cooking process, ensuring your yolks stay perfectly creamy and don’t turn into dry, sulfurous chalk. Second, the rapid drop in temperature causes the egg white to thermally contract. As the protein matrix cools and shrinks, it pulls even further away from the shell and the membrane, creating a microscopic gap that will make peeling an absolute breeze.
Leave the eggs in the ice bath for a minimum of 15 minutes. Do not rush this. If the eggs are still warm in the center, the whites will be fragile and prone to tearing. You want them stone cold.
Peeling Like a Pro: The Final Flourish
You have vented the pressure. You have thermally shocked the proteins. You have contracted the egg whites. Now, it is time for the payoff.
Take a cold egg from the ice bath and gently tap it all over on your kitchen counter. Don’t just crack it once; you want the entire shell to look like a mosaic of tiny, shattered spiderwebs. Roll it gently under the palm of your hand with light pressure to loosen the structural integrity of the shell.
Now, peel the egg while it is completely submerged in the ice water, or hold it under a gentle stream of cold running water in your sink. Start at the wide base where you pierced the hole.
Because you followed the science, the water will easily seep through the shattered shell, slipping right between the keratin membrane and the contracted egg white. The water acts as a hydraulic lubricant. You will feel the membrane give way, and the shell will effortlessly slide off in two or three massive, satisfying pieces, leaving behind a pristine, glossy, flawlessly smooth egg white.
If you’ve ever watched your poached eggs fall apart into a stringy, wispy mess, you know how delicate egg whites can be. But with this method, your hard-boiled whites will be resilient, smooth, and perfectly intact.
Reclaiming Your Time and Your Sanity
Cooking should be a joy, not a stressful battle against your own ingredients. You don’t need to accept pockmarked, ugly eggs as a fact of life, and you certainly don’t need to waste your time pouring useless baking soda into your pots.
By understanding the basic anatomy of the egg and respecting the laws of thermodynamics, you can completely eliminate one of the most annoying prep tasks in the kitchen. For the cost of a $6 egg piercer and a bowl of ice water, you can guarantee professional-level, flawless results every single time you cook.
So go ahead. Volunteer to make the deviled eggs for the next neighborhood potluck. Prep a dozen eggs for your weekday salads. You have the science, you have the hardware, and you have the sass to pull it off without breaking a sweat. Now get out of here and go boil something.






