
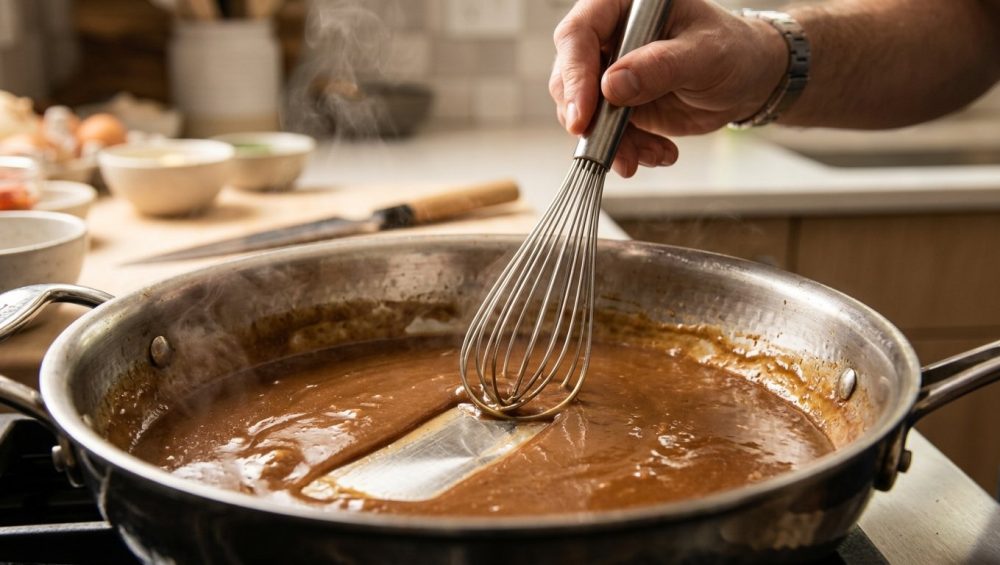
Welcome to the kitchen, weekend warriors. Grab a glass of wine, tie your apron tight, and let’s have a brutally honest conversation about a culinary disaster that has plagued home cooks for generations. According to a recent 2025-2026 culinary industry report, a staggering 93% of Americans expect to cook as much or more at home this year than they did last year. We are officially in the era of the “home culinarian,” a time when everyday people are ditching hyper-processed takeout and demanding real, scratch-made food that relies on proper technique rather than gimmicks.
But despite this beautiful return to home cooking, there is one specific culinary hurdle that still causes widespread panic, frantic sweating, and holiday-ruining meltdowns: making gravy.
You know the exact scenario I am talking about. You have just roasted a beautiful chicken or a massive holiday turkey. The meat is resting perfectly on the cutting board. You place your roasting pan or a flat skillet on the stovetop, heat up the drippings, and sprinkle in your flour. You grab your trusty, bulbous balloon whisk and start stirring like your life depends on it. You whisk until your forearm burns. You whisk until you are out of breath. And yet, as you pour in the broth, you watch in sheer horror as the sauce thickens into a greasy, unappetizing liquid filled with chewy, raw, white dumplings of unmixed flour.
It is maddening. It is stressful. And I am here to tell you, with absolute certainty, that it is not your fault.
You do not lack culinary talent. You do not need a degree from Le Cordon Bleu to make a silky, mind-blowing pan sauce. The reason your gravy is always lumpy is entirely mechanical. You are simply using the wrong tool for the geometry of your pan. It is time to retire the balloon whisk for stovetop sauces and introduce you to your new best friend: the flat whisk.
The Physics of Failure: Why Your Balloon Whisk is Sabotaging You
To understand why your gravy is failing, we need to look at the simple geometry of your cookware and your utensils. I have zero patience for pretentious chef-speak, but a little basic physics will change the way you cook forever.
Take a good look at your standard balloon whisk. It is constructed of thin, flexible wire loops of varying lengths that expand into a large, bulbous, spherical cage. It is a brilliant tool—if you are working inside a deep, concave mixing bowl. The rounded shape of the balloon whisk perfectly mimics the sloping sides of a bowl, allowing it to sweep along the curvature and whip massive amounts of air into egg whites or heavy cream.
But what happens when you take that spherical tool and press it against the completely flat bottom of a stainless steel skillet or a wide roasting pan?
You create massive, unavoidable dead zones.
When you press a round balloon whisk into a flat pan, the actual contact patch—the area where the wires physically touch the metal floor of the pan—is incredibly tiny. It is perhaps a single square inch at the very bottom of the bulb. The rest of the whisk is suspended in the air or floating uselessly in the liquid.
Worse yet, think about the edges of your pan. Where the flat floor of the skillet meets the vertical sidewall, there is a sharp 90-degree corner. A round balloon whisk physically cannot fit into a sharp corner. It is geometrically impossible.
So, what happens in those unreachable corners and expansive dead zones? The dry flour you just sprinkled into the pan settles there. It sits undisturbed, completely untouched by the whisk’s wires. It begins to toast, then scorch, and eventually forms stubborn, impenetrable clumps. You can stir in frantic circles all day long, but you are essentially trying to clear a flat driveway with a round snow shovel. It is an exercise in futility, and it is the exact reason why you might want to learn stop making greasy gravy before you ruin another Sunday roast.
The Science of Starch Gelatinization (Why Lumps Actually Form)
To truly appreciate the genius of the flat whisk, we need to briefly dive into the food science of why lumps form in the first place. Don’t worry, I will keep the snark high and the textbook jargon to a minimum.
Flour is composed of roughly 70% starch, specifically the polysaccharides amylose and amylopectin. When you are making a gravy or a sauce, you are relying on these starch granules to absorb liquid, swell up, and thicken the sauce. This process is called starch gelatinization.
Here is the catch: starch behaves very differently depending on the temperature of the liquid it encounters. If you whisk flour into cold water, the granules disperse evenly without much fuss. But gravy is not made with cold water. It is made in a hot pan, with hot fat, and hot broth.
When hot liquid (anything above 140°F to 160°F) comes into direct contact with raw, dry flour, the starch granules on the very outside of the flour clump gelatinize instantly. They immediately swell and form a sticky, waterproof gel barrier around the dry flour trapped inside. You have essentially created a microscopic suit of armor around a pocket of raw powder. Once that hydrophobic gel shell forms, no amount of gentle stirring is going to break it. The liquid cannot penetrate the shell, and you are left with a permanent, chewy lump floating in your sauce.
To prevent this catastrophic failure, two things must happen.
First, the flour must be thoroughly coated in fat (butter, oil, or meat drippings) before any water-based liquid is added. The fat coats the individual starch granules, lubricating them and keeping them separated so they cannot instantly clump together when the broth hits them. This fat-and-flour mixture is called a roux.
Second, you need intense, direct mechanical shear to physically crush and disperse the flour into the fat. You need a tool that scrapes the bottom of the pan with force, breaking apart any dry pockets before they have a chance to form those waterproof gel barriers.
As we already established, the balloon whisk completely fails at providing this mechanical shear across a flat surface.
Enter the Flat Whisk: The Ultimate Sauce Saver
If the balloon whisk is a fluffy cloud, the flat whisk is a bulldozer. Also known in professional kitchens as a roux whisk, this brilliant, low-cost piece of kitchen gear is about to become your absolute favorite tool.
A flat whisk is constructed from a series of stiff wire loops—usually four or five—that are flattened down into a single, two-dimensional plane. Instead of forming a bulbous cage, the wires form an elongated, flat “U” shape.
The mechanics of this design are flawlessly suited for shallow, flat-bottomed cookware. When you press a flat whisk into a skillet, the entire length of the lower wires makes direct, flush contact with the floor of the pan. You are no longer working with a tiny, one-inch contact patch; you are sweeping a wide, rigid squeegee across the entire cooking surface.
Because the wires are aligned in a flat row, they easily slide right into the sharp 90-degree corners where the pan floor meets the sidewalls. There are absolutely no dead zones.
When you add your flour to your hot fat, the flat whisk traps the flour between its rigid wires and the hard metal of the pan. As you drag the whisk back and forth, it physically crushes the flour, forcing it to disperse evenly into the fat. It eradicates dry pockets on contact. By the time you pour in your broth, your roux is so perfectly smooth and homogenized that lump formation is scientifically impossible.
It is a mechanical fix for a chemical problem. And it is exactly why investing in the right beginner kitchen tools is the fastest way to instantly upgrade your weeknight dinners.
Beyond Gravy: The Flat Whisk’s Versatility
I am a busy professional who relies on efficiency to survive the week. I despise unitaskers—kitchen tools that only serve one highly specific, obscure purpose. If a tool is going to take up precious real estate in my utensil crock, it needs to earn its keep. Fortunately, the flat whisk is an absolute workhorse that extends far beyond the Thanksgiving turkey.
Mastering the Pan Sauce
When you sear a steak, a pork chop, or a chicken breast in a stainless steel skillet, you are left with sticky, caramelized brown bits stuck to the bottom of the pan. This is called the fond, and it is pure, concentrated flavor. To make a pan sauce, you pour in a splash of wine or broth to deglaze the pan. The flat whisk is the ultimate tool for this job. Its rigid, flat wires act like a gentle scraper, lifting every single microscopic bit of fond off the floor of the pan and integrating it into your sauce.
Flawless Béchamel and Cheese Sauces
If you are making homemade macaroni and cheese, you are starting with a roux and adding milk to create a béchamel. Milk contains natural sugars and proteins that love to sink to the bottom of a hot pan and scorch. The flat whisk constantly sweeps the bottom of the pot, keeping the dairy moving so that your sauces always scorch never again. It guarantees a silky smooth base, which is crucial if you want to avoid the tragedy of wondering cheese sauce is grainy and broken.
Gentle Folding and Poaching
Because the wires on a flat whisk are widely spaced and arranged in a single plane, it is surprisingly excellent at folding delicate ingredients. If you need to fold whipped egg whites into a waffle batter without deflating the air, the flat whisk slices through the batter gently and efficiently. Furthermore, if you are poaching eggs, dragging a flat whisk through simmering water creates a perfect, gentle vortex to wrap the egg whites around the yolk.
The “No-Go” Rule: A Brutally Honest Warning on Toxic Kitchen Gear
If you have read my articles before, you know I have a strict, uncompromising “No-Go” rule when it comes to toxic, cheap kitchenware. I actively despise equipment that degrades, melts, flakes, or leaches mystery chemicals into the food you are feeding your family.
When you go shopping for a flat whisk, you are going to see a lot of cheap, brightly colored silicone-coated options. Let me be perfectly clear: you must tread very carefully here.
If you are cooking in a bare stainless steel pan, a carbon steel skillet, or a cast-iron Dutch oven, you should absolutely buy a 100% solid stainless steel flat whisk. Stainless steel is virtually indestructible, it will not warp, and it provides the rigid scraping power necessary to lift fond and crush flour clumps.
However, if you are working in an enameled cast-iron pan (like a Le Creuset) or a non-stick skillet, a bare metal whisk will scratch and permanently ruin the finish. In this specific scenario, you must use a silicone-coated flat whisk.
But here is the catch: you cannot buy the cheapest silicone whisk on the internet. Cheap silicone is filled with plastic fillers. When exposed to the high heat of a sizzling skillet, cheap silicone degrades, micro-cracks, and literally peels off into your food. It is also highly porous, absorbing the oils and smells of your dish, which is exactly why your cheap spatulas taste like soap after going through the dishwasher.
If you need a coated whisk, you must verify that it is made from high-grade, 100% platinum silicone with a heat resistance of at least 450°F to 600°F. If the packaging does not explicitly state the heat resistance, put it back on the shelf.
Frankly, if you are still relying heavily on cheap, easily scratched non-stick pans, it might be time to upgrade your skills. Stop ruining your nonstick pans with aerosol cooking sprays and metal utensils. Better yet, learn the water drop test to make your stainless steel pans naturally stick-resistant, allowing you to use professional-grade metal whisks without fear.
Finally, beware of poorly constructed handles. Cheap whisks often have a gap where the wire tines enter the handle casing. When you wash them, dirty dishwater seeps into that hollow handle, ferments, rusts the interior, and leaks out into your food the next time you use it. This is exactly why your whisk leaks dishwater. Always look for a whisk with a completely sealed, watertight handle construction.
Comparing Whisk Types: A Definitive Breakdown
To truly master your kitchen, you need to understand your arsenal. Throwing out your balloon whisk entirely is not the answer; you just need to stop using it for the wrong jobs. Let’s do a definitive, exhaustive breakdown of the whisks you might encounter, so you never make rookie kitchen mistakes again.
1. The Balloon Whisk (The Aerator)
Design: A wide, bulbous, spherical cage made of thin, flexible wires.
Best For: Deep mixing bowls. Whipping heavy cream, beating egg whites for meringues, and aerating dry ingredients (acting as a lazy baker’s flour sifter).
Worst For: Flat skillets, heavy batters, and thick sauces. The thin wires will bend under heavy loads, and the spherical shape creates massive dead zones in flat pans.
2. The French Whisk (The Emulsifier)
Design: Similar to a balloon whisk, but much narrower, longer, and slightly more tapered. The wires are usually made of a thicker, stiffer gauge of metal.
Best For: Deep pots and heavy mixtures. The stiffer wires easily cut through thick pancake batters, custards, and polenta. The narrow profile allows it to fit into smaller jars to emulsify vinaigrettes vigorously.
Worst For: Flat skillets. While slightly better than a balloon whisk, it still has rounded edges that cannot reach sharp pan corners.
3. The Flat Whisk / Roux Whisk (The Scraper)
Design: Four or five wire loops flattened into a two-dimensional, U-shaped plane.
Best For: Shallow skillets, roasting pans, and wide pots. Essential for making roux, gravy, pan sauces, deglazing fond, and folding delicate batters.
Worst For: Deep mixing bowls. It lacks the three-dimensional geometry required to whip air into cream or egg whites efficiently.
4. The Ball Whisk / Kettle Whisk (The Corner Sweeper)
Design: Instead of loops, this whisk features a series of straight, stiff wires that splay outward. Each wire is capped with a small stainless steel or silicone ball.
Best For: Reaching into the absolute sharpest corners of measuring cups or strange-shaped pots. It is also incredibly easy to clean because there is no wire cage for thick batters to get trapped inside.
Worst For: Heavy scraping. While it reaches corners well, the individual balls do not provide the continuous, rigid scraping line that a flat whisk offers for crushing flour clumps.
5. The Danish Dough Whisk (The Bread Tamer)
Design: A thick, rigid, concentric wire loop that looks almost like a two-dimensional maze, attached to a sturdy wooden handle.
Best For: Sticky, heavy bread doughs. The minimal surface area of the wire cuts through thick, shaggy hydration doughs without the flour clumping up and getting trapped inside the whisk.
Worst For: Literally anything involving liquids, sauces, or aeration.
Step-by-Step: Making Flawless Gravy with Your New Best Friend
Now that you are armed with the correct tool and the science to back it up, let’s walk through the exact, foolproof method for making a flawless, clump-free gravy. Time is money on a weeknight, but if you follow these steps, you will achieve professional results in under ten minutes.
Step 1: Establish the Fat
Whether you are using the rendered drippings from a roasted chicken, bacon grease, or just high-quality unsalted butter, you need fat. Place your skillet or roasting pan over medium heat. Let the fat melt and begin to bubble gently. You want the water content in the butter or drippings to cook off, leaving you with pure, hot fat.
Step 2: Add the Flour
Sprinkle your all-purpose flour directly into the hot fat. The golden ratio for a standard roux is equal parts fat and flour by weight, though equal parts by volume (e.g., two tablespoons of fat to two tablespoons of flour) works perfectly fine for home cooking.
Step 3: Apply Mechanical Shear (The Flat Whisk Magic)
Immediately take your flat whisk and press it flush against the bottom of the pan. Do not stir in lazy circles. According to culinary science, the most efficient whisking motion is a vigorous, side-to-side lateral movement. Drag the flat whisk back and forth across the floor of the pan. The rigid wires will act like a snowplow, physically crushing the flour granules against the metal, breaking up any dry pockets, and thoroughly coating every microscopic particle of starch in hot fat. Slide the flat edge directly into the corners of the pan to ensure no flour is left hiding.
Step 4: Cook Out the Raw Flavor
Keep whisking side-to-side. You must cook this paste (the roux) for at least one to two minutes. This accomplishes two things: it toasts the flour, eliminating that awful, pasty, raw-dough flavor, and it initiates a mild Maillard reaction, developing a deep, nutty, savory aroma. If you want a darker, richer gravy, lower the heat and keep whisking for five to ten minutes until the roux turns the color of peanut butter.
Step 5: The Liquid Tempering Phase
This is where most people panic, but with a flat whisk, you are in total control. Do not dump all your hot broth into the pan at once. If you dump hot liquid into a hot roux, you risk shocking the starches into immediate, uneven gelatinization.
Instead, use warm or room-temperature broth. Slowly stream the liquid into the pan with one hand, while aggressively whisking side-to-side with the flat whisk in your other hand. The flat whisk will shear the liquid into the roux, creating a perfect, homogenous emulsion.
Step 6: The Simmer
Once all your liquid is incorporated, the sauce will likely look a bit thin. Do not panic and do not add raw flour! Starch granules do not reach their maximum swelling and thickening potential until the liquid reaches a simmer (around 195°F). Allow the gravy to come to a gentle bubble, whisking occasionally with your flat whisk to ensure nothing sticks to the bottom. Within sixty seconds of simmering, the magic of starch gelatinization will occur, and your gravy will transform into a thick, glossy, velvet masterpiece.
Step 7: Season and Serve
Remove the pan from the heat. Taste it. Add kosher salt, a heavy crank of fresh black pepper, and perhaps a splash of apple cider vinegar or a squeeze of lemon to brighten the rich flavors. Serve it immediately over a massive pile of potatoes, and revel in the fact that you will never have to Google why your mashed potatoes turn into glue ever again, because your flawless gravy will steal the show anyway.
Maintenance and Care for Your Kitchen Gear
A high-quality tool is only as good as the care you provide it. If you have invested in a proper, professional-grade stainless steel flat whisk, maintenance is incredibly simple, but it requires a bit of mindfulness.
First, never let your whisk sit submerged in a sink full of soapy water overnight. Even high-quality stainless steel can develop microscopic pitting if left in harsh, salty, or highly acidic environments for prolonged periods. Furthermore, if your whisk does not have a perfectly sealed handle, soaking it is a guaranteed way to trap stagnant water inside the grip.
If you have a solid stainless steel whisk, it is entirely dishwasher safe. However, make sure to place it securely in the utensil basket with the tines facing upward, or lay it flat on the top rack. If the tines get jammed under a heavy plate during the wash cycle, the intense heat and water pressure can permanently bend the wires out of alignment, ruining the perfectly flat profile that makes the tool so effective.
If you opted for a platinum silicone-coated flat whisk to protect your enameled or non-stick pans, handwashing is highly recommended. The extreme heat and harsh, abrasive detergents used in modern dishwashers can prematurely dry out and degrade silicone, causing it to crack and peel over time. A quick scrub with warm water, mild dish soap, and a soft sponge is all it takes to keep a silicone whisk pristine.
Always inspect your flat whisk before using it. Run your fingers along the wires to ensure they are still perfectly aligned in a single plane. If one wire has been bent out of shape, it will lift the rest of the whisk off the pan floor, completely defeating the purpose of the tool.
Conclusion
Cooking should not be a stressful chore, and you certainly should not be held hostage by a pan of lumpy gravy on a Tuesday night. The culinary world is filled with complex techniques, but sometimes, the barrier between a frustrating disaster and absolute perfection is nothing more than swapping out a five-dollar tool.
The balloon whisk is a beautiful invention for bakers and pastry chefs, but it has absolutely no business being dragged across a flat skillet. By understanding the simple geometry of your cookware and the basic science of how starch hydrates, you can take total control of your kitchen.
Upgrade to a flat whisk. Embrace the mechanical shear. Scrape those pan corners with confidence. You are entirely capable of making mind-blowing, professional-level food in your own home—you just needed the right bulldozer to get the job done. Now, pour yourself that glass of wine, get the skillet hot, and go make a pan sauce that will make your dinner guests weep.






