The Hockey Puck Epidemic: Why We Are Here
We have all been there. You wake up on a crisp Saturday morning, pour yourself a ridiculously oversized cup of coffee, and decide that today is the day you conquer the weekend baking project. You want to be the kind of effortlessly chic home cook who casually pulls a tray of towering, golden, flaky biscuits out of the oven. You follow the recipe, you mix the dough, you punch out the rounds, and you bake them. But twenty minutes later, instead of sky-high layers of buttery perfection, you pull out a sad, squat tray of dense hockey pucks.
If you are tired of making the same rookie kitchen mistakes weekend after weekend, it is time to face some harsh culinary realities. You probably blamed the recipe. You probably blamed your oven. You might have even blamed the humidity in the air. But the truth is far simpler, and it is hiding right there in your kitchen cabinet.
The culprit behind your flat, dense, depressing biscuits is almost certainly the tool you used to cut them. For decades, well-meaning home cooks have relied on the rim of a drinking glass or a mason jar to stamp out their biscuit dough. It seems like a harmless, folksy kitchen hack, but from a food science perspective, it is a structural disaster. Baking is not just an art; it is a hard science governed by thermodynamics, phase changes, and mechanical shearing. When you use the wrong tool to cut your dough, you are physically sabotaging the chemical reactions required for a proper rise.
The Anatomy of a Biscuit (And Why It Hates You)
To understand why your choice of cutter matters so much, you have to understand what a biscuit actually is. Unlike a loaf of yeast bread, which relies on the slow biological fermentation of yeast to create a network of air bubbles, a biscuit is a “quick bread.” It relies on two entirely different mechanisms to achieve its height: chemical leavening and mechanical steam expansion.
When you mix a classic biscuit dough, you are combining flour, a chemical leavening agent (like baking powder and baking soda), salt, a cold liquid (usually acidic buttermilk), and solid, ice-cold fat (butter or shortening). The goal is to coat tiny, distinct pebbles of cold fat in flour without melting them, and without overworking the proteins in the flour. When flour meets liquid and is agitated, it forms gluten—a stretchy, elastic protein network. In a pizza crust, you want massive gluten development for a chewy bite. In a biscuit, gluten is your absolute worst enemy. You want just enough structure to hold the pastry together, but not a microscopic ounce more, otherwise your biscuit will be tough, dense, and chewy.
This brings us to the first major hurdle: measuring your ingredients. So many home cooks sabotage their dough by heavily scooping flour directly from the bag with a measuring cup, packing it down tightly. This simple mistake ruins baked goods before they even hit the oven because you end up incorporating up to 30% more flour than the recipe intended, throwing off the entire hydration ratio. Do yourself a favor and use a digital kitchen scale to measure your flour in grams. Precision is the only way to ensure your dough remains light, tacky, and perfectly hydrated.
The Grandmother Paradox: Why They Got Away With It
At this point, you might be aggressively yelling at your screen, “But my grandmother used a water glass to cut her biscuits, and they were amazing!”
Let’s clear the air on the Grandmother Paradox. Yes, she probably did use a glass. But your grandmother was likely baking with a regional, soft winter wheat flour (like the legendary White Lily brand popular in the American South) and pure lard. Soft winter wheat has a significantly lower protein content (around 8.5%) compared to the national-brand all-purpose flour (11.7% protein) sitting in your pantry right now. Lower protein means significantly less gluten development. Furthermore, lard has a different melting point and water content than modern supermarket butter.
Because her dough was inherently lower in gluten and incredibly tender, it didn’t fight back when she compressed the edges with a blunt glass. If you are using standard all-purpose flour and butter, your dough has more structural integrity and elasticity. If you compress it, it will stay compressed. You cannot apply 1950s regional baking hacks to 2020s supermarket ingredients and expect the same results.
The Culprit in Your Cupboard: The Drinking Glass Disaster
Let’s get into the actual physics of what happens when you take a standard drinking glass, flip it upside down, and press it into a beautiful, laminated slab of biscuit dough.
The Physics of the Pinch
The rim of a drinking glass is specifically manufactured to be thick, smooth, and rounded so that it feels comfortable against your lips. It is explicitly designed not to be sharp. When you press a rounded, blunt object into a soft dough, it does not shear through the material. Instead, it displaces it.
As the blunt rim of the glass pushes downward, it grabs the top layer of your dough and drags it all the way down the vertical axis, mashing it firmly into the middle and bottom layers. By the time the glass hits the cutting board, you have effectively crimped the entire perimeter of the biscuit shut, much like the sealed edges of a ravioli or an empanada. You have taken all those delicate, alternating layers of butter and flour that you worked so hard to create and violently glued them together.
Air, Steam, and the Illusion of Lift
Why is this crimping effect so catastrophic? It comes down to how a biscuit actually achieves its towering height in the oven.
When you place a tray of biscuits into a screaming hot oven (usually around 425°F to 450°F), a violent thermodynamic reaction occurs. The water content trapped inside those distinct little pebbles of cold butter reaches its boiling point (212°F / 100°C) and rapidly converts into steam. When water turns into steam, it expands to roughly 1,600 times its original liquid volume. This explosive phase change is what physically lifts the heavy layers of dough upward.
Simultaneously, the chemical leaveners (the baking powder and baking soda) react with the heat and the acidic buttermilk to release carbon dioxide gas. This gas needs a place to go.
If you have used a blunt glass to pinch and seal the edges of your biscuit shut, you have built a structural prison. The steam and the carbon dioxide gas expand, but they hit that sealed outer wall. The gas cannot vent horizontally, and the glued edges refuse to separate. The trapped pressure forces the biscuit to either bulge awkwardly in the center, topple over entirely, or simply surrender and stay flat. You end up with a dense, heavy puck because the leavening gases were strangled by a blunt rim.
The Science of Flakiness: How Biscuits Actually Rise
To achieve a mind-blowing, flaky biscuit, you have to work with the laws of physics, not against them. The goal is to create a structure that allows for maximum vertical expansion.
Steam Expansion and the Phase Change
Baking is a complex symphony of heat transfer. When you put a pan of raw dough into the oven, conduction moves heat directly from the metal pan into the bottom of the dough, convection circulates hot air around the outside, and radiation beams heat from the oven walls.
For a biscuit to rise properly, the outer crust must remain flexible and pliable just long enough for the internal steam and CO2 to push the dough upward before the starches gelatinize and the proteins set into a rigid structure. If the layers on the outer edge of the biscuit are cleanly severed and exposed, they act like the folded pages of a book. As the steam expands, it pushes each individual “page” upward, separating the layers and creating that glorious, sky-high, pull-apart texture.
The Role of Cold Fat (A Quick Refresher)
None of this thermodynamic magic happens if your fat is warm. The entire biscuit method relies on keeping distinct, discrete pieces of solid fat suspended in the flour matrix. If your butter gets too warm while you are mixing the dough, it will prematurely melt and coat the flour proteins, resulting in a crumbly, greasy, shortbread-like texture rather than distinct, flaky layers.
Time is money, and time is also temperature. You must work quickly. The butter must be ice-cold. The buttermilk must be ice-cold. If your kitchen is hot, or if you have naturally warm hands, you are racing against the clock. If you want to save time, simply grate your frozen butter directly into the flour mixture using a standard box grater. It creates perfectly sized, uniform shards of ice-cold fat in a fraction of the time it takes to cut it in with a knife.
The Hero We Need: The Straight-Edged Metal Cutter
If the blunt rim of a drinking glass is the villain of this story, the sharp, straight-edged metal biscuit cutter is the undisputed hero. It is a cheap, non-negotiable kitchen tool that will instantly elevate your baking from amateur hour to professional pastry chef status.
The Geometry of the Perfect Shearing Action
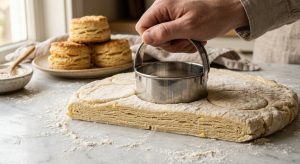
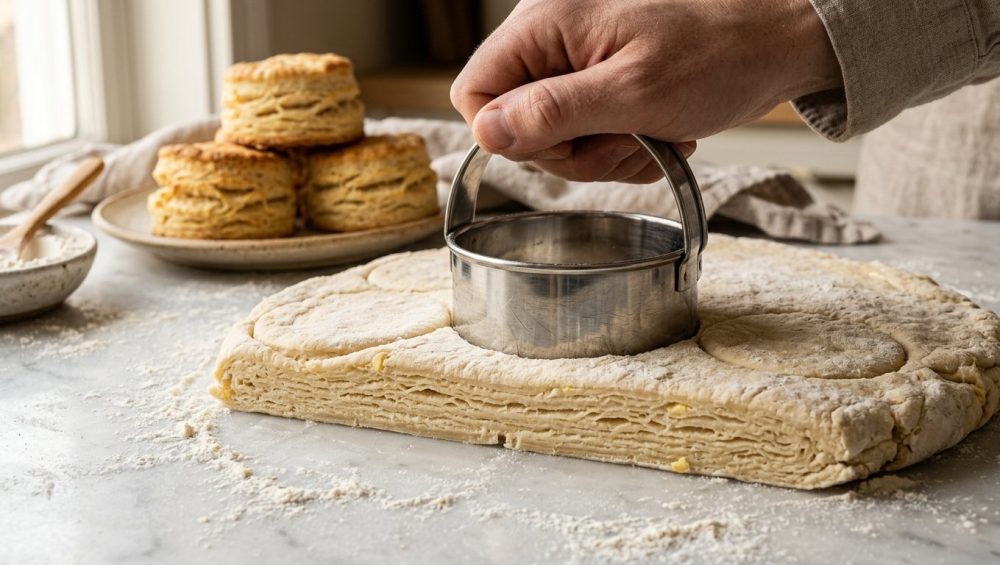
A high-quality metal biscuit cutter features a razor-thin, perfectly vertical cutting edge. When you press it into the dough, it does not displace or drag the material. It shears cleanly through the gluten strands and the butter pockets in one swift, microscopic slice.
Because the cut is clean, the edges of the biscuit remain completely open and unsealed. If you look closely at a properly cut raw biscuit, you can actually see the striations—the alternating layers of yellow butter and white dough stacked on top of each other. When this biscuit hits the hot oven, those exposed layers are free to fan out and expand vertically without any resistance. The result is a towering, flaky masterpiece.
Why Material Matters: Say No to Toxic Plastics and Mystery Metals
As a dedicated home cook, I am absolutely militant about banishing toxic kitchen gear from my house. Do not, under any circumstances, buy those brightly colored, thick plastic biscuit cutters. Plastic is inherently blunt; it cannot hold a microscopic edge like metal can. Furthermore, cheap plastics can warp in the dishwasher, shed microplastics into your food, and degrade when exposed to the highly acidic nature of buttermilk.
Equally offensive are the flimsy, dollar-store “tin” cutters made from mystery metal alloys. They will inevitably rust after a single trip through the sink, leaving a metallic, oxidized taste on your dough and leaching heavy metals into your food.
You need heavy-gauge, food-grade stainless steel (preferably 304 grade). Stainless steel is completely non-reactive, completely rust-proof, and holds a razor-sharp edge for a lifetime of baking. It is a one-time purchase of less than ten dollars that will permanently fix your biscuit woes.
The “Twist” That Ruins Everything (Stop Doing It Immediately)
You have weighed your flour. You have grated your ice-cold butter. You have purchased a beautiful, sharp stainless steel biscuit cutter. You punch the cutter into the dough, and then, instinctively, you give it a little twist to release the biscuit.
Congratulations, you just ruined the batch.
The Mechanics of the Twist-and-Seal
The most insidious habit of all is twisting the biscuit cutter when you punch out the dough. It is a deeply ingrained muscle memory for many bakers, likely because it feels satisfying, or because they treat biscuit dough like a stubborn sugar cookie that needs to be wriggled free from the counter.
But food science dictates otherwise. When you twist a metal cutter—even a razor-sharp one—you create a mechanical friction seal along the entire outer edge of the dough. The rotational force smears the distinct layers of butter and flour together, essentially spackling the sides of the biscuit shut. You have just recreated the exact same crimping problem caused by the drinking glass. The steam is trapped, the layers are fused, and the biscuit will refuse to rise.
The Straight Down, Straight Up Rule
The golden rule of biscuit cutting is absolute, unwavering verticality. You must press the cutter straight down into the dough with firm, even pressure until you feel it hit the cutting board. Then, you must pull it straight back up. No shimmying. No twisting. No wiggling.
If your dough is sticking to the cutter, do not twist it to release it. Instead, simply dip the cutting edge of your metal cutter into a small bowl of dry flour before every single punch. The flour acts as a dry lubricant, allowing the metal to slice cleanly through the sticky buttermilk dough and release effortlessly.
Beyond the Cutter: Foolproof Biscuit Mechanics
While the sharp cutter and the “no-twist” rule are the most critical factors for vertical rise, there are a few other highly efficient, no-nonsense mechanical techniques that will guarantee success.
The Letter Fold Technique for Maximum Layers
If you want those distinct, flaky, pull-apart layers that you see in bakery windows, you have to manually create them through a simplified lamination process. Once your dough comes together in a shaggy, messy mass, turn it out onto a lightly floured surface. Gently pat it out into a rectangle.
Now, fold it into thirds, exactly like you are folding a business letter to put into an envelope. Rotate the dough 90 degrees, gently pat it out again, and fold it into thirds one more time. Doing this two or three times stacks the butter and flour into dozens of distinct layers.
To keep your hot hands from melting the butter during this folding process, use a high-quality stainless steel bench scraper to lift and fold the dough. It acts as a temperature-neutral extension of your hand, keeping the dough icy cold and your kitchen counters easily scrape-able when it is time to clean up.
Handling the Fat
We already discussed grating frozen butter, which is my absolute favorite weekday time-saver. But if you are using cubed butter, you must cut it into the flour quickly and efficiently. While you can use your fingers, the genius of a pastry blender is that it keeps your hot hands away from the fat, using multiple metal blades to rapidly shear the butter down to the size of small peas. The less human body heat that transfers into the dough, the flakier the final product will be.
Upgrading Your Biscuit Arsenal: What to Look For
If you are ready to throw your plastic cutters and drinking glasses into the recycling bin, here is exactly what you should look for when buying a proper biscuit cutter.
The Ergonomic Debate: Handle vs. No Handle
Biscuit cutters generally come in two styles: plain rings, and rings with an arched handle over the top.
A cutter with a handle allows you to apply firm, downward pressure with the palm of your hand, which is great for ergonomics. However, you must be careful to press straight down from the center. If you push on the handle asymmetrically, the cutter will tilt, resulting in a lopsided biscuit.
A plain ring cutter (often sold in nested sets) gives you incredible tactile feedback. Look for a ring cutter that has a “rolled” top edge. This means the top rim of the metal has been curled over to create a smooth, comfortable surface for your hand to press against, while the bottom edge remains razor-sharp.
Fluted vs. Plain Edge
You will often see cutters with a ruffled or “fluted” edge. While they create a beautiful, decorative aesthetic, they can sometimes be slightly less efficient at achieving maximum rise compared to a perfectly smooth edge, simply because the scalloped design creates more surface area and a slightly higher risk of snagging the dough if the metal isn’t perfectly sharp. If you buy a fluted cutter, ensure it is a high-end stainless steel model with a surgically sharp edge.
Troubleshooting Your Biscuit Tragedies
Even with the perfect straight-edged cutter and the flawless straight-down motion, a few environmental factors can still ruin your bake.
Oven Temperature Realities: The Need for High Heat
Biscuits require thermal shock. If you bake them at 350°F, the ambient heat will slowly melt the butter before the water inside it has a chance to violently convert to steam. The butter will simply leak out the bottom of the biscuit, leaving you with a dense, dry pastry sitting in a puddle of grease.
You must bake biscuits at a high temperature—typically 425°F to 450°F. This intense heat instantly vaporizes the water into steam, forcing the layers upward before the butter has a chance to leak. Furthermore, high heat is required to trigger the Maillard reaction, the complex chemical process that browns the crust and creates that deep, toasted, buttery flavor.
If your baking sheets keep warping at these high temperatures, it means you are using cheap, thin aluminum pans. A warped pan will cause your biscuits to slide, bake unevenly, and brown poorly due to a lack of direct conductive heat transfer. Invest in heavy-duty, commercial-grade half-sheet pans.
The Buddy System: Baking Biscuits Close Together
Here is an insider secret that will completely change your biscuit game: do not space your biscuits two inches apart on the baking sheet.
Bake them so that their edges are gently touching. This is affectionately known as the “buddy system” or the “sheet-pan biscuit” method. When biscuits are packed shoulder-to-shoulder, they protect each other’s edges from the intense ambient heat of the oven. This prevents the outer crust from setting too quickly, allowing the interior dough to remain pliable for a longer period of time. Because they cannot expand outward, they are physically forced to rise straight upward, supporting each other as they climb. You will end up with biscuits that are significantly taller, with incredibly soft, pillowy, pull-apart edges.
Final Thoughts: Reclaiming Your Weekend Baking
Baking does not have to be an intimidating, mysterious process filled with arbitrary rules and constant failure. It is simply a matter of understanding the physical mechanics of your ingredients and using the right tools for the job.
By ditching the blunt drinking glass, upgrading to a sharp, straight-edged stainless steel cutter, and strictly adhering to the “straight down, straight up” rule, you are no longer fighting against the physics of dough expansion—you are harnessing it.
You don’t need to be a professionally trained pastry chef to make mind-blowing food in your own kitchen. You just need to respect the science, buy decent gear, and stop twisting that damn cutter. Once you pull that first towering, flaky, perfectly layered batch out of the oven, you will realize that you are well on your way to mastering the art of the home kitchen without a culinary degree. Now, go put on a pot of coffee, grab some cold butter, and reclaim your weekend.