Listen up, weekend warriors and weeknight survivalists. If you think the professional chefs you see on television never screw up, you are living in a heavily edited fantasy world. I have set off enough smoke detectors in my life to have the local fire department on speed dial, and during my early twenties, I served dinners that could have legally been classified as biological weapons. But here is the secret they do not teach you in pretentious culinary schools: being a great cook is not about never making mistakes. It is about knowing how to cover your tracks so flawlessly that your guests think you meant to do it all along.
Before we dive deep into my essential kitchen survival guide, let us talk about why rescuing your ruined food actually matters. According to environmental trackers and the United Nations in 2025, households are responsible for a staggering 60% of the 1.05 billion tons of food wasted globally every single year. In the United States alone, the average person throws away about $728 worth of food annually. That is a plane ticket, people. You are literally throwing vacation money into the garbage disposal because you over-salted your chili or burned your rice. It is time to stop the madness, roll up your sleeves, and learn the actual culinary science behind fixing your biggest disasters.
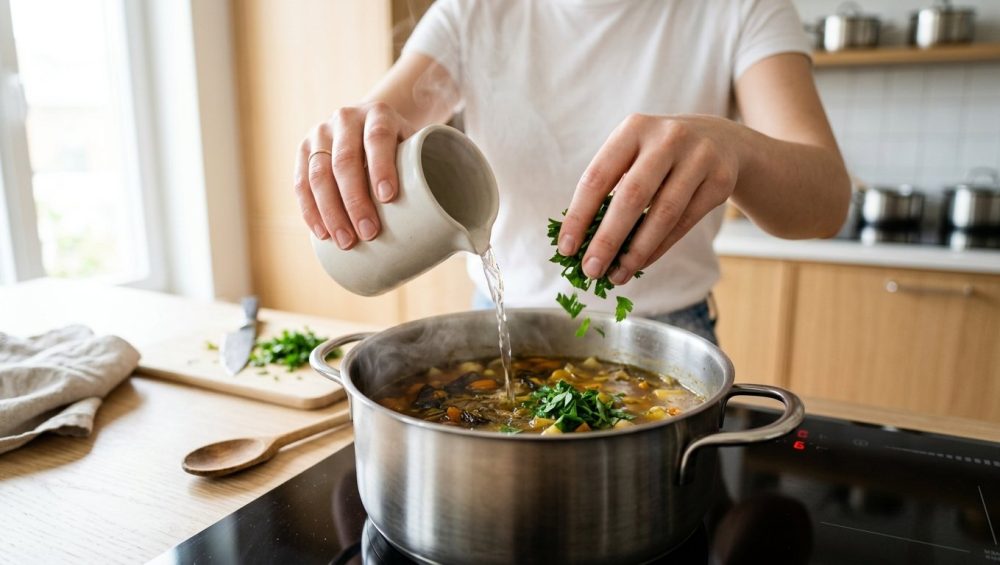
The Salty Sea: Rescuing Over-Salted Disasters
We have all been there. You are making a gorgeous Sunday stew, you turn your back for five seconds, and suddenly the lid of the salt shaker betrays you. One of the most common rookie kitchen woes is the heavy-handed salt pour, turning a delicate broth into seawater. Do not panic, and whatever you do, do not reach for a potato.
The Potato Myth Debunked
You have probably heard the old wives’ tale: just toss a raw potato into the pot, simmer it for twenty minutes, and it will magically suck out the excess salt like a sodium-seeking vacuum cleaner. I hate to break it to you, but potatoes are not capable of reverse osmosis. A raw potato acts exactly like a sponge; it absorbs water and salt proportionally. The ratio of salt to liquid in your soup remains virtually unchanged. The Washington Post even ran a controlled scientific experiment measuring the conductivity of salt water before and after simmering a potato in it, and found absolutely zero decrease in the salt concentration of the liquid. The only thing you achieve with this trick is creating a very salty potato.
The Acid and Sugar Counterbalance
If you cannot magically extract the salt, you have to trick your tongue into ignoring it. Your taste buds can only process so much information at once. By introducing competing flavors, you can mask the salinity. A vigorous squeeze of fresh lemon juice or a splash of apple cider vinegar works wonders. The sharp acidity brightens the dish and fights the salt for your tongue’s attention. If acid alone does not work, add a tiny pinch of sugar or a drizzle of honey. The sweetness rounds out the harsh, metallic bite of the excess sodium.
Dilution and Dairy Muting
If your soup or sauce is aggressively over-salted, your best physical defense is dilution. Add more unsalted broth, water, or unsalted canned tomatoes to increase the total volume of the dish, thereby lowering the salt concentration. If the recipe allows for it, stir in a heavy glug of heavy cream, sour cream, or full-fat coconut milk. The milk fats coat your palate, creating a physical barrier between the salt ions and your taste receptors, effectively muting the saltiness.
Repurposing the Unfixable
Sometimes, a dish is so salty that no amount of lemon juice or cream will save it. Do not throw it away. Instead, change its identity. Turn that hyper-salty stew into a concentrated sauce and serve it over a massive, completely unseasoned bed of rice, quinoa, or plain mashed potatoes. The bland starches will absorb the excess seasoning, balancing the final bite perfectly.
The Scorched Earth: Saving Burnt Food
You got distracted by a text message, and now the bottom of your expensive Dutch oven is coated in a layer of black, carbonized regret. The Maillard reaction—the chemical process that makes browned food taste delicious—occurs around 300°F to 350°F. But when temperatures exceed 400°F, you cross into pyrolysis, where organic matter breaks down into bitter, acrid carbon.
The Golden Rule: Do Not Scrape
If you smell burning, take the pot off the heat immediately. Do not stir it. I repeat: do not stir the pot. If you start scraping the bottom, you are committing one of the seven rookie kitchen mistakes by intentionally mixing the bitter, burnt ash directly into the perfectly good food resting above it.
The Ice Water Shock and Transfer
Take the hot pot and carefully plunge the very bottom of it into a sink filled with an inch of ice water. This rapid temperature drop instantly halts the cooking process and prevents the residual heat of the heavy metal from burning the food further. Next, carefully ladle the unburnt top layers of the food into a brand-new, clean pot. Leave the scorched bottom layer exactly where it is. Let it soak in soapy water for your kitchen’s unsung hero, the bench scraper, to tackle later.
Masking the Smoke
Even if you successfully transfer the food, the ambient smoke might have permeated the dish. To save it, you need to lean into the smokiness. Add a teaspoon of smoked paprika, a dash of chipotle powder, or a few drops of liquid smoke. By introducing intentional smoky flavors, you trick your brain into thinking the campfire taste was a deliberate culinary choice rather than a tragic accident. Finish with a splash of vinegar to cut through the heavy, acrid notes.
The Mush Factor: Fixing Overcooked Carbs & Veggies
Cooking is essentially applied thermodynamics, and when you apply heat for too long, structural integrity collapses. Pectin, the natural glue that holds plant cell walls together, dissolves completely when boiled excessively. Starches absorb water until they literally explode, turning into a gummy paste.
Resurrecting Gummy Pasta
If you boiled your spaghetti until it looks like a sad, limp jellyfish, you cannot reverse the starch hydration. However, you can change the texture. Drain the mushy pasta thoroughly. Heat a generous glug of olive oil in a wide skillet until it is shimmering, and fry the pasta. Let it sit undisturbed until the bottom gets crispy and golden, then toss it. The crunchy, fried exterior will completely mask the overcooked, soft interior. Alternatively, mix the mushy pasta with beaten eggs, cheese, and herbs, and bake it into a sliceable pasta frittata.
Transforming Mushy Rice
Overcooked rice is a tragedy, but it is also the perfect blank canvas. If your rice is waterlogged and gummy, spread it out on a baking sheet and put it in the fridge uncovered to dry out. The next day, use it for fried rice; the intense heat of the wok will crisp up the soggy grains. If it is beyond saving, add chicken broth, ginger, and scallions, and boil it down further into a comforting, savory Asian congee (rice porridge). Turning your failures into a peaceful daily habit of repurposing leftovers is the true mark of a resourceful home cook.
Giving Sad Vegetables a Second Life
If your broccoli or carrots have turned to absolute mush, do not serve them as a side dish. Throw them into a blender or food processor. Add a splash of cream, a knob of butter, and a handful of sharp cheddar cheese, and puree them into a silky, luxurious vegetable soup. You can also mash overcooked root vegetables, mix them with an egg and some breadcrumbs, and pan-fry them into crispy vegetable fritters.
The Spice Inferno: Taming Overly Spicy Food
You wanted a little kick, but you accidentally emptied half a bottle of cayenne pepper into your curry, and now your dinner feels like a localized act of arson. The culprit here is capsaicin, the active chemical compound in chili peppers.
The Dairy Rescue
Capsaicin binds fiercely to the TRPV1 receptors on your tongue, which are responsible for detecting physical heat. Because capsaicin is a non-polar, fat-soluble molecule, drinking water (which is polar) will do absolutely nothing except spread the fire around your mouth. To extinguish the flames, you need a lipophilic substance. Dairy contains a protein called casein, which acts like a detergent, binding to the capsaicin and washing it away from your receptors. Stirring in generous amounts of yogurt, sour cream, heavy cream, or even butter will drastically reduce the perceived heat of the dish.
The Sweet and Sour Defense
If you are cooking a dairy-free dish, you have to rely on flavor distraction. Learning these simple steps to culinary artistry will save your dinner: add sugar and acid. A heavy squeeze of lime juice paired with a tablespoon of brown sugar or agave syrup will confuse your palate. The sharp tang and the soothing sweetness intercept the pain signals being sent to your brain, making the spice level much more tolerable.
The Starch Buffer
When all else fails, dilute the heat by serving the fiery dish alongside a massive mountain of plain, unsalted starches. A thick slice of crusty bread, a massive bowl of plain white rice, or unseasoned potatoes will physically absorb the spicy oils and provide your mouth with a much-needed textural break between bites.
The Broken Emulsion: Fixing Split Sauces & Greasy Gravies
There is no feeling quite as deeply demoralizing as watching a silky, luxurious hollandaise sauce or a glossy vinaigrette suddenly curdle and separate into a greasy, broken mess. If you want to eliminate kitchen chaos, you need to understand the science of what just happened.
The Science of Emulsification
An emulsion is a culinary magic trick where you force two unmixable liquids—like oil and water—to coexist in harmony. This is achieved by rapidly whisking the fat into tiny microscopic droplets and suspending them in the water. To keep them from joining back together, you use an emulsifier (like the lecithin found in egg yolks or the mucilage in mustard). These molecules have a hydrophilic (water-loving) end and a lipophilic (fat-loving) end. They wrap around the oil droplets, preventing them from merging. When a sauce “breaks,” it means the fat droplets have coalesced, usually because the sauce got too hot, too cold, or the oil was added too quickly.
The Boiling Water Trick
If your hollandaise or butter sauce is just starting to look grainy and greasy, stop adding fat immediately. Grab a teaspoon of boiling hot water and whisk it vigorously into the broken sauce. The sudden addition of hot water increases the volume of the continuous phase (the water) and provides the kinetic energy needed to break those fat droplets back apart, often pulling the emulsion back from the brink.
The Fresh Yolk Restart
If your sauce has completely separated into a tragic pool of oil and curdled solids, you have to perform sauce surgery. Grab a clean bowl and add one fresh egg yolk and a tiny splash of warm water. Whisk the yolk until it is frothy. Then, taking your broken, greasy sauce, slowly—and I mean drop by agonizing drop—whisk the broken mixture into the new egg yolk. The fresh lecithin in the new yolk will grab onto the separated fat and rebuild the emulsion from scratch. It is tedious, but it works every single time.
The Tough Guy: Salvaging Dry, Overcooked Meat
You left the chicken breasts in the oven for twenty minutes too long, or you cooked a beautiful steak until it resembled the sole of a hiking boot. When meat exceeds 140°F, the actin and myosin protein fibers tightly contract, literally squeezing the natural moisture out of the muscle like a wrung-out sponge. Once that moisture is gone, no amount of soaking will force it back inside the tight protein matrix.
The Shred and Sauce Strategy
You cannot make the meat juicy again, but you can fake it. Take the overcooked meat and shred it as finely as possible using two forks. By mechanically breaking apart the tough muscle fibers, you reduce the amount of chewing required. Next, toss the shredded meat in a heavy, fat-based sauce. Barbecue sauce, a rich gravy, or a mayonnaise-based dressing will coat the shredded fibers, providing artificial lubrication that mimics the mouthfeel of natural juiciness.
The Broth Bath
If you overcooked a roast, slice it as thinly as humanly possible—paper-thin if you can manage it. Heat up a pan of rich, highly seasoned beef or chicken broth, and drop the thin slices into the warm liquid just before serving. The capillary action of the thinly sliced meat will hold onto the broth, making it much easier to swallow.
Changing the Dish Entirely
Do not serve dry chicken breasts whole on a plate; that is just asking for complaints. Chop the dry meat into tiny cubes and fold it into a cheesy casserole, a heavy chili, or spicy enchiladas. When surrounded by melted cheese, heavy sauces, and soft tortillas, no one will even notice that the meat was overcooked in the first place.
The Sweetness Overload: Balancing Cloying Desserts
Baking is a science, and sometimes a recipe just calls for way too much sugar, leaving you with a dessert or a glaze that makes your teeth ache. You cannot take the sugar out once it is baked in, but you can balance the flavor profile by stocking up on beginner cooking essentials like bitter and acidic counterpoints.
The Bitter Counterpart
Bitterness is the natural enemy of sweetness. If your chocolate frosting or brownie batter is cloyingly sweet, add a teaspoon of instant espresso powder or a handful of unsweetened dark chocolate cocoa powder. The bitter notes will cut right through the sugar, adding depth and complexity without altering the texture of the dish.
The Acidic Cut
Acid is just as effective at neutralizing excessive sweetness. If a fruit pie filling or a dessert sauce is too sweet, stir in the zest and juice of a fresh lemon, or a tiny splash of apple cider vinegar. Finally, never underestimate the power of a generous pinch of flaky sea salt. Salt enhances flavor, but it also suppresses the perception of sweetness on the tongue, which is why salted caramel tastes so incredibly balanced.
The Gear Talk: Why Your Pans Are Ruining Your Dinner
I would be doing you a massive disservice if I taught you how to fix your food without addressing the root cause of half your kitchen disasters: your terrible, cheap, toxic cookware. I have zero patience for flimsy aluminum pans coated in mystery non-stick chemicals that flake off into your scrambled eggs.
The Toxic Truth of Cheap Non-Stick
If you are still using a scratched-up Teflon pan you bought for ten dollars five years ago, throw it in the trash right now. The non-stick coating on those pans is made of PFAS (per- and polyfluoroalkyl substances), notoriously known as “forever chemicals”. In 2026, the regulatory landscape is finally catching up to the science. States like Maine have already implemented strict prohibitions on PFAS in cookware, and Minnesota banned the sale of PFAS-coated non-stick cookware entirely.
Why? Because when these cheap pans are heated past 500°F (which happens in minutes if left empty on a high burner), the PTFE coating begins to degrade and release toxic fumes. The CDC and independent researchers have linked long-term PFAS exposure to a weakened immune system, decreased antibody production, thyroid dysfunction, and an increased risk of kidney and testicular cancers. These chemicals do not break down in the environment, and they accumulate in your bloodstream over time.
Building a Safe Arsenal
When building your minimalist kitchen setup, prioritize safe, durable materials that will outlast you. Retailers like Target are already phasing out intentionally added PFAS from their cookware lines, but you should skip the chemical coatings altogether. Invest in a heavy-bottomed tri-ply stainless steel skillet for searing meats and making pan sauces. Buy a high-quality carbon steel pan—once properly seasoned, it is naturally non-stick, completely non-toxic, and can withstand blazing hot temperatures without off-gassing into your lungs. For slow-cooking stews and braises, enameled cast iron is king; recent third-party laboratory tests confirm that reputable enameled cast iron products pass rigorous safety standards with zero traces of PFAS or heavy metals. Stop blaming yourself for burning your food when your paper-thin, warped pan is incapable of distributing heat evenly.
Conclusion: Embrace the Chaos
Cooking is not about achieving absolute perfection every single time you step up to the stove. It is a messy, chaotic, deeply human process. You are going to burn the garlic. You are going to split the vinaigrette. You are going to accidentally dump a tablespoon of salt into your soup.
But now, you have the knowledge to fix it. You understand the chemistry of emulsification, the physics of heat transfer, and the biological reality of your own taste buds. Investing in a few must-have tools will outlast any cheap gimmick and give you the foundation you need to succeed. The next time disaster strikes in your kitchen, do not panic, and definitely do not throw the food in the trash. Take a deep breath, pour yourself a glass of wine, assess the science of the situation, and pivot. Because the only real difference between a ruined dinner and a culinary masterpiece is a sassy home cook who knows exactly how to hide their mistakes.


