Welcome to my kitchen, you beautiful, ambitious, weekend culinary hobbyists. I am the Sassy Sous-Chef, and today we need to have a very serious, closed-door intervention about your root vegetables. I know exactly why you are reading this. You recently decided to make a comforting batch of mashed potatoes, or perhaps a rustic weeknight potato salad, and despite following the recipe to the absolute letter, your potatoes betrayed you. They ended up as a tragic, waterlogged mess—mushy and disintegrating on the outside, yet aggressively crunchy and raw in the center.
You probably blamed yourself. You probably assumed you bought the wrong type of potato, that your stove was acting up, or that you simply didn’t leave them in the water long enough. But I am here to tell you that the potato is not the problem, and your timing is not the problem. The problem is your water temperature. Specifically, your deeply ingrained, completely misguided habit of dropping dense, raw root vegetables into a pot of violently boiling water.
I get it. Time is money, especially on a Tuesday night when you have exactly thirty-four minutes to get dinner on the table before you lose your mind and order takeout. We all want shortcuts. But there are brilliant weekday hacks that save you time, and then there are shortcuts that actively sabotage your food. Plunging raw potatoes into boiling water is the latter. It is a fundamental violation of kitchen thermodynamics, and it is the exact reason you constantly find yourself trying to fix gluey mashed potatoes with endless amounts of butter and cream. Spoiler alert: it never works.
Today, we are going to strip away the pretentious chef-speak and dive deep into the fascinating, slightly nerdy thermal dynamics of boiling dense root vegetables. We are going to explore the cellular anatomy of a spud, the magic of starch gelatinization, and why starting your potatoes in a pot of cold water is the single most important, scientifically validated technique you will ever learn for achieving a perfectly consistent, tender texture throughout. Grab a glass of wine, pull up a stool, and let’s fix your potatoes once and for all.
The Anatomy of a Spud (Why Your Potatoes Are Stubborn)
To understand why hot water is the ultimate enemy of a raw potato, you first need to understand what a potato actually is. It is not just a lifeless lump of starch waiting to be covered in gravy. At a cellular level, a potato is a highly organized, incredibly dense matrix of water, starch granules, and structural plant proteins.
Think of a raw potato as a microscopic fortress. The walls of this fortress are made of a complex carbohydrate called pectin. Pectin is the cellular glue that holds the plant tissue together, giving the raw tuber its rigid, hard texture. Inside these sturdy pectin walls are millions of tiny starch granules, primarily composed of two distinct molecular structures: amylose and amylopectin.
When a potato is raw, these starch granules are tightly packed, highly crystalline, and completely inaccessible to your digestive system. They are hard, dense, and frankly, terrible to eat. The entire goal of cooking a potato is to apply enough heat to break down the pectin walls just enough to make them tender, while simultaneously forcing those starch granules to absorb water, swell up, and transform into a fluffy, edible gel.
But here is the catch: potatoes are incredibly dense, which means they have notoriously low thermal conductivity. Thermal conductivity is simply the rate at which heat transfers through a material. Heat does not travel through a dense potato quickly. When you apply heat to the exterior of a potato, it takes a significant amount of time for that thermal energy to slowly migrate its way through the dense flesh and into the center. This delayed heat transfer is the root cause of almost every potato-related disaster in the home kitchen.
The Thermodynamics of a Boiling Pot (Or, Why Heat Transfer Hates You)
Let’s talk about what happens when you fill a pot with water, turn your stove to high, and wait for a rolling boil. Water boils at 212°F (100°C) at sea level. This is a tremendous amount of thermal energy. When you carelessly toss a handful of cubed, raw potatoes into this violently bubbling cauldron, you are subjecting them to extreme thermal shock.
Because of the potato’s low thermal conductivity, the heat from the boiling water cannot instantly penetrate to the core of the vegetable. Instead, the extreme heat slams into the exterior layers of the potato and stays there. Within seconds, the outside of your potato reaches 212°F. The pectin walls on the surface immediately begin to dissolve and break down. The exterior starch granules rapidly absorb the boiling water, swell up to their maximum capacity, and burst.
Meanwhile, the center of that very same potato cube is still sitting at a cool, raw 70°F. The heat simply hasn’t had time to travel that far inward yet.
As you stand there, frantically watching your pasta pot boils over because you walked away to check your phone for ten seconds, a microscopic tragedy is unfolding. By the time the thermal energy finally reaches the center of the potato and raises it to the required cooking temperature, the exterior has been exposed to boiling water for ten to fifteen minutes. The outside of the potato literally disintegrates, sloughing off into the water and creating a cloudy, starchy sludge at the bottom of your pot.
When you finally drain them, you are left with waterlogged, mushy exteriors and hard, undercooked interiors. If you attempt to mash these, the overcooked outsides will turn into a sticky, gelatinous paste, while the undercooked insides will remain as stubborn, crunchy lumps. It is a textural nightmare that no amount of heavy cream, roasted garlic, or sheer willpower can salvage.
The Myth of the Rapid Boil (Why Do Recipes Still Get It Wrong?)
If plunging potatoes into boiling water is so disastrous, why do so many home cooks—and even some outdated recipes—still do it? The answer lies in a misunderstanding of professional restaurant techniques and a misapplication of the rules for cooking green vegetables.
In a professional kitchen, chefs often use massive steam-jacketed kettles or high-powered commercial induction burners that can bring ten gallons of water back to a rolling boil in mere seconds. Home stoves take much longer to recover their heat when cold food is added. More importantly, the “drop it in boiling water” rule was created for green vegetables, not root vegetables.
When you cook green beans, asparagus, or peas, you are dealing with thin cell walls, high water content, and volatile chlorophyll. Chlorophyll turns a drab, unappetizing olive green if exposed to prolonged, moderate heat. Therefore, you must boil green vegetables rapidly and shock them in ice water to preserve their snap and vibrant color. Over the decades, well-meaning but scientifically illiterate home cooks incorrectly applied this rapid-boil green vegetable rule to dense, starchy root vegetables. Potatoes do not care about chlorophyll. They care about even heat distribution.
The Magic of Pectin Methylesterase (The Cold Water Cure)
So, how do we outsmart the thermal dynamics of a dense root vegetable? We change the environment. We start in cold water.
When you place your raw, cut potatoes into a pot of cold tap water and then turn on the heat, you are completely changing the rules of heat transfer. Instead of a violent thermal shock, you are introducing a gradual, even temperature rise. The water and the potatoes heat up together. As the water temperature slowly climbs from 60°F to 100°F, and then to 150°F, the heat has ample time to penetrate all the way to the core of the potato. The temperature gradient between the outside of the potato and the inside of the potato remains incredibly small.
But there is a secondary, almost magical scientific phenomenon that occurs when you start potatoes in cold water. It involves a naturally occurring enzyme called Pectin Methylesterase, or PME for short.
PME is an enzyme naturally present in the cell walls of the potato. Its primary job is to alter the chemical structure of pectin. When PME activates, it removes methyl groups from the pectin molecules, allowing them to cross-link with calcium ions naturally present in the cell wall. This cross-linking process essentially reinforces the cell walls, making them significantly stronger and far more resistant to breaking down when eventually exposed to high heat.
Here is the brilliant part: PME is highly temperature-dependent. It remains dormant when the potato is sitting cold on your counter, and it is completely destroyed when the temperature exceeds 160°F. But right in the middle—between 130°F and 140°F (55°C to 60°C)—PME becomes highly active.
When you drop potatoes into already-boiling water, the exterior instantly blasts past 160°F, instantly destroying the PME enzyme before it can do its structural reinforcement job. The cell walls melt into mush. But when you start your potatoes in cold water and slowly bring them to a boil, the potatoes spend several crucial minutes lingering in that magical 130°F to 140°F zone. During this time, the PME enzyme frantically goes to work, reinforcing and firming up the exterior cell walls of the potato.
By the time the water finally reaches a full boil, the outside of the potato has been structurally fortified. It can now withstand the 212°F water without disintegrating, sloughing off, or turning to mush, while the inside of the potato finishes cooking to tender perfection. This gradual, enzymatic firming process is the exact same reason why you should never use this cold-start method for hard-boiled eggs, which require an immediate blast of violent heat to rapidly separate the inner membrane from the shell. Different foods require entirely different thermal strategies, and knowing the difference is what makes you a great cook.
The 200°F Target for Perfect Starch Gelatinization
We’ve saved the exterior of the potato from turning into a watery paste, but what about the inside? The ultimate goal of cooking a potato is a chemical process called starch gelatinization.
As the internal temperature of the potato rises, the tightly packed starch granules begin to absorb the surrounding moisture. Around 140°F (60°C), the amylose molecules within the starch begin to loosen and swell. However, to achieve that incredibly fluffy, melt-in-your-mouth texture that we all crave, you need to break down the more stubborn, highly branched amylopectin molecules. This requires even higher heat.
Full starch gelatinization in a dense potato peaks as the internal temperature approaches 200°F (93°C). At this temperature, the starch granules have absorbed their maximum amount of water, swelling to many times their original size. They transform from hard, crystalline structures into a soft, viscous gel. This is the exact moment a potato transitions from raw and crunchy to perfectly “fork-tender.”
Because you started in cold water, the exterior and the interior of the potato will reach this 200°F target at almost the exact same time. You will have a potato that is structurally intact on the outside, yet beautifully gelatinized and fluffy on the inside. If you are ever in doubt, or if you are boiling massive whole potatoes for a specific recipe, you can literally use a high-quality meat thermometer to check the core temperature of the potato chunk. If it reads 200°F dead in the center, you are ready to drain.
The Step-by-Step Masterclass to Boiling Potatoes
Understanding the underlying science is great, but executing it flawlessly on a chaotic weeknight is what actually matters. Here is your foolproof, step-by-step masterclass guide to boiling potatoes with absolute precision.
Step 1: The Prep and the Cut
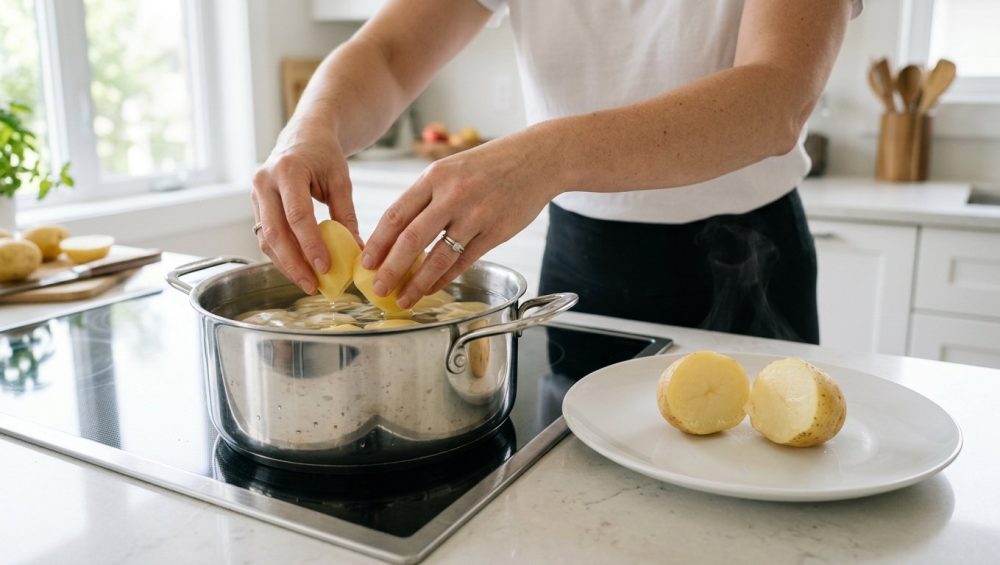
Begin by peeling your potatoes (if your recipe calls for it) and cutting them into uniform pieces. Uniformity is absolutely non-negotiable. If you have a chaotic mixture of massive chunks and tiny slivers, the small pieces will overcook and disintegrate before the large pieces even begin to soften, completely defeating the purpose of the cold water start. Aim for one-inch to two-inch cubes. Once chopped, use a bench scraper to quickly and cleanly transfer your massive pile of potatoes from your cutting board directly into your cooking pot without dropping them all over the floor.
Step 2: The Cold Water Bath
Place your perfectly uniform potato cubes into your pot and cover them with cold tap water. You want exactly one inch of water above the top of the potatoes. Do not drown them in a massive, overflowing cauldron of water; too much water takes forever to boil, wasting your precious time and energy. Too little water, and the starchy liquid will become a viscous syrup that insulates the potatoes and ruins the heat transfer.
Step 3: Aggressive Salting
Do not skip this step. You must salt the water heavily before you turn on the heat. Salt does much more than just season the interior of the potato as it cooks. Scientifically, the sodium ions in the salted water actually help stabilize the pectin in the cell walls, further preventing the potato from turning into mush. Add about one tablespoon of kosher salt per quart of water. It should taste pleasantly briny, like a mild broth.
Step 4: The Gentle Simmer
Place the pot on the stove over medium-high heat. Do not cover it with a tight lid, as this traps the starches and almost guarantees it will boil over violently. Let the water gradually come to a boil. The moment you see large, aggressive bubbles breaking the surface, immediately turn the heat down to medium-low to maintain a gentle, rolling simmer.
A violent, aggressive boil is a mechanical disaster for potatoes. The extreme turbulence of the rapidly boiling water will physically smash the potato chunks against each other and against the hard walls of the pot. Even with the PME enzyme fortifying the cell walls, this aggressive mechanical agitation will break the potatoes apart, leaving you with rounded, eroded nubs and a pot full of starchy sludge. A gentle, lazy simmer is all you need to maintain the necessary water temperature without beating your vegetables to death.
Step 5: The Drain and Steam
Once a fork slides effortlessly into the center of the largest potato chunk (or your thermometer reads the magic 200°F), immediately remove the pot from the heat and drain the potatoes in a colander. But you are not done yet. Return the drained potatoes to the hot, empty pot and place it back on the warm (but turned off) stove burner for two minutes. This allows the residual surface moisture to evaporate as steam. Dry potatoes absorb butter, cream, and dressings infinitely better than wet, waterlogged potatoes.
The “No-Go” Rule on Toxic Gear (Cookware Matters)
As your favorite Sassy Sous-Chef, I have a strict, non-negotiable rule in my kitchen: life is absolutely too short to cook with cheap, peeling, toxic garbage. The vessel you use to boil your potatoes matters immensely for heat distribution and your overall health.
I absolutely despise cheap, lightweight aluminum pots with mystery non-stick coatings. When you use these flimsy pots on high heat, they create massive thermal hot spots. The water at the bottom of the pot will boil violently while the water at the top remains tepid. Furthermore, boiling heavy root vegetables in a cheap non-stick pot will inevitably scratch the delicate coating, causing it to flake off into your food. It is time to throw away your toxic kitchen gear and invest in real, durable equipment that will last a lifetime.
For boiling potatoes, you need a heavy-bottomed, fully clad stainless steel pot or an enameled cast-iron Dutch oven. These materials boast superior thermal mass and conductivity. They absorb the heat from your stove and distribute it evenly across the entire base and up the sides of the pot. This ensures that the water heats uniformly, which means your potatoes heat uniformly.
And please, when you are gently stirring your potatoes to ensure they aren’t sticking to the bottom, use a heat-safe silicone spatula or a high-quality stainless steel spoon. If you are still using those cheap, splintering wooden spoons that have been sitting unwashed in a damp drawer since 2012, throw them out. They harbor bacteria, absorb starchy potato water like a sponge, and will eventually crack and ruin your food.
The Hidden Variables: Water pH and Potato Varieties
Even if you follow the cold water start perfectly and use the best cookware on the market, there are a few hidden variables in your kitchen that can still sabotage your spuds. Let’s eliminate them.
The pH of Your Tap Water
Did you know that the acidity or alkalinity of your tap water directly affects how potato pectin breaks down? It’s true. Pectin is highly unstable in alkaline environments. If you live in an area with hard, alkaline tap water (a pH above 8.0, which is common in limestone-rich regions), the pectin in your potatoes will hydrolyze and break down up to three times faster than normal. This means your potatoes will turn to mush even if you start them in cold water.
If you suspect your tap water is highly alkaline, you can easily neutralize it by adding just one quarter-teaspoon of white vinegar per quart of boiling water. The slight acidity will stabilize the pectin and keep your potatoes firm. (This is also a brilliant, pro-level trick if you are boiling potatoes for potato salad and want them to hold their shape perfectly).
Starchy vs. Waxy Potatoes
Not all potatoes are created equal. The ratio of amylose to amylopectin varies wildly depending on the specific variety of the potato, and you need to choose the right tool for the job.
- Starchy Potatoes (Russets, Idahos): These have a high starch content and low moisture. They swell up and become incredibly fluffy when gelatinized. They are the undisputed kings of mashed potatoes and gnocchi. However, because they are so starchy, they are the most prone to falling apart if boiled improperly. The cold water start is absolutely critical for them.
- Waxy Potatoes (Red Bliss, New Potatoes): These have a lower starch content and higher moisture, along with a denser cellular structure. They hold their shape beautifully after cooking, making them ideal for potato salads or soups. While they are slightly more forgiving than Russets, starting them in cold water still ensures a perfectly even, creamy texture without the dreaded crunchy center.
- All-Purpose Potatoes (Yukon Golds): The perfect middle ground. They have enough starch to be mashed, but enough structure to hold their shape. A cold water start makes Yukon Golds sing, resulting in a buttery, velvety texture that is hard to beat.
The Aftermath: The Science of Cooling and Starch Retrogradation
What happens after you boil your potatoes is just as important as how you boil them, especially if you are making potato salad. You don’t want fluffy, hot potatoes for a salad; you want them firm, cold, and capable of holding their shape when tossed with heavy mayonnaise or vinaigrette.
This brings us to a concept called starch retrogradation. As gelatinized starch cools down, the swollen amylose molecules begin to realign and form a rigid, crystalline structure once again. This creates what scientists call “resistant starch.” It makes the cooked potato significantly firmer and less likely to break apart.
This is exactly why you must boil potatoes for potato salad using the cold water start (so they cook evenly and don’t turn to exterior mush), but then you must let them cool completely before dressing them. If you toss hot potatoes with mayonnaise, they will crumble into a starchy paste. Let the retrogradation process do its job, and your potato salad will have the perfect, distinct bite.
Troubleshooting Common Potato Disasters
Let’s do a quick post-mortem on some of your past kitchen failures so you know exactly how to avoid them in the future.
The Disaster: Your mashed potatoes turned into literal wallpaper paste.
The Cause: You over-mashed them. When you aggressively mash or blend potatoes, you physically rupture the swollen starch granules, releasing a flood of sticky amylose into the mixture. This turns the fluffy gel into a cohesive, gluey nightmare.
The Fix: Stop using a blender, a food processor, or a high-speed hand mixer to whip your potatoes. These high-speed blades shear the delicate starch granules to pieces. Instead, gently press your perfectly boiled potatoes through a potato ricer. A ricer gently extrudes the potato flesh without tearing the starch molecules, guaranteeing a silky, lump-free, cloud-like texture every single time.
The Disaster: Your roasted potatoes are soft and soggy instead of crunchy.
The Cause: You treated roasting like boiling. Boiling requires a cold water start to protect the exterior. Roasting requires the exact opposite.
The Fix: If you want crispy roasted potatoes, you actually want the exterior to break down slightly so it can crisp up in the hot fat. For the ultimate roast potato, you par-boil them in hot, alkaline water (using baking soda) to intentionally break down the exterior pectin, creating a starchy slurry on the outside that roasts into an incredibly thick, glass-like crust in the oven. Science is all about knowing which rules to break and when.
The Disaster: Your potatoes taste watery and bland.
The Cause: You didn’t salt the water, and you didn’t let them steam dry after draining.
The Fix: Salt the cold water heavily before boiling. Once drained, return them to the hot pot to evaporate the surface moisture. A dry potato eagerly absorbs the fat from butter and heavy cream, whereas a wet potato repels it, leaving you with a watery, flavorless side dish.
Conclusion: Empowering the Everyday Cook
Cooking is not magic, and it certainly doesn’t require a pretentious culinary degree from an expensive French institute. It is simply applied physics and chemistry, disguised as dinner. Once you understand the basic thermal dynamics of the ingredients you are working with, you gain absolute control over your kitchen.
You now know that dropping a dense root vegetable into a pot of violently boiling water is a recipe for disaster. You understand that heat transfer takes time, that starch needs to reach 200°F to fully gelatinize, and that the magical PME enzyme needs a few uninterrupted minutes in a warm water bath to fortify the cellular walls of your spuds.
By simply changing the temperature of the water you start with, you have completely eliminated the frustration of uneven, mushy, crunchy potatoes. You have taken a stressful, unpredictable chore and turned it into a reliable, foolproof technique that you can execute flawlessly on the busiest of weeknights.
So, the next time you are rushing to get a Tuesday night dinner on the table, resist the urge to crank the heat and boil the water first. Take a breath. Put your perfectly cubed potatoes into a heavy stainless steel pot. Cover them with cold water. Salt them generously. Let the heat rise slowly. And while you wait, maybe pour yourself another glass of wine and throw that useless, rusty garlic press into the trash where it belongs.
You’ve got this. Now go make some mind-blowing food.


