Let us be brutally honest for a second. There is nothing quite as universally beloved, yet so frequently butchered, as a batch of homemade mashed potatoes. You hype yourself up for a comforting, cloud-like mound of buttery perfection, only to take a bite and realize you are chewing on a mouthful of industrial wallpaper paste. It is heavy, it is gummy, and it clings to the roof of your mouth like a bad life decision. You followed the recipe. You bought the expensive European butter. You even warmed the cream. So what exactly went wrong?
If your mashed potatoes can be used to successfully hang drywall, we need to have a serious talk about kitchen science. I have zero patience for pretentious, gatekeeping chef-speak, but if you want to stop serving your family spackle, you have to understand the basic physical mechanics of what happens when you crush a cooked tuber. I am tired of seeing well-meaning home cooks sabotage their own holiday dinners because they brought a high-speed blender to a gentle mashing fight.
If you are dedicated to fixing rookie kitchen mistakes and reclaiming your weekend comfort food, you are in the right place. Grab a cup of coffee, or a glass of wine if it has been that kind of day, and let us dive deep into the fascinating, microscopic world of potato starch. By the end of this masterclass, you will understand exactly why you need to invest in a potato ricer, and you will never serve a gluey, dense, or disappointing bowl of mashed potatoes ever again.
The Mashed Potato Tragedy: Why You’re Eating Wallpaper Paste
To understand why your potatoes are failing you, we have to zoom in. Way in. We need to look at the cellular structure of the humble potato. I promise to keep the science class flashbacks to a minimum, but understanding this is the key to unlocking restaurant-quality results in your standard home kitchen.
The Anatomy of a Spud
Think of a raw potato as a microscopic honeycomb. It is made up of millions of tiny, rigid cells, all cemented together by a natural glue called pectin. Inside each of these individual cells are tightly packed, hard little granules of starch. When the potato is raw, these starch granules are completely impervious to water.
When you drop those potatoes into a pot of water and turn up the heat, everything changes. At around 140°F (60°C), the starch granules inside the cells begin to absorb the surrounding water. By the time the internal temperature hits 160°F (71°C), those tiny granules have swollen to many times their original size. This process is called gelatinization. The starch has essentially transformed into a viscous, hydrated gel that completely fills up the inside of the potato cell.
At this stage, the pectin holding the cell walls together begins to dissolve, allowing the cells to separate from one another easily. If you treat these swollen, delicate cells with respect, they will separate cleanly, giving you a fluffy, incredibly smooth texture. But if you violently rupture those cell walls, all of that gelatinized starch oozes out into the open. This extracellular starch is the ultimate enemy. It is the exact reason why your potatoes are gluey and heavy.
The Starch Bomb: Amylose vs. Amylopectin
Not all starches are created equal. The starch inside a potato is made up of two different molecular structures: amylose and amylopectin.
Amylose is a long, straight-chain molecule. Because it is linear, it does not tangle up easily with other molecules. Potatoes that are high in amylose—like the classic Russet—tend to be mealy, dry, and incredibly fluffy when cooked.
Amylopectin, on the other hand, is a highly branched, bushy molecule. Because of all those branches, amylopectin molecules love to tangle, bond, and stick together. Potatoes that are high in amylopectin—like red potatoes or new potatoes—are considered “waxy.” They hold their shape beautifully in a potato salad, but if you try to mash them, those branched molecules will cross-link and form a sticky, cohesive paste.
When you take a potato and subject it to aggressive mashing, you are breaking open the cell walls and unleashing a flood of amylose and amylopectin. If you release too much of it, the starches bond with the water in the pot, creating a non-Newtonian fluid that gets thicker and gummier the more you stir it.
The Science of the Mash: What Actually Happens When You Crush a Potato
Now that we know the enemy is ruptured cell walls and free starch, let us look at the weapons we use to attack our potatoes. The tool you choose dictates the physical force applied to the cellular structure of the tuber.
Cellular Rupture and High-Shear Warfare
In physics and engineering, “shear force” refers to unaligned forces pushing one part of a body in one specific direction, and another part of the body in the opposite direction. When you drag a metal blade through a pile of soft potatoes, you are applying extreme shear force. You are literally slicing, tearing, and shredding the delicate, swollen potato cells.
To make perfect mashed potatoes, you want to apply compressive force, not shear force. Compressive force gently squeezes the cells apart without popping them like microscopic water balloons.
The Food Processor: Public Enemy Number One
I know what you are thinking. It is a busy Tuesday night. You are exhausted. You just want to get dinner on the table without a chaotic cooking routine that leaves you with a sink full of dishes. You look at your food processor, sitting there on the counter, promising salvation and speed. You dump your hot, boiled potatoes into the bowl, lock the lid, and hit the pulse button.
Congratulations. You have just committed culinary homicide.
A standard food processor blade spins at anywhere from 1,500 to 2,000 revolutions per minute. When those blades hit the hot potatoes, they obliterate the cell walls instantly. The sheer speed and friction generate localized heat, which further accelerates the starch release. Within three seconds, the blades have whipped the released amylose and amylopectin into a sticky, cohesive polymer. The motor strains, the mixture seizes, and you are left with a shiny, elastic glob of paste that stretches like melted mozzarella cheese.
The food processor is a magnificent invention. It makes brilliant pesto. It makes silky hummus. But if you put hot potatoes into it, you are actively choosing to make glue. Step away from the appliance.
Why the Traditional Hand Masher Frequently Fails You
“But Sassy Sous-Chef,” you say, “I use a traditional hand masher! Why are my potatoes still dense?”
The classic wire or perforated metal hand masher is certainly better than a blender, but it is deeply flawed. The problem with a hand masher is that it requires repeated, aggressive plunging to eliminate lumps. You smash down, you twist, you drag it through the potatoes, and you repeat this motion thirty or forty times until the mixture looks smooth.
Every time you plunge that masher down and twist your wrist, you are applying friction and shear force. By the time you finally crush that last stubborn lump of potato, you have severely overworked the rest of the batch, rupturing millions of cells in the process. You are trading lumps for glue. It is a lose-lose scenario.
Enter the Potato Ricer: The Low-Friction Hero Your Kitchen Needs
If high-shear blending is a disaster and repetitive hand-mashing is a gamble, how do we achieve that impossibly smooth, cloud-like texture you get at high-end steakhouses?
This is where the magic of a potato ricer comes into play. It is the ultimate secret weapon of the professional kitchen, and it is entirely accessible to the weekend home cook.
What Exactly is a Potato Ricer?
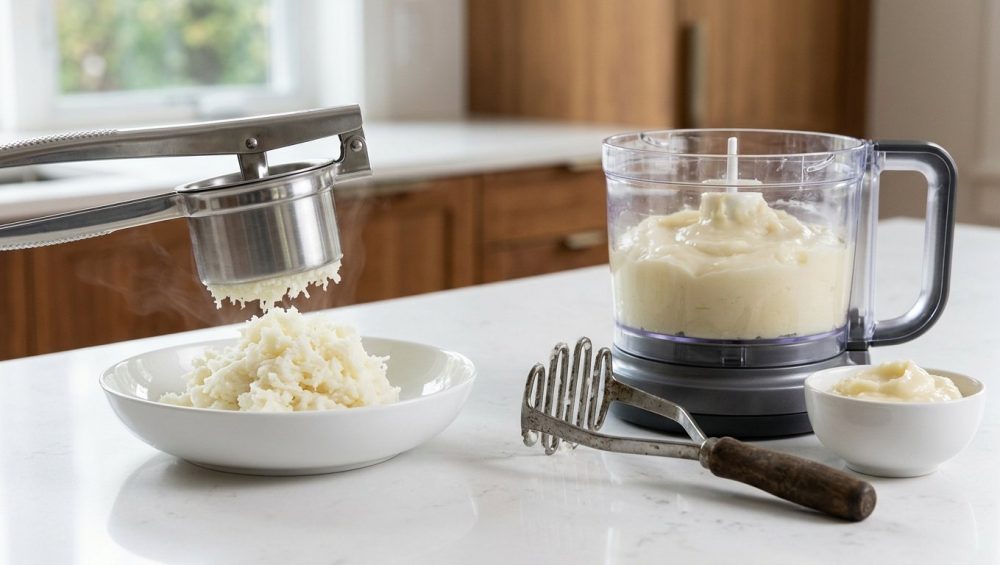
A potato ricer looks like a giant, heavy-duty garlic press. It consists of a hopper (a small basket where you place the cooked potato) and a flat plunger attached to a long lever handle. The bottom of the hopper is perforated with dozens of tiny holes.
When you place a hot, boiled potato into the hopper and squeeze the handles together, the plunger forces the potato through the small holes. The potato emerges on the other side in long, thin, delicate strands that look remarkably like grains of rice (hence the name).
The Mechanics of Gentle Extrusion
Why does this simple gadget produce such vastly superior results? It all comes down to the physics of extrusion.
When you use a ricer, you are applying a single, smooth, downward compressive force. The potato is gently squeezed through the perforations exactly one time. There is no repetitive smashing, no twisting, no spinning blades, and virtually zero friction. The delicate potato cells are separated from one another, but the vast majority of the cell walls remain completely intact.
Because the cell walls do not rupture, the starch remains trapped safely inside. The resulting potato strands are incredibly light, airy, and fluffy. They have a massive amount of surface area, which means they are perfectly primed to absorb butter and cream without requiring aggressive stirring. It is a foolproof mechanical solution to a chemical problem.
Food Mill vs. Ricer: Which One Deserves Your Drawer Space?
You might hear professional chefs talk about using a food mill (a “moulin à légumes”) for mashed potatoes. A food mill works by using a hand crank to sweep a slanted metal blade over a perforated bottom plate, pressing the food through the holes.
Food mills are fantastic for processing large volumes of potatoes, and they do a great job of leaving the skins behind if you are too lazy to peel them. However, the sweeping motion of the food mill’s blade does introduce slightly more shear force than the direct downward plunge of a ricer.
For the everyday home cook making a standard family-sized batch of potatoes, the ricer is the superior choice. It is cheaper, easier to clean, takes up less drawer space, and provides the absolute lowest-friction mashing method possible.
The Sassy Sous-Chef’s Rules for Buying a Ricer (No Toxic Junk Allowed)
If you have been reading my articles for any length of time, you know I have a strict, non-negotiable rule about kitchen equipment. I am completely committed to banishing toxic kitchen gear from my home, and I expect you to do the same.
The market is flooded with cheap, poorly manufactured kitchen gadgets that are actively detrimental to your health and your cooking. When buying a potato ricer, you must be discerning.
Material Matters: Say No to Mystery Metals
Do not, under any circumstances, buy a potato ricer made of cheap plastic or mystery metal coated in chrome plating.
Plastic ricers will flex, bend, and eventually snap under the pressure of a slightly undercooked potato. Worse, when hot food comes into contact with cheap plastic, you risk leaching endocrine-disrupting chemicals into your dinner.
Chrome-plated zinc or aluminum ricers are just as bad. The extreme pressure and the acidic nature of some foods (if you use your ricer for tomatoes or citrus) will cause the cheap chrome plating to blister, peel, and flake off directly into your mashed potatoes. I do not know about you, but I prefer my side dishes without a garnish of metallic paint chips.
You must buy a ricer made entirely of 18/10 commercial-grade stainless steel. It is non-reactive, rust-proof, incredibly durable, and completely safe. It will outlive you, and you can pass it down to your grandchildren.
Hopper Size and Leverage
Look for a ricer with a large hopper capacity. If the basket is too small, you will have to cut your potatoes into tiny pieces and reload the gadget twenty times, which is tedious and allows the potatoes to cool down too much.
Additionally, pay attention to the handles. You want long handles that provide excellent mechanical leverage. Squeezing a potato through tiny holes requires a fair amount of force, and short handles will leave your hands cramping. Some high-quality ricers feature a silicone grip on the handles and a small resting hook on the front of the hopper, allowing you to rest the tool securely on the rim of your mixing bowl while you press.
The Ultimate Masterclass: Step-by-Step to Flawless, Restaurant-Quality Mashed Potatoes
Now that you understand the science and have the right equipment, it is time to put it all together. You don’t need to decode pretentious recipe jargon to know that execution is everything. Here is my definitive, foolproof, step-by-step masterclass for flawless mashed potatoes.
Step 1: Potato Selection (Waxy vs. Starchy)
Great mashed potatoes start at the grocery store. As we discussed earlier, you want potatoes with a high amylose content to ensure a fluffy texture.
The classic Idaho Russet is the undisputed king of the fluffy mash. They fall apart easily and rice beautifully. However, Russets can be a bit one-dimensional in flavor.
Yukon Gold potatoes offer a fantastic middle ground. They have a medium starch content, but they bring an incredibly rich, naturally buttery flavor and a gorgeous golden hue to the dish.
The Sassy Sous-Chef Secret: Use a 50/50 blend. Combine the airy, fluffy texture of the Russet with the rich, creamy flavor of the Yukon Gold. It is the ultimate compromise.
Step 2: The Boil (To Peel or Not to Peel?)
Peel your potatoes. I know rustic, skin-on mashed potatoes are trendy, but if you are using a ricer, potato skins will clog the perforations and make the extrusion process a nightmare.
Cut your peeled potatoes into uniform, two-inch chunks. Uniformity is critical. If you have large chunks and small chunks in the same pot, the small ones will overcook and disintegrate into waterlogged mush before the large ones are tender.
Place the potato chunks into a large pot and cover them with cold water. Never drop potatoes into boiling water. If you drop them into boiling water, the exterior of the potato will cook instantly, gelatinizing the outer starches and creating a barrier, while the inside remains raw and crunchy. Starting in cold water ensures the temperature rises gently and the potatoes cook evenly from edge to center.
Add a generous handful of kosher salt to the cold water. Potatoes act like sponges as they heat up; if you do not salt the water, you will never be able to adequately season them later, no matter how much salt you pour on top.
Bring the pot to a boil, then reduce the heat to a gentle simmer. Boil until a paring knife slides into the largest potato chunk with absolutely zero resistance.
Step 3: The Crucial Drying Phase
This is the step that 90% of home cooks skip, and it is the reason their potatoes taste watered down.
When the potatoes are tender, drain them thoroughly in a colander. But do not stop there. If your spuds get waterlogged, you can bring them back to life by immediately returning the drained potatoes to the hot, empty pot.
Place the pot back on the stove over low heat for about two to three minutes. Gently shake the pot. You will see steam rising from the potatoes, and the edges will start to look slightly chalky and dry. You are evaporating all the excess surface moisture. Water is the enemy of butter. The drier the potato, the more rich dairy fat it can absorb.
Step 4: The Extrusion (Ricing Like a Pro)
Working quickly while the potatoes are still piping hot, load them into the hopper of your stainless steel ricer. Squeeze the handles and extrude the potatoes directly into a large, warm mixing bowl.
Do not pack the hopper too full, and do not try to force it if it jams. Just apply smooth, steady pressure. As the delicate ribbons of potato fall into the bowl, you will immediately notice the difference. They look light, dry, and incredibly fluffy.
This is one of those tools every beginner needs if they want to instantly elevate their cooking game. Once all the potatoes are riced, do not stir them yet! We have to talk about the dairy.
Step 5: Incorporating Fats (Temperature and Order are Everything)
This is where the final magic happens, and where the science of starch chemistry makes its final stand.
First: Order of operations matters. You must add your fat (butter) before you add your liquid (milk or cream).
Why? When you add melted butter to the riced potatoes, the fat molecules coat the swollen starch granules. This lipid coating acts as a waterproof barrier. When you subsequently add the milk, the fat barrier prevents the starch granules from absorbing the water in the milk and swelling further, which would cause them to burst and turn gluey. If you add the milk first, the starch absorbs the liquid immediately, leading to a gummy texture, and the butter just pools greasily on the surface.
Second: Temperature is critical. Never, ever add cold butter or cold milk to hot mashed potatoes.
When hot, gelatinized starch granules are suddenly shocked with cold dairy, they rapidly contract. This thermal shock causes the starch matrix to squeeze out its trapped water, resulting in a grainy, separated, and gluey texture.
While your potatoes are boiling, gently heat your butter and your whole milk (or heavy cream, if you are feeling decadent) in a small saucepan until the butter is completely melted and the mixture is steaming hot.
Pour the hot melted butter over the riced potatoes first. Using a silicone spatula, gently fold the butter into the potatoes. Do not whip. Do not stir vigorously. Use a gentle, sweeping folding motion, just until the butter is absorbed.
Next, gradually pour in the hot milk, folding gently until you reach your desired consistency. Taste for seasoning, add more salt if necessary, and perhaps a crack of fresh white pepper.
These small scientific tweaks will transform your daily meals from mediocre to Michelin-star quality without requiring a culinary degree.
Troubleshooting Common Mashed Potato Disasters
Even with the best intentions, things can go sideways in the kitchen. If you find yourself staring at a pot of compromised potatoes, do not panic. Let us troubleshoot.
The Waterlogged Spud
If you accidentally boiled your potatoes to the point of complete disintegration, they have absorbed too much water. The cells have burst in the pot. If you try to mash them, they will be soupy and gluey.
The Fix: Do not mash them. Spread the drained, overcooked potato chunks on a baking sheet and place them in a 300°F (150°C) oven for 10-15 minutes to aggressively evaporate the moisture. Then, rice them very gently. They will not be perfect, but they will be salvageable.
The Overworked Mash
If you ignored my advice, used a food processor, and created a bowl of sticky, elastic paste, I have bad news. You cannot un-rupture a cell wall. You cannot reverse gelatinization once the starches have cross-linked.
The Fix: Pivot. Do not serve them as mashed potatoes. Spread the gluey mash into a baking dish, chill it in the fridge until it is completely firm, then cut it into squares, dredge them in flour, egg, and breadcrumbs, and fry them. Congratulations, you just made potato croquettes.
The Cold Butter Catastrophe
If you added cold milk and butter and your potatoes seized up and turned grainy, the starches have undergone retrogradation due to thermal shock.
The Fix: Place the bowl over a pot of simmering water (a double boiler) and gently heat the mixture while folding in a few tablespoons of very hot cream. The gentle, ambient heat will help relax the starch matrix and smooth out the graininess.
Reheating and Storing: Don’t Ruin Your Masterpiece
You have successfully navigated the starch chemistry, purchased the correct equipment, and executed the perfect mash. But what happens if the turkey is delayed by an hour? If you want to throw a flawless dinner party, you cannot serve cold, congealed potatoes.
The Microwave Trap
Do not put your beautiful, fluffy mashed potatoes in the microwave. Microwaves heat food unevenly by exciting water molecules. This rapid, aggressive heating will cause the emulsions in your potatoes to break, leaving you with a puddle of separated butter and dense, dry potato clumps.
The Double-Boiler Salvation
Restaurants do not make mashed potatoes to order. They make a massive batch before service and hold them at the perfect temperature for hours. You can do the same thing.
Transfer your finished mashed potatoes to a heat-proof glass or stainless steel bowl. Place that bowl over a saucepan filled with an inch of barely simmering water, making sure the bottom of the bowl does not touch the water. Cover the bowl tightly with plastic wrap or a secure lid.
The gentle, indirect steam heat will keep the potatoes perfectly hot and flawlessly smooth for up to two hours without drying them out or breaking the butter emulsion. When you are ready to serve, give them one gentle fold with a spatula, and plate them up.
Final Thoughts: Reclaim Your Comfort Food
Cooking is not magic; it is applied physics and chemistry. Once you understand the basic rules of engagement—that potato cells are delicate, that shear force is the enemy, and that temperature control is paramount—you take the guesswork out of your kitchen.
Ditch the food processor. Throw away the peeling chrome gadgets. Invest in a heavy-duty stainless steel potato ricer, treat your starches with the respect they deserve, and get ready to experience the lightest, fluffiest, most deeply comforting mashed potatoes of your life. You have got this.


