
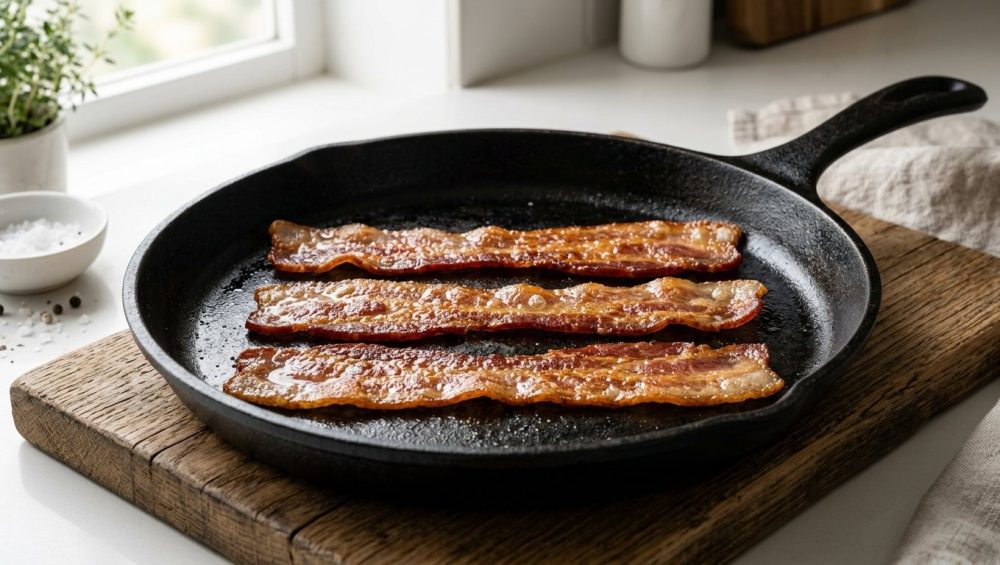
Picture this: It is a beautiful Saturday morning. You have finally clawed your way out of bed, the coffee is brewing, and you are craving a diner-style breakfast. You pull a beautiful, expensive package of thick-cut bacon from the fridge. You preheat your favorite skillet until it is ripping hot because, well, that is what every pretentious television chef tells you to do with meat, right? You drop the strips into the pan. Immediately, there is a violent hiss, a terrifying eruption of grease splatter that threatens your eyebrows, and within seconds, your beautiful strips of pork belly have contorted themselves into shriveled, chewy, unevenly cooked ribbons of absolute disappointment.
If you are wondering why your bacon always shrinks into tiny, sad little squiggles, you are not alone. As a home cook, you have probably been told that the secret to a good sear is a screaming hot pan. While that is generally true for a ribeye steak, applying that logic to cured pork belly is a fundamental misunderstanding of culinary thermodynamics.
Here is the brutal truth: Preheating your pan is the exact reason your breakfast is ruined.
I am here to tell you that you do not need a culinary degree, a commercial griddle, or a single-use gadget to achieve perfectly flat, uniformly crispy bacon. You just need to understand a little bit of basic science, practice a tiny bit of patience, and embrace the simple, foolproof magic of a cold pan. Let’s break down exactly why your bacon is throwing a temper tantrum in the skillet and how you can fix it forever.
The Great Breakfast Betrayal: Why Hot Pans Ruin Good Bacon
To understand why your bacon curls, we first have to understand what bacon actually is. You are not just cooking a piece of meat; you are cooking a complex composite material made of muscle, fat, and water.
The Anatomy of a Pig Strip
Bacon comes from the pork belly. If you look closely at a raw strip, you will see distinct layers. You have the pink, lean muscle fibers (the meat), and the stark white lipid layers (the fat). These two components react to heat in completely different ways.
Furthermore, unless you are buying dry-cured artisanal bacon directly from a local butcher who wears leather aprons and waxes his mustache, you are likely buying commercially processed grocery store bacon. Commercial bacon is typically “wet-cured” or “pumped.” This means the pork belly is injected with a liquid brine containing water, salt, sugar, sodium nitrite, and flavorings. This process is highly efficient for mass production, but it means that your standard grocery store bacon is packed with excess water.
The Violent Reaction to Preheated Metal
So, what happens when you take this wet, cold composite of fat and muscle and drop it onto a skillet that is sitting at 375°F? Absolute thermodynamic chaos.
First, the excess water from the wet-curing process instantly vaporizes. When water turns to steam, it expands violently. This is what causes that terrifying grease splatter that makes you look like you are dodging shrapnel in your pajamas.
Second, the lean muscle fibers react to the intense, sudden heat by seizing. Proteins are essentially long, coiled chains of amino acids. When exposed to high heat, these proteins denature and tightly contract. Because the pan is so hot, the muscle fibers shrink rapidly and aggressively.
Third, we have the fat. Fat does not evaporate; it renders (liquefies). But rendering takes time. When you use a hot pan, the muscle fibers seize and shrink instantly, but the white fat hasn’t had time to melt. Because the muscle is shrinking faster than the fat is rendering, the entire strip is pulled in different directions. The result? The bacon buckles, curls, and folds onto itself.
Once the bacon curls, it loses contact with the surface of the pan. The parts touching the metal burn, while the elevated, curled parts remain rubbery, flabby, and undercooked. It is a textural nightmare.
The Thermodynamics of a Seizing Pig
To fix this, we need to look at the specific temperatures at which these culinary reactions occur. Do not worry, I will spare you the pretentious chef-speak, but we do need to talk numbers for a second.
Rendering Fat vs. The Maillard Reaction
Bacon fat begins to render—meaning it transitions from a solid white mass into a translucent liquid—at a relatively low temperature, usually around 130°F to 140°F (54°C to 60°C).
On the other hand, the Maillard reaction—the chemical reaction between amino acids and reducing sugars that gives browned food its distinctive, delicious flavor and crispy texture—does not kick into high gear until the temperature reaches about 300°F to 325°F (150°C to 165°C).
When you preheat a skillet to 350°F and drop the bacon in, you are completely skipping the rendering phase. You are forcing the Maillard reaction (and eventually, the burning phase) before the fat has a chance to liquefy. You are effectively trapping the unrendered fat inside a shell of seized, overcooked meat.
The Cold Pan Solution: A Lesson in Heat Transfer
The solution is almost insultingly simple: Start your bacon in a cold pan.
When you place raw bacon in a cold skillet and turn the burner to medium-low, the metal and the meat heat up together. As the temperature slowly climbs past 130°F, the fat begins to gently melt. The excess water from the curing process evaporates slowly, rather than violently exploding.
By the time the pan reaches the 300°F threshold required for crisping, the bacon is swimming in a shallow, even pool of its own rendered liquid gold. The proteins in the muscle fibers have had time to relax and slowly contract, rather than violently seizing. Because the contraction is gradual, the bacon stays perfectly flat.
Furthermore, because it is laying flat in a pool of its own fat, it is essentially shallow-frying. This guarantees uniform heat distribution across the entire strip, resulting in bacon that is perfectly crispy from edge to edge, with melt-in-your-mouth fat that shatters beautifully when you bite into it.
The Step-by-Step Masterclass: Your Ticket to Flat, Crispy Perfection
I know that on a busy Tuesday morning, time is money. But if you are making bacon, you owe it to yourself to do it right. The cold pan method requires a bit more time upfront, but it requires significantly less active babysitting (and less time spent cleaning grease off your backsplash).
Prepping the Skillet (And Your Patience)
Step one: Take your skillet—completely cold, straight out of the cabinet—and place it on the stove. Do not turn the burner on yet.
Step two: Lay your bacon strips flat in the pan. You want them to be close, but they should not overlap. If they overlap, they will steam each other instead of frying, and you will end up with flabby spots. If you are cooking for a crowd and cannot fit it all in one pan, you will have to cook in batches. (Or use the oven, but that is a different article for a different day).
Step three: Turn the burner to medium-low. Do not get impatient and crank it to high. The goal is a slow, steady climb in temperature.
The Sweating Phase
As the pan heats up, you will notice the bacon starting to sweat. The white fat will slowly turn translucent, and a clear liquid will begin pooling around the edges of the meat. This is exactly what you want. You are extracting the fat without shocking the muscle fibers.
At this stage, you might hear a gentle sizzle. It should sound like a quiet, relaxing rainfall, not a violent fireworks display.
Flipping and Babysitting
Unlike a steak, which you generally want to leave alone to develop a crust, bacon benefits from frequent flipping. Once you see a good amount of fat rendered and the bottom side is starting to take on a slightly golden hue, grab your tongs.
Flip the bacon every couple of minutes. This ensures that both sides are cooking evenly in the rendered fat pool and prevents any hot spots in your pan from burning a specific section.
As the water continues to evaporate and the fat renders, the bubbling will change. Initially, the bubbles will be large and watery. As the moisture leaves the pan, the bubbles will become smaller, thicker, and foamier. When you see this fine foam, your bacon is in the final crisping stage. Keep a close eye on it, because it can go from perfectly crispy to burnt carbon in a matter of seconds.
The Art of the Drain
Once the bacon has reached your desired level of crispness, immediately remove it from the pan. Do not put it on a plate layered with paper towels.
I see rookies make this mistake all the time. When you place hot, grease-covered food directly onto paper towels, the towels absorb the hot grease, but they also trap the steam rising off the food. You are essentially creating a greasy sauna that will turn your perfectly crispy bacon soggy within minutes.
Instead, transfer the bacon to a wire cooling rack set over a baking sheet. This allows the excess fat to drip away while air circulates entirely around the strips, keeping them shatteringly crisp as they cool.
Ditch the Single-Use Gadgets (And the Toxic Pans)
Now that you know the science, we need to have a serious talk about the equipment you are using. As a home cook, you are constantly marketed to by companies trying to sell you useless kitchen junk. Let’s clear out the clutter.
Why Bacon Presses Are a Waste of Drawer Space
If you walk into any trendy kitchen supply store, you will see heavy cast iron bacon presses. The idea is that you preheat your pan, throw the bacon in, and immediately slap a heavy iron weight on top of it to physically pin it down so it cannot curl.
While a vented chef’s press can be useful for searing a spatchcocked chicken or getting a crust on a smash burger, buying one just to keep your breakfast meat flat is ridiculous. It is a band-aid solution to a thermodynamic problem. If you control the temperature and use the cold pan method, the bacon will stay flat naturally. You do not need to physically assault your food with a heavy piece of iron to make it behave. Save your money and your drawer space.
The Danger of Cheap Non-Stick (A Rant on Toxic Gear)
If you are currently cooking your morning meals in a scratched, peeling, lightweight non-stick skillet you bought for fifteen dollars at a big-box store five years ago, I need you to walk into your kitchen and throw it in the trash immediately. I have zero patience for toxic gear.
Traditional non-stick pans are coated with Polytetrafluoroethylene (PTFE), commonly known as Teflon. For decades, these coatings were manufactured using Per- and polyfluoroalkyl substances (PFAS), widely known as “forever chemicals.” While the FDA announced in early 2024 that PFAS-containing grease-proofing agents were finally phased out of US food packaging (like fast-food wrappers and microwave popcorn bags), the cookware industry is still a minefield of misleading labels.
When you heat a cheap PTFE pan beyond 500°F—which happens much faster than you think on a standard gas or electric burner—the coating begins to break down and off-gas toxic fumes. Furthermore, as the coating inevitably scratches and peels, those chemical flakes end up right in your food. You should start by banishing toxic kitchen gear from your life entirely. Do not poison your family just because you are afraid of doing the dishes.
Also, never use aerosol cooking sprays on your pans, even the supposedly “safe” ceramic ones. The emulsifiers in commercial cooking sprays burn at low temperatures and create a sticky, polymerized residue that will permanently ruin the non-stick properties of your cookware.
The Best Skillets for the Job
You want to cook like an expert? You need to use the right tools. Invest in solid beginner kitchen tools that will last a lifetime.
Carbon Steel: This is my absolute favorite pan for this job. The thermodynamics of carbon steel pans make them perfect for the slow, controlled heat required for rendering fat. Furthermore, every time you cook bacon in a carbon steel skillet, the rendered pork fat contributes to the pan’s natural, non-toxic polymerized seasoning layer. It gets better with every use.
Cast Iron: The classic choice. A heavy cast iron skillet takes a long time to heat up, which is actually an advantage for the cold pan method. It forces you to render the fat slowly. Once it gets hot, it holds that heat beautifully, ensuring an even fry.
Stainless Steel: Many home cooks are terrified of stainless steel because they think everything will stick to it. If you are wondering why your food always sticks to your stainless steel when you cook, it is usually because you are not managing your heat correctly. However, the cold pan method works beautifully here. Because the fat renders out slowly before the proteins get hot enough to bond with the metal, the bacon naturally releases itself from the pan.
Advanced Cold Pan Tactics for the Weekend Warrior
If you have mastered the basic cold pan method and want to take your weekend brunch game to the absolute pinnacle of culinary perfection, there is an advanced technique you need to try. It sounds completely counterintuitive, but it is rooted in flawless science.
The Water Method: Fact or Fiction?
You may have seen internet rumors suggesting that you should boil your bacon. While “boiling” is the wrong word, adding water to your skillet is actually a brilliant technique. Some professional chefs swear by cooking it in water to achieve the ultimate tender-crisp texture.
Here is how it works: You place your bacon in a cold skillet, just like before. But before you turn on the heat, you pour in just enough cold water to barely cover the bottom of the pan (about a quarter cup for a standard skillet). You turn the heat to medium-high.
Why does this work? Water boils at exactly 212°F (100°C) and will not exceed that temperature until it fully evaporates. Remember our thermodynamics lesson? Fat renders at 140°F, but meat doesn’t burn until well past 300°F. By submerging the bacon in simmering water, you are locking the temperature of the pan at 212°F. This is the absolute perfect temperature to completely render the fat without crisping or burning the muscle fibers.
As the water simmers, the fat melts beautifully into the liquid. The muscle fibers gently cook and tenderize without seizing. Eventually, all the water will evaporate, leaving behind perfectly tenderized meat sitting in a generous pool of its own rendered fat. At this point, the temperature of the pan will rise above 212°F, and the bacon will begin to fry.
Because the fat is already fully rendered and the muscle fibers are already cooked and relaxed, the bacon will fry perfectly flat, incredibly fast, and with a texture that is shatteringly crisp on the outside but tender on the inside. It is culinary magic.
Managing the Grease Splatter
Another massive benefit of the water method—and the standard cold pan method—is the reduction in grease splatter. Splatter occurs when water droplets (either from the meat or from condensation) violently hit hot oil, instantly turning to steam and exploding outward, carrying hot grease with them.
When you start cold, the moisture evaporates gradually. By the time the fat is hot enough to fry, the vast majority of the water has already gently steamed away. Your stovetop stays clean, and your forearms remain burn-free.
Troubleshooting Your Bacon Woes
Even with the cold pan method, you might occasionally run into issues depending on the specific product you purchased. Not all pork belly is created equal, and understanding your ingredients is the key to being a resourceful home cook.
Chewy Centers and Burnt Edges
If you find that your bacon is burning on the edges before the center gets crispy, you need to check the packaging. Is it sugar-cured? Maple-flavored? Applewood smoked with a brown sugar rub?
Sugar burns at around 350°F (175°C). If your bacon has a high sugar content from the curing process, it will caramelize and then rapidly burn long before the fat has fully rendered. If you are cooking sugar-cured bacon, you must keep the heat strictly on medium-low for the entire cooking process. Do not rush it.
Thick-Cut vs. Thin-Cut Timing
The thickness of the slice dramatically changes the thermodynamic math. Wafer-thin bacon will render and crisp very quickly, meaning you have a much smaller window between “perfectly crispy” and “burnt to a literal crisp.”
Thick-cut bacon, on the other hand, is much more forgiving but requires significantly more patience. With thick-cut strips, the water method mentioned above is highly recommended, as it ensures the thick band of fat renders completely before the outside burns.
The “Too Much Fat” Dilemma
If you are cooking a very fatty batch of pork belly in a smaller pan, you might find that the rendered fat completely submerges the meat, turning your shallow-fry into a deep-fry. While this isn’t necessarily a bad thing, excessive fat can drop the temperature of the pan and make the crisping process take forever.
If your pan is overflowing with grease, simply use a pair of tongs to hold the bacon back and carefully pour some of the excess liquid gold into a heat-safe ceramic or metal container mid-cook. (Never pour hot grease down your sink drain, unless you enjoy paying exorbitant plumbing bills).
Cleanup and Reclaiming Your Morning Routine
Once you have enjoyed your perfectly flat, uniformly crispy breakfast, you are left with a pan full of grease. As a resourceful cook, you should view this not as waste, but as a culinary byproduct.
Let the fat cool slightly in the pan, then strain it through a fine-mesh sieve into a glass jar and store it in your fridge. You now have a jar of smoky, savory cooking fat that will elevate your roasted potatoes, sautéed greens, or fried eggs to a professional level.
As for the pan, if you used cast iron or carbon steel, do not scrub it with harsh chemical soaps. Let it cool, wipe out the excess grease with a paper towel, and clean it with a chainmail scrubber and hot water to preserve the polymerized seasoning. If you used a knife to trim your bacon before cooking, make sure you wash and dry it immediately—leaving acidic or salty residue on the blade is exactly why cheap steel goes dull so fast.
Cooking shouldn’t be a stressful chore, and it certainly shouldn’t involve fighting with curling, seizing, misbehaving meat. By understanding the simple thermodynamics of fat rendering and ignoring the terrible advice to preheat your skillet, you take control of your kitchen.
You don’t need a culinary degree to make mind-blowing food. You don’t need toxic, peeling non-stick pans, and you certainly don’t need a cast iron press to bully your breakfast into submission. All you need is a cold pan, a little patience, and the confidence to let the science do the heavy lifting. Now go reclaim your weekend brunch. You’ve earned it.






