Picture this: You’ve invited your favorite people over for a cozy, interactive dinner. You’ve seen the viral videos of chefs dramatically pouring a cascading wave of golden, steaming polenta directly onto a rustic wooden table, creating an edible canvas of comfort food. You confidently march out of your kitchen, tilt your pot, and… thud. Instead of a luxurious, flowing river of cornmeal, you have just birthed a giant, lukewarm yellow frisbee that bounces off the board. Your guests stare. You pour another glass of wine and contemplate ordering a pizza.
We have all been there. Polenta is notoriously finicky, and if you don’t understand the underlying mechanics of what is actually happening in that pot, it will seize up on you faster than a cheap zipper. But here is the good news: you do not need a culinary degree or a Michelin star to pull off the ultimate communal dining experience. You just need a little bit of food science, the right hydration ratio, and a strict refusal to use terrible cookware.
Today, we are leaving absolutely no stone unturned. We are going to break down the exact chemistry of why your cornmeal turns into a weapon, how to manipulate your ingredients to keep it perfectly creamy, and the foolproof techniques that will make you look like a hosting genius. Grab your whisk, pour yourself something strong, and let’s get into it.
The Science of the Seize: Why Polenta Turns into a Weapon
If you want to stop serving your friends yellow concrete, you have to understand the enemy. And in this case, the enemy is a microscopic carbohydrate structure doing exactly what nature intended it to do.
Starch Gelatinization Explained (Without the PhD Jargon)
When you combine raw cornmeal and water, nothing much happens at room temperature. The magic—and the danger—begins when you apply heat. As the temperature of the water climbs to between 142°F and 161°F (61°C to 72°C), the starch granules in the cornmeal begin to absorb the liquid and swell. This process is called starch gelatinization.
Eventually, those swollen granules burst open, releasing their starchy contents into the surrounding water, which thickens the liquid into that luscious porridge we all know and love. It sounds simple enough, but the moment you take that pot off the stove, the clock starts ticking. I promise we will avoid pretentious recipe jargon wherever possible, but to truly master this dish, you need to meet the two molecular culprits responsible for your dinner party disasters.
Amylose vs. Amylopectin: The Culprits Behind the Clump
Starch is not just one uniform thing; it is composed of two different types of carbohydrate molecules: amylose and amylopectin.
Amylopectin is a highly branched molecule. Think of it like a messy, sprawling tree. Because of its irregular shape, it has a hard time stacking neatly together, which means it stays relatively loose and gives your polenta its beautiful, viscous creaminess.
Amylose, on the other hand, is a straight, linear molecule. It is the rigid rule-follower of the starch world. Traditional polenta is made from flint corn, which naturally contains a very high percentage of amylose—up to 28% by weight. When heated, amylose dissolves, but the second it starts to cool down, those straight chains immediately seek each other out and lock together like microscopic Lego bricks.
The Cooling Curve: Retrogradation and the Solidification Process
This locking-together process is scientifically known as retrogradation. As the temperature of the polenta drops, the amylose chains expel the water they previously absorbed and form a rigid, crystalline network.
This is exactly why the creamy porridge you tasted on the stove suddenly turns into a sliceable block the moment it hits a room-temperature serving platter. Retrogradation is a one-way street; once those amylose molecules lock hands, your flowing communal board is officially ruined. To beat the seize, we have to interfere with this chemical bonding process using liquid, fat, and strategic thermal control.
The Holy Trinity of Creamy Polenta: Liquid, Fat, and Heat
You cannot negotiate with retrogradation, but you can absolutely sabotage it. By altering the environment inside your pot, you can keep those amylose molecules separated for as long as possible.
The Hydration Ratio Reality Check (Hint: The Box is Lying to You)
Turn around any standard bag or box of cornmeal at the grocery store, and the instructions will likely tell you to use a 1:3 or 1:4 ratio of cornmeal to liquid. I need you to take a black marker and cross that out immediately. That ratio is designed to produce a stiff, sliceable side dish, not a luxurious, flowing centerpiece.
If you want a texture that cascades beautifully across a board, you need to radically increase your hydration. A 1:5 ratio (one cup of cornmeal to five cups of liquid) is the absolute bare minimum for a creamy result, and frankly, I strongly prefer a 1:6 ratio when hosting. Yes, it sounds like an absurd amount of liquid when you first pour it in, but remember that those starch granules are going to swell massively. You can always cook off a little excess moisture, but trying to vigorously whisk cold water into a seized block of cornmeal while your guests are watching is a nightmare.
Fat Incorporation: Emulsification as a Barrier to Seizing
Water alone is not enough to keep the peace. You need fat, and you need a lot of it. Butter, heavy cream, mascarpone, and grated Parmesan aren’t just there to make the dish taste like a decadent hug; they serve a crucial structural purpose.
When you vigorously beat cold butter and cheese into your hot polenta at the very end of the cooking process, you are creating an emulsion. The fat coats the swollen starch granules and physically gets in the way of the amylose chains trying to link together. It is basically molecular lubrication. If you skimp on the fat, the starch network tightens up immediately. Nobody wants to deal with the tragedy of when their cheese sauce turns grainy, and the same principle applies here: proper emulsification requires patience, the right temperature, and high-quality dairy.
The Slow-Cook vs. Quick-Cook Debate
Do not buy “instant” or “quick-cooking” polenta for a communal board. I know, I am usually the biggest advocate for time-saving weekday hacks, but instant polenta has been pre-cooked and dehydrated. The starch structures have already been altered, meaning it will never achieve that deeply creamy, pudding-like consistency, and it will seize up almost instantly upon hitting the table.
Buy authentic, stone-ground flint cornmeal. Yes, it takes longer to hydrate, but the varied particle sizes (some coarse, some powdery) create a far superior, multidimensional texture that holds its flow significantly longer.
Gear Warning: Stop Using Toxic Pots for Long Simmers
We need to have a serious talk about your equipment. Polenta requires a long, slow simmer, and it is incredibly thick and heavy. This is the exact scenario where cheap cookware goes to die, and takes your health down with it.
The Dangers of Cheap Non-Stick (Teflon) for Polenta
I have a strict, zero-tolerance policy when it comes to toxic kitchenware, and I will never stop banishing toxic kitchen gear from my readers’ homes. Do not cook polenta in a scratched, peeling, lightweight non-stick pot.
When polenta simmers, it behaves like a geothermal mud pot, erupting with heavy, violent bubbles. Because it is so thick, it traps heat intensely at the bottom of the pan. A thin, cheap aluminum pot with a Teflon coating will develop severe hot spots. The cornmeal will scorch, and worse, the intense, prolonged heat can degrade the chemical non-stick coating, causing it to flake off directly into your dinner. There is nothing rustic or charming about serving your friends a side of perfluorooctanoic acid (PFOA) or forever chemicals.
The Best Heavy-Bottomed Alternatives
You need thermal mass. You need a pot that absorbs heat slowly and distributes it perfectly evenly across the base. An enameled cast-iron Dutch oven (like a Le Creuset or Staub) is the undisputed king of polenta. The thick cast iron prevents scorching, and the smooth enamel is naturally stick-resistant and completely non-toxic.
If you don’t have enameled cast iron, a high-quality, fully clad tri-ply stainless steel pot is your next best option. A heavy stainless pot will conduct heat beautifully, and as long as you manage your heat properly, cleanup is a breeze. Just remember to use the water drop test to ensure your stainless steel is properly preheated for other cooking tasks, though for this dish, you’ll be starting with cold liquid anyway.
Protect Your Utensils
A thick pot of cornmeal provides serious resistance. If you are using a flimsy, dollar-store plastic spatula or an old, splintering spoon, it is going to snap in half. I get countless messages from readers asking why their wooden spoons keep cracking, and the answer is almost always a combination of dishwasher abuse and stirring heavy stews. Invest in a solid, single-piece silicone spatula with a rigid core, or a thick, high-quality hardwood spoon that has been properly oiled.
The “No-Stir” Oven Method: A Host’s Best Friend
There is a pervasive, romanticized myth that authentic Italian cooking requires an old nonna standing over a hot stove for an hour, stirring the pot continuously in a figure-eight motion with a wooden paddle. I am here to tell you that this is nonsense. You have a life, you have a glass of wine to drink, and you have guests to entertain.
Why the Oven Outperforms the Stovetop for Stress-Free Hosting
The stovetop method is inherently flawed because the heat source is entirely concentrated at the bottom of the pot. This forces you to stir constantly to prevent the bottom from burning while the top remains raw.
When you move the pot to the oven, you surround the vessel with gentle, even, ambient heat. The cornmeal hydrates perfectly without scorching, and you are freed from your stovetop prison. I highly recommend that you stop stirring constantly and let the oven do the heavy lifting for you.
Step-by-Step Oven Polenta Workflow
Here is the ultimate low-stress, high-reward method:
- Preheat your oven to 350°F (175°C).
- In your heavy enameled Dutch oven, combine 1 cup of stone-ground cornmeal, 5 cups of liquid (I like a mix of high-quality chicken or vegetable stock and whole milk), and a generous pinch of kosher salt.
- Whisk it thoroughly to prevent dry clumps, bring it to a bare simmer on the stove, and then immediately cover it with a heavy lid and transfer it to the oven.
- Set a timer for 40 minutes. Go socialize.
- Take it out, give it a vigorous whisk (it will look separated, just keep whisking until it comes together), and put it back in for another 10 to 15 minutes until the grains are completely tender.
- Remove from the oven and vigorously beat in your butter, cheese, and a splash of heavy cream.
Thermodynamic Holding Strategies: Keeping It Flowing Until Guests Arrive
Timing a dinner party perfectly is impossible. Someone will always be stuck in traffic, and someone will always arrive 30 minutes early. If your polenta finishes cooking before it is time to serve, leaving it sitting on a cold counter is a death sentence. You must master thermal holding to keep the starch matrix relaxed and flowing.
The Bain-Marie (Water Bath) Hack
Restaurant chefs do not make polenta to order; they make a massive batch before service and hold it at the perfect temperature. You can replicate this at home using a bain-marie (a water bath).
Fill a large pot with an inch of simmering water. Place a heatproof bowl (or a slightly smaller pot) containing your finished polenta over the simmering water, ensuring the bottom of the bowl does not touch the water. Cover the surface of the polenta directly with a piece of buttered parchment paper or plastic wrap to prevent a skin from forming. The gentle, indirect steam heat will keep the cornmeal above the retrogradation temperature without scorching the bottom.
Slow Cookers and Rice Cookers: The Ultimate Holding Vessels
If you want an even easier, hands-off approach, transfer the finished dish into a slow cooker or a high-end rice cooker set to the “Keep Warm” setting. These appliances are specifically engineered to maintain a safe, consistent holding temperature (usually around 150°F to 160°F) without applying direct, intense heat to the base. Just remember to keep the lid on tight to trap the moisture.
The Last-Minute Hydration Rescue
No matter how perfectly you hold it, some moisture will inevitably evaporate, and the mixture will thicken. Do not panic. Keep a small saucepan of simmering chicken stock or milk on the stove. Right before you are ready to pour the board, vigorously whisk a splash of the boiling liquid into the polenta. The sudden introduction of heat and moisture will re-emulsify the fat and relax the starch, instantly restoring that gorgeous, cascading texture.
Building the Ultimate Cozy Communal Polenta Board
Now that you have successfully engineered a perfectly creamy, stable base, it is time for the fun part. The polenta board (traditionally known in Italy as polenta alla spianatoia) is a rustic, highly visual way to serve a crowd. It breaks down the formal barriers of dining and forces everyone to lean in, share, and connect.
Selecting the Right Board
Do not pour hot food onto a piece of chemically treated plywood from the hardware store. You need a dedicated, food-safe wooden board. Traditional spianatoia boards are often made from pine, beechwood, cherry, or olive wood.
Ensure the wood has been heavily conditioned with a food-grade mineral oil or beeswax so the moisture from the food doesn’t instantly warp the wood. If you don’t want to invest in a massive wooden board, a large marble slab or a massive ceramic platter works beautifully, though they will pull heat away from the food faster than wood. Planning the presentation is a huge part of hosting a meaningful dinner party, so use a surface that makes you happy and is easy to clean.
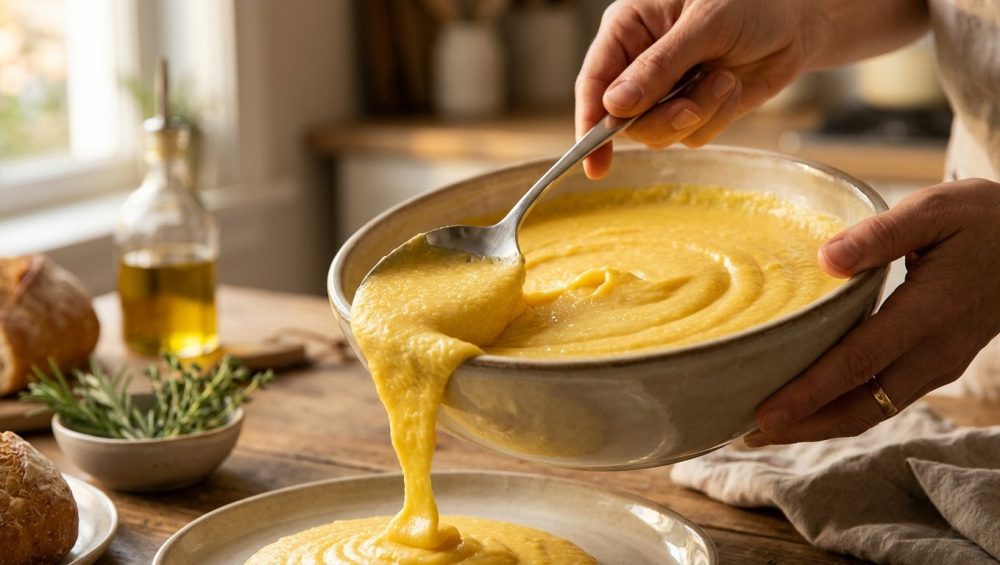
The Pour: Timing is Everything
The visual impact of this dish relies entirely on theatrical timing. Do not pour the board in the kitchen and awkwardly carry it to the table. Place the empty board in the center of the table, gather your guests around with their wine glasses, and bring the steaming pot directly to them.
Pour it slowly down the center of the board, using a spatula to gently guide it outward into a thick, golden oval. This is the exact moment where you realize that learning the art of effortless hosting is mostly just about confidence and showmanship.
Toppings and Flavor Pairing Strategies
A plain board of cornmeal is boring. The polenta is merely the canvas; the toppings are the paint. You want to provide a variety of textures and temperatures.
- The Saucy Element: A rich, slow-braised short rib ragu, spicy Italian sausage in marinara, or a deeply savory wild mushroom and thyme fricassee. Spoon this aggressively down the center line of the pour.
- The Cheese Element: Dot the edges with crumbled Gorgonzola dolce, dollops of fresh ricotta, or shaved pecorino. The residual heat will melt them into gooey puddles.
- The Crunchy Element: Pine nuts, crispy fried sage leaves, or roasted chickpeas add a necessary textural contrast to the soft porridge.
- The Acid: A drizzle of high-quality aged balsamic vinegar or a handful of bright, lemony arugula scattered over the top cuts through the heavy richness of the fat and starch.
Troubleshooting the Yellow Brick: Fixes for Polenta Disasters
Even with the best intentions and the finest ingredients, things can occasionally go sideways in the kitchen. If you find yourself staring at a culinary disaster, take a deep breath. Almost anything can be fixed.
How to Rescue Lumpy Polenta
If you dumped your cornmeal into the water too fast, or if the water was at a rolling boil instead of a gentle simmer, the starches on the outside of the clumps will gelatinize instantly, forming a waterproof seal around the raw, dry cornmeal inside. Whisking will not save you now.
Instead of throwing it away, grab your immersion blender. A few quick pulses will obliterate the lumps and smooth out the texture perfectly. It’s the same trick I use when people complain that their mashed potatoes are gluey or lumpy; mechanical sheer force beats manual whisking every single time.
What to Do If It Hardens Anyway (Repurposing the Brick)
Let’s say you miscalculated the timing, the board sat out for an hour before people ate, and the retrogradation process won the battle. The polenta has fully set into a stiff block.
Do not try to reheat it into a porridge; you will just end up with a watery, broken mess. Instead, pivot. Lean into the firmness. Take a knife, slice the hardened block into thick fries or neat squares. Brush them generously with olive oil, sprinkle with flaky sea salt, and blast them in a 425°F (220°C) oven on a preheated dark steel baking sheet.
Because the amylose has crystallized, the exterior will fry up incredibly crispy while the interior remains soft and fluffy. Serve them with a side of marinara or garlic aioli, and your guests will think you planned a two-course appetizer all along.
The communal polenta board is not about having superhuman culinary instincts; it is about respecting the ingredients. Once you understand the science of starch gelatinization, respect the hydration ratios, and refuse to cook in cheap, toxic pots, you unlock a level of hosting that is visually stunning, incredibly delicious, and surprisingly low-stress.
So, put down the instant cornmeal, crank up the oven, and invite your friends over. You are officially ready to pour the perfect board. Just make sure someone else is on dish duty. Cheers!


