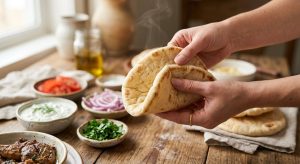
Picture this: It is a beautiful Saturday evening. You have spent the last three hours meticulously marinating chicken thighs in yogurt, lemon, and oregano. You have chopped a mountain of crisp cucumbers and tomatoes with the precision of a seasoned prep cook. You have whipped up a garlicky tzatziki so vibrant it could bring a tear to a Greek grandmother’s eye. You are ready to host a relaxed dinner party, and you have set up a stunning, interactive build-your-own gyro bar on your kitchen island.
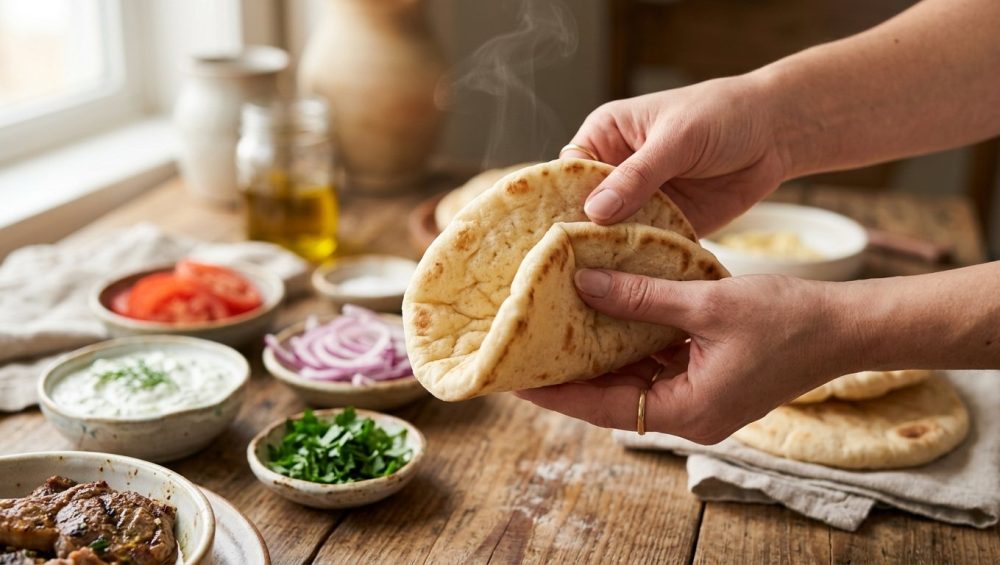
Your friends gather around, drinks in hand. You proudly grab a store-bought pita, load it generously with your perfectly seared chicken and fresh toppings, and go for the quintessential fold.
CRACK.
The pita shatters. It doesn’t just tear; it explodes into a dozen dry, powdery shards, spilling your beautiful, lovingly crafted fillings all over your plate, your hands, and your dignity. You are left holding a broken, brittle carbohydrate taco shell, wondering where it all went wrong.
Welcome to the infuriating reality of the uncooperative flatbread.
If you have ever felt personally victimized by a brittle pita bread, pour yourself a glass of wine and pull up a chair. Today, we are stripping away the pretentious chef-speak and diving deep into the actual science of why your flatbreads turn into cardboard, and more importantly, exactly how to rescue them. Because I firmly believe that anyone can cook like an expert in a standard home kitchen, provided they have the right techniques up their sleeve.
The Tragic Reality of Store-Bought Pita (And Why We Settle for It)
Let’s be brutally honest: we are busy professionals. While I absolutely love a weekend baking project that involves proofing dough for 48 hours, I also know that on a Tuesday night—or even a busy Saturday when you are focusing all your energy on the proteins and side dishes—baking fresh flatbreads from scratch is not always on the menu. Time is money, and sometimes, convenience wins.
We buy store-bought pita bread because it buys us time. But that convenience comes with a massive, structural trade-off.
The Anatomy of a Flatbread Failure
To understand why your store-bought pita is failing you, you need to understand what it actually is. Pita is a double-layered flatbread baked at blisteringly high temperatures (often between 350°C to 550°C, or 660°F to over 1000°F in commercial ovens). This intense, rapid heat causes the water in the dough to instantly turn to steam, puffing the bread up like a balloon and creating that famous interior pocket.
However, authentic, high-quality pita bread contains very few ingredients: usually just flour, water, yeast, and salt. It lacks the heavy chemical preservatives and dough conditioners found in highly processed sandwich loaves. In the commercial baking industry, large-scale manufacturers sometimes use specialized enzyme blends to maintain flatbread softness for a few extra days. But the standard, natural pita you pick up from the bakery aisle? It is essentially a ticking time bomb. The moment it leaves the oven and hits the air, it begins to die.
Just like how bamboo cutting boards are ruining your expensive chef’s knives by being too hard and unyielding, the ambient air in your kitchen is ruining your flatbreads by crystallizing their internal structure.
The Science of Starch Retrogradation: Why Your Pita Hates You
If you want to stop your dinners from falling apart, you need to understand the enemy. And the enemy here is a chemical process known as starch retrogradation.
Wheat flour is composed of approximately 70% to 75% starch. This starch is made up of two primary polysaccharides: amylose and amylopectin, typically existing in a ratio of about 1:3.
When the raw pita dough is thrown into a blazing hot oven, a magical transformation occurs. As the internal temperature of the dough reaches between 140°F and 158°F (60°C to 70°C), the starch granules absorb the surrounding water, swell up, and burst. This process, called starch gelatinization, creates a disordered, flexible, gel-like structure that gives freshly baked bread its incredibly soft, pliable, and pillowy texture.
But here is the catch: starch gelatinization is a temporary state.
Moisture Migration and the Staling Process
Almost immediately after the bread comes out of the oven and begins to cool, those starches start to rebel. The amylopectin molecules begin to realign themselves, forming a rigid, crystalline structure, which then forms associations with the amylose. The starch is essentially trying to return to its original, hard, crystalline state.
This is what we call staling. It is not merely a loss of moisture through evaporation; it is a fundamental chemical restructuring of the bread. You could seal a fresh pita in a vacuum-tight bag to prevent any water from escaping, and it would still turn hard and brittle over a few days because of this retrogradation process. You might think it is just simple dehydration—the exact same reason your chicken breast turns out dry if you leave it in the pan too long—but it is actually a complex molecular shift.
A Quick Sassy Pro-Tip: This is exactly why you should never store your bread in the refrigerator. The chilly temperature of a fridge (usually around 35°F to 40°F) is the absolute optimal environment for accelerating starch retrogradation. Your fridge will turn a soft pita into a rigid frisbee in record time. If you need to store flatbreads long-term, freeze them. Freezing halts the retrogradation process in its tracks.
The Masterclass: How to Rescue Brittle Pita Bread
So, you have a bag of rigid, uncooperative store-bought pitas. How do we fix them?
The goal is to reverse the staling process by forcing the starches to re-gelatinize. To do this, we need two things: Heat (to reach that 140°F/60°C threshold) and Moisture (to rehydrate the crystalline starches).
Before you grab a skillet and just blindly blast your bread with dry heat—or worse, subject it to the danger of aerosol cooking sprays—let’s look at the proper, scientifically sound techniques to bring your flatbreads back from the dead.
Method 1: The Damp Towel Microwave Miracle (For the Weekday Rush)
When you are throwing together a 15-minute weeknight dinner, efficiency is everything. The microwave is highly effective here because it heats the water molecules inside the bread directly, rapidly raising the temperature to the gelatinization point.
- Hydrate the Towel: Take a standard paper towel and run it under the faucet. Wring it out completely until it is only slightly damp. If it is dripping wet, you will end up with a soggy, unappetizing sponge.
- Wrap and Trap: Wrap your stale pita completely in the damp towel. This creates a micro-steamer environment.
- The Short Blast: Place it on a microwave-safe plate and microwave on high for exactly 15 to 20 seconds. Do not walk away. Do not check your email.
- Immediate Consumption: The steam will penetrate the crumb, forcing the amylopectin to temporarily relax. The pita will emerge astonishingly soft and pliable. However, you must eat it immediately. Once a microwaved pita cools down, the retrogradation happens twice as fast, leaving you with a texture resembling shoe leather.
Method 2: The Stovetop Steam and Sear (For the Perfectionist)
If it is the weekend and you want to elevate your store-bought pita to restaurant-quality status, we are going to use the stovetop. This method gives you the best of both worlds: a pillowy, steamed interior with a slightly charred, toasted exterior.
The Bamboo Steamer Approach:
If you own a bamboo steamer basket, place it over a wok of simmering water. Line the basket with parchment paper to prevent sticking, and steam the pitas for about 3 to 5 minutes. The gentle, ambient steam penetrates the bread slowly, re-gelatinizing the starches without waterlogging the crust.
The Skillet Steam Approach:
If you don’t have a bamboo steamer, grab a high-quality, heavy-bottomed skillet with a tight-fitting lid.
- Heat the skillet over medium heat. Do not add oil.
- Place your pita in the dry pan.
- Flick about a teaspoon of water directly onto the hot surface of the pan (make sure the water hits the metal, not the bread).
- Immediately slam the lid on. The water will instantly turn to steam, trapped inside the pan.
- Let it steam for 30 seconds, then remove the lid and let the pita sear for another 15 seconds to dry the exterior.
If you are worried that the wet bread sticks to your stainless steel skillet, ensure the pan is properly preheated before you begin. The steam barrier will naturally release the bread.
Method 3: The Oven Batch-Warm (For the Mindful Gyro Bar)
When you are hosting a dinner party, you cannot stand by the microwave or the stove reviving one single pita every 30 seconds. You need a batch solution that holds the bread at the perfect temperature for your guests.
- Preheat: Set your oven to 350°F (175°C).
- The Spritz: Take your stack of pitas and lightly mist them with water. You can use a clean spray bottle, or simply flick water off your fingertips onto the bread.
- The Crinkled Foil Pouch: Tear off a large sheet of heavy-duty aluminum foil. Before wrapping the bread, crumple the foil into a ball, then smooth it back out. Why? Because crinkling the foil minimizes the surface area contact between the hot metal and the bread. If the bread sits flat against smooth foil, the condensation will pool, creating a soggy, gummy crust. The crinkles allow the steam to circulate evenly.
- Bake: Wrap the moistened pitas loosely in the crinkled foil pouch, ensuring it is completely sealed to trap the steam. Bake for 10 to 15 minutes.
- Serve: Transfer the foil pouch directly to a cloth-lined basket on your gyro bar. The insulated pouch will keep the bread steaming hot and perfectly pliable for the duration of the meal.
Essential Non-Toxic Gear for Flatbread Revival
As a home cook who prioritizes health and durability, I have a strict “No-Go” rule when it comes to toxic kitchen gear. If you are going to use the stovetop steaming method, you must pay attention to the equipment you are using.
Ditch the Peeling Teflon
I absolutely despise cheap, non-stick pans. When you add a splash of water to a hot skillet and cover it with a lid, you are creating a high-heat, high-pressure steam environment. If you are doing this in a bargain-bin non-stick pan with a scratched, peeling Teflon coating, that steam is actively interacting with degraded synthetic polymers. You are essentially infusing your beautiful, natural flatbread with toxic forever chemicals.
Just like how cheap silicone spatulas taste like soap and ruin your dinner with synthetic off-gassing, mystery-metal cookware ruins both your food and your health. Throw them away.
The Stainless Steel and Bamboo Alternatives
For the stovetop steam-and-sear method, invest in a high-quality, fully clad stainless steel skillet. Stainless steel is non-reactive, handles high heat beautifully, and will last you a lifetime. Make sure it comes with a heavy, tight-fitting lid to properly trap the steam.
If you prefer the bamboo steamer method, pair it with a traditional carbon steel wok. Carbon steel is a fantastic, safe, natural non-stick alternative once properly seasoned. The beauty of a bamboo steamer is that the natural wood absorbs excess condensation, meaning water droplets won’t rain back down onto your pita bread and make it soggy. It is an ancient, brilliant, and completely non-toxic culinary tool.
Building the Ultimate Mindful Gyro Bar
Now that you have mastered the science of starch retrogradation and possess the power to revive any stale flatbread, it is time to put it all together. Hosting a mindful gyro bar is the ultimate hack for effortless entertaining. It shifts the burden of assembly from the host to the guests, making the meal interactive, highly customizable, and incredibly fun.
Prepping the Proteins Without Losing Your Mind
Whether you are making a traditional lamb and beef mixture, or opting for a weeknight-friendly chicken shawarma, the secret is in the marinade. Yogurt-based marinades are incredible for chicken because the lactic acid gently tenderizes the meat without turning it to mush.
Toss your chicken thighs in a mixture of full-fat Greek yogurt, lemon juice, olive oil, minced garlic, oregano, smoked paprika, and a dash of turmeric. But take heed: when working with potent spices like turmeric, be warned that your plastic containers stain orange permanently. Always use glass or stainless steel mixing bowls for heavily pigmented marinades.
Cook your proteins ahead of time and hold them in a warm oven (around 170°F) covered with foil until your guests are ready to eat.
The Tzatziki and Toppings Strategy
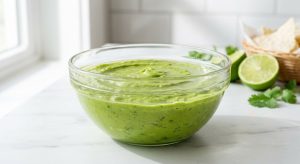
A gyro bar lives and dies by its condiments. You need a stellar tzatziki sauce. The biggest rookie mistake when making tzatziki is failing to properly drain the cucumber. Cucumbers are over 90% water. If you simply grate a cucumber and fold it into your yogurt, you will quickly discover why your tzatziki gets watery and destroys your newly softened bread.
Grate your cucumber, toss it with a hefty pinch of kosher salt, and let it sit in a fine-mesh strainer for 15 minutes. The salt will draw out the excess moisture. Then, wrap the grated cucumber in a clean kitchen towel and wring it out with brute force until it is completely dry. Fold that into your full-fat Greek yogurt with garlic, dill, lemon juice, and olive oil.
For the rest of the toppings, keep it classic and fresh:
- Thinly sliced red onions
- Diced Roma tomatoes (seeds removed to prevent extra moisture)
- Crumbled sheep’s milk feta cheese
- Kalamata olives
- Fresh parsley
Staging the Assembly Line for Stress-Free Hosting
The flow of your gyro bar is crucial for a relaxed gathering. Set up your kitchen island or dining table in a logical assembly line:
- The Foundation: Start with the warm, crinkled-foil pouch of rescued pita bread.
- The Base: Next, place the tzatziki and any other spreads (like hummus or a spicy feta dip). Applying the spread directly to the bread creates a lipid barrier that protects the pita from the juices of the meat.
- The Protein: Place your warm chicken, lamb, or beef in a heavy cast-iron or ceramic serving dish to retain heat.
- The Crunch: End the line with your bowls of tomatoes, onions, feta, and herbs.
By staging it this way, your guests build their gyros structurally sound, preventing bottom-blowouts and cracked folds.
Troubleshooting Common Gyro Bar Disasters
Even with the best preparation, the kitchen can occasionally throw you a curveball. Here is how to troubleshoot if your flatbreads are still misbehaving.
When the Pita Still Cracks
If you followed the warming methods and your pita still shatters when you fold it, one of three things happened:
- Insufficient Heat: You did not get the internal temperature of the bread high enough (past 140°F) to trigger starch gelatinization.
- Insufficient Moisture: The bread was so incredibly stale that your damp towel or foil spritz wasn’t enough water to rehydrate the crystallized amylopectin. Next time, add a little more water.
- You Waited Too Long: This is the most common culprit. You warmed the bread perfectly, but then you let it sit on your plate for ten minutes while you chatted and drank wine. As the bread cooled back down to room temperature, the starches instantly retrograded again. Warm bread must be eaten warm.
Soggy Bread Syndrome
On the opposite end of the spectrum, if your pita bread feels like a wet sponge and dissolves in your hands, you over-hydrated it. This usually happens if you run the pita directly under the faucet, or if you wrapped it in a soaking wet paper towel rather than a damp one.
Moisture control in the kitchen is a delicate balance of emulsion and hydration—much like understanding why your salad dressing always separates if you skip the mustard. You need just enough water to create steam, but not so much that you drown the crumb structure.
The Onion Dilemma
If your guests are complaining that the raw red onions on the gyro bar are overwhelmingly harsh and pungent, you have a prep issue. When you aggressively hack at an onion, you crush the cell walls, releasing an enzyme called alliinase, which creates that harsh, eye-watering sulfur compound.
If you are crying over the cutting board, remember the real culprit is your dull knife crushing the cell walls rather than slicing cleanly through them. Sharpen your chef’s knife. Additionally, to mellow out sliced red onions for a raw garnish, soak them in a bowl of ice water with a splash of red wine vinegar for 10 minutes before serving. It removes the harsh bite while keeping them incredibly crisp.
The Final Fold: Bringing It All Together
Hosting a beautiful, mindful gathering should never end with you stressing over a pile of crumbly, broken bread. You do not need a bakery in your backyard or a culinary degree to pull off a flawless gyro bar. You just need to understand your ingredients.
By recognizing that store-bought pita bread is fighting a constant, chemical battle against starch retrogradation, you can intervene. Armed with a little bit of heat, a touch of moisture, and the right non-toxic equipment, you can force those stubborn starch molecules to relax, re-gelatinize, and return to their soft, pillowy glory.
So the next time you are staring down a bag of sad, rigid flatbreads on a Friday night, don’t panic. Grab your crinkled foil, preheat your oven, and get ready to fold the perfect gyro. You’ve got this. Now, go pour yourself that glass of wine.