
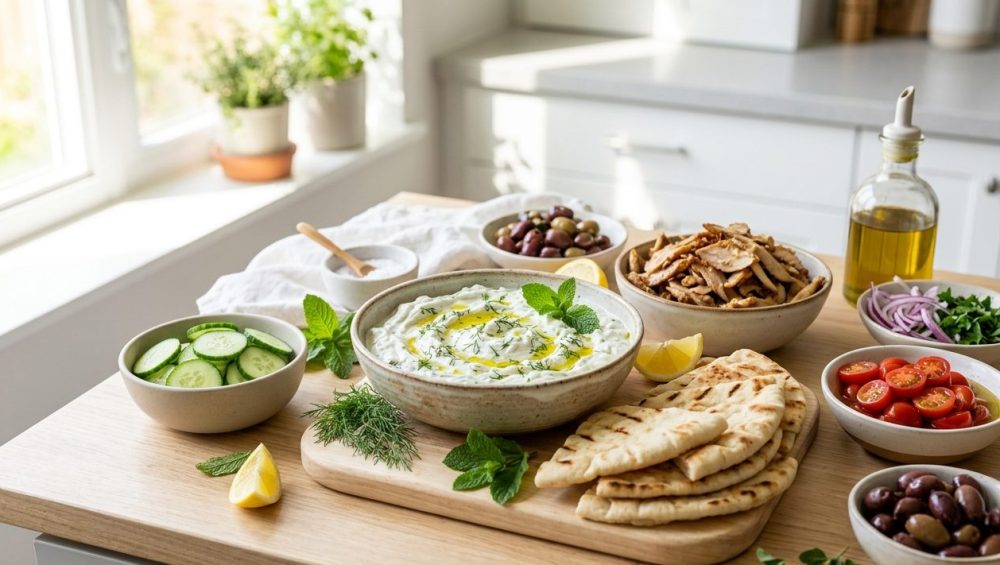
Picture this: You have invited your closest friends over for a weekend dinner. You have spent the better part of your Saturday marinating chicken thighs in a beautiful blend of olive oil, oregano, and lemon juice. You have warmed the fluffy pita bread to pillowy perfection. You have artfully arranged a platter of crisp red onions, briny kalamata olives, and crumbled feta. You are feeling like an absolute culinary rockstar. And then, the tragedy strikes. You spoon a generous dollop of homemade tzatziki onto your masterpiece, and within thirty seconds, a milky, translucent puddle of cucumber water floods the plate. It breaches the borders of your pita, turning the bread into a soggy, unappetizing sponge. Your beautiful gyro has structurally collapsed before the first bite.
Listen to me closely: there is absolutely no excuse for watery tzatziki.
I know you are a busy person. I know that during the week, time is money, and we rely on quick kitchen hacks just to survive until Friday. But when the weekend rolls around and you are dedicating your precious free time to building a gorgeous, interactive DIY gyro bar for your friends, you need to be an absolute perfectionist about your condiments. Tzatziki is not just a dip; it is the structural glue and the primary flavor vehicle of the entire Mediterranean spread. When it breaks, the meal breaks. Skipping the foundational prep steps is one of those beginner cooking mistakes that will haunt your dinner plates for years if you do not correct it immediately.
The good news? You do not need a culinary degree from Le Cordon Bleu to fix this. You do not need pretentious chef-speak or a kitchen full of gadgets you cannot pronounce. You just need a basic understanding of high school biology, a little bit of salt, and the willingness to use some brute force. Today, we are going to dive deep into the kitchen science of osmosis, dissect the anatomy of the cucumber, and build a foolproof, prep-ahead mindful gyro bar that will make you the ultimate stress-free host. Grab a glass of wine, pull up a stool, and let’s get to work.
The Biology of the Cucumber and the Enemy Within
To understand why your tzatziki is failing, you have to understand the enemy. And in this scenario, the enemy is water.
Botanically speaking, cucumbers are an absolute marvel of hydration. According to recent USDA agricultural data, a standard cucumber is composed of approximately 95.2% water by weight. When you pick up a cucumber at the grocery store, you are essentially holding a slightly crunchy, green water balloon. That moisture is not just sloshing around freely; it is locked tightly inside large, thin-walled parenchyma cells, which are surrounded by semi-permeable membranes.
When you slice, dice, or grate a raw cucumber to make tzatziki, your knife blade physically ruptures thousands of these microscopic cells, releasing a small amount of surface moisture. However, the vast majority of the water remains stubbornly trapped inside the intact cells that survived the initial chopping process. (As a quick aside: if you notice that your cutting board is instantly flooded the second you start chopping, the hidden culprit is your dull knife absolutely mangling the cellular structure instead of cleanly slicing through it. Sharpen your tools, people!)
Why is this trapped water such a massive problem for your sauce? Because yogurt is essentially a delicate emulsion of milk fat, proteins, and a very specific ratio of water. When you fold raw, untreated cucumber directly into your thick, luxurious yogurt, you are planting a ticking time bomb. As the sauce sits in the refrigerator, the salt and acid in the yogurt will slowly break down the cucumber’s cellular walls, releasing that 95.2% water content directly into your perfectly balanced emulsion. The extra water physically separates the dairy fat from the proteins, causing the sauce to “break” or split. You are left with a grainy, separated mess that tastes more like cucumber dishwater than a rich Mediterranean condiment.
The Science of Osmosis: Your Kitchen’s Invisible Sous-Chef
We know the water is trapped inside the cucumber’s cells, and we know we cannot just squeeze raw cucumber effectively because the cell walls are too rigid. So, how do we get the water out without cooking the vegetable and ruining its fresh, crisp texture? We call upon your kitchen’s invisible sous-chef: Osmosis.
I promised no pretentious chef-speak, but we are going to do a tiny bit of science here because understanding the “why” is what separates a weekend hobbyist from a confident home cook. Osmosis is the passive movement of water across a semi-permeable membrane from an area of low solute concentration to an area of high solute concentration.
When you aggressively salt your grated cucumber, you are instantly creating a hypertonic environment on the outside of the plant cells. The universe hates an imbalance. In a desperate attempt to dilute the heavy concentration of salt on the exterior, the parenchyma cells will automatically expel their intracellular water through their membranes and out into your bowl.
This process does not just save your sauce from becoming a puddle; it actively improves the flavor profile of the cucumber itself. By forcing the water out, you are concentrating the cucumber’s natural sugars and volatile aroma compounds by an impressive 18 to 22%. Furthermore, the osmotic process helps leach out cucurbitacins—the organic triterpenoid compounds concentrated near the skin and seeds that give cucumbers a bitter, astringent taste. By salting and draining, you are simultaneously dehydrating, sweetening, and flavor-boosting your ingredients. It is an absolute win-win scenario, grounded entirely in unarguable physics.
The Salting Ritual: How to Extract the Saboteur
Now that we understand the science, let us talk about the execution. The salting ritual is non-negotiable. If you skip this step because you are “in a rush,” I cannot help you. Time is money, yes, but ruining a whole batch of expensive Greek yogurt because you couldn’t wait fifteen minutes is a terrible return on investment.
Choosing Your Weapon: Grating vs. Dicing
Before we salt, we must prep. For a masterclass tzatziki, you have two options: grating or dicing. I strongly advocate for grating your cucumber on the large holes of a standard stainless steel box grater. Grating maximizes the exposed surface area of the cucumber, which significantly accelerates the osmotic process. It also creates a finer, more integrated texture in the final sauce, allowing the cucumber to melt into the yogurt rather than fighting it. If you prefer a chunkier texture, you can perform a fine brunoise (a very tiny, precise dice), but be aware that it will take longer for the salt to penetrate and extract the moisture.
The Salt Selection
Do not reach for the cheap, iodized table salt that has been sitting in your pantry since 2018. Table salt contains anti-caking agents and iodine, which can impart a harsh, metallic aftertaste to raw vegetables. You want to use a high-quality Kosher salt or a fine sea salt. The pure sodium chloride will trigger the osmosis without leaving any chemical residue behind. You will need about a half teaspoon of Kosher salt for every medium-sized cucumber you grate.
The Waiting Game
Once you have grated the cucumber into a bowl, sprinkle the salt evenly over the top and use your hands to aggressively toss the mixture, ensuring every single shred is coated. Now, walk away.
According to food structure lab trials, measurable exudate (water pooling) will begin to appear within 90 seconds, but you must wait a minimum of 10 to 15 minutes for the cells to reach osmotic equilibrium and release their maximal extractable moisture. Use this time efficiently. This is your window to prep your garlic, squeeze your lemons, or pour yourself another glass of wine.
The Squeeze: Brute Force Meets Finesse
The timer has gone off. You will return to your bowl to find your grated cucumber swimming in a pool of pale green liquid. The salt has successfully drawn the water out of the cells, but your job is not done. If you just scoop the cucumber out of the bowl, it will still be completely waterlogged. You have to physically wring it out.
The “No-Go” Rule on Toxic Kitchen Gear
Before we get into the physical techniques, we need to have a very serious conversation about your equipment. I have talked extensively about the essential tools every beginner needs to avoid this exact scenario, and a medical-grade stainless steel mesh strainer is at the top of the list. I absolutely despise cheap, toxic kitchenware. If you are using a plastic colander from a dollar store, or a strainer with a mystery-metal coating that is actively flaking off into your food, throw it in the trash right now.
When you are working with acidic or highly salted ingredients, cheap metals can react, leaching toxic compounds and metallic flavors directly into your beautiful, organic produce. Non-stick coatings on cheap strainers will inevitably peel under the friction of squeezing. You deserve better. Your food deserves better. Invest in a heavy-duty, 18/10 stainless steel fine mesh strainer. It will outlive you, and it will never poison your tzatziki.
Squeezing Methods: Choose Your Fighter
There are three acceptable ways to extract the salted water from your cucumber.
Method 1: The Cheesecloth Wring
This is the traditional culinary school method. Transfer the salted cucumber into the center of a double-layered square of culinary cheesecloth (or a clean, lint-free flour sack towel). Gather the corners to form a tight pouch, hold it over the sink, and twist the top. As you twist tighter and tighter, the pressure will force an astonishing amount of water through the fabric. Keep twisting until your forearms burn and not a single drop falls.
Method 2: The Brute Force Hand Squeeze
If you do not have cheesecloth, your impeccably clean hands will do just fine. Grab a handful of the salted cucumber, make a tight fist, and squeeze as hard as humanly possible over the sink. Transfer the dry puck of cucumber to a clean bowl, and repeat until finished.
Method 3: The Potato Ricer Hack
This is my ultimate weeknight efficiency hack. If you own a heavy-duty stainless steel potato ricer, load the salted cucumber into the hopper and press down on the handles. The mechanical leverage will extract the water with minimal physical effort on your part, leaving you with a perfectly dry, compressed disc of cucumber.
Whatever method you choose, your goal is to render the cucumber almost completely dry to the touch. It should look like a dense, green snowball.
The Yogurt Conundrum: Full-Fat or Bust
With your cucumber thoroughly dehydrated, it is time to build the base of the sauce. The type of yogurt you choose will single-handedly dictate the success or failure of your tzatziki.
Why Greek Yogurt is Mandatory
You must use authentic Greek yogurt. Do not buy “Greek-style” yogurt, which is often just thin regular yogurt thickened artificially with pectin, gelatin, or gums. You need the real deal.
What makes Greek yogurt so special? It all comes down to the straining process. Traditional yogurt is placed in centrifuges or massive cloth bags and strained to remove the acid whey. Acid whey is a watery, highly acidic byproduct (with a pH of around 4.6) that contains lactose and calcium phosphate. By physically removing this liquid whey, manufacturers consolidate the remaining milk solids, resulting in a product that has almost twice as much protein and half the carbohydrates of regular yogurt.
Because the moisture content in Greek yogurt is so remarkably low, it provides a stable, dense matrix of casein proteins that can safely absorb the lemon juice and olive oil we are going to add later without breaking the emulsion. If you try to make tzatziki with regular, unstrained yogurt, it will be soup before you even add the cucumber.
The Fat Content Debate
I will say this loudly for the people in the back: do not use zero-percent fat yogurt for tzatziki.
Fat is a mechanical flavor carrier. It coats the tongue, allowing the volatile oils from the garlic and herbs to linger on your palate. It also provides a luxurious, velvety mouthfeel that simply cannot be replicated by skim milk products. You want a minimum of 5% milkfat, though a decadent 10% fat Greek yogurt will yield a sauce so rich it could practically double as a standalone dip.
When you are folding your ingredients into this thick, fatty yogurt, make sure you are using a high-quality wooden spoon or a premium silicone spatula. It is a nightmare when silicone spatulas taste like soap because of cheap manufacturing and porous materials absorbing dish detergent. Use non-porous, food-grade platinum silicone to ensure your sauce tastes like garlic and mint, not synthetic lavender dish soap.
Flavor Alchemy: Garlic, Acid, and Herbs
Tzatziki is a masterclass in minimalism. Because there are only a handful of ingredients, there is absolutely nowhere for bad technique to hide. The flavor alchemy requires careful balance.
The Garlic Trap
Raw garlic is a highly volatile ingredient. When you damage the cell walls of a garlic clove, an enzyme called alliinase converts the amino acid alliin into allicin, the compound responsible for garlic’s pungent, spicy burn. The more aggressively you crush the garlic, the more allicin is produced.
Do not use a cheap metal garlic press for this recipe. The crushing, macerating action of a poorly designed press releases a massive, unbalanced wave of allicin, and using one is exactly why your garlic press makes food bitter in raw applications. Instead, use a sharp chef’s knife to mince the garlic into an incredibly fine paste, or gently grate it on a ceramic ginger grater. You want the garlic to whisper throughout the sauce, not scream at your guests. One or two medium cloves is plenty for two cups of yogurt. Remember, the garlic flavor will bloom and intensify significantly as the sauce rests in the fridge.
The Acid Factor
You have a rich, heavy, high-fat dairy base. If you’ve ever wondered why your dinner actually needs acid, it is because heavy butterfat demands a sharp, bright counterpoint to wake up the palate and prevent the dish from tasting muddy or cloying.
Traditional Greek recipes often call for a splash of high-quality white wine vinegar, which provides a clean, sharp tang. However, fresh lemon juice is equally acceptable and adds a beautiful, floral citrus note that pairs perfectly with marinated chicken. Whichever you choose, add it slowly. Start with one tablespoon, stir, and taste. You want the acid to cut through the fat, but you do not want to curdle the dairy.
The Herb Selection
Fresh herbs are non-negotiable. Do not even look at the dusty jar of dried dill in your spice rack. Dried herbs have their place in long-simmered stews, but in a raw, fresh sauce, they taste like lawn clippings. Finely chop a generous handful of fresh dill. If you want to elevate the complexity, add a tablespoon of finely minced fresh mint. The cooling menthol notes of the mint play beautifully against the sharp garlic and the rich yogurt.
Building the Mindful Gyro Bar (Stress-Free Entertaining)
Now that you have mastered the tzatziki, let’s talk about the main event. Why are we building a DIY gyro bar instead of plating individual meals in the kitchen? Because you are a host, not a short-order restaurant cook.
The landscape of home entertaining has drastically shifted. According to the 2026 International Housewares Association (IHA) Occasions Survey, 57% of consumers hosted casual, at-home gatherings in the past year, marking a massive departure from the stuffy, formal dinner parties of previous decades. Furthermore, industry data shows that nearly 70% of hosts in 2026 are embracing DIY elements and buffet-style serving to reduce pressure and foster connection. People do not want to sit in a rigid dining room while the host sweats over a hot stove in isolation. They want to gather around a kitchen island, interact with their food, and customize their plates.
The secret to hosting mindful gatherings is doing all the heavy lifting before anyone even arrives. A gyro bar is the ultimate expression of this philosophy.
The Prep-Ahead Timeline
A successful gyro bar is 90% preparation and 10% execution.
24 Hours Before:
Make your tzatziki. This is crucial. The flavors of the garlic, dill, and lemon need time to meld and permeate the fat molecules in the yogurt.
Marinate your protein. Whether you are using boneless, skinless chicken thighs, lamb shoulder, or thick slices of halloumi cheese, get them into a ziplock bag with olive oil, lemon zest, oregano, and black pepper.
4 Hours Before:
Prep your vegetable garnishes. Slice your tomatoes, thinly shave your red onions (toss them in a little red wine vinegar to quickly pickle them and remove their raw bite), and crumble your feta cheese. Store everything in airtight containers in the fridge.
30 Minutes Before:
Cook your protein. If you are pan-searing chicken on the stovetop, I have explained before why your garlic always burns—add it at the very end of the cooking process, not the beginning, or just rely on the garlic in the tzatziki and keep the meat marinade garlic-free.
Wrap your pita breads in a damp kitchen towel and warm them in a 250°F (120°C) oven so they are pliable and soft.
When your guests arrive, all you have to do is pull the bowls out of the fridge, slice the hot meat, and pour the wine. You get to actually enjoy the party you threw.
The Master Tzatziki Recipe & Assembly Guide
For those who need exact measurements, here is the definitive, un-ruinable blueprint for the Sassy Sous-Chef’s Master Tzatziki.
The Ingredients:
- 2 cups authentic, full-fat Greek yogurt (5% or 10% milkfat)
- 1 large English cucumber (they have fewer seeds and thinner skins)
- 1/2 teaspoon Kosher salt (for the cucumber extraction)
- 2 medium cloves garlic, minced into a microscopic paste
- 1.5 tablespoons extra-virgin olive oil (the good stuff, cold-pressed)
- 1 tablespoon fresh lemon juice or white wine vinegar
- 2 tablespoons fresh dill, finely chopped
- 1 tablespoon fresh mint, finely chopped (optional, but highly recommended)
- Freshly cracked black pepper to taste
The Method:
- Grate the English cucumber on the large holes of a box grater.
- Toss the grated cucumber with the Kosher salt in a bowl. Walk away for 15 minutes.
- Squeeze the absolute life out of the cucumber using cheesecloth, a potato ricer, or your bare hands. Discard the extracted green water.
- In a large mixing bowl, combine the ultra-dry cucumber pulp with the Greek yogurt, garlic paste, olive oil, lemon juice, dill, and mint.
- Stir gently until completely incorporated. Taste for seasoning—you may need a tiny pinch more salt, but remember the cucumber was already salted. Add black pepper to your liking.
Storage and Maturation
Transfer the finished tzatziki to a high-quality glass storage container. Do not use cheap plastic tupperware. It is infuriating when plastic containers stay greasy and hold onto pungent garlic odors for eternity, ruining your future meal preps. Glass is non-porous, safe, and easily sterilized.
Smooth the top of the tzatziki with a spoon, drizzle a tiny bit of olive oil over the surface to create an airtight seal, cover with a lid, and place it in the refrigerator. If you want to host a relaxed dinner party, make this sauce 24 hours in advance. The transformation that occurs overnight is nothing short of magical. The harsh bite of the garlic mellows, the dill infuses the dairy fat, and the sauce thickens even further into a luxurious, scoopable masterpiece.
Final Thoughts: Reclaiming the Kitchen
Cooking for friends should never be a source of anxiety. You do not need to be a professional chef to create mind-blowing food; you just need to respect the ingredients and understand the basic science of how they interact. By taking the extra fifteen minutes to let osmosis do its job, you are elevating a simple yogurt dip into a restaurant-quality condiment. You are ensuring that your pita remains soft, your chicken remains the star, and your guests remain thoroughly impressed.
So throw away your toxic strainers, sharpen your knives, and embrace the beautiful, messy, deeply rewarding art of the DIY gyro bar. Your weekends are about to get a whole lot more delicious. Now go grate some cucumbers, and for the love of all things culinary, squeeze them until your hands hurt.






