
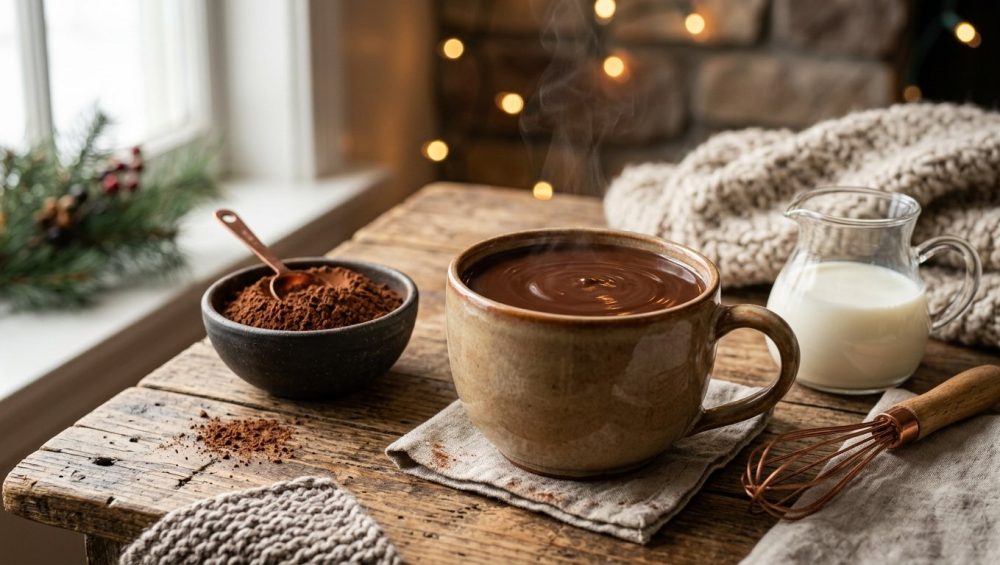
The Gritty Truth About Your Sad, Clumpy Hot Chocolate
We have all been there, standing in a dimly lit kitchen on a freezing winter evening, desperately craving comfort. You rip open a sad, crinkly paper packet of store-bought hot cocoa mix, dump the dusty contents into a mug of lukewarm microwaved milk, and begin to stir frantically with a spoon. What happens next is a culinary tragedy that has plagued home cooks for generations. Instead of dissolving into a rich, velvety elixir, the powder forms an impenetrable, hydrophobic life raft that floats mockingly on the surface of your drink. No matter how aggressively you agitate that spoon, the powder refuses to yield. When you finally give up and take a sip, you are rewarded with a mouthful of dry, gritty dust followed immediately by thin, scorched milk.
Frankly, you deserve better. Your guests deserve better. Weekdays might be a chaotic scramble where we survive on clever shortcuts and sheer willpower, but the weekend is sacred. The weekend is when we slow down, channel our inner perfectionists, and create mind-blowing food without needing a pretentious culinary degree to do it. Hosting a winter gathering should be a joyful, cozy experience, not an exercise in beverage-based frustration.
If you want to elevate your hosting game, it is time to ditch the powdery packets and learn the actual science behind a proper hot chocolate bar. We are going to deconstruct the mechanics of cocoa hydration, master the delicate art of milk emulsions, and build a stress-free, DIY beverage station that will make your friends weep with joy. By understanding exactly why your ingredients behave the way they do, you will never have to serve a gritty, scalded mug of disappointment ever again. Grab your whisk, pour yourself a glass of wine, and let us get to work.
The Science of the Clump: Why Cocoa Powder Hates You (And Water)
To defeat your enemy, you must first understand your enemy. Why does cocoa powder stubbornly refuse to mix with liquid? The answer lies in microscopic chemistry and the infuriating mechanics of hydrophobicity. Cocoa powder is not just a simple, uniform dust; it is a highly complex colloidal suspension waiting to happen, composed of various particles that have wildly different reactions to moisture.
First, we have to talk about fat. Cocoa beans are naturally loaded with cocoa butter. Even after the beans are roasted, ground into chocolate liquor, and hydraulically pressed to remove the majority of that fat, standard cocoa powder still retains anywhere from 10% to 24% cocoa butter. Fat is inherently hydrophobic, meaning it repels water with the same fierce intensity that I repel unsolicited advice in my kitchen. Because the microscopic cocoa solids are naturally coated in this residual cocoa butter, the powder possesses a fatty outer layer that acts as a waterproof shield. When you dump a spoonful of this powder directly into a large volume of hot milk—which is primarily composed of water—it is a classic case of oil and water refusing to mix.
But the fat is only half of the problem. Cocoa powder also contains complex carbohydrates, specifically starch molecules, which are highly hydrophilic, or water-loving. When you unceremoniously drop dry cocoa powder into hot liquid, the starch molecules on the very outer perimeter of the powder clump eagerly grab onto the moisture and swell. This rapid absorption creates a gelatinized, sticky seal around the remaining dry powder. The hydrophobic fat molecules reinforce this barrier, stopping the liquid from penetrating any further into the center of the clump.
The result is a microscopic disaster: you have created a dry, dusty pocket of unmixed cocoa encapsulated in a wet, starchy shell. This shell is held together by intense surface tension. It is so structurally sound that if you were to carefully poke the floating clump with a toothpick, you would literally pop the surface tension, causing the wet shell to peel away and revealing the completely dry powder trapped inside. You cannot defeat this starchy, fatty armor by lazily stirring it with a spoon in a giant mug of liquid. You have to change your entire approach to hydration.
The Secret Weapon: Creating the Ultimate Cocoa Paste
The only way to break the hydrophobic curse is to force the cocoa powder into submission before it ever sees a full pot of milk. To do this, we rely on a classic culinary technique: the slurry, or the paste method. By introducing a very small, concentrated amount of warm liquid to the dry powder, you can systematically break down the surface tension and force the fat and starch molecules to hydrate evenly.
Here is how you execute it flawlessly. Place your high-quality cocoa powder, sugar, and a pinch of salt into the bottom of a heavy bowl or your cooking pot. Add just enough warm liquid—whether that is hot water, warm milk, or even a splash of melted butter—to moisten the dry ingredients. We are talking about mere tablespoons of liquid here. Now, you whisk aggressively.
Because the volume of liquid is so low, the mechanical friction of your whisk easily shatters the starchy, gelatinized shells that try to form. The friction forces the hydrophobic fat molecules to disperse, trapping them in a thick, glossy, homogenous paste. You are essentially creating a highly concentrated emulsion. Once you have achieved a perfectly smooth, dark paste that looks a bit like brownie batter, the hard work is done. The cocoa is fully hydrated and the surface tension is broken. When you gradually whisk in the remaining hot milk, the paste will dissolve seamlessly into the liquid, creating a rich, velvety suspension without a single clump in sight.
If you find that a standard wire tool gets hopelessly clogged with thick paste, a Danish dough whisk slices through heavy mixtures without trapping dry pockets of powder. It is a brilliant, inexpensive upgrade that will save you from banging a metal whisk against the side of your pot like a maniac.
Milk Mechanics: How to Heat Without Scalding
Now that we have conquered the cocoa, we must address the dairy. Heating milk seems like the easiest task in the world until you turn your back for five seconds, only to find a scorched, boiling mess overflowing onto your burners and a rubbery, unappetizing skin floating on top. Milk is a delicate emulsion of butterfat globules suspended in a water-based fluid, packed with dissolved carbohydrates (lactose) and vital proteins. Treating it with disrespect will ruin your entire beverage bar.
Before we discuss temperature control, we need to address your cookware. I am a fierce advocate for banishing toxic kitchen gear from your home. Do not even think about heating milk in a cheap, scratched, peeling non-stick pot. Those mystery-metal pans with their flaking chemical coatings have zero thermal mass and create aggressive hot spots that will scorch your dairy instantly, not to mention the horrifying chemicals they leach into your food. Instead, invest in a heavy-bottomed, stainless steel curved saucier pan. The rounded bottom prevents milk from getting trapped and burning in the sharp corners, and the heavy clad metal ensures gentle, even heat distribution.
The primary villains in the tragedy of scorched milk are whey proteins, specifically beta-lactoglobulin and alpha-lactalbumin. While casein proteins are relatively heat-stable, whey proteins are highly sensitive divas. Once your milk reaches roughly 150°F (65°C), these whey proteins begin to denature. Their tightly coiled molecular structures unravel, exposing hydrophobic amino acids that desperately want to escape the water in the milk. These unraveled proteins instantly bond with each other and with the fat globules in the milk.
As the heat causes water to evaporate from the surface of your saucepan, this newly formed web of denatured protein and fat dries out, solidifying into that gross, chewy skin. This skin forms a hard, impermeable barrier across the top of the pot. Steam builds up beneath it, pressure mounts, and suddenly your milk violently boils over.
To prevent this, you must heat your milk low and slow. Never let it reach a rolling boil. Keep the temperature around 150°F to 160°F. More importantly, you must stir frequently. Constant agitation physically breaks up the protein and fat molecules before they have a chance to bond and form a membrane. If you are heating a large batch, you can also rinse your pot with a splash of cold water before adding the milk; the thin layer of water acts as a temporary protective barrier at the bottom of the pan, reducing the risk of initial scorching.
Elevating the Base: Real Chocolate vs. Cocoa Powder
If you want to serve a hot chocolate that tastes like it came from a high-end European café, you need to understand the ingredients you are working with. Not all chocolate is created equal, and knowing the chemical differences will dictate the final texture and flavor of your drink.
Let us start with cocoa powder. When you walk down the baking aisle, you will primarily encounter two types: Natural and Dutch-processed. Natural cocoa powder is exactly what it sounds like. It is made from roasted cocoa beans that have been ground into a paste and pressed to extract the cocoa butter, leaving behind solids that are pulverized into a fine powder. Because cocoa beans are naturally acidic, natural cocoa powder retains a low pH of about 5.0 to 6.0. It is light reddish-brown in color and boasts a sharp, fruity, astringent, and slightly bitter flavor profile.
Dutch-processed cocoa powder, however, has undergone a brilliant chemical intervention. In the 19th century, a Dutch chemist named Coenraad Johannes van Houten discovered that washing cocoa solids in an alkaline solution—typically potassium carbonate—drastically alters their properties. This alkalization process neutralizes the natural acidity, bringing the pH up to a perfectly balanced 7.0 (or even 8.0 for heavily Dutched varieties). This chemical shift darkens the powder to a deep, rich mahogany or near-black color. It strips away the sharp, bitter astringency, leaving behind a smooth, mellow, intensely earthy chocolate flavor. Crucially for our purposes, because Dutch-processed cocoa is pH-neutral, it actually dissolves much more readily in liquids than its natural counterpart. For a luxurious hot chocolate, Dutch-processed is almost always the superior choice.
But why stop at powder? To achieve that incredibly thick, coffee-shop texture, you need to introduce real, high-quality couverture chocolate into your base. Real chocolate brings back the cocoa butter that was pressed out of the powder, adding an irreplaceable silky mouthfeel. When working with couverture chocolate, using a digital kitchen scale is absolutely mandatory. Volume measurements for chopped chocolate are wildly inaccurate, and baking is a science.
When you add chopped real chocolate to your hot milk, you are creating a fat-in-water emulsion. You must whisk vigorously to suspend the melted cocoa butter evenly throughout the dairy. Temperature control here is paramount. If you overheat the mixture, the emulsion shatters and your melted chocolate turns clumpy and greasy, leaving an unappetizing oil slick on the surface of your drink. Keep the heat gentle, and whisk until perfectly smooth. Furthermore, a generous pinch of sea salt makes chocolate taste richer by suppressing bitterness and amplifying the sweet, roasted notes of the cocoa beans. Never skip the salt.
Setting Up the Mindful Hot Chocolate Bar
Now that you have mastered the chemistry of the beverage itself, it is time to talk about execution. Hosting a gathering should not feel like a punishment. With a little strategic prep, you can host a relaxed dinner party without spending the entire evening babysitting a stove while your friends have fun in the living room. The key to a successful DIY hot chocolate bar is thermal holding and bottleneck prevention.
Proper staging is the ultimate way to eliminate kitchen chaos before your guests even arrive. You want to create a self-serve station that flows logically: mugs first, then the hot chocolate base, followed by the toppings, and finally the stirring implements and napkins.
For the hot chocolate base, you need a reliable thermal holding strategy. You cannot leave a pot of milk on a lit stove during a party; it will inevitably boil over, scorch, and ruin your night. Instead, utilize a slow cooker. Once you have perfected your hot chocolate on the stovetop, transfer it to a pre-warmed slow cooker set to the “Keep Warm” setting. This setting generally hovers between 145°F and 165°F, which is the perfect serving temperature to keep the chocolate fluid without rapidly degrading the milk proteins.
However, holding hot milk for hours brings us back to our old nemesis: the milk skin. Because the slow cooker is heating the liquid, evaporation will occur at the surface, leading to protein coagulation. To prevent this during a party, you have a few clever options. The most traditional culinary method is a “cartouche”—a piece of parchment or wax paper cut to the exact diameter of the pot and laid directly on the surface of the liquid. This acts as a physical lid, trapping the moisture and completely halting the evaporation process that causes the skin.
If floating paper in your beverage feels a bit too rustic for a party, you can utilize a delicious edible barrier. Cover the entire surface of the hot chocolate in the slow cooker with a thin, even layer of miniature marshmallows. As they gently melt, they create a sugary lipid barrier that insulates the liquid below, drastically slowing down evaporation while looking incredibly festive. Alternatively, just keep the heavy glass lid on the slow cooker to trap the steam, and leave a ladle inside so guests naturally agitate the mixture every time they serve themselves.
The Essential Gear for Your Cocoa Station
Do not force your guests to awkwardly pour hot liquid from a heavy, cumbersome pot. Provide a deep, long-handled stainless steel ladle that allows them to easily reach the bottom of the slow cooker, ensuring the chocolate stays well-mixed.
Pre-warm your mugs. Serving a hot, beautifully emulsified beverage in a freezing cold ceramic mug will instantly drop the temperature of the drink, causing the cocoa butter to seize and dulling the flavor. Simply fill the mugs with hot tap water for five minutes before the party starts, then dump the water and dry them.
If you infuse your milk with whole cinnamon sticks or cardamom pods, passing the liquid through a fine mesh strainer ensures a perfectly smooth beverage before it goes into the slow cooker. Nobody wants to choke on a rogue piece of star anise while trying to enjoy a cozy winter drink.
The Toppings: Moving Beyond Sad Marshmallows
A mindful hot chocolate bar is all about customization. Move beyond the stale, chalky marshmallows from the back of your pantry and offer toppings that elevate the flavor profile.
Whip your own cream. It takes exactly three minutes and tastes infinitely better than the stabilized, chemical-laden foam from an aerosol can. Whip heavy cream with a dash of vanilla bean paste and a pinch of powdered sugar until it holds soft, pillowy peaks.
Offer a variety of textural contrasts: crushed peppermint candies, dark chocolate shavings, toasted coconut flakes, or flaky Maldon sea salt. If you want to add ground spices directly to the cocoa base, rely on the magic of blooming in oil—or in this case, a tiny bit of melted cocoa butter. Gently heating spices like cinnamon, nutmeg, or cayenne pepper in a little fat before whisking them into the milk awakens their dormant, fat-soluble flavor compounds, transforming a flat, dusty spice into a vibrant aromatic experience.
Troubleshooting Your Hot Chocolate Disasters
Even with the best intentions, things can go sideways. Here is how to fix the most common hot chocolate emergencies on the fly:
The Texture is Grainy: If your hot chocolate feels like wet sand, you likely either failed to dissolve the sugar completely, or your real chocolate seized. If it is undissolved sugar, simply return the mixture to a gentle heat and whisk continuously until it smooths out. If your chocolate seized due to a sudden temperature shock (like adding ice-cold milk to melted chocolate), you have broken the emulsion. Grab an immersion blender and blitz the mixture on high speed. The sheer mechanical force of the blades will often shear the fat droplets back down to size and force the emulsion to re-form.
There is an Oil Slick on Top: You boiled it. Boiling real chocolate causes the cocoa butter to separate from the cocoa solids and pool unappetizingly on the surface. Take the pot off the heat immediately. Add a splash of cold milk to rapidly drop the temperature, and whisk aggressively, or use that trusty immersion blender to force the fat back into suspension.
It is Too Bitter or Flat: You forgot the salt. Salt is a magical flavor enhancer that suppresses the perception of bitterness on your tongue while highlighting sweetness. Add a generous pinch of kosher salt and whisk. If it still tastes flat, a tiny dash of vanilla extract added off the heat will round out the flavor profile beautifully.
The Master Recipe: A Foolproof Silky Hot Cocoa Base
This is the definitive, scalable blueprint for a flawless hot chocolate base. It utilizes the paste method for perfect hydration, Dutch-processed cocoa for deep flavor, and real chocolate for a luxurious mouthfeel. This recipe serves four, but can easily be scaled up for your slow-cooker station.
The Ingredients:
- 1/4 cup high-quality Dutch-processed cocoa powder
- 1/4 cup granulated sugar (adjust to your preference)
- 1/4 teaspoon kosher salt
- 1/4 cup boiling water
- 4 cups whole milk (do not use skim; you need the fat for the emulsion)
- 4 ounces high-quality semi-sweet or bittersweet chocolate (60-70% cacao), finely chopped
- 1 teaspoon pure vanilla extract
The Method:
- In a heavy-bottomed saucier pan, whisk together the Dutch-processed cocoa powder, sugar, and kosher salt.
- Pour in the boiling water. Whisk aggressively until you form a thick, glossy, completely smooth paste. Ensure there are no dry pockets of powder hiding in the corners of the pan.
- Place the pan over medium-low heat. Gradually pour in the whole milk, whisking constantly so the cocoa paste dissolves seamlessly into the liquid.
- Heat the mixture gently, stirring frequently to prevent the milk proteins from scorching or forming a skin. Bring the liquid to a steaming simmer (around 150°F to 160°F). Do not let it boil.
- Once steaming, remove the pan from the heat. Instantly add the finely chopped chocolate. Let it sit undisturbed for 60 seconds to allow the ambient heat of the milk to melt the cocoa butter.
- Whisk vigorously until the chocolate is completely melted and emulsified into the milk, resulting in a thick, velvety texture.
- Stir in the vanilla extract.
- Serve immediately in pre-warmed mugs, or transfer to a pre-warmed slow cooker set to “Keep Warm” for your serving station.
Cooking is not about innate magic; it is about understanding the mechanics of your ingredients and having the confidence to control them. By respecting the hydrophobicity of cocoa powder and the delicate thermal limits of dairy, you can transform a stressful hosting chore into a masterpiece of mindful kitchen artistry. Now go banish those sad paper packets to the trash bin where they belong, and show your weekend guests what real hot chocolate tastes like.






