Picture this: You’ve invited a group of your closest friends over for a cozy, relaxed weekend dinner. You’ve spent the entire afternoon lovingly tending to a massive pot of chili. The intoxicating aromas of toasted cumin, ancho chiles, and slow-simmered beef are wafting through your home. You are feeling like an absolute culinary deity. But then, you lift the heavy lid to give your creation one final stir before the doorbell rings, and your heart sinks into your stomach. Staring back at you is a horrifying, neon-orange oil slick floating an inch deep on top of your masterpiece.
Listen to me very carefully. We are not drilling for crude oil in your kitchen. We are trying to serve dinner.
If you have ever found yourself desperately dabbing at the top of a slow cooker with a wad of paper towels while your guests are taking off their coats, take a deep breath. You are not alone, and you are not a bad cook. You simply haven’t been taught the fundamental food science of fat emulsification. As a home cook who has made every mistake in the book (and ruined more than a few dinner parties in my early days), I am here to tell you that professional-level results are completely achievable in a standard home kitchen. You don’t need a culinary degree to fix this; you just need to understand how ingredients interact on a molecular level.
Today, we are going deep. We are going to permanently solve the greasy chili problem by exploring the practical science of emulsion, the thermodynamic laws of safe food holding, and the strategic layout of the ultimate DIY chili bar. We are going to transform your stressful, messy dinner party into a mindful, communal gathering where you actually get to sit down and drink a glass of wine with your friends. Let’s get to work.
The Science of the Slick: Why Your Chili Separates
To defeat the enemy, you must first understand the enemy. That unappealing, greasy layer on top of your chili is the result of a broken emulsion. In the culinary world, an emulsion is the forced marriage of two liquids that absolutely despise each other: fat and water.
The Battle Between Lipids and Water
At a molecular level, water is hydrophilic (water-loving), and the rendered fat from your meat is lipophilic (fat-loving). When you mix them together in a pot, they naturally want to separate. Fat is less dense than water, which is why it aggressively floats to the surface, creating that dreaded orange slick. In a perfectly executed stew or chili, the fat is suspended within the liquid matrix, bound together by starches, proteins, and physical agitation. When that matrix breaks down—or when there is simply too much fat for the liquid to hold—the emulsion shatters.
The Meat Factor and Rendered Fat
The primary culprit behind your oil slick is the meat. Traditional chili relies on ingredients with a high fat content, such as 80/20 ground beef, pork shoulder, or even bacon. As the meat cooks, the heat breaks down the cellular structure and melts the intramuscular fat, rendering it out into the pot. While this fat carries an immense amount of flavor and is essential for a rich, luxurious mouthfeel, a pot of chili can only absorb so much of it. If you don’t properly brown your ground beef in batches and drain the excess, you are essentially setting a ticking time bomb for a greasy disaster. You want to retain enough fat to coat the palate, but not so much that your guests need a straw to get to the beans.
The Danger of the Rolling Boil
Temperature abuse is the silent killer of a good emulsion. Many weekend cooks make the mistake of bringing their chili to a violent, rolling boil to “cook it down” faster. This is a catastrophic error. A rapid boil violently agitates the proteins and forces the fat molecules to rapidly separate from the water molecules. Instead of a cohesive sauce, the high heat breaks the suspension, causing the lipids to pool together at the top. Chili requires a low, slow, gentle simmer. Patience is not just a virtue; it is a scientific requirement for a stable sauce.
Phase One: Fixing the Grease Fire (Emergency Interventions)
Alright, the damage is done. Your guests arrive in thirty minutes, and your chili looks like a hazard spill. Put down the paper towels. We have intelligent, chef-approved ways to fix this without ruining the flavor profile of your hard work.
The Mechanical Skim
If you have a massive excess of oil, you need to physically remove the bulk of it before you try to re-emulsify the rest.
- The Ladle Trick: Turn off the heat completely and let the pot sit undisturbed for ten minutes. The fat will rapidly rise to the top. Take a cold metal ladle and gently press the bottom of the bowl just barely below the surface of the oil. The fat will spill over the rim into the ladle, leaving the heavier chili behind.
- The Ice Cube Trick: Fat solidifies when it hits a cold surface. Wrap a few large ice cubes in a piece of clean cheesecloth or a heavy-duty paper towel, and gently glide it across the surface of the chili. The hot grease will instantly congeal onto the cold surface, allowing you to lift it right out of the pot.
- The Bread Sponge: In an absolute pinch, take a thick slice of rustic bread and lightly drag it across the top of the liquid. The porous bread will soak up the surface oil. (And honestly, a chef’s treat is eating that fat-soaked bread over the sink, but we’ll keep that our little secret).
The Magic of Masa Harina
Once you’ve skimmed the worst of the slick, you still need to bind the remaining fat into the liquid to create a thick, cohesive, velvety texture. Enter your new best friend: masa harina.
Masa harina is a traditional Latin American corn flour made from corn that has been nixtamalized (soaked in an alkaline solution, usually limewater). This alkaline process doesn’t just make the corn more nutritious; it fundamentally alters its chemistry. The fats in the corn are broken down, and the proteins are chemically altered to bond more easily. When introduced to your chili, masa harina acts as a powerful thickening agent and a natural emulsifier, grabbing onto both the water and the free-floating fat, binding them together into a stable sauce.
Do not just dump dry masa into the pot, or you will end up with gritty corn dumplings. Create a slurry by whisking two tablespoons of masa harina with a quarter cup of warm water until smooth. Stir this slurry into your gently simmering chili and let it cook for about ten minutes. The oil slick will vanish, replaced by a gorgeous, glossy, thick chili with a subtle, earthy tamale flavor.
The Immersion Blender Cheat Code
If you don’t have masa harina, you can force an emulsion using the starches already present in your pot. Take a ladle full of your chili (making sure to get plenty of beans and veggies, but avoiding large chunks of meat if possible) and place it in a tall container. Hit it with an immersion blender until it is completely smooth. Pour this starchy, pureed mixture back into the main pot and stir well. The pulverized starches from the beans act as a mechanical binder, absorbing the free fat and thickening the entire batch instantly.
Phase Two: Preventing the Slick from the Start
Emergency fixes are great, but a true home kitchen master prevents the disaster from happening in the first place. Next time you plan a weekend chili project, follow these non-negotiable steps.
Strategic Browning and Draining
The foundation of deep, complex flavor is the Maillard reaction—the browning of proteins. You must brown your meat in a blazing hot pan, in small batches, so it sears rather than steams. Once the meat is deeply caramelized, remove it from the pot with a slotted spoon. Now, look at the fat left behind. You only need about two tablespoons of this rendered fat to sauté your onions, garlic, and spices. Discard the rest. If you are making a massive batch of chili and need to degrease a large volume of beef stock or meat drippings quickly, a bottom-release fat separator is your absolute best friend. It draws the flavorful liquid from the bottom, leaving the pure grease trapped at the top.
Blooming the Spices
Do not just dump raw chili powder into a pot of wet tomatoes. Spices contain essential oils that are fat-soluble. To unlock their full, robust flavor, you must “bloom” them. Add your chili powder, cumin, smoked paprika, and oregano to the two tablespoons of reserved meat fat in your pot. Stir them constantly over medium heat for about sixty seconds until they become incredibly fragrant. This toasts the spices and infuses their flavors directly into the lipid base, which will eventually be emulsified into the whole pot.
Managing the Acid and the Simmer
Chili relies heavily on an acidic tomato base to cut through the richness of the meat and spices. However, you must be careful with your timing. When you are cooking dried beans from scratch directly in the chili pot, remember that high acidity hardens the cellular walls of legumes, preventing them from ever getting tender. Always ensure your beans are fully cooked and creamy before introducing your crushed tomatoes or tomato paste. Once all the ingredients are swimming together, drop the heat to the lowest possible setting. A barely-there, lazy bubble is all you need. This gentle heat allows the collagen in the meat to melt into gelatin, which naturally thickens the chili without breaking the fat emulsion.
Phase Three: The Equipment (And Why I Despise Cheap Pans)
You cannot execute flawless food science in terrible cookware. I have zero patience for flimsy pots that scorch your food and ruin your weekend. If you want to cook like an expert, you need to respect the tools of the trade.
The Non-Stick Nightmare
I have a strict, uncompromising rule when it comes to toxic kitchen gear, especially when we are talking about long, acidic simmers. Do not ever make chili in a cheap, scratched Teflon pot. The acidity of the tomatoes combined with the long cooking time will degrade cheap non-stick coatings, leaching forever chemicals and actual flakes of polymer directly into your dinner. It is disgusting, it is unsafe, and it has no place in a mindful kitchen.
The Case for Enameled Cast Iron
You might think your trusty, raw cast iron skillet is the perfect vessel for a rustic chili. You would be wrong. Simmering a highly acidic stew for three hours will aggressively strip your beautifully seasoned cast iron down to the bare, reactive metal. This will ruin your pan’s non-stick patina and infuse your chili with a harsh, metallic, rusty flavor that no amount of sour cream can mask.
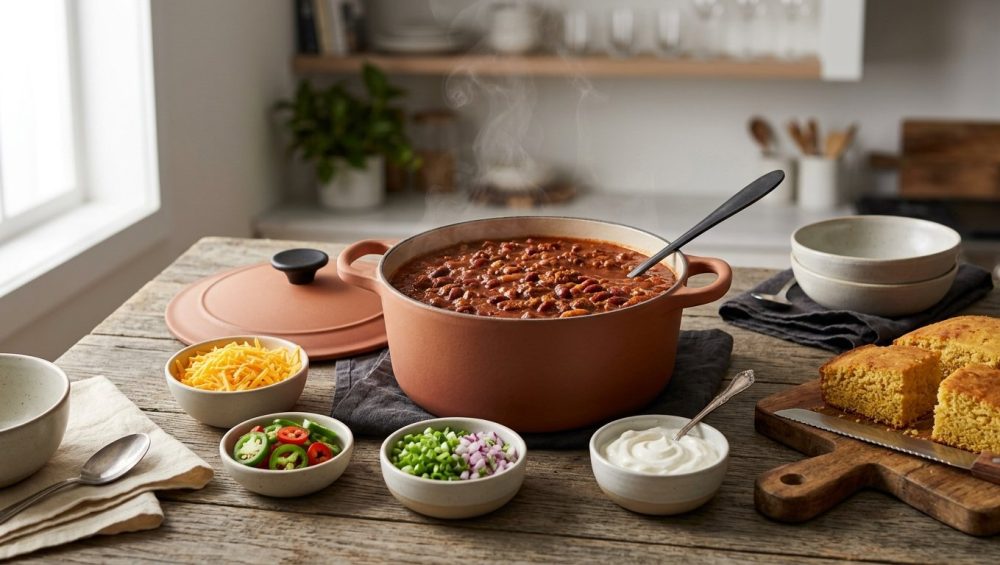
The ultimate vessel for chili is an enameled cast iron Dutch oven. The heavy cast iron core provides unparalleled, even heat distribution, preventing those nasty hot spots that scorch the bottom of your chili. Meanwhile, the glass-enamel coating is completely non-reactive, meaning you can simmer tomatoes for ten hours without a single worry.
The Right Tools for the Job
When you are stirring a thick, heavy pot of stew, a flimsy plastic spoon isn’t going to cut it. You need a rigid tool that can scrape the fond (the browned bits) off the bottom of the pot. A flat-edged wooden spoon is fantastic, but if you prefer modern materials, invest in high-grade, heat-resistant silicone with a solid steel core. I have absolutely zero tolerance for cheap, soapy silicone spatulas that absorb dishwasher detergent and leach weird, chemical floral flavors into your savory food. Buy professional-grade tools once, and they will serve you for a lifetime.
Phase Four: The Thermodynamics of a Stress-Free Chili Bar
Now that we have engineered a perfectly emulsified, glossy, thick chili, we need to talk about hosting. The entire point of a DIY Chili Bar is to get you out of the kitchen so you can actually enjoy the company of your guests. To do this safely and elegantly, we have to talk about thermodynamics and bacterial growth.
Decoding the Temperature Danger Zone
If you are hosting a party that lasts for several hours, you cannot just leave a pot of warm meat on the kitchen island and hope for the best. The FDA Food Code defines the “Temperature Danger Zone” as the range between 41°F and 135°F. (The USDA consumer guidelines often cite 40°F to 140°F for an added safety buffer).
Within this specific temperature window, foodborne pathogens like Salmonella, E. coli, and Clostridium perfringens thrive. Given the rich moisture and nutrients in chili, these bacteria can double in number roughly every 20 minutes. If your chili drops into this zone for more than two hours (or four hours total cumulative time, according to strict FDA holding limits), it becomes a legitimate health hazard and must be discarded. Nobody wants their dinner party to be remembered for a localized outbreak of food poisoning.
Safe Hot-Holding Strategies
To keep your chili bar safe, appetizing, and stress-free, you must maintain the food at a continuous temperature of 135°F or higher (aiming for 140°F to be absolutely safe).
If you are serving straight from your stove, keep the burner on the absolute lowest “warm” setting and stir periodically to distribute the heat. However, if you want to move the chili to a dining table or buffet setup, you need dedicated holding equipment. A high-quality slow cooker switched to the “Keep Warm” setting is the easiest solution for the home cook. Alternatively, an induction hot plate set to a precise temperature holding mode works brilliantly.
The Role of Thermal Mass
If you do not have an electronic warming device on your buffet table, you must rely on the physical properties of your serving vessels. You want a heavy enameled Dutch oven or a thick stoneware pot that offers incredible thermal mass. These heavy, dense materials absorb heat while on the stove and radiate it back into the food very slowly over time. If you preheat a heavy ceramic tureen with boiling water, dump the water, and then fill it with bubbling hot chili, the thermal mass of the vessel will keep the chili safely above 135°F for significantly longer than a thin stainless steel or glass bowl ever could. Keep the lid on whenever guests aren’t actively serving themselves to trap the steam and prevent a dry, unappealing skin from forming on the surface of the chili.
Phase Five: The Mindful Chili Bar Layout & Toppings
The chili is perfect. The temperature is safe. Now, we execute the presentation. A mindful gathering is all about flow, accessibility, and eliminating bottlenecks.
The Psychology of Traffic Flow
Do not put the bowls, the chili, and the toppings in one clustered pile. You will create a traffic jam of hungry people bumping elbows. Instead, create a linear progression.
- Station One (The Foundation): Stack your wide, shallow bowls (shallow bowls cool the chili faster so guests can eat sooner without burning their mouths) alongside heavy soup spoons and rolled napkins.
- Station Two (The Main Event): The hot-holding vessel of chili, complete with a long-handled, deep ladle. Provide a small ceramic dish next to the pot for guests to rest the messy ladle on.
- Station Three (The Garnishes): The toppings matrix, spread out over a large board or in individual ramekins, complete with their own small serving spoons.
Curating the Ultimate Toppings Matrix
A great bowl of chili is heavy, rich, and deeply savory. The toppings are not just decorative; they are functionally necessary to provide contrast in texture, temperature, and acidity.
The Acid: You need bright, sharp flavors to cut through the heavy fat of the beef. Offer lime wedges, pickled red onions, and sharp hot sauces. The acidity cleanses the palate between bites, making a heavy meal feel vibrant.
The Cream: Dairy provides a cooling contrast to the spicy heat of the chiles. Sour cream or Mexican crema are standard, but the cheese is where people make mistakes. If you try to melt pre-shredded bagged cheese into a hot liquid, you’ll end up with a grainy cheese sauce because of the cellulose anti-caking agents used to keep the shreds separate in the bag. Always buy a block of high-quality sharp cheddar or Monterey Jack and grate it yourself. It takes three minutes and melts into a flawless, silky pull.
The Fresh & Crunchy: Fresh cilantro, thinly sliced radishes, and diced jalapeños add vital crunch and herbaceous freshness. Diced avocado is a luxurious addition, but you need to know how to prevent guacamole from browning before your guests even arrive. Toss your diced avocados in a little lime juice; the ascorbic acid will halt the enzymatic browning process, keeping them bright green for hours on the buffet line. Finally, offer a bowl of Fritos, crushed tortilla chips, or warm cornbread to provide that essential, satisfying carbohydrate crunch.
The Final Word
Hosting a dinner party should never feel like a stressful chore, and you should never have to apologize for a greasy meal. By understanding the simple science of emulsification, respecting the thermodynamics of food safety, and organizing your space with intention, you elevate a humble pot of ground beef and beans into an interactive, masterfully executed culinary event.
You don’t need a white chef’s coat to pull this off. You just need a little bit of food science, a reliable Dutch oven, and the confidence to know that you are entirely in control of your kitchen. Now go bloom those spices, skim that fat, and pour yourself a well-deserved glass of wine. You’ve got a party to host.