
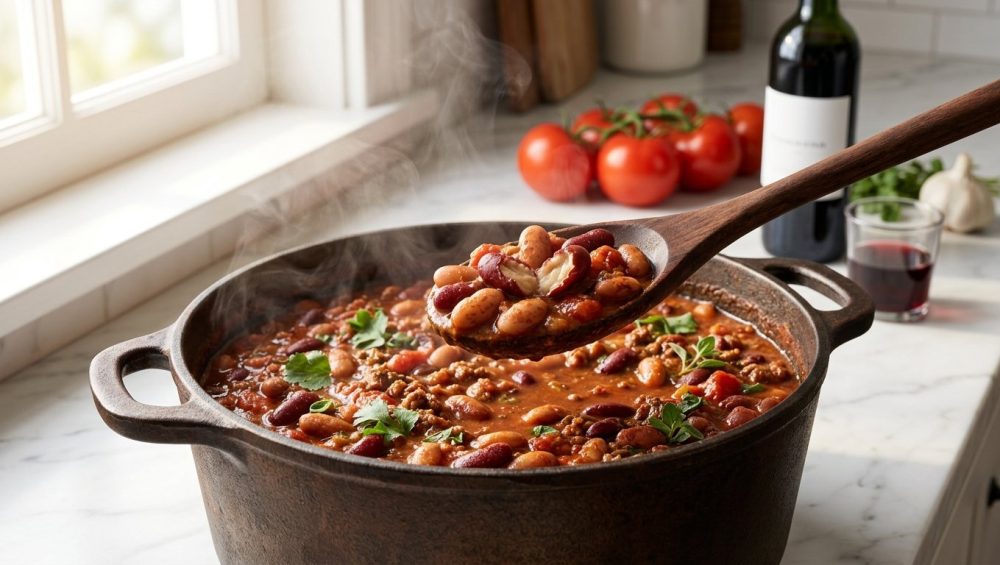
You have undoubtedly been there. It is a chilly Sunday afternoon, the kind of day practically begging for a culinary project. You have a beautiful, heavy-bottomed pot simmering on the stove. You are making your famous weekend chili, or perhaps a rustic Tuscan ribollita, or a deeply spiced black bean soup. You did absolutely everything right. You lovingly soaked the beans overnight. You sautéed the aromatics until they were translucent and sweet. You poured in the crushed San Marzano tomatoes, the splash of wine, the rich bone broth. You let it bubble away for hours, filling your home with the kind of savory aroma that makes the neighbors deeply jealous.
But then, you take a taste test. You bite down, expecting a creamy, velvety, melt-in-your-mouth texture, and instead—crunch.
Your beans are hard. Not just pleasantly al dente. We are talking about gravel-level, tooth-chipping, stubbornly crunchy nuggets of absolute despair.
You tell yourself, “They just need another hour.” So you wait. An hour passes. Still crunchy. You add a little more broth to keep the pot from drying out. Another hour goes by. Still crunchy. By the time dinner rolls around, you are serving a soup that has the texture of aquarium gravel, and you are secretly wondering if you should have just ordered takeout instead of playing chef.
Listen to me, my frustrated weekend culinary hobbyists: It is not your fault. You are not a bad cook. You did not buy a cursed bag of legumes. You simply ran afoul of a fundamental law of food science, a microscopic battle happening right there in your Dutch oven. You fell into the oldest, most pervasive trap in the home cooking playbook. You added the tomatoes too early.
I am your Sassy Sous-Chef, and I have zero patience for pretentious chef-speak, but I have even less patience for ruined dinners. Today, we are going to dive deep into the brutally honest, unapologetically nerdy science of why your homemade beans refuse to soften. We are going to talk about cellular biology, pH levels, and why timing your acidic ingredients is the absolute difference between a culinary masterpiece and a pot of sad, crunchy pebbles. Grab a glass of wine, pull up a stool, and let’s fix your chili forever.
The Anatomy of a Bean and the Cellular Glue
To understand why your beans are currently mocking you, we have to zoom in on a microscopic level. A dried bean is essentially a dormant little vault of nutrients, encased in a tough, protective outer shield called the seed coat. Inside this armor is the cotyledon, which contains all the complex starches and proteins we want to access and eat. When a bean dries out for long-term storage, it loses almost all its internal moisture, becoming a rock-hard little pebble designed to survive harsh conditions.
To turn that defensive pebble into a creamy, luscious bite of food, two specific things must happen: water must penetrate the seed coat (usually through a tiny opening called the micropyle) to hydrate the starches inside, and heat must break down the cellular “glue” that holds the bean’s rigid structure together.
That glue is a complex carbohydrate called pectin.
If you have ever dabbled in making homemade jams or jellies, you are already familiar with pectin. It is the natural substance that makes fruit set into a firm gel. In a bean, pectin acts quite literally like the mortar between the bricks of the plant’s cell walls. When you boil a bean in plain, neutral water, the heat gradually dissolves this pectin. The mortar melts away, the plant cells separate from one another, the newly hydrated starches swell up, and the bean becomes delightfully soft and tender.
But pectin is highly sensitive to its chemical environment. It does not just react to heat; it reacts aggressively to the molecular makeup of the liquid it is swimming in. And this is exactly where your favorite recipe betrayed you, and why your [dried beans never soften] no matter how long you leave them on the stove.
The Acid Trap: Why Tomatoes Are Your Bean’s Worst Enemy
Let’s talk about the pH scale, the chemistry concept you likely slept through in high school. Neutral tap water sits right in the middle at a pH of 7. At this neutral level, pectin behaves itself perfectly, dissolving nicely and predictably as the water temperature rises.
But what happens when you pour in a giant can of crushed tomatoes? Or a generous splash of white wine? Or a spoonful of apple cider vinegar? Or even a dollop of molasses or a squeeze of citrus?
You immediately drop the pH of your cooking liquid, creating a highly acidic environment. And pectin, my friends, absolutely loves acid in the worst possible way.
When pectin is exposed to an acidic environment, its molecular structure fundamentally changes. Instead of breaking down and dissolving into the water, the pectin molecules actually cross-link and bind tighter together. The acid reinforces the cellular mortar. It effectively locks the seed coat and the interior cell walls into a rigid, impenetrable matrix.
Once this acidic cross-linking happens, the process is practically irreversible. You can boil those beans until the end of recorded time. You can simmer them until the liquid completely evaporates and your pot turns into a scorched, smoking disaster. It will not matter one bit. The acid has fortified the pectin, and those beans are going to stay crunchy forever.
This is exactly why your chili beans never soften. Most standard chili recipes, written by people who clearly do not understand food chemistry, call for dumping everything into the pot at once—the soaked beans, the broth, the onions, and the massive cans of diced tomatoes. The exact moment those tomatoes hit the water, the pH plummets, the pectin locks up like a bank vault, and your beans are doomed before the water even returns to a simmer.
If you take nothing else away from this masterclass, let it be this absolute, unbreakable law of the kitchen: Never, ever introduce acid to a pot of beans until the beans are already completely, entirely tender.
The Hard Water Conspiracy
Now, I can already hear some of you protesting through the screen. “But Sous-Chef! I didn’t add any tomatoes! I didn’t add wine! I just boiled them in plain tap water and they still turned out like gravel! Explain that!”
Alright, let’s take a hard look at the water coming out of your kitchen faucet. If you live in an area with “hard water” (which, by the way, accounts for roughly 85% of households in the United States), your tap water is loaded with dissolved minerals, specifically calcium and magnesium.
Remember how we just talked about pectin being the mortar between the cell walls? Well, calcium and magnesium act like molecular rebar reinforcing that mortar.
When you boil beans in hard water, the calcium and magnesium ions bond directly with the pectin in the bean skins. This mineral cross-linking strengthens the cell walls almost as effectively as acid does. The bond is so remarkably strong that no matter how long you boil your beans, they will maintain a tough, chewy, unpleasant exterior.
If you suspect hard water is the invisible culprit ruining your weeknight meals, you have a few options. You could buy distilled or filtered water exclusively for your beans, which is great if you have it on hand and don’t mind the extra grocery expense. But because I firmly believe that time is money and we need practical, cheap solutions for busy weeknights, there is a much better, highly scientific trick you can use to defeat both hard water and stubborn pectin simultaneously.
The Magic of the Baking Soda Brine
If acid is the sworn enemy of tender beans, it stands to reason that alkalinity is their absolute best friend. Enter the humble, inexpensive box of baking soda (sodium bicarbonate) sitting in the back of your pantry.
Adding a tiny, measured amount of baking soda to your bean-soaking water—or directly to the cooking pot—raises the pH, creating a slightly alkaline environment. This alkaline environment is a pectin-destroying powerhouse.
Here is exactly what happens on a molecular level when you introduce baking soda to your legumes:
- It Cleaves the Cross-Links: The alkaline water actually breaks apart the ester bonds in the pectin molecules, causing the cell walls to weaken and separate rapidly.
- It Displaces the Minerals: The sodium ions in the baking soda literally kick the tough magnesium and calcium ions out of the pectin structure. This makes the cell walls much more readily dissolvable, entirely neutralizing the negative effects of your hard tap water.
- It Speeds Up Hydration: Because the seed coat is chemically weakened by the alkalinity, water rushes into the center of the bean much faster. This can reduce your actual stovetop cooking time by 25% to 40%. When you are trying to get a healthy dinner on the table on a frantic Tuesday night, that time saving is absolute gold.
But wait, the science gets even better. Baking soda does not just soften the beans. It also aggressively attacks the oligosaccharides—specifically raffinose, stachyose, and verbascose. These are the complex, indigestible sugars that ferment in your lower intestine and cause… well, you know. The musical fruit effect. The alkaline environment catalyzes the hydrolysis of these sugars, breaking them down in the bowl before they ever reach your digestive tract.
The Golden Ratio for Baking Soda
Do not go dumping a whole cup of baking soda into your pot, unless you want your dinner to taste like a mouthful of soapy pennies. Precision matters here. The rigorously tested, science-backed ratio is 1/2 teaspoon of baking soda per quart of water used for soaking or cooking.
The Sassy Sous-Chef’s Masterclass Sequence for Flawless Beans
We have covered the chemistry class you slept through. Now, let’s translate this into actionable, foolproof kitchen steps. I am going to walk you through the definitive sequence for cooking beans from scratch. Follow this, and you will achieve creamy, velvety, mind-blowing beans every single time, whether you are meal-prepping on a Tuesday or hosting a dinner party on a Saturday.
Step 1: The Sort and Rinse
Do not skip this step just to save two minutes. Beans are agricultural products. They grow in the dirt, they are harvested by massive machines, and they are packed in bulk. Sometimes, tiny rocks, twigs, or shriveled, dead beans make it into the bag. Pour the dried beans out onto a rimmed baking sheet and just give them a quick visual scan. Pick out anything that looks like it would break a tooth. Then, toss them in a colander and rinse them under cold water to remove the field dust.
Step 2: The Alkaline Soak (The Brine)
Place your sorted, rinsed beans into a large, non-reactive bowl. Cover them with at least three inches of water, because they will expand significantly as they hydrate. Add 1/2 teaspoon of baking soda and 1 tablespoon of kosher salt per quart of water.
Yes, salt. There is an old, pervasive, entirely incorrect kitchen myth that salting beans early makes them tough. This is unequivocally false. Salt actually aids in the softening process by helping to break down the cell walls, and more importantly, it flavors the bean all the way through to the center. If you wait to salt until the very end of cooking, you will just have salty broth surrounding bland, flavorless beans.
Let them soak for 8 to 12 hours at room temperature. If you are a weekday warrior, do this before you leave for work in the morning. When you get home, they will be plump, hydrated, and ready to cook.
Step 3: The Simmer (And The Gear Talk)
Drain and rinse your soaked beans thoroughly to wash away the excess baking soda and the expelled indigestible sugars. Place them in a high-quality, heavy-bottomed pot.
Let’s pause for a crucial public service announcement. I have a strict, non-negotiable rule on toxic, garbage kitchen gear. If you are still boiling your beautiful soups in a scratched, peeling, lightweight mystery-metal non-stick pot from a discount store, throw it in the trash right now. I mean it. Go to your cabinet, take it out, and throw it away. You cannot achieve professional-level results in cheap, toxic pans that leach forever chemicals into your food and warp the second they touch a burner.
For beans, soups, and stews, you need thermal mass and flawlessly even heat distribution. You need an enameled cast-iron Dutch oven, or a high-quality, fully-clad stainless steel pot. These heavyweight vessels hold a steady, gentle simmer without creating intense hot spots that scorch the bottom of your beans. (And while we are talking about upgrading your kitchen habits, please make sure you aren’t [air drying your cast iron] if you use raw cast iron skillets to bake the cornbread you plan to serve on the side!).
Cover the beans with fresh water or chicken broth (about two inches above the beans). Add your aromatics: a halved onion, a few smashed cloves of garlic, a bay leaf, and maybe a parmesan rind if you are feeling fancy.
Bring the pot to a rapid boil for exactly 10 minutes. This initial high-heat phase is absolutely necessary to destroy a natural toxin found in many beans (especially red kidney beans) called phytohaemagglutinin, which can cause severe gastrointestinal distress if not neutralized by boiling.
After 10 minutes, drop the heat to the lowest possible setting. You want a gentle, lazy simmer. A rapid, violent boil will thrash the beans around, causing their delicate skins to burst and turning your pot into a mushy puree. If you have ever wondered why your [chicken soup is cloudy] and greasy-looking, a violent rolling boil is usually the exact same culprit for that, too. Gentle heat is the secret to intact, beautiful food.
Step 4: The Golden Rule of Acid
Simmer the beans until they are completely, 100% tender. Not “almost done.” Not “just a little bite left in the center.” They must be fully creamy, soft, and ready to eat. Depending on the age and variety of the bean, this could take anywhere from 45 minutes to 2 hours.
ONLY THEN do you add your acidic ingredients.
Once the beans have achieved perfect tenderness, you finally have my blessing to pour in the crushed tomatoes for your chili. You can deglaze the pan with that splash of white wine. You can add a squeeze of fresh lime juice, a dash of apple cider vinegar, or a spoonful of molasses.
Because the pectin has already completely broken down and the beans are already soft, the acid can no longer lock up the cell walls. Instead, the acid will simply do its intended job: brightening the flavors of your dish, cutting through the richness, and providing that necessary tangy contrast to the earthy, starchy beans.
The Hierarchy of Bean Resilience (Varieties Matter)
Not all beans are created equal when it comes to their pectin structure and seed coat thickness. Understanding what kind of legume you are dealing with will help you anticipate how aggressively they will react to early acid introduction.
The Fragile Legumes: Lentils and Split Peas
Lentils and split peas have either a very thin seed coat or have had their seed coats mechanically removed entirely. Because they lack that thick, pectin-rich defensive wall, they cook incredibly fast. However, even these fragile legumes are susceptible to the acid trap. If you attempt to make a French lentil soup and dump a bottle of red wine or a can of tomatoes into the pot before the lentils have softened, those tiny discs will remain unpleasantly firm. They won’t be tooth-chipping, but they will lack that luxurious, melt-in-your-mouth texture you want in a comforting stew.
The Middleweights: Pinto, Black, and Navy Beans
These are the standard chili and soup beans, and they are the prime victims of the tomato trap. Their seed coats are thick enough to require a proper soak and a long simmer, and their pectin networks are highly reactive to pH changes. Black beans, in particular, have a dense cellular structure that relies heavily on a neutral or alkaline environment to break down. If you are making Cuban black beans, you must wait until they are fully creamy before adding your vinegar-heavy sofrito or a squeeze of lime.
The Heavyweights: Chickpeas and Kidney Beans
If you want to see the acid trap at its most ruthless, try cooking dried chickpeas (garbanzo beans) in a tomato-based broth. Chickpeas have notoriously tough, fibrous seed coats. Even in perfectly alkaline, soft water, they can take hours to soften. If you introduce acid to a boiling pot of raw chickpeas, you might as well be boiling glass marbles. They will literally never soften. This is why making restaurant-quality homemade hummus requires not just an alkaline soak, but an alkaline boil (adding baking soda directly to the cooking water) to completely obliterate the skins for a silky smooth puree.
Troubleshooting Other Bean Saboteurs
Even with the perfect alkaline soak, high-quality cookware, and strict adherence to the “No Early Acid” rule, sometimes things go sideways. Here are a few other rookie mistakes that might be ruining your dinners.
The Tragedy of Ancient Beans
Dried beans have a fantastic shelf life, but they do not last forever. If you found a dusty bag of navy beans in the back of your pantry that you bought during a blizzard panic four years ago, throw them out.
As beans sit in storage for years, they continue to lose trace amounts of moisture, and their cellular structure becomes permanently hardened. After about two years, beans become so desiccated that no amount of soaking, baking soda, or boiling will ever fully soften them. They are dead. Let them go. Buy fresh dried beans from a grocery store with high inventory turnover.
Salting Too Late
I mentioned this earlier, but it bears repeating because it is one of the most common mistakes home cooks make. Salting at the end of the cooking process is a culinary crime. Beans are dense. They need time for the sodium ions to physically penetrate the cotyledon. If you don’t salt the soaking water and the early cooking liquid, your beans will taste like wet cardboard, no matter how aggressively you season the broth later. It is exactly the same logic behind why your silicone [spatula smells like garlic]—porous materials absorb whatever they sit in over a long period of time. You want the salt inside the bean, not just floating around it. (Speaking of absorption, this is also exactly [why your plastic containers stay greasy] if you don’t wash them with the right surfactants immediately, because the plastic literally absorbs the fat molecules!).
The Great Tomato Debate: Paste, Canned, and Fresh
Since tomatoes are the most common culprit in the ruining of chili beans, we need to examine them closely. Tomatoes are naturally acidic, but the form of the tomato dictates just how much havoc it will wreak on your pot.
Tomato Paste: This is highly concentrated tomato flavor, and consequently, highly concentrated acid. If your recipe calls for sautéing aromatics and then cooking down a few tablespoons of tomato paste, you are creating a highly acidic flavor base. If you add raw beans and water to this base, the pectin will lock up instantly.
Canned Diced Tomatoes: These are the standard chili builders. What most home cooks do not realize is that commercial canners often add citric acid to canned tomatoes to ensure they reach a safe pH level for shelf stability. This means canned tomatoes are often more acidic than fresh tomatoes! Dumping a 28-ounce can of these into your bean pot is a guaranteed pectin-locking disaster.
Fresh Tomatoes: While slightly less acidic than their commercially canned counterparts, fresh tomatoes still hover around a pH of 4.3 to 4.9. This is more than acidic enough to halt the softening of your beans.
The rule remains absolute across all tomato products: they must wait in the wings until the beans have completed their transformation.
Weekday Meal Prep and Storage
I am a firm believer that time is money. While cooking a pot of beans from scratch on a Sunday afternoon is a beautiful, meditative practice, it is not practical for a Wednesday night when you just got off work, you are exhausted, and you are starving.
This is why you must embrace the art of batch cooking.
When you take the time to cook dried beans, do not cook one measly cup. Cook a massive pot. A pound or two at a time. Once they are perfectly tender (and you have followed all my rules about acid), let them cool completely in their own cooking liquid.
Storing beans in their cooking liquid prevents them from drying out and cracking in the fridge. They will keep beautifully in an airtight container for up to five days.
Even better, beans freeze exceptionally well. Portion the cooled beans and their liquid into freezer-safe containers or heavy-duty zip-top bags. Lay the bags flat in your freezer so they freeze into neat, stackable bricks. The next time you want to make a weeknight chili, you don’t have to reach for a tinny-tasting aluminum can. You just pull a brick of your flawless, homemade beans out of the freezer, drop them directly into your simmering soup, and boom—you have a gourmet, slow-cooked meal in 20 minutes.
Just make sure you are storing them properly. I highly recommend investing in high-quality glass storage containers with snap-locking lids. If you have ever had a cheap [glass baking dish shattered] because of sudden thermal shock, you know that buying cheap tempered glass is a fool’s errand. Buy genuine borosilicate glass containers. They do not stain, they do not hold onto odors, and they transition safely from the freezer to the microwave without exploding.
The Culinary Canvas of Perfectly Cooked Beans
Once you have mastered the science of the perfectly tender bean, your culinary repertoire expands exponentially. You are no longer bound by the mushy, metallic limitations of canned beans.
You can puree those creamy, homemade cannellini beans with roasted garlic, good olive oil, and a squeeze of lemon for a dip that puts store-bought hummus to absolute shame. You can toss perfectly intact black beans with roasted corn, diced red onion, jalapeño, and a cilantro-lime vinaigrette for a vibrant, make-ahead lunch salad that won’t get soggy.
You can fold tender pinto beans into a skillet of sizzling onions and fresh spices, [blooming them in oil] with cumin, coriander, and smoked paprika for the most incredible homemade refried beans you have ever tasted. Blooming your spices in hot fat is the only way to unlock fat-soluble flavor compounds that water simply cannot access.
And of course, you can finally make that legendary weekend chili. You can sauté your ground beef, build a rich, complex base with your chili powders, pour in those crushed tomatoes, and simmer it until the flavors meld into a deep, savory symphony. And when you finally stir in your pre-cooked, perfectly tender beans at the very end, you will know with absolute certainty that every single bite will be flawless.
Trust the Science, Trust Yourself
Cooking is not magic. It is applied physics and chemistry that we get the distinct pleasure of eating. When things go terribly wrong in the kitchen—when you are [scorching your sauces] in cheap thin pans, or when you are [ruining your knives] by aggressively chopping on terrible bamboo cutting boards—it is rarely because you lack natural talent. It is almost always because you were missing a crucial piece of scientific information.
You do not need a fancy culinary degree to cook like a professional in your own home. You just need to understand the basic rules of engagement. You need to know that pectin builds walls, acid locks the doors, and baking soda hands you the master key.
If you have been avoiding dried beans for years because of past traumas involving crunchy chili, broken teeth, and hours of wasted time, I am officially giving you permission to try again. Go buy a fresh bag of dried beans. Soak them in a salty, alkaline brine. Simmer them gently in a high-quality, heavy-bottomed pot. And for the love of all things holy, keep those tomatoes far, far away until the very end.
You can do this. Your weekend chili is about to become legendary. Now get out of here, go sort some legumes, and remember: never settle for toxic cookware, never accept crunchy beans, and never stop cooking with attitude.






