
Picture this. You’ve invited six of your favorite people over for a weekend dinner. The wine is flowing, the playlist is immaculate, and you’re standing over the stove, whisking what was supposed to be a velvety, luxurious cheese sauce. But instead of a glossy cascade of culinary triumph, you are staring down into a saucepan full of gritty, oily, separated despair. Your beautiful cheddar has seemingly divorced itself, leaving behind a puddle of grease and a handful of grainy, rubbery clumps.
I’ve been there. We have all been there. I have personally set off smoke detectors, ruined expensive Gruyère, and panic-ordered takeout while hiding a failed Mornay sauce in the depths of the garbage can. But listen to me carefully: you do not need a culinary degree from Le Cordon Bleu to make a flawless cheese sauce. You just need to understand a few basic principles of kitchen science.
Today, we are going to leave no stone unturned. We are going to dive deep into the molecular anatomy of melted cheese, explore the foolproof methods for keeping it perfectly emulsified, and discuss how you can leverage this newfound superpower to host the ultimate interactive, stress-free gathering.
The Kitchen Science: Why Your Cheese Sauce Breaks
Let’s get one thing straight before we even touch a whisk: cheese is not a single, uniform ingredient. It is a delicate, highly unstable matrix of water, fat, and dairy proteins (specifically casein). When you buy a block of cheese, those three elements are living together in perfect, peaceful harmony, bound together by the cheese-making process.
The Anatomy of an Emulsion
In the culinary world, an emulsion is the magical phenomenon that occurs when two things that absolutely hate each other—like oil and water—are forced to hold hands and play nicely. Mayonnaise is an emulsion. Hollandaise is an emulsion. And yes, a liquid cheese sauce is a hot emulsion.
When you melt cheese, you are applying thermal energy to that delicate matrix. As the temperature rises, the dairy proteins relax, the water heats up, and the fats turn into liquid oil. If everything goes according to plan, the proteins act as a net, keeping the water and the oil suspended together in a smooth, creamy liquid. But emulsions are fragile. They are temperamental. If you look at them the wrong way, they will spite you.
The Breaking Point: Heat, Acid, and Agitation
So, what causes that protein net to fail? The number one culprit is heat. When a cheese sauce exceeds a gentle simmer (around 180°F or 82°C), the casein proteins literally seize up. Imagine those proteins as tiny sponges holding onto the water and fat. When they get too hot, they clench like a fist, aggressively squeezing out all the moisture and oil.
What you are left with is a broken sauce. The water evaporates, the fat pools on the surface as an unappetizing oil slick, and the clenched proteins turn into those dreaded, grainy little pebbles that feel like wet sand in your mouth. Once those proteins denature and tighten up to that extreme degree, it is incredibly difficult to coax them back into a relaxed state.
Acid can also be a culprit. While a tiny splash of white wine or lemon juice can brighten up a rich sauce, adding too much acid too quickly will instantly curdle the dairy proteins.
The Usual Suspects: What You Are Doing Wrong
Before we talk about how to do it right, we need to have a brutally honest conversation about what you might be doing wrong. If your weeknight macaroni and cheese constantly turns into a greasy disaster, one of these three usual suspects is likely to blame.
The Pre-Shredded Trap
I am all for saving time on a busy Tuesday evening, but buying pre-shredded cheese in a plastic bag is the fastest way to sabotage your sauce. Commercial shredded cheese is heavily coated in anti-caking agents—usually cellulose (wood pulp) or potato starch. These powders are designed to absorb moisture and prevent the cheese shreds from clumping together in the bag.
When you dump that coated cheese into a hot liquid, the cellulose acts as a barrier, preventing the cheese from melting smoothly. Instead of a glossy sauce, you get a gritty, thickened paste. Always, always buy a block of cheese and grate it yourself. It takes exactly two extra minutes and will fundamentally change the trajectory of your meal. If you prefer, portioning it with a wire slicer before gently melting it can also yield fantastic results.
The Boiling Blunder
As we established in our science lesson, boiling is the enemy of dairy. If your base liquid (whether it’s milk, cream, or broth) is aggressively bubbling when you add your cheese, you are sending your sauce straight to the graveyard. The liquid should be steaming, perhaps with a few tiny, lazy bubbles around the edges of the pan, but it should never be at a rolling boil. Take the pot completely off the heat source before you add your cheese. The residual heat is more than enough to melt it gently.
The Age of the Cheese Matters
Not all cheeses are created equal when it comes to melting. Young, high-moisture cheeses like mild cheddar, Monterey Jack, fontina, and Gruyère are melting champions. They have a high water content and a loose protein structure.
Aged cheeses, on the other hand—like a sharp 5-year-old cheddar or a crumbly Parmigiano-Reggiano—have lost most of their moisture over time. Their proteins are tightly packed. If you try to make a sauce using only an aged, sharp cheddar, it will almost certainly separate because there simply isn’t enough water to maintain the emulsion. The secret is blending: use a young, highly meltable cheese as your base, and add a smaller handful of the aged cheese purely for that sharp, punchy flavor.
Method 1: The Classic Béchamel (The Roux Route)
For generations, the traditional French method for stabilizing a cheese sauce (technically turning a Béchamel into a Mornay sauce) has relied on a roux. A roux is simply equal parts fat (usually butter) and flour, cooked together. The flour provides starch molecules that physically get in between the dairy proteins, preventing them from clumping together when the cheese is added.
Building the Base
Start by melting two tablespoons of high-quality unsalted butter in a saucepan over medium heat. Once it’s foaming, whisk in two tablespoons of all-purpose flour. You need to cook this paste for about 60 to 90 seconds. You are not trying to brown it—you just want to cook out that raw, pasty flour taste.
Next, you are going to slowly whisk in two cups of whole milk. Please, for the love of all things culinary, do not use skim milk. You need the fat. Whisk constantly as you pour.
The Art of Tempering
Bring the milk mixture to a very gentle simmer. You will notice it begin to thicken and coat the back of a spoon. This is your Béchamel. Now comes the critical moment. Turn the burner completely off. Move the pot to a cool burner if you have an electric stove that holds heat.
Add your freshly grated cheese (about two to three cups) in small handfuls. Do not dump it all in at once. Whisk gently until the first handful is completely melted before adding the next. This gradual tempering ensures the temperature of the sauce doesn’t drop too rapidly, and it prevents the proteins from panicking.
Whisking Without the Workout
A quick note on tools: use a proper whisk, but treat it with respect. If your whisk leaks dishwater from the handle into your pristine sauce, throw it in the trash immediately and invest in a fully sealed, stainless steel professional whisk. You want to agitate the sauce enough to incorporate the cheese, but you don’t want to whip air into it like a meringue. Gentle, consistent figure-eight motions work best.
Method 2: The Modern Marvel (Sodium Citrate)
If the traditional Béchamel method feels too fussy, or if you simply despise the slightly muted flavor that flour brings to a cheese sauce, I am about to introduce you to a modern culinary miracle. This is the secret weapon used by high-end restaurants and modernist chefs to create liquid gold.
What is Sodium Citrate?
Sodium citrate is a type of salt derived from citrus fruits. It sounds like a scary chemical, but it is a completely safe, naturally occurring food additive. In fact, it is the exact ingredient that gives American cheese its supernatural melting abilities.
When you add sodium citrate to a cheese sauce, it acts as the ultimate chemical peacekeeper. It replaces the calcium ions in the cheese’s protein matrix with sodium ions. This fundamentally alters the structure of the proteins, making them highly soluble and preventing them from clumping together, even at higher temperatures. With sodium citrate, you don’t need a roux. You don’t even need milk. You can melt cheese into water, beer, or wine, and it will remain flawlessly smooth.
The Golden Ratio
The math for a sodium citrate cheese sauce is incredibly simple, and it relies on baker’s percentages. You need to weigh your ingredients using a digital kitchen scale.
The ideal ratio is 2% to 3% sodium citrate by weight of your total liquid and cheese combined.
For example, if you are using 200 grams of cheese and 200 grams of liquid (totaling 400 grams), you will need roughly 8 to 12 grams of sodium citrate. If you add too much, your sauce will take on a noticeably sour, salty, metallic taste. Stick to the 2-3% rule, and you will achieve perfection.
Step-by-Step Modern Magic
To execute this, combine your liquid (water, milk, or a light beer) and your measured sodium citrate in a saucepan. Bring it to a gentle simmer so the salt dissolves completely.
Once dissolved, begin adding your grated cheese a handful at a time, whisking continuously or using an immersion blender. The cheese will melt into the liquid with an almost eerie smoothness. The resulting sauce is intensely cheesy, unmuted by flour, and boasts a glossy, silken texture that will never break, even if you accidentally boil it or reheat it the next day. It is the absolute best method if you want to host a relaxed dinner party without stressing over a volatile sauce on the stove.
While some cooks swear by using evaporated milk as a shortcut for a stable sauce (since the concentrated milk proteins act as a buffer), nothing beats the sheer bulletproof reliability of sodium citrate.
The “No-Go” Gear Warning: Stop Poisoning Your Pasta
As your sassy culinary guide, I would be doing you a massive disservice if I taught you these beautiful techniques but let you cook them in toxic garbage. We need to talk about your cookware.
The Teflon Tragedy
I have zero patience for cheap, peeling, non-stick cookware. If you are whisking a cheese sauce in a scratched Teflon pot, you are actively incorporating microscopic flakes of synthetic polymers into your family’s dinner. These coatings degrade rapidly under heat and friction (like the friction of a metal whisk). There is absolutely no reason to use a non-stick pot for a liquid sauce.
What to Use Instead
For sauces, you need a heavy-bottomed vessel that conducts and retains heat evenly, preventing hot spots that can scorch your dairy.
A tri-ply stainless steel saucepan or an enameled cast iron pot is your best friend here. Yes, stainless steel requires a bit of technique to prevent sticking when searing meats—mastering the water drop test is absolutely essential for that—but for liquid sauces, stainless steel is brilliant, safe, and indestructible.
If you happen to use bare cast iron or carbon steel for other kitchen tasks, make sure you properly clean it with a chainmail scrubber to preserve the seasoning, but stick to enameled or stainless pots for your acidic or dairy-heavy sauces to avoid picking up metallic flavors.
Curating the Ultimate Mindful Mac and Cheese Bar
Now that you possess the sacred knowledge of an unbreakable cheese sauce, it is time to put it to use. Recent statistics show that home entertaining is experiencing a massive renaissance. According to a 2025 survey by Talker Research, 72% of people now prefer staying in and hosting friends over going out for the night. We are officially in the era of the dinner party. But hosting should not mean spending your entire evening hyperventilating over a hot stove while your guests have all the fun in the living room.
The Hosting Philosophy
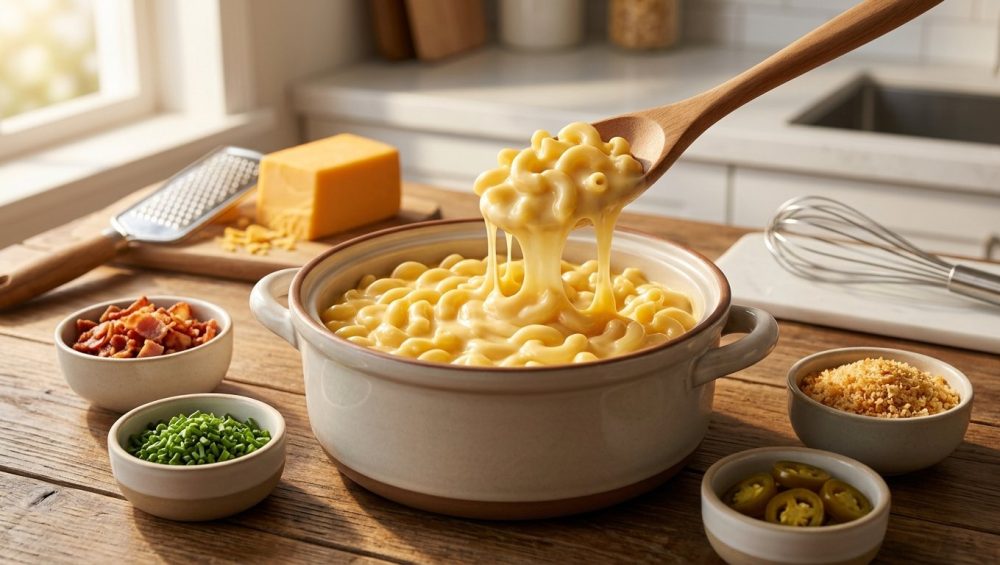
Setting up a mindful macaroni bar is the ultimate hack for effortless, interactive hosting. The concept is simple: you provide a massive pot of perfectly cooked pasta, a cauldron of liquid-gold cheese sauce, and an expansive matrix of toppings. Your guests build their own custom bowls. It caters to picky eaters, it scales up easily for large crowds, and most importantly, the host gets to actually enjoy the party.
Keeping It Warm Without Breaking
The biggest logistical hurdle of a hot food bar is temperature control. As a cheese sauce cools, the fats begin to solidify and moisture evaporates, causing the sauce to thicken and congeal. If you let it sit at room temperature, it will turn into a solid block of dairy within twenty minutes.
The ideal holding temperature for a cheese sauce is between 140°F and 160°F. To maintain this throughout your party, a slow cooker is your greatest ally. Once your sauce is perfectly emulsified on the stove, transfer it to a slow cooker set to the “Warm” setting.
Keep a small pitcher of warm milk or hot water nearby. Every twenty minutes or so, give the sauce a gentle stir. If you notice it getting too thick due to evaporation, whisk in a tiny splash of the warm liquid to loosen it back up. Never add cold milk to a hot sauce, as the temperature shock can cause the fats to seize.
If you don’t have a slow cooker, a traditional fondue pot over a low tea light or a chafing dish with a water bath works brilliantly. The water bath ensures gentle, indirect heat, preventing the bottom of the sauce from scorching.
The Toppings Matrix
A mac and cheese bar lives and dies by its toppings. You want to provide a balance of textures and flavor profiles: salty, crunchy, acidic, and fresh.
- The Crunch Factor: Toasted panko breadcrumbs tossed in brown butter, crushed kettle chips, or crispy fried onions.
- The Savory Proteins: Crumbled thick-cut bacon, pulled pork, smoked brisket, or spicy chorizo crumbles.
- The Acid & Heat: Pickled jalapeños, a dash of hot sauce, sun-dried tomatoes, or a drizzle of balsamic glaze. Acid cuts through the heavy fat of the cheese, balancing the palate.
- The Fresh Finish: Chopped chives, scallions, or fresh parsley.
Boil your pasta right before guests arrive. Toss the noodles in a tiny bit of neutral oil to prevent them from sticking together in the serving bowl. (Normally, coating pasta in oil is a sin because it prevents sauces from adhering, but for a buffet setting where the pasta sits out, it is a necessary evil. Alternatively, you can rely on the hidden magic of starchy water to bring it together in individual bowls if you hold the pasta in a warm water bath, but oil is far less stressful for a party).
Damage Control: Can You Save a Broken Sauce?
Let’s say you ignored my advice. You cranked the heat to high, dumped in a bag of pre-shredded cheese, and now you have a gritty, oily disaster. Can it be saved?
Sometimes. If the proteins haven’t completely turned into rubber bullets, you can attempt an emergency rescue.
First, get the pot off the heat immediately. Do not keep cooking it.
Second, whisk in a tablespoon of very cold water or cold heavy cream. I know I just told you not to add cold liquids to a hot sauce, but this is an emergency. The sudden drop in temperature can sometimes shock the proteins into relaxing, while the added water gives the fat somewhere to disperse.
Whisk vigorously. If you have an immersion blender, now is the time to use it. The mechanical sheer force of the blender blades can physically force the fat droplets back into the liquid suspension.
If it works, congratulations. Serve it immediately and never speak of the incident again. If it doesn’t work, well, you have learned a valuable lesson in thermodynamics. Toss it out, and take a moment to figure out why your plastic containers stay greasy while you wash your backup bowls.
Final Thoughts
Making a flawless, velvety cheese sauce is not a dark art reserved for restaurant kitchens. It is a simple matter of respecting the ingredients. Keep your heat low, grate your own cheese, and don’t rush the process. Whether you choose the traditional comfort of a roux-based Béchamel or embrace the modernist wizardry of sodium citrate, you now have the tools to conquer dairy.
Hosting a dinner party shouldn’t be an exercise in anxiety. By setting up a mindful, interactive mac and cheese bar, you are giving yourself permission to step away from the stove, pour a glass of wine, and actually enjoy the company of the people you invited into your home.
Now get out of here, go buy a block of good sharp cheddar, and show that saucepan who is boss. Happy cooking!






