We need to have a serious conversation about what is happening in your kitchen on a Saturday afternoon. You’ve decided to skip the ridiculously overpriced café line, you’ve invited some friends over, and you’ve boldly declared that you are going to make bubble tea from scratch. You boil some water, toss in a handful of tapioca pearls, brew some tea, and construct your masterpiece. The first sip is glorious. But twenty minutes later, your friends are politely trying to chew through what feels like flavorless, rubbery gravel at the bottom of their cups.
Sound familiar? Welcome to the club.
The global bubble tea market was valued at nearly $2.8 billion in 2024 and is hurtling toward a staggering $4.7 billion by 2031. We are collectively obsessed with this Taiwanese beverage, and rightfully so. But here is the brutal truth: most home cooks fail miserably at making it because they treat tapioca pearls like pasta. They are not pasta. They are complex little spheres of pure starch, and if you don’t understand the food science behind them, they will betray you.
As your resident culinary realist, I have zero patience for pretentious chef-speak, but I also refuse to let you serve your guests sub-par, rock-hard boba. Today, we are going to decode pretentious recipe jargon and break down the exact molecular science, the boiling techniques, and the sweetening methods required to achieve that perfect, bouncy café-quality chew. Then, we are going to seamlessly integrate this into a stunning, interactive drink station.
Grab your heavy-bottomed pots and let’s get to work.
The Molecular Saboteur: Why Your Boba Turns to Stone
To understand why your boba gets hard the second it touches a cold drink, we have to talk about cassava. Tapioca pearls are essentially pure starch extracted from the cassava root, a tuberous vegetable native to South America but widely cultivated and innovated upon in Taiwan.
When you cook raw tapioca starch, you are initiating a process called starch gelatinization. As you drop the pearls into violently boiling water, the intense heat and moisture penetrate the tightly packed starch molecules. The hydrogen bonds holding the starch together break down, allowing water to rush in. The granules swell, thicken, and transform into that coveted, bouncy, jelly-like state known in Taiwan as the “Q-texture”.
But here is where the sabotage happens. The moment those beautifully gelatinized pearls begin to cool down, a sinister secondary process begins: starch retrogradation (or recrystallization).
When the temperature drops, those swollen starch molecules panic. They attempt to realign themselves back into their original, rigid crystalline structure. As they tightly bind back together, they violently expel the water they just absorbed during the boiling phase. The result? The pearls lose their moisture, their elasticity, and their joy, reverting to a chalky, hard state.
This retrogradation happens rapidly when the pearls are exposed to cold temperatures. This is exactly why putting leftover cooked boba in the refrigerator is a culinary crime, and why dumping hot pearls directly onto ice will instantly ruin their texture. To conquer the pearl, we must manipulate its temperature and its hydration.
Banishing the “Quick-Cook” Impostors and Toxic Gear
Before we even turn on the stove, we need to audit your pantry and your cookware. If you take away only one piece of advice from me, let it be this: throw away the “3-minute quick-cook” boba.
If you walk down the aisle of your local supermarket and buy a bag of tapioca pearls that promises to be ready in five minutes, you are setting yourself up for failure. These impostor pearls have been pre-gelatinized and dehydrated in a factory. Their cellular structure has been permanently altered and compromised. They lack the structural integrity to hold onto moisture, meaning they will succumb to retrogradation and turn rock-hard almost immediately upon touching cold milk. You want raw, uncooked tapioca pearls. Yes, they take an hour to prepare. Your weekend is worth the effort.
Next, let’s talk about your hardware. Boiling a massive pot of sticky starch requires high, sustained, even heat. If you are using a cheap, scratched, mystery-metal pot with a peeling Teflon coating, I need you to march to the trash can right now. Stop ruining your nonstick pans and your health. You need a high-quality, fully clad stainless steel stockpot. It provides the thermal mass necessary to keep the water at a rolling boil when you drop the room-temperature pearls in.
The Foolproof Masterclass: Boiling, Steeping, and Sweetening
Achieving the perfect chew is a three-phase operation. Do not rush this. Do not cut corners.
Phase 1: The Rolling Boil (Gelatinization)
You cannot cook boba in a shallow pan of simmering water. You need a massive volume of water to give the pearls room to dance and to prevent the ambient starch from turning the water into a sludgy glue. The golden ratio is 8 parts water to 1 part raw tapioca pearls by volume.
Bring your massive pot of water to a violent, rolling boil. Do not add the pearls until the water is bubbling aggressively. If the water is too cool, the exterior of the pearls will dissolve into mush before the interior even begins to cook.
Once boiling, pour the pearls in slowly—like a gentle rain—so they don’t clump together. Immediately give them a gentle stir with a wooden spoon to ensure they don’t stick to the bottom of the pot. Within a minute or two, they will bob to the surface.
Lower the heat just slightly to maintain a strong, steady simmer, and let them cook uncovered for 25 to 30 minutes. Stir them every five minutes. You are forcing water into the dense core of the starch.
Phase 2: The Crucial Steam (Setting the Core)
After 30 minutes of boiling, the pearls will be soft on the outside but likely still have a tiny, opaque, raw dot in the dead center. This is where amateur cooks panic and keep boiling them until they turn to mush.
Instead, turn the heat completely off. Move the pot to a cool burner, clamp a tight-fitting lid onto the pot, and walk away. Let the pearls steep in the residual hot water for another 25 to 30 minutes.
This resting phase is non-negotiable. It allows the ambient heat to gently penetrate the very core of the pearl, achieving total gelatinization without violently agitating and destroying the delicate exterior.
Phase 3: The Osmotic Sugar Soak (The Secret Weapon)
Once the steeping time is up, you must act quickly. Pour the pearls into a colander and rinse them under lukewarm water for about 60 seconds. This halts the cooking process and washes away the excess surface starch that makes them slimy. (Pro tip: use a proper tool for this. Stop chasing your pasta and slippery boba with a flimsy slotted spoon; invest in a wide stainless steel spider skimmer).
Now for the absolute most critical step to prevent your boba from hardening: The Sugar Soak.
You must immediately submerge the warm pearls in a rich sugar syrup. Do not let them sit naked in a bowl. Why? Osmosis and hydration locking.
When you soak the pearls in a heavy syrup (a 1:1 ratio of dark brown sugar and hot water, perhaps with a splash of longan honey for authentic Taiwanese flavor), the dense sugar molecules coat the pearls. The sugar acts as a humectant. It draws a microscopic amount of water out of the pearl’s surface while simultaneously infusing the pearl with sugar, creating a protective, glossy barrier. This barrier drastically slows down the rate of starch retrogradation.
Let the pearls soak in this syrup for at least 30 minutes before serving. Held in this warm syrup bath, your boba will remain perfectly soft, bouncy, and chewy for up to 4 to 6 hours.
Crafting the Teas: Cold Brews and Flash-Chilling
You have spent an hour perfecting your boba. Please do not insult your own hard work by pouring weak, lukewarm, bagged tea over it.
When you build an iced bubble tea, the ice and the milk are going to severely dilute the tea base. If you brew your tea normally, your final drink will taste like vaguely caffeinated dishwater. You need to brew your tea at double strength.
You have two scientifically sound methods for this:
Method 1: The Flash-Chill
This is for the host who forgot to prep the night before (we’ve all been there). Use high-quality loose leaf tea—Assam black tea, robust Oolong, or Jasmine green tea. Use double the amount of tea leaves you normally would for the volume of water (e.g., 8 tea bags or 3 tablespoons of loose leaf for just 4 cups of boiling water). Steep it for a strict 5 minutes. Do not over-steep, or the tannins will extract and make the tea unbearably bitter. Strain the tea and immediately pour it over a massive block of ice. The rapid drop in temperature locks in the volatile aromatic compounds before they can evaporate, giving you a punchy, fragrant tea base.
Method 2: The Cold Brew
If you are planning ahead, cold brewing is the ultimate flex. Combine 4 tablespoons of loose leaf tea with 4 cups of cold, filtered water in a large glass mason jar. Leave it in the fridge for 12 to 16 hours. Cold water doesn’t extract the bitter, astringent tannins from the tea leaves, resulting in an incredibly smooth, naturally sweet, highly concentrated tea.
Setting Up Your Mindful Bubble Tea Bar
Now that the science is handled, it is time to focus on the hospitality. The beauty of a DIY bubble tea bar is that it is inherently interactive. It forces your guests to slow down, engage with their food, and customize their experience. It is the perfect way to host a relaxed dinner party or afternoon gathering without being trapped behind the stove while everyone else is having fun.
Safe, High-Quality Gear Only
A mindful gathering requires mindful equipment. We are not serving our lovingly crafted drinks in flimsy, single-use plastic cups that will sit in a landfill for four centuries.
Set your station with heavy, clear glass tumblers or wide-mouth mason jars. Provide wide, reusable stainless steel or borosilicate glass boba straws.
When setting out the components, aesthetic and thermal safety are key. If you’ve ever had a glass baking dish shattered on you, you know that thermal shock is a very real danger. Do not pour boiling liquids into cheap decorative pitchers. Use tempered glass beverage dispensers for your chilled teas.
The Architecture of the Station
To prevent a bottleneck of confused guests, arrange your station linearly, following the exact order of drink assembly.
Station 1: The Boba Warmer
Your boba must be kept warm (ideally between 131–149 °F) to stave off retrogradation. Do not just leave the bowl on the counter. Transfer your pearls and their syrup into a small slow cooker set to “warm,” or a ceramic fondue pot over a tea light. Provide a stainless steel ladle.
Station 2: The Ice Bucket
Use a proper insulated ice bucket. And please, stop bending your spoons trying to chisel apart frozen blocks of ice; provide a dedicated, heavy-duty metal ice scoop.
Station 3: The Teas
Offer at least two options: a robust Black Tea (like Earl Grey or Assam) and a floral Green Tea (like Jasmine). Serve them in clear glass dispensers with stainless steel spigots.
Station 4: The Milks and Creamers
Provide variety for your dairy-free friends. Whole milk offers the richest texture, but oat milk provides a fantastic creamy neutrality, and coconut milk adds a tropical sweetness. Keep these in chilled glass carafes nestled in a shallow tray of crushed ice.
The Assembly: Drink Architecture 101
When your guests arrive at the station, you need to gently instruct them on the architecture of the drink. The order in which the ingredients go into the glass is not just about aesthetics; it is about protecting the boba.
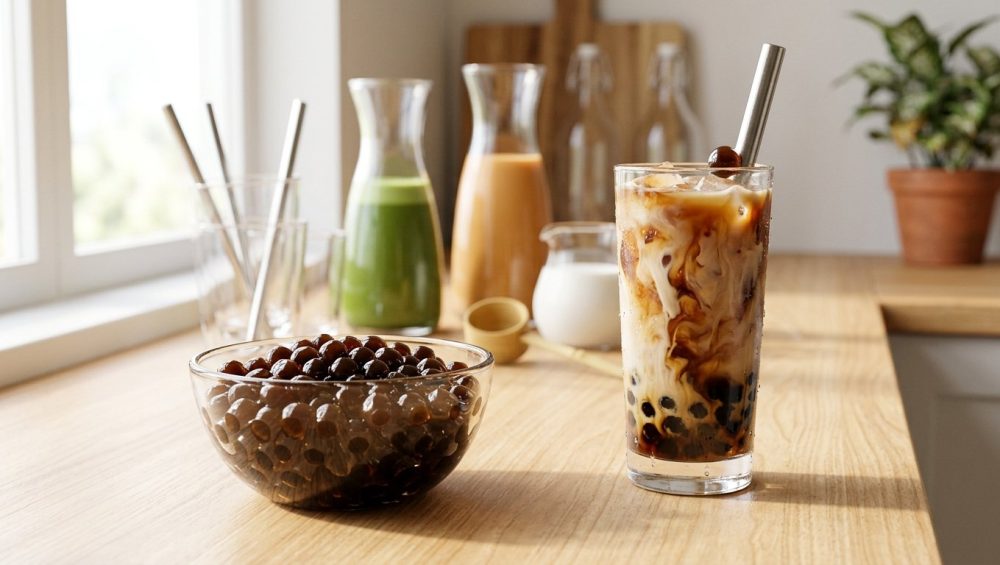
Step 1: The Warm Base. Ladle a generous scoop of the warm boba and the brown sugar syrup into the bottom of the glass. Tilt the glass and rotate it so the thick syrup coats the inner walls. (This is how you get those highly Instagrammable “tiger stripes” bleeding into the milk).
Step 2: The Ice Buffer. Add the ice second. The ice acts as a thermal buffer. If you pour cold milk directly onto the warm boba, the sudden temperature shock will instantly harden the starch.
Step 3: The Tea. Pour the concentrated tea over the ice, filling the glass about three-quarters of the way.
Step 4: The Cloud. Top it off with a heavy splash of milk. Watching the milk cascade down through the ice and tea, mixing with the brown sugar syrup, is one of the most visually satisfying culinary moments you can offer a guest.
The Clean-Up and Storage Reality Check
Let’s talk about the aftermath. Cooked tapioca pearls have a strict lifespan of about 4 to 6 hours. After that, no amount of sugar syrup is going to save them from becoming tough and unpalatable. Do not put cooked boba in the refrigerator. The cold ambient temperature will rapidly accelerate starch retrogradation, and you will wake up to a bowl of inedible rubber bullets.
If you made too much, simply discard the cooked pearls. However, if you made a massive batch of raw pearls and didn’t boil them all, you can absolutely freeze the uncooked pearls in an airtight bag.
When it comes to cleaning up your station, dairy and sticky sugar syrup can leave a stubborn film on your equipment. Don’t let your plastic containers stay greasy; avoid using plastic altogether. Soak your glass carafes and stainless steel ladles in hot, soapy water immediately after the party ends to dissolve the sugar bonds.
The Art of the Weekend Host
Mastering the art of effortless hosting doesn’t mean you magically conjure perfect food out of thin air. It means you respect the science of your ingredients, you utilize the essential tools every beginner needs, and you do the heavy lifting before your guests ever walk through the door.
By taking the time to properly gelatinize your tapioca, protect it with an osmotic sugar soak, and set up an intuitive, beautiful station, you eliminate the stress of playing bartender all afternoon. You empower your friends to craft their own perfect beverages, tailored exactly to their sweetness and dairy preferences.
You don’t need a commercial kitchen or a culinary degree to pull this off. You just need a heavy-bottomed pot, a little bit of patience, and the good sense to never, ever buy the 3-minute boba again. Now go boil some water. Your perfect cup of tea is waiting.