
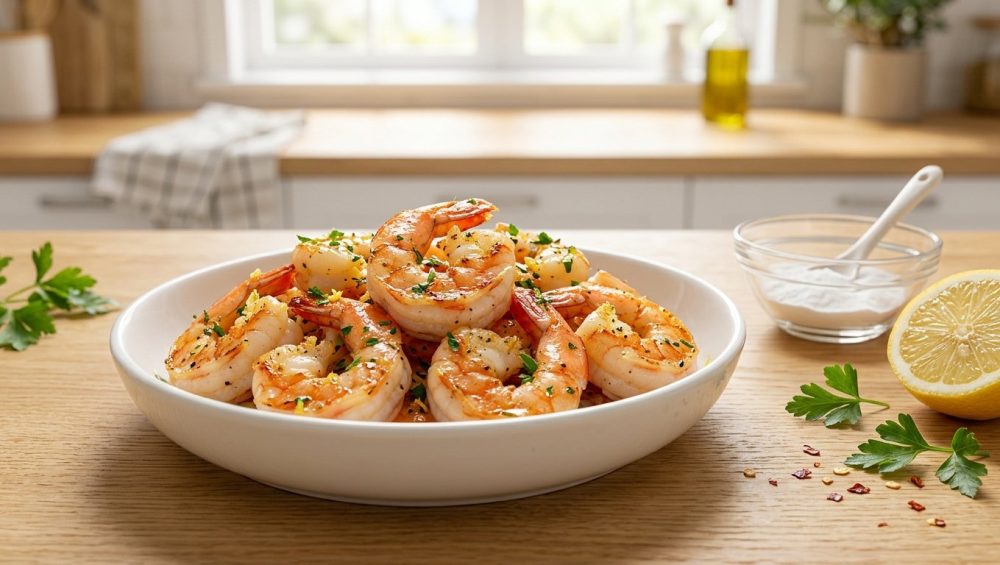
Let’s get one thing straight right out of the gate: if your jaw aches after eating a weeknight seafood stir-fry, you aren’t eating dinner—you are chewing on a crustacean-flavored pencil eraser. We have all been there. You drop a handful of expensive, beautiful, translucent shrimp into a hot skillet, turn around to grab a glass of wine, and by the time you look back, they have shriveled into dense, rubbery little tires. It is a culinary tragedy, and frankly, it is a massive waste of your hard-earned grocery budget.
As a home cook, you might think that achieving that perfectly plump, snappy, restaurant-quality texture requires a culinary degree or a commercial kitchen setup. It absolutely does not. You do not need to be a Michelin-starred chef to master seafood; you just need to understand a tiny bit of basic food science and stop repeating the same seven rookie kitchen mistakes that sabotage everyday meals.
Cooking is essentially applied physics and chemistry. When your food fails, it is not because the universe hates you; it is because you did not manage the chemical reactions happening inside your skillet. Today, we are going to completely demystify the rapid protein coagulation that ruins your seafood, and I am going to teach you a brilliant, dirt-cheap kitchen hack using a pantry staple that will guarantee juicy, tender results every single time. Time is money, so let’s skip the fluff and fix your dinner.
The Biological Anatomy of a Shrimp: Why It Hates Heat
To understand why your shrimp turns to rubber, you first have to understand what you are actually cooking. A shrimp is not a cow, and it is not a chicken. When you cook a tough cut of beef, like a chuck roast, you are dealing with complex musculature packed with fat, marbling, and tough connective tissues like collagen. When you braise that beef over low heat for hours, the collagen slowly melts down into rich, unctuous gelatin, basting the meat from the inside out.
Shrimp have absolutely none of these biological safety nets. They are marine creatures designed by evolution for quick, darting bursts of movement in the water—specifically, rapidly flicking their tails to escape predators. Because of this evolutionary design, their muscle fibers are incredibly short, fine, and highly concentrated. Furthermore, a shrimp is composed almost entirely of water and protein, with virtually zero fat to protect it from heat.
When you drop this delicate, moisture-packed, fat-free protein into a ripping hot pan, there is no melting collagen to save you. The heat penetrates the short muscle fibers almost instantaneously. If you treat a shrimp with the same aggressive heat application you would use for a thick steak, you are going to destroy its delicate structure.
The Physics of Protein Coagulation (The Rubber Band Effect)
Let’s zoom in on a microscopic level and look at the thermodynamics of your skillet. The primary proteins inside a shrimp’s muscle are myosin and actin. In their raw, uncooked state, these protein strands are loosely bundled up, which is why raw shrimp feels soft and looks translucent.
When you apply thermal energy (heat) to the shrimp, these proteins undergo a process called denaturation. The heat causes the tightly wound protein bundles to uncoil and unfold. Immediately after unfolding, they seek out new partners and link together, forming a brand-new, firm, three-dimensional network. Up to a certain point, this chemical process is exactly what we want. It is the magic that turns a raw, unappetizing piece of seafood into a firm, opaque, and delicious bite.
However, heat does not magically stop working just because the food looks done. If you leave the shrimp in the pan for even a minute too long, that newly formed protein network continues to tighten. Imagine a wet sponge being aggressively squeezed by a giant fist. As the protein strands contract tighter and tighter, they literally wring the water out of the muscle fibers.
In food science, this phenomenon is known as “drip loss,” and it is the exact reason your seafood shrinks to half its original size and takes on the texture of a bouncy ball. You haven’t just cooked the shrimp; you have physically squeezed all the hydration out of it, leaving behind a dense, dry matrix of over-contracted proteins. If you want to master the art of a perfectly seared fish or crustacean, you have to learn how to halt this coagulation process before the “sponge” gets squeezed.
The Visual Cues: Decoding the “C” vs. the “O”
You do not need a fancy digital thermometer to tell when your shrimp are perfectly cooked; you just need to use your eyes. Because of the way their muscle fibers are structured, shrimp physically curl up as their proteins contract under heat. This curling action is your built-in culinary timer.
When the shrimp hits the pan, the proteins along the inner curve of its body begin to tighten. A perfectly cooked shrimp will gently curl into a relaxed “C” shape. The flesh will turn from translucent gray to opaque pink and white. The absolute second you see that gentle “C,” the shrimp is done. You must remove it from the heat source immediately.
If you turn your back to chop some parsley or check your phone, the proteins will continue to contract aggressively. The head of the shrimp will curl all the way in to meet the tail, forming a tight, closed circle. If your shrimp looks like an “O,” you have officially crossed the threshold into rubber territory. Just remember the golden rule of the skillet: “C” stands for Cooked, and “O” stands for Overcooked.
The Temperature Trap and FDA Guidelines
When it comes to internal temperature, there is often a massive disconnect between government food safety guidelines and actual culinary reality. The FDA recommends cooking all seafood to a safe minimum internal temperature of 145°F (63°C) to ensure that any harmful bacteria or parasites are completely destroyed.
From a strict food safety and liability standpoint, this is the standard. However, from a practical cooking perspective in a home kitchen, aiming for 145°F while the shrimp is still in the pan is a guaranteed recipe for disaster. Because shrimp are so small and lack protective fat, heat transfer happens violently fast. If you wait until a thermometer reads 145°F in the skillet, “carryover cooking”—the residual heat trapped inside the food—will easily push the final resting temperature well past 155°F or 160°F. At that temperature, the proteins have fully seized, and all moisture is gone.
Many professional chefs actually pull their shrimp from the heat when the internal temperature is closer to 120°F to 130°F, knowing that the residual heat will finish the job gently on the plate. The window between a succulent bite and a ruined dinner is literally a matter of 30 to 60 seconds. This incredibly narrow margin of error is exactly why so many home cooks struggle to throw together simple weeknight dinners without stressing out over the stove. But what if we could chemically widen that window of perfection?
The Masterclass Fix: The Science of Alkaline Brining
Here is the definitive, life-changing kitchen hack that will rescue you from overcooked seafood forever. We are going to use a basic pantry staple to outsmart the protein coagulation process entirely.
Most people mistakenly believe that they should marinate their seafood in an acidic liquid, like lemon juice or vinegar, to tenderize it. This is completely wrong. Acid actually denatures proteins the exact same way heat does (which is the entire scientific basis behind ceviche). If you soak your shrimp in a highly acidic marinade, the outer layers will turn mushy and chalky before they even touch the hot pan.
Instead of acid, we are going to use an alkaline brine. Baking soda (sodium bicarbonate) is a mild base. When you toss raw shrimp with a simple mixture of salt and baking soda, you actively raise the surface pH of the meat from its natural, slightly neutral state (around 7.5) to a more alkaline state (around 8.3 or higher).
Why does this matter? Elevating the pH fundamentally alters the electrical charge of the amino acids within the protein strands. Instead of seeking each other out and bonding tightly together when exposed to heat, the altered proteins actually repel each other slightly. This causes the short muscle fibers to physically swell, acting like a highly absorbent sponge that draws in and holds onto moisture.
Because the proteins are now repelling each other, they physically cannot contract tightly enough to squeeze out their internal water when heated. You have effectively disabled the “rubber band” effect. The result is a phenomenally plump, juicy, and snappy texture that mimics the mouthfeel of expensive lobster. It is the exact same scientific principle behind the magic of dry brining your poultry, just applied with an alkaline twist for delicate seafood.
The Maillard Reaction Bonus (Why Alkalinity Equals Browning)
The alkaline brine does not just protect the internal texture of your food; it actively supercharges the exterior flavor. If you love cooking, you are likely familiar with the Maillard reaction. This is the complex chemical reaction between amino acids and reducing sugars that creates a deeply browned, savory, and aromatic crust on seared foods. It is what makes a seared steak taste infinitely better than a boiled one.
The Maillard reaction is highly dependent on pH levels. In acidic environments, browning happens very slowly. But in alkaline environments, the activation energy required for the Maillard reaction to occur is significantly lowered.
By raising the pH of your shrimp with baking soda, you are effectively hitting the fast-forward button on the browning process. Your shrimp will develop a gorgeous, deeply caramelized crust in a fraction of the time it normally takes. This is a massive tactical advantage for the home cook. It allows you to get that beautiful, restaurant-quality sear on the outside of the shrimp incredibly quickly, meaning you can pull them off the heat long before the delicate interior has a chance to overcook and turn rubbery. It is the ultimate two-for-one scientific hack.
The Asian Culinary Roots: Water Velveting
It is worth noting that this technique is not some new, trendy internet fad. The practice of using alkaline agents to manipulate the texture of meat and seafood has deep roots in traditional Chinese cuisine.
In many Asian culinary traditions, a technique known as “velveting” is used to protect delicate proteins from the intense, aggressive heat of a wok. While velveting often involves coating the meat in a mixture of egg whites and cornstarch to create a protective thermal barrier, a specific variation known as “water velveting” relies heavily on an alkaline wash.
For example, when preparing classic dishes like Crystal Shrimp, chefs will thoroughly wash small, delicate river shrimp in a solution of salt and baking soda. This process tightens the exterior texture, coaxing out the natural salinity and sweetness of the seafood, while ensuring that the final cooked product retains an incredibly bouncy, snappy bite that is highly prized in the cuisine. By adopting this alkaline brine in your own kitchen, you are utilizing a time-tested, professional technique that has been perfecting seafood for generations.
The Step-by-Step Alkaline Brine Formula
Implementing this food science hack in your own kitchen is ridiculously simple, cheap, and requires virtually zero extra effort. Here is the exact formula you need to follow for flawless results:
The Ratio:
For every 1 pound (450 grams) of raw, peeled, and deveined shrimp, you will need:
- 1 teaspoon of kosher salt
- 1/4 teaspoon of baking soda
The Method:
- Place your raw shrimp in a mixing bowl.
- Sprinkle the kosher salt and baking soda evenly over the top.
- Toss the shrimp vigorously until every single piece is evenly coated in the dry mixture.
- Place the bowl in the refrigerator and let it rest for 15 to 30 minutes.
The Warning:
Do not think that if 15 minutes is good, two hours must be better. Time is money, and efficiency is key. If you leave the shrimp sitting in the alkaline baking soda for too long, the elevated pH will continue to break down the proteins excessively. Instead of being snappy and plump, the shrimp will cross over into a highly unpleasant, slippery, and gelatinous texture. Set a timer for 15 minutes. Use that time productively to chop your vegetables, mince your aromatics, or boil your pasta water.
The “No-Go” Rule on Toxic Kitchenware
Now that you have perfectly brined, scientifically optimized shrimp, we need to have a very serious conversation about the equipment you are going to cook them in. I absolutely refuse to let you drop these beautiful ingredients into a garbage pan.
If you are still trying to achieve a hard sear using a scratched, peeling, lightweight non-stick skillet you bought for ten dollars at a big-box store, you need to throw it in the trash immediately. I have a strict “no-go” rule when it comes to toxic kitchen gear. Heating cheap Teflon or mystery-metal pans to searing temperatures is a disaster. Not only do these thin pans lack the thermal mass required to hold heat, but they also degrade rapidly, releasing noxious fumes and physically flaking toxic chemical coatings straight into your dinner.
To cook like a pro, you need to prevent food from sticking using proper heat management, not cheap chemical coatings. You need a pan with serious thermal mass—specifically, a heavy-bottomed multi-clad stainless steel skillet, a well-seasoned carbon steel pan, or a cast-iron skillet.
When you drop cold seafood into a flimsy aluminum pan, the temperature of the metal plummets instantly. The pan cannot recover its heat fast enough, meaning your shrimp will end up simmering and steaming in their own juices rather than searing. A heavy pan holds onto its heat, ensuring that the Maillard reaction kicks off the second the food hits the metal.
And while we are on the subject of toxic habits, I highly recommend banishing toxic kitchen gear like aerosol cooking sprays from your pantry. Those pressurized cans are filled with propellants and emulsifiers like soy lecithin that polymerize under high heat, baking a sticky, impossible-to-remove yellow residue onto your expensive pans. Stop ruining your nonstick pans and stainless skillets with chemical sprays. Just use a bottle of high-quality, high-smoke-point liquid oil, like avocado or grapeseed oil.
Four Rookie Mistakes Ruining Your Seafood
Even with the baking soda hack and a fantastic carbon steel skillet, you can still ruin your dinner if you ignore the basic rules of heat transfer. Avoid these four common pitfalls:
1. Thawing in Warm Water
Never, under any circumstances, attempt to speed-thaw frozen shrimp by running them under warm or hot water. Because shrimp are so small and delicate, warm water will literally begin to cook the exterior flesh while the interior remains frozen solid. By the time they hit the pan, the outside is already rubbery. Always plan ahead and thaw your seafood overnight in the refrigerator. If you are in a desperate time crunch, place them in a sealed colander and run a continuous stream of strictly cold water over them until thawed.
2. Searing Wet Shrimp
Moisture is the ultimate enemy of browning. If your shrimp go into the hot oil dripping wet from the sink, the thermal energy of the pan is entirely wasted on evaporating that surface water. The temperature drops, steam billows up, and you end up with sad, grey, boiled shrimp. After your 15-minute alkaline brine, aggressively pat the shrimp completely dry with paper towels. The drier the surface, the faster the sear.
3. Adding Aromatics Too Early
If you are making a classic garlic butter shrimp, do not drop your minced garlic into the pan at the same time as the raw seafood. Minced garlic burns in about 30 to 45 seconds over high heat. If you throw it in at the beginning, it will turn acrid and bitter long before the shrimp are fully cooked. If you want to know why your garlic always burns, it is because you are treating a delicate aromatic like a robust vegetable. Sear the shrimp first, lower the heat, add your butter, and then toss the garlic in for the final 30 seconds of cooking.
4. Overcrowding the Skillet
If you dump two pounds of cold shrimp into a standard 10-inch skillet all at once, you will completely overwhelm the thermal capacity of the pan. The shrimp will rapidly drop the temperature of the metal, causing them to release their juices and boil in a watery puddle. Always cook in batches. Give each shrimp enough breathing room in the pan so that the steam can escape and the oil can do its job.
Applying the Hack to Different Cooking Methods
The beauty of the alkaline brine is that it protects your shrimp regardless of how you choose to cook them. Here is how to adapt the technique for your favorite weeknight meals.
The Perfect Pan-Sear
After resting in the baking soda and salt, pat the shrimp dry. Get your heavy stainless steel or carbon steel pan ripping hot over medium-high heat. Add a tablespoon of high-smoke-point oil. Lay the shrimp down in a single, uncrowded layer. Do not touch them. Let them sear undisturbed for 60 to 90 seconds until a deep golden crust forms and the edges turn pink. Flip them over, cook for another 30 to 60 seconds until they form a gentle “C” shape, and immediately remove them to a plate. Do not leave them in the hot pan while you make your sauce; the residual heat of the metal will overcook them. This is the exact same high-heat, fast-action philosophy you would use in a guide to pan-seared salmon.
High-Heat Grilling
Shrimp are fantastic on the grill, picking up beautiful smoky char, but the intense, dry heat of the grates can turn them to leather in seconds. The alkaline brine is mandatory here. After brining, thread the shrimp onto soaked wooden skewers or metal skewers to prevent them from falling through the grates. Make sure your grill is preheated to high. Because the baking soda accelerates the Maillard reaction, they will develop beautiful grill marks in just 1 to 2 minutes per side.
Gentle Poaching (Shrimp Cocktail)
Even if you are not relying on the Maillard reaction for browning, the alkaline brine still works miracles for boiled or poached shrimp by keeping the muscle fibers swollen and snappy. For the ultimate shrimp cocktail, do not subject your seafood to a violent, rolling boil. Bring a heavily seasoned pot of water (loaded with lemon halves, black peppercorns, and bay leaves) to a gentle simmer. Drop the brined shrimp in. The absolute second they turn pink and opaque—usually around 2 minutes—scoop them out with a spider skimmer and plunge them directly into a bowl of ice water. The ice bath immediately halts the carryover cooking, locking in that perfect, plump texture.
Conclusion: Take Back Your Kitchen
Cooking incredible, restaurant-quality seafood at home does not require expensive gadgets, a culinary degree, or hours of stressful prep work. It simply requires respecting the biology of the ingredients, understanding the basic physics of heat transfer, and keeping a close eye on the pan for two consecutive minutes.
By utilizing a simple alkaline brine with a quarter teaspoon of baking soda, you can fundamentally alter the chemistry of your shrimp, disabling the protein contraction that causes drip loss and rubbery textures. You are no longer at the mercy of a finicky protein; you are in control of the science.
So, ditch the toxic, peeling non-stick pans, grab a heavy skillet and a high-quality odor-free silicone spatula that won’t taint your food with yesterday’s onions, and get to work. You have the knowledge, you have the technique, and you have the power to banish rubbery seafood from your dining room table forever. Now go pour yourself a glass of wine, preheat that skillet, and show that shrimp who is actually in charge of the kitchen.






