
The Eraser Epidemic: Why We Keep Ruining Good Seafood
Shrimp is a massive, multi-billion dollar global industry, and projections for 2026 show we are eating more of these little crustaceans than ever before. In Europe and North America alone, the average person is putting away over a kilogram of shrimp every single year. Yet, despite our collective obsession with this premium weeknight protein, the average home cook is committing culinary homicide on a nightly basis.
You know exactly what I am talking about. You buy a beautiful bag of jumbo shrimp, envisioning a restaurant-quality garlic butter scampi. You drop them into a hot pan, turn your back for thirty seconds to grab a spatula, and suddenly, they have curled into tight, impenetrable little “O” shapes. You plate them up, take a bite, and immediately realize your dinner has the exact texture of a pencil eraser. If you are constantly wondering why your shrimp tastes like rubber after mere minutes on the stove, you are not alone. It is not a lack of culinary talent; it is a lack of basic food science.
The Biology of a Shrimp (And Why It Hates Heat)
To understand the solution, we have to respect the biology. Shrimp are marine athletes. Their bodies are built for short, rapid bursts of movement through the water, which means their tails are composed of highly active, incredibly lean muscle fibers—specifically, the proteins myosin and actin.
Unlike a beautifully marbled ribeye steak or a fatty pork shoulder, shrimp have virtually zero intramuscular fat to protect them from heat. Fat acts as an insulator; it melts slowly, basting the meat from the inside out and providing a buffer against the harsh thermodynamics of a hot skillet. Shrimp do not have this luxury. They are essentially pure protein and water.
When you introduce raw shrimp to a hot pan, those myosin and actin proteins begin to denature and coagulate almost instantly. As they heat up, the protein bonds tighten and contract violently, wringing out moisture like a wet sponge being twisted in a muscular fist. The longer they stay in the pan, the tighter those bonds become. The moisture evaporates, the flesh seizes, and the shrimp curls from a gentle, tender “C” shape into a rigid, overcooked “O”.
This window of perfection is agonizingly short. You have about sixty to ninety seconds per side before you cross the threshold from succulent seafood to bouncy rubber. But what if you could cheat time? What if you could alter the physical structure of the shrimp so it actually resists overcooking?
The Magic of Sodium Bicarbonate: A Lesson in pH
Enter the unsung hero sitting in the back of your pantry: baking soda (sodium bicarbonate). Yes, the same powdery substance you use to keep your refrigerator smelling less like leftover takeout is the ultimate secret weapon for flawless seafood.
In traditional Chinese cooking, there is a brilliant, centuries-old technique known as “velveting.” Restaurant chefs have long used a combination of egg whites, cornstarch, and alkaline ingredients to coat proteins before hitting the heat. This is the exact reason why the shrimp in your favorite takeout lo mein is always impossibly plump, glossy, and tender, while the shrimp you cook at home feels like chewing on a tire. If your stir-fry meat is chewy, it’s because you are skipping this crucial chemical step.
Here is the hardcore food science: Baking soda is an alkaline compound with a pH of around 8.3. When you expose the surface of raw meat to an alkaline environment, it fundamentally alters the electrical charge of the protein molecules. The higher pH prevents the proteins from bonding together as tightly when they are subjected to heat. Because the muscle fibers cannot contract as aggressively, they physically cannot squeeze out their internal moisture.
The result? The shrimp stays plump, juicy, and snappy—even if you accidentally leave it in the pan for an extra thirty seconds. It extends your cooking window, giving you the grace period that chaotic weeknight cooking demands.
The Maillard Reaction Bonus
But wait, the magic does not stop at texture. We also have to talk about the Maillard reaction—the complex chemical process between amino acids and reducing sugars that gives browned food its distinctive, savory flavor.
The Maillard reaction typically requires very high heat to kick off. However, this reaction occurs much faster and more efficiently in an alkaline environment. By treating your shrimp with a tiny amount of baking soda, you are not just protecting the interior moisture; you are accelerating the exterior browning. You get that gorgeous, restaurant-quality crust in a fraction of the time, meaning the shrimp spends less overall time in the pan. It is a win-win scenario governed by pure chemistry.
The Co-Star: Why You Cannot Forget the Salt
Baking soda is the star of the show, but it requires a supporting actor to pull off this culinary magic trick: Kosher salt.
We are essentially performing a rapid dry brine. When you toss the shrimp with salt, the salt draws out a tiny amount of surface moisture, dissolves into a concentrated brine, and is then reabsorbed deep into the muscle tissues. This does two things. First, it seasons the shrimp from the inside out, ensuring every single bite is flavorful, rather than just having a salty exterior.
Second, salt denatures proteins in its own unique way. While baking soda prevents the proteins from tightening via alkalinity, salt causes the protein strands to slightly uncoil and swell, creating a web-like structure that traps water molecules. It is the exact same reason your chicken breasts are dry when you skip the brine; without salt, the meat cannot hold onto its juices during the cooking process.
When you combine the moisture-trapping power of salt with the anti-contracting power of baking soda, you create an impenetrable shield against overcooking.
The 15-Minute Masterclass: The Exact Technique
I promised you a definitive guide, and I do not do fluff. Here is the exact, foolproof, rigorously tested method to achieve perfect shrimp every single time. This is a time-saving weekday hack that yields weekend-project results.
Step 1: The Thaw
Never, ever thaw shrimp in warm water or the microwave. You will begin cooking the exterior before the interior is defrosted, guaranteeing a mushy texture. If you are using frozen shrimp (which is often fresher than the “fresh” shrimp sitting on ice at the seafood counter), place them in a colander and run them under cold tap water for about ten to fifteen minutes. They thaw incredibly fast.
Step 2: The Great Dry-Off
Moisture is the enemy of a good sear. If your shrimp are wet, they will steam in the pan instead of browning. Take the time to aggressively pat your shrimp dry with paper towels. You want the surface to be as matte and dry as possible.
Step 3: The Magic Ratio
For every one pound (450g) of peeled, raw shrimp, you need:
- 1 teaspoon of Kosher salt
- 1/4 teaspoon of baking soda (do NOT exceed this, or your food will taste like soap)
- Optional: 1/4 teaspoon of sugar (to enhance browning and balance the salinity)
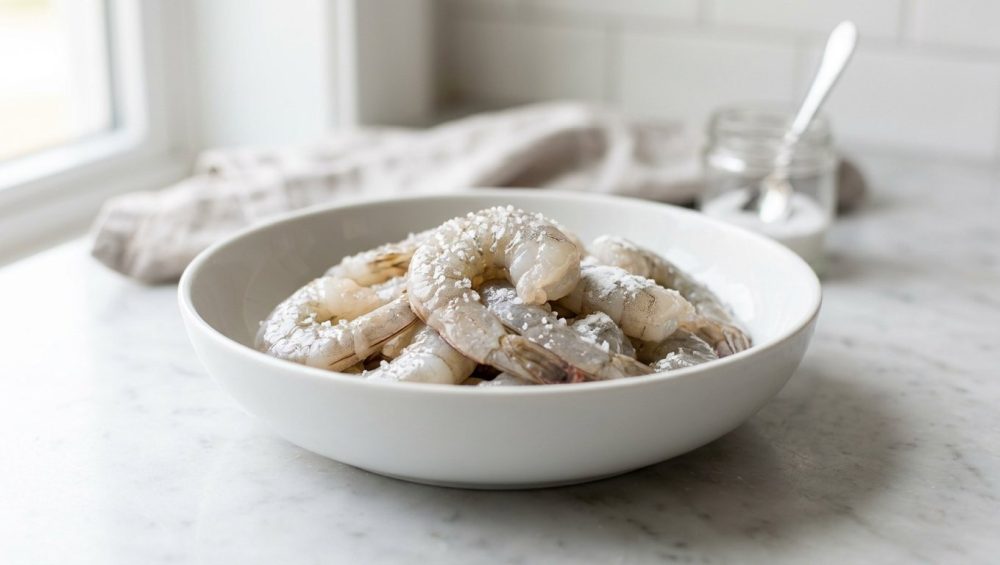
Toss the dry shrimp in a bowl with this mixture until every piece is evenly coated.
Step 4: The Rest
Place the bowl in the refrigerator for exactly 15 to 30 minutes. Do not leave them in there for hours. Prolonged exposure to baking soda will eventually break down the proteins too much, resulting in a bizarre, mushy texture. Fifteen minutes is all the time the chemistry needs to work its magic. Go prep your vegetables, boil your pasta, or pour yourself a glass of wine.
Step 5: To Rinse or Not to Rinse?
Some traditional water-velveting techniques call for rinsing the baking soda off before cooking. For our rapid weeknight dry-brine method, rinsing is entirely unnecessary. The amount of baking soda is so small that it will not leave a soapy or metallic taste, provided you measured accurately. Just pull them out of the fridge and they are ready for the heat.
The Cookware Manifesto: Ditch the Toxic Non-Stick
Now that we have perfectly engineered our shrimp, we need to talk about the hardware. As your sassy culinary guide, I have a strict “no-go” rule when it comes to cheap, toxic kitchen gear. I absolutely despise flimsy, peeling Teflon pans, and you should actively avoid them.
When you are searing seafood, you need high heat. Traditional non-stick coatings begin to degrade and release toxic fumes at high temperatures. Furthermore, they are terrible conductors of heat. When you drop cold shrimp into a cheap non-stick skillet, the pan’s temperature plummets, and your shrimp end up boiling in their own juices. You will never achieve that beautiful Maillard crust in a pan that cannot hold thermal mass.
You need a pan that means business. You need heavy-duty carbon steel or high-quality, multi-clad stainless steel. Yes, I know people are terrified of stainless steel because they think everything will glue itself to the bottom. But if your stainless steel pan sticks to everything, it is simply because you are not heating it properly.
Mastering the Sear
To properly sear your treated shrimp, place your stainless steel or carbon steel skillet over medium-high heat. Let the dry pan heat up for a few minutes. Perform the water drop test: flick a droplet of water into the pan. If it instantly sizzles and evaporates, the pan is too cold. If it splatters violently, it is too hot. If it forms a perfect little bead of mercury and glides effortlessly across the surface (the Leidenfrost effect), your pan is ready.
Add a high-smoke-point oil (like avocado oil, grapeseed oil, or clarified butter). Do not use extra virgin olive oil for searing; it will burn and turn bitter, making you cry chopping onions while the oil smokes out your kitchen.
Lay the shrimp in the pan in a single layer. Do not overcrowd the pan! If you pile them on top of each other, the temperature will drop, and they will steam. Cook them in batches if you have to.
Let them sear, undisturbed, for about 60 to 90 seconds. You will see the edges turning pink and opaque. Flip them once. Cook for another 30 to 60 seconds. The moment they form a loose “C” shape, get them out of the pan. Do not leave them in the skillet while you build a pan sauce; the residual heat of the heavy metal will continue to cook them, ruining all your hard work. Transfer them to a cool plate immediately, just like the trick to stop ruining your salmon relies on precise temperature control and knowing when to pull the protein away from the heat source.
Troubleshooting Common Rookie Mistakes
Even with the magic of chemistry on your side, there are a few pitfalls you need to avoid. Let’s address the most common ways people sabotage this technique.
Mistake 1: Confusing Baking Soda with Baking Powder
This is a catastrophic error. Baking soda (sodium bicarbonate) is 100% alkaline. Baking powder is a mixture of baking soda and an acidic powder (like cream of tartar). If you use baking powder, the acid will neutralize the alkaline effect, completely negating the tenderizing process. Much like fixing why your chicken skin is rubbery requires a chemical intervention specific to that meat, you must use the correct powder for the job. For shrimp, it is strictly baking soda.
Mistake 2: The Heavy Hand
If a little is good, a lot is better, right? Absolutely not. Baking soda is a powerful chemical. If you use more than 1/4 teaspoon per pound of meat, your shrimp will taste distinctly metallic, soapy, and unpleasant. Measure accurately. Do not eyeball it.
Mistake 3: The Over-Marination
As mentioned earlier, 15 to 30 minutes is the sweet spot. If you leave the shrimp in the baking soda brine overnight, the alkalinity will break down the protein matrix too far. You won’t get snappy shrimp; you will get a bizarre, mushy paste that disintegrates in your mouth. Time is money, but in this case, time is also texture.
Mistake 4: Buying “Enhanced” Shrimp
Always read the label on your frozen shrimp. You are looking for exactly one ingredient: Shrimp (and maybe a little salt). Many cheap supermarket brands sell “enhanced” shrimp that have been pumped full of sodium tripolyphosphate (STPP). This chemical is used to make the shrimp retain water so they weigh more (meaning you pay more for water). STPP-treated shrimp are incredibly difficult to sear, as they constantly leak water into the pan, and they often have a weird, chemical aftertaste. Avoid them at all costs.
Elevating Your Weeknight Repertoire
Once you have mastered the baking soda dry brine, the culinary world is your oyster (or, well, your shrimp). This technique is incredibly versatile and forms the foundation for countless stress-free weeknight meals.
The Ultimate Garlic Butter Scampi
Because you are searing the shrimp so quickly, you have to be careful with your aromatics. If you throw minced garlic into the pan at the exact same time as the raw shrimp, you are going to have a bad time, because your garlic always burns before the protein finishes cooking.
Instead, sear the treated shrimp first, remove them from the pan, and turn the heat down to low. Add a generous knob of high-quality butter to the pan, let it melt, and then add your minced garlic and red pepper flakes. Let the garlic gently toast in the residual heat for thirty seconds until fragrant. Deglaze the pan with a splash of dry white wine and a squeeze of fresh lemon juice, scraping up all those beautiful browned bits (the fond) left behind by the Maillard reaction. Toss the cooked shrimp back into the sauce just to coat them and warm them through. Finish with fresh parsley. You just made a restaurant-quality scampi in under twenty minutes.
The High-Heat Stir-Fry
If you want to recreate that glossy, takeout-style dish, the baking soda treatment is non-negotiable. After your shrimp have rested in the fridge, get your pan screaming hot. Tossing them in a roaring carbon steel wok for sixty seconds will yield an incredible, smoky sear (the coveted wok hei). Remove the shrimp, stir-fry your vegetables with ginger and garlic, build a quick sauce with soy sauce, oyster sauce, and a dash of sesame oil, and fold the snappy shrimp back in at the very last second.
The Perfect Taco Filling
Treated shrimp are an absolute game-changer for taco night. Because the baking soda locks in the moisture, the shrimp hold up beautifully to heavy spices without drying out. Toss the brined shrimp in a mixture of smoked paprika, cumin, chili powder, and a dash of cayenne right before they hit the pan. Sear them hard and fast. Serve them in charred corn tortillas with a bright, acidic slaw and a drizzle of crema. The contrast between the crunchy slaw and the plump, spicy shrimp is mind-blowing.
The Maintenance of Your Gear
A quick note on clean-up, because I know the thought of scrubbing a stainless steel or carbon steel pan deters many beginners from cooking seafood. If you used the proper heat control and allowed the Maillard reaction to naturally release the shrimp from the pan, cleanup should be a breeze.
For carbon steel, simply wipe it out while it is still warm, or use a little warm water and a gentle brush. Never soak it, and always dry it thoroughly on the stove to prevent rust. You can easily clean off any stuck-on protein without ruining your cast iron or carbon steel seasoning in the process by using a specialized chainmail scrubber. For stainless steel, a quick deglaze with water while the pan is hot will lift almost any residue, and a dash of Bar Keepers Friend will keep it shining like a mirror.
The Final Word on Food Science
Cooking is not magic; it is applied chemistry and physics. You do not need a culinary degree to make mind-blowing food in a standard home kitchen. You just need to understand the basic rules of engagement.
By utilizing a simple, inexpensive pantry staple like baking soda, you can fundamentally alter the pH of your ingredients, manipulate the structure of muscle proteins, and guarantee perfectly plump, snappy shrimp every single time you turn on the stove. You are taking control of the cooking process rather than crossing your fingers and hoping for the best.
So, the next time you find yourself staring down a bag of raw shrimp on a busy Tuesday night, do not panic. Grab the kosher salt, reach for the sodium bicarbonate, and give those little crustaceans the fifteen-minute spa treatment they deserve. Your palate, your dinner guests, and your sanity will thank you. Now get out of here, go preheat your pan, and stop eating rubbery seafood. You are better than that.






