The Frustration of the Sticky Skillet
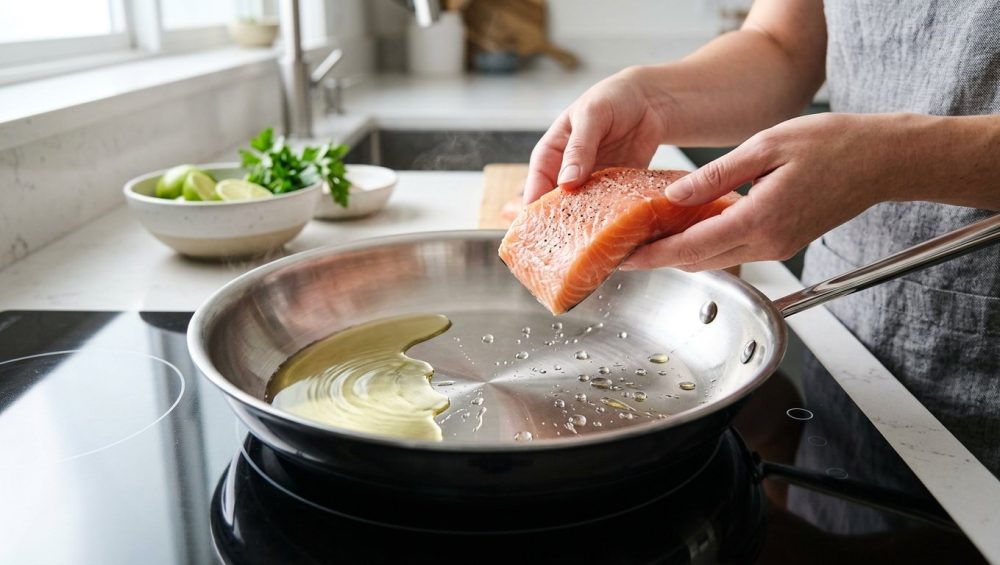
Listen, I get it. You finally decided to upgrade your kitchen arsenal. You ditched the cheap, scratched-up pans from your college days and invested in a gorgeous, heavy-bottomed, multi-clad stainless steel skillet. You felt like a real chef. You brought it home, threw it on the stove, dropped in a beautiful, expensive piece of salmon, and… watched in absolute horror as it immediately bonded to the metal like it was welded there by a construction crew. You tried to flip it, but you only managed to tear the top half of the fish off, leaving the crispy skin completely cemented to the pan. By the time dinner was served, your fish looked like it had been through a wood chipper, and you spent the next forty-five minutes angrily scrubbing the pan in the sink, cursing the culinary gods.
If this sounds familiar, take a deep breath and put down the scouring pad. You are not alone, and you are not a bad cook. You simply haven’t been taught the operational manual for your equipment.
In my years of burning dinners, setting off smoke alarms, and ultimately figuring out how to make restaurant-quality food on a busy weeknight, I have learned one undeniable truth: anyone can cook like an expert. You do not need a culinary degree to make mind-blowing food. What you do need, however, is an understanding of how your tools actually work. When you are building your collection of beginner kitchen tools, a stainless steel skillet is arguably the most important piece you will buy. It is virtually indestructible, it distributes heat beautifully, and it is the absolute best vessel for building incredible pan sauces.
But it comes with a learning curve. Stainless steel is not inherently non-stick. In fact, chemically speaking, it actively wants to grab onto your food. But there is a very specific, highly scientific, and incredibly easy trick to completely bypass this problem. By mastering a simple temperature threshold and a specific oil-heating sequence, you can transform that unforgiving piece of metal into a slick, stick-free surface that rivals any chemical-coated pan on the market.
Time is money, especially when you are trying to get dinner on the table after a long day of work. I have zero patience for pretentious chef-speak or overly complicated techniques that require an hour of prep. So, we are going to break down the exact science of why your food is sticking, and I am going to give you the foolproof, step-by-step masterclass on how to stop it from ever happening again.
The Toxic Truth About “Non-Stick” Cookware
Before we dive into the thermodynamics of your stainless steel, we need to address the elephant in the kitchen: why not just use a non-stick pan? If stainless steel requires a special technique, why not just buy a cheap Teflon skillet and call it a day?
Because I have a strict, non-negotiable rule in my kitchen: no toxic gear. I absolutely despise cheap, chemically coated cookware, and you should too.
For decades, the cookware industry has sold us on the convenience of non-stick pans, which are predominantly coated in a polymer called polytetrafluoroethylene (PTFE), most commonly known by the brand name Teflon. PTFE is part of a massive family of synthetic chemicals known as PFAS (per- and polyfluoroalkyl substances) [1]. You might know them by their much more terrifying nickname: “forever chemicals.” They are called this because they do not break down in the environment, and worse, they accumulate in the human body over time.
Here is the brutal reality of that convenient non-stick pan: it is essentially a chemical ticking time bomb on your stove. When PTFE is heated above 500°F (260°C)—a temperature that an empty pan on a gas burner can reach in just a few minutes—the coating begins to break down and degrade [2]. As it degrades, it releases toxic fumes into the air. These fumes are so potent that they are famously known to be fatal to pet birds kept in the same house. In humans, inhaling these fumes causes a condition literally called “Teflon flu,” or polymer fume fever, which brings on chills, headaches, chest tightness, and coughing [2].
If that isn’t enough to make you throw your scratched pan in the garbage, consider what happens when the coating inevitably starts to wear away. Even with careful use, non-stick pans are notorious for losing their slip after just a year or two. When you use metal utensils, or simply subject the pan to repeated thermal stress, the coating chips and flakes off directly into your scrambled eggs. Recent studies have shown that using damaged non-stick cookware can release millions of microplastic and nanoplastic particles into your food [2].
The cookware industry has tried to pivot by slapping “PFOA-free” labels on their boxes. PFOA was a particularly nasty type of PFAS that was phased out, but manufacturers simply replaced it with other forever chemicals that behave similarly [2]. By 2025 and 2026, despite massive public outcry and legislative efforts to ban PFAS in food-contact materials, the industry has aggressively lobbied to keep these chemicals in production, meaning it is still largely up to the consumer to protect themselves [1].
You might think you are saving time with a non-stick pan, but the reality is that you are cooking on a disposable piece of plastic that will inevitably end up in a landfill, while potentially leaching synthetic chemicals into your family’s dinner. You are ruining your nonstick pans anyway by blasting them with aerosol cooking sprays, which contain emulsifiers that bake into the coating and destroy the non-stick properties permanently.
Stainless steel, on the other hand, is a “forever pan” in the best way possible. It contains no synthetic coatings, it can withstand roaring high heat without off-gassing, and it will literally outlive you if you treat it right. You just have to learn how to drive it.
The Microscopic Battlefield: Why Food Sticks
To understand how to prevent food from sticking, we first have to understand why it sticks in the first place. And to do that, we have to look at your pan on a microscopic level.
When you look at a high-quality stainless steel skillet, the surface appears perfectly smooth and polished. But if you were to look at that same surface under a powerful microscope, it would look like a jagged mountain range. The steel is full of tiny, microscopic pores, valleys, and crevices [3].
When you place a cold piece of protein—like a chicken breast, a steak, or an egg—into a cold or improperly heated pan, the soft, pliable food sinks directly into those microscopic valleys. As the pan begins to heat up, the metal actually expands. When the metal expands, those tiny pores and valleys pinch shut, physically clamping down on the food like a microscopic vice grip [4].
But the physical clamping is only half the battle; the real enemy is chemistry. Protein-rich foods are particularly prone to sticking because of the way their molecules interact with metal. As proteins heat up, their complex, three-dimensional structures begin to unwind and denature [5]. This unravelling exposes reactive amino acids. When these exposed amino acids come into contact with the iron atoms present in the stainless steel alloy, they form strong chemical bonds—specifically covalent bonds and van der Waals forces [5].
Your food isn’t just physically stuck; it has chemically welded itself to the surface of the pan. This is why pulling it away requires so much force that the food tears.
Furthermore, moisture plays a massive role in this disaster. If your food is wet when it hits the pan, the heat energy from the stove is entirely consumed by trying to boil off that surface water, rather than searing the meat. This is why your chicken won’t brown and instead ends up steaming in its own juices, turning gray, rubbery, and hopelessly fused to the steel.
The Physics of Salvation: The Leidenfrost Effect
So, how do we stop this chemical and physical bonding from happening? We deploy a brilliant quirk of thermodynamics known as the Leidenfrost effect.
Named after Johann Gottlob Leidenfrost, an 18th-century German doctor and theologian who first described the phenomenon in 1756, the Leidenfrost effect occurs when a liquid comes into contact with a surface that is significantly hotter than the liquid’s boiling point [6].
Normally, when water hits a hot pan (say, around 212°F or 100°C), it simply boils, turning into steam and evaporating. But when the pan is much hotter—specifically, crossing a temperature threshold of around 380°F to 400°F (193°C to 204°C)—something magical happens [6]. The moment the bottom of the water droplet touches the scorching metal, it vaporizes so instantaneously that it creates a microscopic cushion of steam underneath the rest of the droplet.
This steam layer acts as a physical barrier and a thermal insulator. Because steam conducts heat much more poorly than liquid water or solid metal, the water droplet doesn’t instantly evaporate. Instead, it hovers on top of its own vapor cushion, suspended in mid-air, completely detached from the surface of the pan [6]. It will skitter and glide around the metal like a bead of liquid mercury.
How does this help you cook a steak? When you heat your stainless steel pan to the Leidenfrost threshold before adding your food, the natural moisture present on the surface of your meat hits the hot pan and instantly vaporizes. This micro-layer of steam physically lifts the protein away from the metal. Because the protein is hovering on a cushion of vapor, it cannot sink into the microscopic pores of the steel, and the amino acids cannot chemically bond with the iron atoms [7].
You have essentially created a temporary, invisible non-stick coating made entirely out of steam.
The Diagnostic Tool: The Water Drop Test
You do not need an expensive infrared laser thermometer to figure out when your pan has reached the Leidenfrost threshold. All you need is a teaspoon of tap water and your own eyeballs.
This diagnostic trick is the absolute holy grail of stainless steel cooking. I use the water drop test every single time I turn on my stove, without exception. Here is exactly how to read the temperature of your pan based on how water reacts to it.
Place your clean, dry, empty stainless steel skillet on the stove over medium heat. Do not use high heat; stainless steel holds onto temperature very well, and blasting it with maximum fire will only lead to burning your oil later. Let the pan heat up completely dry for about two to three minutes.
Dip your fingers in a glass of water and flick a few drops into the center of the pan. You will see one of three things happen:
Zone 1: The Sizzle (Too Cold)
If the water drops hit the pan, immediately bubble, aggressively sizzle, and evaporate into nothing within a second or two, your pan is too cold. The metal has exceeded the boiling point of water (212°F), but it has not yet reached the Leidenfrost threshold (380°F). If you put your food in now, it will aggressively stick. Wipe the pan dry and wait another minute.
Zone 2: The Mercury Ball (The Goldilocks Zone)
Flick another drop of water into the pan. If the drop hits the metal, stays completely intact, and immediately begins gliding and dancing around the surface of the pan like a shiny bead of mercury, congratulations. You have achieved the Leidenfrost effect. The pan is perfectly heated, the microscopic pores have expanded and settled, and the surface is ready to become non-stick.
Zone 3: The Shatter (Too Hot)
If you flick water into the pan and the droplet instantly explodes into dozens of tiny, frantic micro-beads that ricochet all over the kitchen, your pan is entirely too hot. You have overshot the runway. If you add cooking oil right now, it will instantly combust into a cloud of acrid, bitter smoke, setting off your alarms and ruining the flavor of your meal. If your pan is in the shatter zone, take it off the heat for sixty seconds to let it cool down before testing again.
The Crucial Role of Oil: Kinematic Viscosity
Now that your pan is hovering perfectly in the Leidenfrost zone, it is time to add your cooking fat. But wait—why didn’t we add the oil at the very beginning while the pan was cold?
This is the second massive mistake that rookie cooks make. The golden rule of stainless steel is: Hot Pan, Cold Oil. (Or, more accurately, room-temperature oil).
If you put cold oil into a cold pan and heat them up together, the oil spends several minutes slowly rising in temperature. During this time, it begins to degrade, and by the time the pan is hot enough to cook your food, the oil is already inching dangerously close to its smoke point, breaking down its flavor compounds.
But there is a much more important physics concept at play here: kinematic viscosity [8]. Viscosity is a measure of a fluid’s resistance to flow. Cold cooking oil is highly viscous; it is thick, sluggish, and heavy. When you pour cold oil into a perfectly heated pan, the sudden transfer of thermal energy causes the oil’s kinematic viscosity to plummet [8]. The oil instantly becomes incredibly thin, loose, and fluid—almost like water.
Because the pan is already hot, the microscopic pores and valleys in the steel have expanded. When the suddenly thin, hyper-fluid oil hits the pan, it immediately rushes into every single microscopic crevice, filling in the jagged mountain range of the steel [9]. The oil essentially paves over the rough surface of the metal, creating a flawlessly smooth, lubricated barrier.
When you add the oil to the hot pan, you will see it immediately “shimmer.” It will look like the heat waves radiating off a blacktop highway in the middle of July. Swirl the pan gently so the shimmering oil coats the entire bottom surface. You now have a pan that is perfectly heated, perfectly lubricated, and primed for stick-free searing that will make you look like a culinary genius.
The Masterclass: Step-by-Step Stick-Free Searing
We have covered the chemistry, the thermodynamics, and the fluid dynamics. Now, let’s put it all together on a busy Tuesday night when you just want to eat a decent meal without spending an hour at the sink. Here is the exact, step-by-step workflow for cooking a perfect protein in a stainless steel pan.
Step 1: The Dry Protein
Moisture is the mortal enemy of a good sear. If you take a chicken breast straight out of its plastic packaging, dripping with fridge condensation, and throw it into hot oil, the temperature of the pan will plummet. The water will boil, creating a steam bath that prevents browning and encourages sticking. Thirty minutes before you plan to cook, take your protein out of the fridge. Pat it obsessively dry with paper towels. Season it generously with salt. Letting it sit at room temperature takes the chill off the meat, ensuring that the center cooks evenly without the outside burning.
Step 2: The Dry Preheat
Place your impeccably clean, completely dry stainless steel skillet on the stove. Turn the burner to medium heat. Do not rush this. Let the pan heat up for about two to three minutes. Use this time to chop a shallot or pour yourself a glass of wine.
Step 3: The Drop Test
Flick a few drops of water into the center of the pan. Look for the mercury ball. If it sizzles and dies, wait. If it forms a perfect, dancing bead, grab a dry towel, quickly wipe the water bead out of the pan (you do not want water mixing with hot oil), and proceed immediately to the next step.
Step 4: The Oil Slick
Pour in a high-smoke-point cooking oil. Olive oil is fine for gentle sautéing, but for searing meat, you want avocado oil, grapeseed oil, or clarified butter (ghee). You do not need a massive puddle, just enough to coat the bottom of the pan—usually about one to two tablespoons. Swirl the pan. Watch for the oil to shimmer and ripple. It should move incredibly fast due to the drop in viscosity.
Step 5: The Drop and Leave
Gently lay your dry, seasoned protein into the pan, laying it away from you so you don’t splash hot oil onto your shirt. You should hear an immediate, aggressive, satisfying sizzle.
Now, here is the most important instruction in this entire article: Step away from the pan. Do not touch it. Do not poke it with tongs. Do not try to shimmy it. Do not lift the edge to see how it looks. Leave it completely alone.
When the cold meat hits the hot metal, the temperature drops slightly, and the proteins will initially grab onto the steel. This is normal. But as the heat recovers and the Maillard reaction (the chemical process of browning) begins, the exterior of the meat will undergo a transformation. The proteins will form a hard, caramelized crust. Once that crust is fully formed, the meat will naturally release its grip on the pan.
If you try to flip a piece of meat and you feel resistance, it is the pan’s way of telling you, “I’m not done yet.” Forcing it will tear the food. If you wait another 60 to 90 seconds, that same piece of meat will slide around the pan as if it were on ice skates.
Troubleshooting the Inevitable Mistakes
If you followed the steps above and your food still stuck, do not throw the pan out the window. Cooking is an active learning process, and you likely committed one of the classic rookie errors. Let’s diagnose what went wrong.
Mistake 1: You rushed the preheat.
This is the number one culprit. You were hungry, you were impatient, and you added the oil and the food before the pan reached the Leidenfrost threshold. The microscopic pores were wide open, and your food sank right in. Always wait for the dancing water bead.
Mistake 2: You crowded the pan.
You tried to cook four massive chicken breasts in a 10-inch skillet. When you overload the pan with cold mass, the ambient temperature of the steel completely crashes. The pan loses its Leidenfrost barrier, the oil cools down and becomes thick again, and the meat begins to steam in its own juices. This is exactly why your chicken turns out dry and pale. Always cook in batches, leaving at least an inch of space between each piece of food.
Mistake 3: You used fridge-cold, soaking wet meat.
If you pull a steak directly from a 34°F refrigerator, dripping in marinade, and slap it into the pan, the thermal shock will instantly kill your heat. Dry your meat, and let it rest on the counter for 20 minutes before cooking.
Mistake 4: You panicked and flipped too early.
The crust is your release valve. If you don’t let the crust form, the chemical bonds between the protein and the iron won’t break. Have a little faith in the process and let the heat do its job.
The Cleanup and The Fond
When you finally pull your perfectly seared, golden-brown chicken breasts out of the pan, you will likely notice a layer of dark brown, crusty bits stuck to the bottom of the skillet. Do not panic. This is not burnt food, and it is not a failure of the non-stick method.
In the culinary world, those browned bits are called the fond (a French word meaning “base” or “foundation”). This is pure, concentrated flavor, created by the caramelization of proteins and sugars. You do not want to scrub this away; you want to eat it.
While the pan is still screaming hot over the burner, pour in half a cup of liquid—chicken broth, white wine, or even just tap water. The liquid will instantly boil and bubble violently. Grab a wooden spoon and scrape the bottom of the pan. The liquid will lift all of those glorious browned bits away from the steel, dissolving them into a rich, deeply savory liquid. Add a pat of cold butter and a squeeze of lemon juice, and swirl it around until it thickens. You have just mastered the art of turning burnt bits into sauce, elevating a boring weeknight dinner into a restaurant-quality meal in exactly three minutes.
Once you pour the sauce over your meat, look at your pan. Because you deglazed it, the pan is practically clean. A quick wipe with a soapy sponge in the sink is all it will take to restore it to a mirror shine.
Occasionally, if you overheat your oil, you might notice a sticky, yellowish-brown residue building up on the sidewalls of your skillet. This is polymerized oil—oil that has chemically bonded to the metal due to high heat. Normal dish soap won’t touch it. Simply sprinkle a little Bar Keepers Friend (a mild abrasive cleaning powder containing oxalic acid) onto a damp sponge, give it a quick scrub, and the polymerized oil will melt away instantly, leaving your pan looking brand new.
The Bottom Line
Cooking shouldn’t be a source of stress, and you shouldn’t be held hostage by cheap, toxic equipment that degrades after a few months of use. Your stainless steel pan is not your enemy; it is a high-performance tool that simply requires a basic understanding of physics.
By taking an extra ninety seconds to properly preheat your pan, utilizing the water drop test to find the Leidenfrost threshold, and understanding how hot oil manipulates the microscopic surface of the steel, you can completely eliminate the frustration of sticking food.
You don’t need a culinary degree to cook like a pro. You just need a little bit of patience, a little bit of science, and the confidence to let the pan do the heavy lifting. Now go dry off a steak, heat up that skillet, and show your kitchen who is actually in charge.


