
The Mushy Rice Epidemic (And Why It’s Not Entirely Your Fault)
Listen, I get it. You had a long day, you just wanted a simple side dish, and somehow, twenty minutes later, you are staring into a pot of something that looks suspiciously like industrial wallpaper paste. You poured water into a vessel, added some grains, and birthed a solid block of gummy, waterlogged despair. You are definitely not alone.
According to the USDA’s 2024 and 2025 global agricultural forecasts, the world is currently producing a record-breaking 535.8 million metric tons of milled rice, with the average person consuming nearly 48 kilograms of the stuff every single year. It is the foundational dietary staple for over half the planet. And yet, despite its omnipresence, stovetop rice remains one of the most universally botched dishes in the modern home kitchen.
Why? Because for decades, we have been fed terrible advice. The instructions printed on the back of the generic supermarket rice bag are practically designed to make you fail. They give you arbitrary water ratios, tell you to boil it into oblivion, and completely ignore the fundamental chemistry of the grain. But here is the good news: making perfectly fluffy, distinct, non-clumpy rice is not sorcery. It does not require a culinary degree, and it certainly does not require a $500 countertop appliance that plays a digital lullaby when it finishes cooking.
It simply requires a basic understanding of starch mechanics, a little bit of friction, and the patience to leave a lid alone. Even the most notorious clumsy cooks can master this staple by learning a few fundamental scientific truths. We are going to break down exactly why your rice turns into a sticky brick, and I am going to give you a foolproof, scientifically backed method to fix it permanently.
The Science of the Spackle: Amylose vs. Amylopectin
If you want to stop making mush, you have to understand what you are actually cooking. A grain of raw, uncooked rice is essentially a tiny, hard crystal of tightly packed starch molecules in a glassy state. It is entirely inedible until we introduce two things: heat and water.
When rice is heated in water, those hard starch granules begin to swell. Eventually, they absorb so much moisture that they burst open, releasing their contents into the surrounding liquid. This process is called gelatinization. However, not all starches are created equal. The texture of your cooked rice—whether it is beautifully fluffy or intentionally sticky—comes down to the ratio of two specific complex carbohydrates: amylose and amylopectin.
Amylose: The Fluff Factor
Amylose is a long, straight-chain molecule. Because of its linear structure, amylose molecules pack together very tightly and do not easily tangle with one another. When a rice grain has a high percentage of amylose, it resists bursting and maintains its structural integrity even after absorbing water.
Long-grain varieties like Basmati and Jasmine are packed with amylose (often upwards of 20% to 25%). This is exactly why a good Basmati cooks up into distinct, separate grains that effortlessly fall off your fork. The high amylose content prevents the grains from gluing themselves to their neighbors. If you are aiming for a light, fluffy side dish, high-amylose long-grain rice is your best friend.
Amylopectin: The Sticky Situation
Amylopectin, on the other hand, is the chaotic sibling. It is a highly branched, bushy molecule that looks a bit like a microscopic tumbleweed. Because of all these branches, amylopectin molecules easily tangle up with one another, trapping water and creating a thick, sticky, gel-like web.
Short-grain and medium-grain rice varieties (like Arborio, Sushi rice, and sticky glutinous rice) have a very low amylose content and a massive amount of amylopectin. When these grains cook and burst, that branching amylopectin floods the pot, binding the grains together. This is absolutely essential if you are making a creamy Parmesan risotto or rolling sushi. But if you try to serve short-grain rice as a fluffy side for your weeknight chicken stir-fry, you are going to end up with a dense, sticky clump. Choosing the right grain for the right job is your first line of defense against mush.
The Cardinal Sin: Skipping the Rinse
Let us assume you bought the right long-grain rice. You bring it home, dump it straight from the bag into a pot of water, and turn on the stove. Congratulations, you have just committed the cardinal sin of stovetop cooking.
When rice is harvested, it is encased in a tough, inedible husk. To make white rice, the grain goes through a rigorous mechanical milling process that strips away the husk, the bran, and the germ. This heavy friction leaves the exterior of every single grain coated in a microscopic layer of pure, highly gelatinous starch dust.
If you do not wash that dust away, it instantly hydrates the second it hits boiling water, creating a layer of glue that coats the grains before they even have a chance to cook. The simple act of rinsing your grains is non-negotiable if you want a fluffy texture. Yes, you might wash away a tiny fraction of surface-level fortified vitamins, but we are prioritizing culinary perfection here; you can get your B vitamins from the vegetables you serve on the side.
The Friction Method (How to Actually Wash Rice)
Running your rice under a gentle stream of tap water in a metal colander for three seconds does absolutely nothing. To remove that stubborn starch dust, you need mechanical friction.
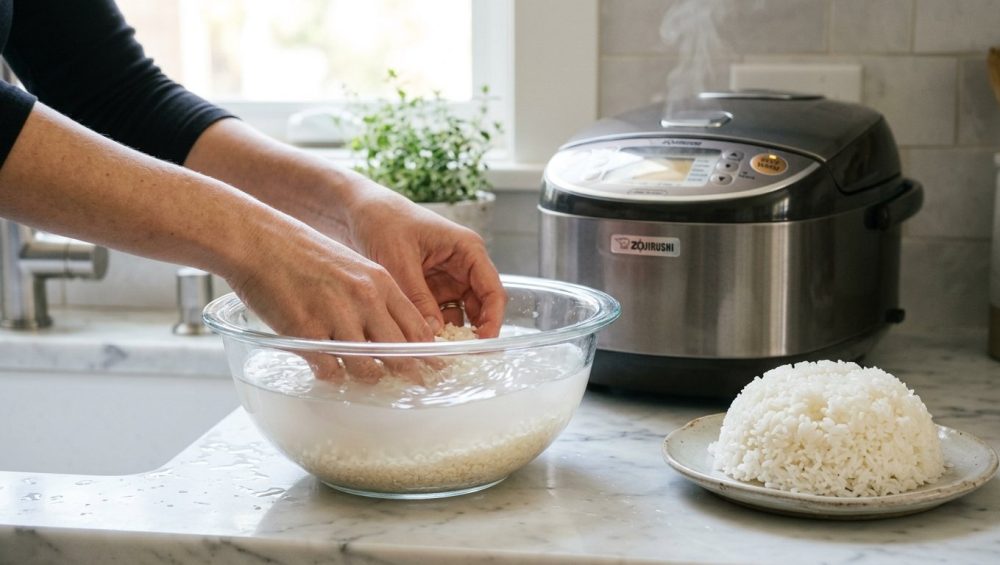
Place your measured rice into a bowl, cover it with a few inches of cold water, and use your hand like a claw to vigorously swirl and agitate the grains. The water will immediately turn a milky, opaque white. Carefully pour off the starchy water, holding the rice back with your hand, and repeat the process. You need to do this three to five times until the water runs mostly clear. It does not need to be perfectly transparent like spring water, but it should no longer look like skim milk.
If you make this a regular habit, investing in a dedicated Japanese wash bowl can make this process incredibly fast and efficient. These bowls have slotted bottoms that allow the starchy water to drain continuously while keeping the grains safely contained, saving you from the tragic fate of accidentally dumping half your dinner down the sink drain.
The Water-to-Rice Ratio Lie (It’s Not 2:1)
If you grew up learning to cook in a standard Western kitchen, you were almost certainly taught the golden rule of rice: two parts water to one part rice. I need you to take that rule, crumple it up, and throw it in the trash. It is a culinary myth that has ruined millions of dinners.
Here is the scientific reality: almost all types of rice absorb water in a 1:1 ratio. One cup of raw rice will absorb exactly one cup of water to become perfectly tender and gelatinized. Period.
So why does every recipe tell you to add extra water? Because of evaporation.
When you cook rice on the stove, a significant amount of water turns into steam and escapes before the grain has a chance to absorb it. The extra water you add to the pot is purely there to account for that evaporation loss.
The Golden Ratios for Different Grains
The problem with the 2:1 ratio is that evaporation is not a linear multiplier; it is a constant based on the surface area of your pot and the tightness of your lid. If you double a recipe from one cup of rice to two cups, the rice still only needs a 1:1 ratio to absorb, and your pot (assuming you use the same pot) will still evaporate the exact same amount of water. If you blindly double the water to four cups, you are drowning your grains in excess liquid that they cannot absorb, resulting in a waterlogged, mushy disaster.
For a standard, heavy-bottomed pot with a tight-fitting lid, here are the actual, scientifically sound starting ratios you should be using:
- Basmati Rice: 1 cup rice to 1.5 cups water
- Jasmine Rice: 1 cup rice to 1.25 cups water
- Medium/Short Grain White Rice: 1 cup rice to 1.1 or 1.2 cups water
- Brown Rice: 1 cup rice to 1.75 cups water (the tough bran layer requires a much longer cooking time, which means significantly more water is lost to evaporation).
The Gear: Ditch the Toxic Non-Stick
As a home cook who deeply values efficiency, I understand the appeal of non-stick cookware. But as your sassy culinary advocate, I have a strict, zero-tolerance policy for cheap, peeling Teflon pots.
In recent years, the conversation around the dangers of per- and polyfluoroalkyl substances (PFAS), commonly known as “forever chemicals,” has reached a boiling point. By January 2025, states like Minnesota enacted sweeping bans on PFAS in cookware, and for good reason. When cheap non-stick pots are scratched by a metal spoon or overheated on a stovetop, their chemical coatings begin to degrade, flake off, and leach directly into your food. Furthermore, heating these pans past 500°F can release toxic fumes that cause a very real, documented condition known as “polymer fume fever.”
I am completely serious about banishing toxic kitchen gear from your home. You do not want forever chemicals in your bloodstream, and you certainly do not want black flakes of mystery polymer garnishing your pristine white rice.
What to Use Instead (Safe, Heavy-Bottomed Cookware)
You do not need a non-stick pot to cook rice. You need thermal mass and even heat distribution. A high-quality, heavy-bottomed stainless steel pan or pot is your best option.
Look for fully clad stainless steel, which features an aluminum or copper core sandwiched between layers of steel. This core conducts heat rapidly and evenly across the entire base and up the sides of the pot. Cheap, thin-bottomed pots create intense hot spots directly over the burner flame, which guarantees that the bottom layer of your rice will scorch into a blackened crust before the top layer even finishes steaming. If you want to invest in convenience, using a specialized rice washing bowl for prep and a heavy enameled cast-iron Dutch oven for cooking will yield professional-level results every single time.
The Foolproof Stovetop Method (Step-by-Step)
We have covered the chemistry, the prep, the ratios, and the gear. Now it is time to execute. This is the definitive, no-nonsense method for cooking perfect stovetop long-grain white rice. Follow these steps exactly, and you will never eat wallpaper paste again.
Step 1: The Prep and Rinse
Measure your rice precisely. Place it in your bowl and utilize the friction wash technique described earlier. Rinse, agitate, and drain 3 to 5 times until the water is mostly clear. Drain the rice as thoroughly as humanly possible; any excess water clinging to the grains will throw off your meticulously calculated ratio.
Step 2: The Boil and Simmer
Transfer the drained rice to your heavy-bottomed pot. Add your measured water (e.g., 1.5 cups of cold water for 1 cup of Basmati). Add a generous pinch of kosher salt—rice is an agricultural product and desperately needs seasoning to wake up its flavor.
Place the pot uncovered over medium-high heat. Do not walk away. The moment the water reaches a vigorous, rolling boil, immediately drop the heat to the absolute lowest setting your stove can manage. If your burner has a “barely breathing” setting, use it. Place a tight-fitting lid on the pot.
Step 3: The Crucial Post-Cook Rest (Do Not Touch That Lid)
Set a timer for exactly 15 minutes. During this time, you are forbidden from lifting the lid. Do not peek. Do not stir. Every time you lift that lid, you release the trapped steam that is actively cooking the top layer of your grains, ruining the evaporation math.
When the 15 minutes are up, turn off the heat entirely. But you are still not done. Leave the pot exactly where it is, lid still firmly attached, for another 10 to 15 minutes.
This post-cook resting phase is the most frequently skipped step, and it is the primary reason people end up with gummy rice. When the heat is turned off, the rice at the very bottom of the pot is still incredibly wet, while the rice at the top is slightly dry. As the pot sits undisturbed, the residual heat allows the moisture to gently redistribute itself evenly throughout the entire batch. The grains firm up, the starches settle, and the magic happens.
After the rest, remove the lid and use a rice paddle (a shamoji) or a fork to gently fluff the grains. Slice through the rice rather than mashing or stirring it in circles.
Troubleshooting Your Rice Disasters
Even with the best instructions, weeknight chaos happens. If your batch didn’t turn out perfectly, do not panic. Cooking is just applied physics, which means every failure leaves a trail of evidence. Let’s diagnose your specific disaster.
“My Rice is Hard in the Middle but Wet on the Outside”
This is a classic symptom of cooking at too high of a temperature. If your simmer was too aggressive, the water in the pot boiled off and evaporated into the atmosphere before it had enough time to penetrate the center of the starch granules. The outside of the grain turned to mush while the inside remained a hard, glassy crystal. Next time, ensure your burner is on its absolute lowest setting, and check that your lid creates a proper, tight seal to trap the steam.
“The Bottom Burned into a Black Crust”
A little bit of golden browning at the bottom of the pot can be a delicacy (think of Persian tahdig or Spanish socarrat), but a thick, acrid, blackened crust is a mistake. This happens for two reasons: either your heat was far too high, or your pot is too thin. Thin metal cannot distribute thermal energy effectively, meaning the area directly touching the flame gets superheated. Upgrade to a heavier pot, or use a heat diffuser ring on your gas burner.
“It’s Still a Little Too Sticky”
If you followed the heat instructions perfectly but your grains are still clumping together, you either used a short-grain variety (which is inherently sticky due to amylopectin), you completely skipped the friction rinse, or you bypassed the 10-minute resting phase. Do not rush the rest; it is the difference between a gummy clump and a fluffy masterpiece.
Repurposing the Mush: What to Do When You Mess Up
Let’s say you read this article too late. You already made the rice, it is a catastrophic, waterlogged mess, and dinner is in ten minutes. Do not throw it in the trash. You can easily save ruined meals with a little creativity and a pivot in your menu planning.
If your rice is hopelessly mushy, lean into the texture. Add a cup of chicken broth, some grated ginger, a dash of soy sauce, and a drizzle of sesame oil, and simmer it for another twenty minutes to create a comforting, savory congee (rice porridge). Alternatively, add milk, sugar, a cinnamon stick, and a splash of vanilla extract, and boil it down into a rich, creamy dessert rice pudding.
If it is just slightly sticky, spread it out in a thin layer on a baking sheet and put it in the refrigerator uncovered overnight. The cold, dry air of the fridge will undergo a process called starch retrogradation, dehydrating the grains and firming up their structure. This makes it the perfect base for homemade fried rice the next day. Because using chilled, day-old rice is the secret to getting that perfect, restaurant-quality wok-tossed texture anyway.
Final Thoughts: You Are Now a Rice Master
Cooking is not about innate talent; it is about respecting the ingredients and understanding the basic rules of the kitchen. You do not need to rely on instant, parboiled, microwaveable pouches that taste like damp cardboard. You have the knowledge to fix your food without ordering takeout in a panic.
By rinsing away the surface starches, respecting the 1:1 absorption ratio, using a heavy-bottomed pot, and practicing the patience to let the steam do its job during the resting phase, you can achieve professional-level results on a random Tuesday night. So go wash your grains, turn down the heat, and step away from the lid. You’ve got this.






