You bought a beautiful, thick-cut pork chop. You heated up your skillet. You dropped the meat in, expecting that glorious, aggressive sizzle and a perfectly even, golden-brown crust. But within seconds, the edges seized. The meat contorted. Before your very eyes, your premium weeknight dinner warped into a rigid, meat-based cereal bowl.
Only the outer edges are actually touching the pan, burning to a crisp, while the center hovers uselessly in the air, steaming in its own pale mediocrity.
Look, I get it. It is 6:30 PM on a Tuesday, you are exhausted, and you just want a decent meal without setting off the smoke detector. The curling pork chop is one of the most frustrating, universal seven rookie kitchen mistakes that haunt everyday home cooks. But here is the good news: you do not need a culinary degree to fix it. You do not need expensive gadgets. You just need five seconds, a sharp knife, and a basic understanding of what happens to meat when it hits a violently hot pan.
As a home cook who learned by trial, error, and eating my fair share of dry, shoe-leather pork, I am here to tell you that professional-level results are entirely achievable in your standard kitchen. We just need to outsmart the meat.
The Generational Trauma of Ruined Pork
Before we fix the curl, we need to address the elephant in the room: most people secretly hate cooking pork chops. For decades, home cooks have been traumatized by dry, flavorless, chalky meat.
This trauma is largely generational. Back in the mid-20th century, the USDA recommended cooking all pork to an internal temperature of 160°F to prevent trichinosis. That guideline essentially mandated that you cook all the moisture and joy out of the animal. Today, commercial farming practices have virtually eradicated that risk, and the USDA has lowered the safe cooking temperature for whole cuts of pork to 145°F (with a three-minute rest). Yet, the fear remains, and people still overcook their chops into oblivion.
But things are changing. Americans are eating more meat than ever, with 2026 USDA data showing that over 98% of American households purchase meat for daily meals. Pork chops remain the most popular cut of pork, with retail prices hovering around $4.33 per pound as of April 2026. Despite the rising costs, pork remains a fantastic, accessible protein for weeknight dinners—provided you know how to treat it right. Understanding the science of the meat and stocking up on the essential tools every beginner needs is the first step to breaking the cycle of bad dinners.
The Anatomy of a Pork Chop
To understand why your dinner is curling, we need to take a quick, non-pretentious look at meat anatomy. A standard pork chop—specifically a loin chop, which is what most of us are grabbing at the grocery store—is composed of two distinct biological parts.
First, you have the primary muscle. This is the pale, lean meat that makes up the bulk of the chop. It is primarily composed of muscle fibers (actin and myosin proteins) and water.
Second, running along the outer edge, you have the fat cap. But here is the catch that most home cooks miss: that fat cap is not just pure, rendering fat. It is heavily interwoven with a tough band of connective tissue, primarily made of collagen and elastin. This connective band acts like a structural rubber band, holding the fat and the muscle together while the animal is alive.
When you cook a pork chop, you are essentially throwing two completely different biological materials into a brutally hot environment and expecting them to behave the exact same way. Spoiler alert: they absolutely do not.
The Physics and Chemistry of the Curl
Let’s get into the thermodynamics, because understanding the “why” is the secret to never ruining a meal again. I have zero patience for fluff, so let’s look at the hard science of meat shrinkage.
When meat is exposed to heat, its protein structures undergo denaturation. They unwind, lose their shape, and then coagulate, squeezing out moisture and shrinking in the process. However, the lean muscle fibers and the connective tissue in the fat cap shrink at drastically different rates and at entirely different temperatures.
Muscle Fibers vs. Connective Tissue
The lean muscle fibers of the pork chop begin to gently contract around 120°F to 140°F. It is a relatively slow, uniform shrinkage. But the connective tissue—the collagen and elastin—is a completely different beast.
According to meat science, collagen begins to aggressively shrink and tighten the moment it hits about 140°F, and that contraction accelerates rapidly as it approaches 160°F. And when I say shrink, I mean it seizes up violently. Because this connective tissue is wrapped around the outer edge of the chop like a tight belt, its sudden contraction pulls the edges of the meat inward.
Since the lean muscle in the center isn’t shrinking nearly as fast or as aggressively, the meat has nowhere to go but up. It buckles under the tension. The result? The dreaded meat bowl. The center lifts off the pan, entirely ruining your chances of an even Maillard reaction (that beautiful, flavorful, caramelized crust we all desperately want).
The Five-Second Prep Trick to Stop the Curl
You do not need fancy equipment to stop this from happening. You just need to sever the tension.
The absolute best, most foolproof way to prevent a pork chop from curling is to score the fat cap before it ever touches the heat. By cutting through that tight band of connective tissue, you are essentially snipping the rubber band. When the heat hits the meat and the collagen tries to shrink, it cannot pull the whole chop with it because the continuous loop has been broken.
How to Score the Fat Cap Like a Pro
Here is the exact, step-by-step technique to prep your chops for a perfectly flat, even sear. Time is money, so this will only take you five seconds.
- Pat the Meat Dry: Before you do anything, grab a paper towel and aggressively dry the surface of the pork chop. Moisture is the enemy of browning. If your meat is wet, the water has to evaporate before the meat can sear, meaning your chop will steam instead of brown.
- Grab a Sharp Knife: Please, for the love of all things holy, use a sharp knife. If you are hacking at your food with a dull blade, you are making your life infinitely harder. In fact, a dull blade is usually the reason you struggle with prep, much like how the culprit is your dull knife when you are weeping over a cutting board.
- Make Vertical Cuts: Stand the pork chop on its edge or lay it flat on your board. Using the tip of your knife, make vertical slits through the fat cap and the connective tissue, spaced about one inch apart along the entire outer edge.
- Do Not Cut the Meat: This is crucial. You only want to slice through the fat and the tough silver skin underneath it. Do not slice deeply into the actual lean muscle, or you will create channels for the natural juices to escape, leaving you with dry, sad meat.
Choosing the Right Pork Chop
Now that you know how to prep the meat, let’s talk about buying it. Not all chops are created equal, and if you start with a terrible cut of meat, no amount of scoring is going to save your dinner.
Thickness Matters
If you are buying those paper-thin, half-inch pork chops, you are setting yourself up for failure. Thin chops cook so incredibly fast that by the time you develop a decent crust on the outside, the inside is overcooked, chalky, and dry.
Always look for chops that are at least one to one-and-a-half inches thick. This gives you the thermal buffer you need to achieve a hard, aggressive sear on the outside while keeping the center tender, juicy, and perfectly cooked.
Bone-In vs. Boneless
Whenever possible, buy bone-in chops. The bone acts as an insulator, slowing down the cooking process slightly and protecting the meat right next to it from overcooking. Plus, the meat closest to the bone is always the most flavorful. Boneless chops are convenient, sure, but they dry out significantly faster and lack the depth of flavor that a bone-in cut provides.
The Pan Matters (And Why Cheap Non-Stick is Garbage)
We need to have a serious talk about your cookware. If you are trying to sear a beautiful, thick-cut pork chop in a scratched, peeling, $15 Teflon pan from a big-box store, we have a major problem.
I have a strict “no-go” rule on toxic kitchen gear. I absolutely despise cheap non-stick coatings, and you should too. You cannot achieve a professional-level sear in a flimsy non-stick pan anyway. They do not hold heat well, and the moment you drop a cold piece of meat into them, the temperature plummets, leading to sad, steamed meat.
The Dangers of PTFE and PFAS
Most conventional non-stick pans are coated in polytetrafluoroethylene (PTFE), commonly known as Teflon. PTFE is part of a massive family of synthetic chemicals called PFAS (per- and polyfluoroalkyl substances), notoriously known as “forever chemicals” because they do not break down in the environment or in the human body.
When you heat a conventional non-stick pan over 500°F—a temperature easily reached when preheating a pan for a hard sear—that coating begins to degrade. It releases toxic fumes that can cause polymer fume fever in humans, an illness with flu-like symptoms. In fact, reports of “Teflon flu” have been rising, with hundreds of cases reported in recent years as people overheat these toxic pans. Furthermore, as the coating scratches and flakes, microscopic plastic particles leach directly into your food. This degradation is exactly why you experience the losing their slip issue when your eggs suddenly start sticking to a pan that used to be slick.
What to Use Instead
If you are serious about banishing toxic kitchen gear from your life, you need cookware with serious thermal mass that can handle high heat without poisoning your food.
- Stainless Steel: A high-quality, fully clad stainless steel skillet is a kitchen workhorse. It holds heat beautifully, allows for a phenomenal crust, and leaves behind fond (those caramelized brown bits) that you can deglaze into a pan sauce.
- Cast Iron: The undisputed king of the hard sear. It takes a while to heat up, but once it is hot, it stays hot, delivering a crust that will make you weep tears of joy.
- Carbon Steel: The professional kitchen’s best-kept secret. It is lighter than cast iron, heats up faster, and when seasoned correctly, becomes naturally non-stick. Mastering the thermodynamics of carbon steel will change your weeknight dinners forever, allowing you to sear meats flawlessly without relying on synthetic chemicals.
Prepping for the Perfect Sear
We have scored the fat cap. We have selected a thick, bone-in chop. We have thrown our toxic pans in the trash. Now, how do we actually cook this thing without drying it out?
The Magic of Dry Brining
Pork is notoriously lean, which means it is incredibly easy to overcook and dry out. The absolute best way to ensure a juicy chop is to dry brine it.
Dry brining is just a fancy term for salting your meat in advance and letting it rest in the fridge. When you salt a pork chop, osmosis draws moisture out of the meat. That moisture dissolves the salt on the surface, and then the meat reabsorbs the salty liquid deep into its muscle fibers. This not only seasons the meat all the way through, but it also alters the protein structure, allowing the meat to hold onto more of its natural moisture during the cooking process. The magic of dry brining works just as brilliantly on pork as it does on poultry, ensuring a juicy interior every single time.
Ideally, salt your pork chops with kosher salt and leave them uncovered on a wire rack in the fridge for at least an hour, or up to 24 hours. The circulating air in the fridge will also dry out the surface of the meat, guaranteeing a phenomenally crispy crust when it hits the hot pan.
Cooking the Perfect Pork Chop
Time is money on a weeknight, so let’s get down to the most efficient, foolproof way to cook these chops.
The Cold Pan Trick for Rendering Fat
Normally, you want a ripping hot pan for a hard sear. But pork chops have that thick band of fat on the edge. If you throw them straight into high heat, the meat will cook before the fat has a chance to render (melt down), leaving you with a chewy, unappetizing strip of blubber on the side of your meat.
Instead, try a brilliant variation of the cold pan trick. Place your chops fat-side down in a cold skillet. You can use tongs to hold them upright. Turn the heat to medium. As the pan slowly heats up, the fat will slowly render out, creating a pool of liquid gold in the pan. By the time the fat is crispy and golden brown, you will have enough rendered pork fat in the skillet to fry the rest of the chop in its own juices. It is a game-changer.
The Hard Sear
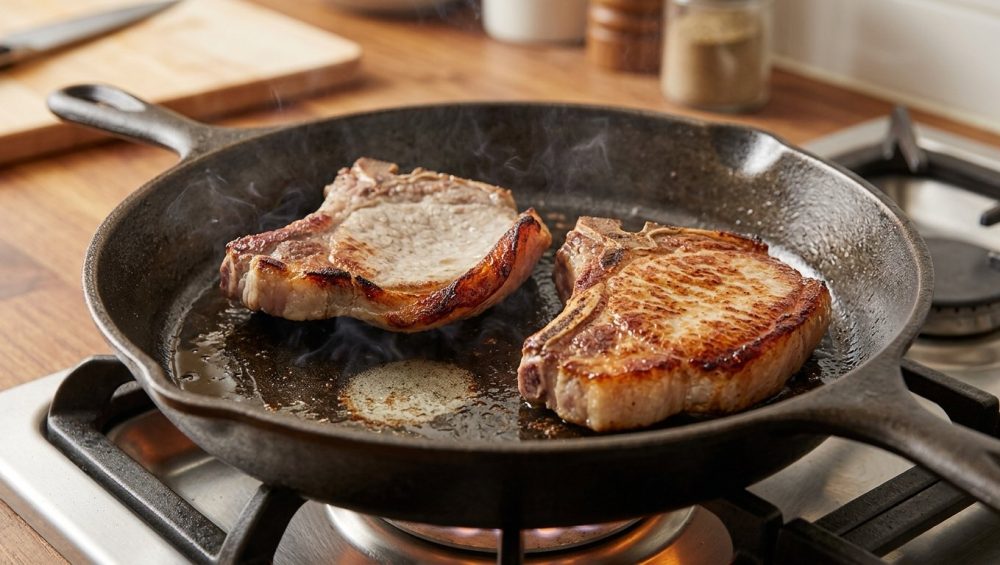
Once the fat is rendered, lay the chops flat in the pan. Because you took five seconds to score the edges, they will lay perfectly flat, ensuring 100% contact with the hot metal.
Do not touch them. Let them sear undisturbed for 3 to 4 minutes until a deep, mahogany crust forms. If you find that the meat is still trying to lift slightly in the center (sometimes bone-in chops can be stubborn due to the bone contracting differently than the meat), you can use a vented chef’s press or a heavy cast-iron bacon weight to gently hold the meat flat against the pan. This guarantees an aggressive, even sear across the entire surface area.
Temperature Control and Carryover Cooking
Flip the chops and cook the other side. Now, how do you know when they are done? You do not guess. You do not poke them with your finger and compare it to the fleshy part of your palm. You use a digital instant-read thermometer.
Pork is safe and delicious to eat at 145°F (which yields a beautiful medium-rare to medium finish, with a slight blush of pink in the center). However, you must pull the chops off the heat when they reach 135°F to 140°F. Why? Because of a phenomenon called carryover cooking.
The residual heat inside the meat will continue to cook it even after it is off the pan, bringing it up to that perfect 145°F mark as it rests on your cutting board. If you wait until it hits 145°F while it is still in the skillet, it will be 155°F by the time you eat it, and it will taste like sawdust. And please, make sure you are using a high-quality, calibrated digital thermometer. If you are relying on that rusty, uncalibrated dial thermometer from 1998, your meat thermometer is lying to you, and it is the reason your dinners are constantly overcooked.
The Golden Rule: Rest Your Meat
You just spent all this time perfectly prepping, rendering, and searing your pork chop. If you slice into it the second it comes out of the pan, I will personally come to your kitchen and confiscate your spatulas.
When meat cooks, the intense heat drives the moisture toward the center of the cut. If you cut it immediately, all those pressurized juices will violently spill out onto your cutting board, leaving the meat bone-dry on your plate.
Place the chops on a cutting board and let them rest for at least 5 to 10 minutes. This mandatory resting period allows the muscle fibers to relax and the juices to redistribute evenly throughout the meat. While the meat rests, you can use this time to quickly whip up a pan sauce using the fond left in your skillet, or simply pour yourself a glass of wine and admire your handiwork.
Conquering the Kitchen, One Flat Chop at a Time
Cooking does not have to be a stressful, chaotic chore. You do not need to be a classically trained chef to make mind-blowing food on a random Thursday night. You just need to understand the basic mechanics of your ingredients and refuse to settle for mediocre results.
By taking exactly five seconds to score the fat cap of your pork chops, you are taking complete control of the cooking process. You are preventing the connective tissue from ruining your sear, ensuring maximum pan contact, and guaranteeing a beautifully caramelized crust every single time.
Ditch the toxic pans, buy thick-cut bone-in chops, salt them early, and remember to cut the tension. Your weeknight dinners are about to get a massive upgrade, and you will never have to eat a sad, curled-up meat bowl ever again. Now go get your skillet hot and start cooking.


