
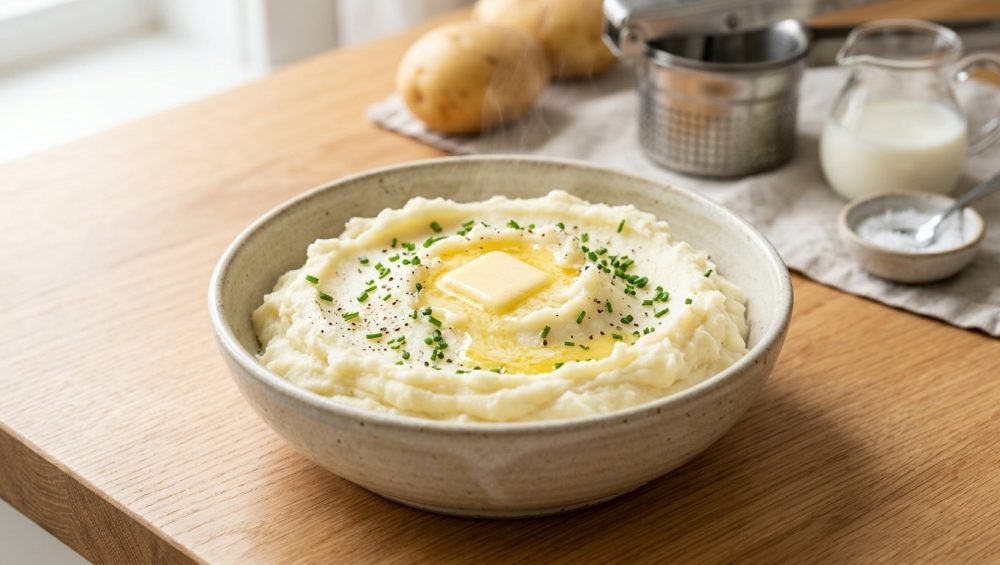
Picture this: You’ve spent hours orchestrating a beautiful meal. You proudly carry a steaming, aromatic bowl of mashed potatoes to the dining table, feeling like an absolute culinary champion. You dip a serving spoon in, expecting to scoop up a fluffy, cloud-like mound of buttery goodness. Instead, the entire mass lifts out of the bowl in one giant, elastic wad, clinging to the spoon like a dollop of warm chewing gum. Congratulations, my friend. You haven’t made a side dish; you’ve successfully manufactured industrial-grade wallpaper paste.
We’ve all been there. Gummy, gluey, heavy mashed potatoes are a rite of passage for the everyday home cook. But here is the good news: you don’t need a culinary degree from Le Cordon Bleu to fix this. You just need a basic understanding of food physics and the willingness to stop abusing your spuds. If you are serious about breaking your takeout habit and want to produce restaurant-quality food in your standard home kitchen, mastering the mashed potato is step one.
Today, we are leaving no stone unturned. We are going to dissect the exact scientific reasons your potatoes turn into a sticky nightmare, how to choose the right ingredients, the tools you absolutely must avoid, and the foolproof techniques that will guarantee light, fluffy, melt-in-your-mouth perfection every single time. Grab your vegetable peeler and a glass of wine; it’s time to get to work.
The Science of Starch: Why Your Potatoes Turned Into Spackle
Before we can fix the problem, we have to understand the crime scene. Potatoes are essentially giant, underground storage units for water and starch. When you boil them, you are initiating a complex chemical reaction. If you mess up this reaction, you get glue. It is not about luck; it is about microscopic plant biology.
Amylose and Amylopectin: The Jekyll and Hyde of Potatoes
Potatoes contain two primary types of starch molecules: amylose and amylopectin. Think of amylose as the well-behaved, structured sister. When cooked, amylose remains relatively firm and dry, helping the potato maintain a fluffy texture. Amylopectin, on the other hand, is the chaotic, sticky sibling. It is highly branched and, when heated and hydrated, it swells up and turns into a soft, gelatinous gel.
When you cook a potato, the starch granules inside the plant cells absorb water and begin to swell—a process known as gelatinization. As long as those swollen starch granules remain safely contained within their cell walls, your mashed potatoes will be delightfully fluffy. But the moment you apply too much mechanical force—by aggressively mashing, whipping, or blending—those delicate cell walls rupture.
The Gelatinization Process (Or, How Heat Changes Everything)
When the cell walls burst, they vomit their swollen, gelatinized amylopectin and amylose directly into your mixing bowl. The amylose molecules escape into the surrounding liquid and rapidly realign themselves into a rigid, crystalline network. This chemical realignment is called “starch retrogradation,” and it is the exact scientific mechanism that transforms a tender potato into a bouncy, elastic paste.
The 90-Second Rule of Starch Destruction
Food scientists have actually measured this. From the moment your hot, drained potatoes make contact with dairy and a mashing implement, you have approximately 90 seconds of safe mixing time before starch damage becomes irreversible. Every single fold, stir, and mash after that 90-second window exponentially increases the amount of ruptured cells. If you take away only one lesson from this masterclass, let it be this: respect the starch. Treat your cooked potatoes like a delicate soufflé, not a punching bag.
Mistake #1: You Picked the Wrong Potato
You cannot build a sturdy house out of wet cardboard, and you cannot make fluffy mashed potatoes out of waxy tubers. The biggest mistake rookies make happens in the produce aisle, long before the water even boils. Grocery stores do not explicitly label potatoes by their starch-to-water ratios, so it is up to you to know the difference.
The Starchy Heavyweights: Russets
Russet potatoes (often labeled as Idaho or baking potatoes) are the undisputed kings of the fluffy mash. They boast a high starch content (around 22% to 24% by weight) and a very low moisture content. Because their cells are packed with dry starch, they swell beautifully when boiled and fall apart with minimal effort. This means you do not have to mash them aggressively to achieve a smooth texture, thereby preserving those delicate cell walls and preventing the release of gluey amylopectin. If your goal is the lightest, airiest, most cloud-like mound of potatoes imaginable, Russets are your best friend.
The Golden Middle Ground: Yukon Golds
If Russets are the fluffy clouds, Yukon Golds are the rich, velvety butter. Yukon Golds are classified as medium-starch, all-purpose potatoes. They have slightly more moisture than a Russet and a naturally buttery, earthy flavor. They require a bit more care when mashing to avoid gumminess, but their lower starch content actually makes them slightly more resistant to over-mashing than some high-starch varieties. Many professional chefs prefer a 50/50 blend of Russets and Yukon Golds to achieve the perfect balance of airy texture and rich, buttery flavor.
The Waxy Culprits: Red and New Potatoes
Avoid waxy varieties like Red Bliss, New Potatoes, or Fingerlings for traditional mashing. These potatoes have a high moisture content and very low starch. Their cellular structure is designed to hold together tightly when cooked, which makes them brilliant for potato salads, soups, and roasting. However, because they resist breaking down, you have to mash them forcefully to eliminate lumps. That aggressive mashing destroys the cells, releasing whatever starch they do have into the excess water they retain, instantly creating a dense, lumpy, gummy disaster. Leave the red potatoes for the potato salad.
Mistake #2: You Boiled Them Like a Maniac
So, you’ve selected the right potato. Now, you are going to ruin them by boiling them incorrectly. Yes, there is a wrong way to boil water.
The Cold Water Rule
If you drop cubed potatoes into a pot of rapidly boiling water, you are guaranteeing an uneven cook. The violent heat of the boiling water will immediately overcook the exterior of the potato cubes, turning them to mush and causing their outer cell walls to disintegrate into the water. Meanwhile, the centers of the cubes will remain hard and raw. When you go to mash them, you’ll be aggressively trying to crush the hard, raw centers, while the overcooked exteriors turn into pure glue.
The secret to perfectly even cooking is starting in cold water. Place your evenly cut potato chunks into a large pot, cover them with an inch of cold water, and bring the entire pot up to a boil together. This allows the temperature of the potato to rise gradually alongside the water, ensuring the center is perfectly tender at the exact same moment the exterior is done.
The Art of the Prep and the Cut
Consistency is critical. If you chop your potatoes into wildly different sizes, they will cook at different rates. Use a sharp chef’s knife and a stainless steel bench scraper to easily gather and transfer your perfectly uniform one-inch cubes into the pot. Do not cut them too small, or they will absorb too much water during the boil.
Salting the Water: It is Not Just for Pasta
Potatoes are essentially culinary sponges. If you boil them in plain, unseasoned water, they will absorb plain, unseasoned water. You will then spend the rest of the recipe desperately dumping salt into the finished mash, trying to inject flavor into a dish that is already fully saturated. Salt your cooking water aggressively—it should taste like the sea. As the potatoes swell and absorb the water, they will absorb the salt directly into their cellular structure, seasoning them from the inside out.
The Danger of Waterlogged Spuds and the “Dry Out” Trick
Water is the enemy of a rich, creamy mash. If your potatoes are waterlogged, they will not be able to absorb the butter and cream you add later. After your potatoes are fork-tender (usually 15 to 20 minutes of simmering), drain them thoroughly in a colander. But do not stop there. Return the drained potatoes to the hot, empty pot and place it back on the stove over low heat for about 60 to 90 seconds. Gently toss them until the residual surface moisture evaporates and the edges look slightly chalky and dry. This crucial step creates thirsty potatoes that are primed to soak up liquid fat.
Mistake #3: You Used the Wrong Tools (Put the Food Processor Down)
If you take a food processor to a batch of boiled potatoes, you deserve the wallpaper paste you are about to eat. I have zero patience for this shortcut.
The Shearing Effect: How Blades Create Instant Glue
Food processors, blenders, and immersion blenders operate using high-shear mechanical energy. A standard food processor blade spins at over 3,200 RPM. Remember those delicate swollen starch cells we talked about earlier? A metal blade spinning at thousands of revolutions per minute will violently slice, tear, and obliterate millions of those cells in a matter of seconds. The amylose is violently expelled, and the mixture instantly polymerizes into a shiny, elastic, unappetizing mass. Never, under any circumstances, let a motorized blade touch your mashed potatoes.
The Holy Trinity of Mashing Tools
To achieve perfection, you need tools that press or gently crush the potato without shearing the cells.
1. The Potato Ricer: If you want Michelin-star, silky-smooth, lump-free potatoes, using a potato ricer is non-negotiable. A ricer works like a giant garlic press. You place the cooked potato chunks inside and gently squeeze the handles, forcing the potato through tiny holes. This extrusion process breaks the potato down into uniform, fluffy, rice-like pieces with minimal cellular damage. It is the holy grail of potato tools.
2. The Food Mill: Similar to a ricer, a food mill gently forces the potatoes through a perforated plate using a hand crank. It is fantastic for large batches and yields an incredibly smooth, velvety texture without overworking the starch.
3. The Traditional Hand Masher: If you don’t mind a few rustic lumps and prefer a slightly denser texture, a standard wire or perforated metal hand masher works fine. Just remember to use a gentle, straight up-and-down pressing motion. Do not stir or whip the potatoes with the masher.
A Sassy Rant on Toxic Kitchen Gear
While we are on the subject of equipment, we need to have a very serious conversation about the pots you are using. I am endlessly baffled by home cooks who spend good money on organic produce and high-quality Kerrygold butter, only to boil and mash their food in a scratched, peeling, $15 non-stick pot from a discount bin.
When you use a metal hand masher inside a cheap Teflon-coated pot, you are scraping microscopic shards of toxic forever-chemicals directly into your family’s side dish. It is disgusting, it is dangerous, and it ruins the flavor of your food. You must banish toxic kitchen gear from your home immediately.
Invest in a heavy-bottomed, fully clad stainless steel pot. They are practically indestructible, they heat evenly, and they will never leach synthetic chemicals into your meals. Yes, some beginners complain that their stainless steel pan sticks when searing meats, but for boiling water and mashing potatoes, stainless steel is the undisputed champion of the kitchen. Buy it once, take care of it, and pass it down to your grandchildren.
Mistake #4: You Shocked Them With Cold Dairy
You have perfectly boiled, perfectly dried, and perfectly riced your potatoes. The starch cells are intact and ready to be enriched. And then, you open the refrigerator, pull out a carton of ice-cold milk, and dump it straight into the hot potatoes. You just ruined them.
Why Temperature Matters for Emulsions
Mashed potatoes are essentially an emulsion—a suspension of fat (butter and milk fat) and water (from the milk and the potatoes) held together by the potato starch. When you introduce freezing cold dairy to hot starch, two disastrous things happen.
First, the sudden drop in temperature causes the hot, swollen starch molecules to experience immediate thermal shock. The amylose molecules rapidly contract and realign, instantly triggering that dreaded starch retrogradation we discussed earlier. The potatoes seize up, turning stiff and pasty.
Second, the cold temperature prevents the butterfat from properly emulsifying with the liquids. Instead of a creamy, unified mixture, you get a lumpy, greasy mess where the fat separates and pools around the edges of the bowl.
Always, always warm your dairy. Place your milk, cream, or half-and-half in a small saucepan and gently heat it to around 60–65°C (140–150°F) before adding it to the potatoes. It should be steaming, but not boiling.
The Butter-First Rule: A Lesson in Lipid Absorption
Here is a brilliant food science trick popularized by culinary legends and test kitchens alike: never add your milk and your butter at the same time, and always add the butter first.
When your potatoes are hot and freshly riced, their cells are swollen and thirsty. If you add milk first, the cells will absorb the water from the milk, leaving the milk fat and butter to just slide around on the outside of the cells, resulting in a watery, grainy texture.
However, if you fold in room-temperature (or melted) butter first, the liquid fat coats the starch molecules and absorbs directly into the cellular structure. This lipid coating acts as a waterproof barrier. When you subsequently add the warm milk, the fat-coated cells are protected from absorbing too much water, preventing them from bursting and turning gummy. The result is an exponentially richer, creamier, and more buttery-tasting dish. If you want to take the flavor profile to an entirely different stratosphere, try using browned butter. Taking the time to craft a better brown butter with deep, nutty, caramelized notes will elevate your mash from a simple side dish to the star of the entire dinner party.
Milk vs. Cream: Dialing in the Emulsion
The type of dairy you use dictates the final texture. Heavy cream provides incredible richness but can make the dish feel heavy and dense if overused. Whole milk offers great hydration but lacks the luxurious fat content. A 50/50 mix of whole milk and heavy cream (or just using half-and-half) is the sweet spot for weekend perfection. For a tangy twist, folding in a dollop of room-temperature sour cream or crème fraîche at the very end adds a beautiful acidity that cuts through the heavy fat.
Mistake #5: Overworking the Mash
We are in the home stretch. You have your warm dairy, your melted butter, and your perfectly riced potatoes. This is where you must exercise extreme self-control.
The Gluten-Free Dough You Didn’t Mean to Make
As I mentioned earlier, you have a 90-second window to incorporate your fats and liquids before the mechanical friction begins to tear the starch cells apart. If you grab a whisk and start beating the potatoes like a frantic baker trying to whip up a meringue, you are going to ruin them. If you decide to ditch the hand mixer (which you absolutely must do), you still need to be careful with your spatula.
Folding vs. Whipping
Do not stir in rapid circles. Do not whip. Instead, use a silicone spatula or a large wooden spoon to gently fold the ingredients together. Pour the warm butter over the riced potatoes and use a wide, sweeping motion to lift the potatoes from the bottom of the bowl and fold them over the top. Once the butter is absorbed, gradually pour in the warm milk in three additions, gently folding just until the liquid disappears. The moment the mixture is unified and creamy, stop touching it. Step away from the bowl.
How to Rescue Gummy Mashed Potatoes (Is It Possible?)
Let’s address the elephant in the room. What happens if you are reading this article too late? What if you already used a blender, or you mashed waxy potatoes for twenty minutes, and you are currently staring at a bowl of warm, potato-flavored glue?
The Harsh Truth: You Can’t Un-Glue Starch
I am known for being a straight shooter, so I will not lie to you. You cannot reverse starch retrogradation. Once those cell walls are ruptured and the amylose has polymerized into a sticky gel, no amount of cream, butter, or aggressive stirring will save them. Adding more liquid will just turn the glue into a watery soup. If you are hosting a dinner party and you need perfect mashed potatoes, your only option is to throw them out and start over.
Repurposing the Paste: Croquettes, Gnocchi, and Casseroles
However, if you are just cooking for yourself and want to rescue a ruined dinner without throwing food in the trash, gummy potatoes can be repurposed into dishes where a sticky, binding texture is actually an asset.
- Potato Croquettes: Let the gluey mash cool completely in the fridge. The retrograded starch will solidify into a firm block. Scoop out balls of the cold mash, roll them in flour, dip them in beaten egg, coat them in panko breadcrumbs, and deep fry them. The sticky starch acts as a perfect binder, keeping the croquettes from falling apart in the hot oil.
- Gnocchi: Traditional gnocchi relies on the binding power of starch and flour. You can knead an egg and some all-purpose flour into your ruined mash to create a passable gnocchi dough.
- Shepherd’s Pie Topping: Spread the dense paste over a casserole of savory ground beef and vegetables. Bake it in a hot oven until the top forms a crispy, golden-brown crust.
The Sassy Sous-Chef’s Foolproof Master Recipe for Perfect Mashed Potatoes
Alright, enough theory. It is time to put the science into practice. This is my definitive, no-nonsense method for achieving potato perfection. I designed this recipe to be scalable—whether you are making a massive batch for a holiday feast or whipping up simple weeknight dinners for two.
The Ingredients (Quality Matters)
- 3 lbs Potatoes: A 50/50 mix of Russets and Yukon Golds. (1.5 lbs of each). Peeled and cut into uniform 1-inch cubes.
- 1/2 Cup (1 stick) Unsalted Butter: High-quality, European-style butter (like Kerrygold). Cut into tablespoons and brought to room temperature.
- 3/4 Cup Whole Milk: (Or a mix of half milk and half heavy cream for weekend indulgence).
- 1/4 Cup Sour Cream: Room temperature. (Optional, but highly recommended for a subtle, tangy depth).
- Kosher Salt: For boiling and finishing.
- Freshly Cracked Black Pepper: (Or white pepper if you are a traditionalist who hates black specks in your mash).
Step-by-Step Instructions (No Skimping on the Details)
Step 1: The Cold Water Bath
Place your uniform potato cubes into a large, heavy-bottomed stainless steel pot. Cover them with cold water by about one inch. Add a generous handful of kosher salt. (I use about 1 tablespoon of salt per quart of water).
Step 2: The Gentle Boil
Place the pot over medium-high heat and bring to a boil. Once boiling, immediately reduce the heat to maintain a steady, gentle simmer. Do not aggressively rapid-boil them, or they will break apart. Simmer for 15 to 20 minutes.
Step 3: The Fork Test
Start testing at the 15-minute mark. A paring knife or a fork should slide into the center of the largest potato cube with absolutely zero resistance. If there is even a hint of a hard core, let them cook for another 2 minutes.
Step 4: The Dry Out
Drain the potatoes thoroughly in a colander. Immediately return the empty pot to the stove over low heat. Pour the drained potatoes back into the hot pot. Gently shake the pot for 60 to 90 seconds until the surface moisture evaporates and the potatoes look dry and slightly chalky. Remove the pot from the heat.
Step 5: The Dairy Prep (Time is Money)
While the potatoes are boiling, prepare your dairy. Place the butter in a small bowl so it comes to room temperature. In a small saucepan, gently heat the milk/cream mixture until it is steaming (about 140°F). Do not let it boil over. If you are in a rush on a Tuesday night, just microwave the milk in a glass measuring cup for 45 seconds.
Step 6: The Extrusion (Ricing)
Working quickly while the potatoes are still piping hot, pass them through a potato ricer directly into a large, warm mixing bowl. (Pro tip: rinse your mixing bowl with hot water and dry it first so it doesn’t sap the heat from the potatoes).
Step 7: The Fat Barrier (Butter First)
Scatter the room-temperature butter pieces over the hot, riced potatoes. Using a silicone spatula, gently fold the mixture until the butter is completely melted and absorbed into the starch.
Step 8: The Hydration (Warm Dairy)
Gradually pour in the warm milk mixture in three separate additions. After each addition, gently fold the potatoes just until the liquid is absorbed. Do not overmix!
Step 9: The Finishing Touch
If using, gently fold in the room-temperature sour cream. Taste the potatoes and add additional kosher salt and freshly cracked pepper to your liking. Serve immediately.
Conclusion: Go Forth and Mash With Confidence
Cooking is not magic; it is simply applied chemistry and basic thermodynamics wrapped in an apron. The reason your mashed potatoes have been turning out like gummy, sticky glue is not because you are a bad cook. It is because nobody ever taught you the microscopic rules of starch gelatinization.
Now that you know how amylose and amylopectin react to high-shear force, cold dairy, and waxy potato varieties, you hold the keys to the kingdom. You know to step away from the food processor, to respect the ricer, and to always, always heat your milk.
You don’t need a culinary degree to make mind-blowing food in a standard home kitchen. You just need the right knowledge, safe and reliable equipment, and the confidence to execute the technique. So go buy a bag of Russets, grab your stainless steel pot, and show those starches who is boss. You’ve got this, chef. Now get cooking!






