The Jump Scare in Your Oven: Why We Are Talking About This
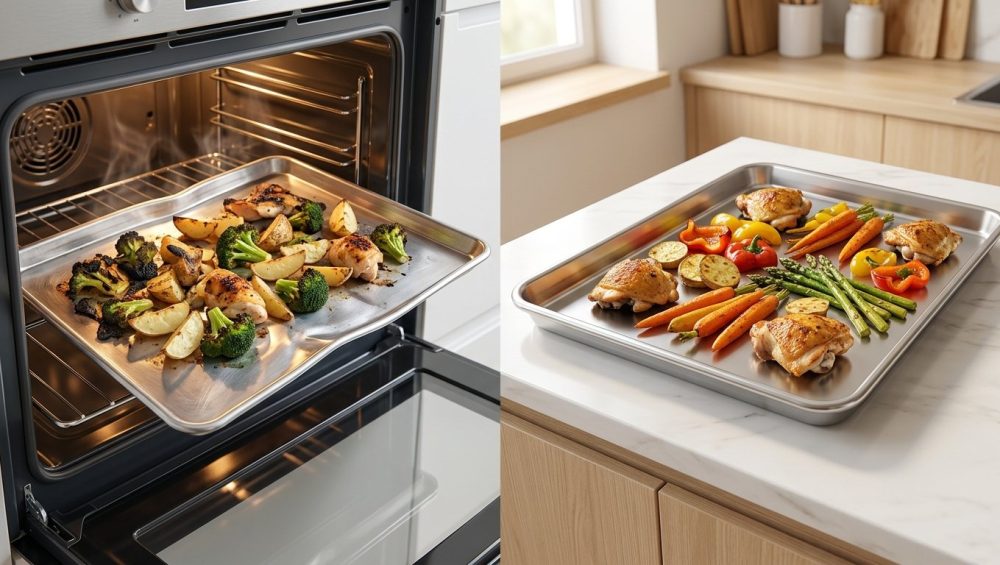
Picture this: It is a Tuesday night. You are exhausted from back-to-back virtual meetings that easily could have been emails. You have finally poured yourself a well-deserved glass of Pinot Noir, and you are simply trying to master simple weeknight dinners by roasting some beautifully seasoned chicken thighs and broccoli florets. You slide your sheet pan into a 425-degree oven, close the door, take a deep breath, and take a sip of your wine.
Suddenly—BANG!
It sounds like a small explosive device just detonated inside your kitchen appliance. You jump, spill your wine on your favorite slippers, and cautiously peer through the oven window, half-expecting to see your dinner plastered against the upper heating element. Instead, you see that your baking sheet has violently buckled, lifting one corner high into the air and sending your precious broccoli florets rolling into a sad, greasy pool of chicken fat.
Welcome to the infuriating, noisy, and chaotic world of warped baking sheets.
If this scenario sounds familiar, I need you to know two things right right now. First, you are not alone, and second, this is absolutely not your fault. You did not ruin dinner because you lack culinary skills; you ruined dinner because you are a victim of basic thermodynamics and incredibly cheap kitchen manufacturing. As a home cook, your time is money. You do not have the patience to babysit flimsy equipment that actively works against you. In this exhaustive masterclass, we are going to break down the exact material science of why your pans forcefully pop, the metallurgical truths behind heat conductivity, and the precise techniques you can use to stop this kitchen jump scare from ever happening again.
The Anatomy of Bakeware: Stop Calling Everything a “Cookie Sheet”
Before we can dive into the physics of bending metal, we need to get our terminology straight. One of my biggest pet peeves in the culinary world is the interchangeable use of bakeware terms. If you want to cook like an expert, you need to speak like one. Not every flat piece of metal in your kitchen is a cookie sheet.
A true “cookie sheet” is a completely flat piece of metal with absolutely no raised edges, except perhaps one slightly angled lip on a single side to give you something to grip. The entire point of a rimless cookie sheet is to allow maximum, unobstructed airflow around your delicate baked goods, ensuring perfectly even browning. Because a true cookie sheet lacks a continuous raised rim, it actually does not suffer from the violent, popping warp we are discussing today. It might bow slightly under extreme heat, but it will rarely give you that terrifying “bang.”
What you are likely using to roast your vegetables and chicken is a “sheet pan.” A sheet pan features a continuous, rolled edge all the way around its perimeter. This rolled rim is designed to keep juices, fats, and rogue cherry tomatoes from spilling off the edge and starting a grease fire in the bottom of your oven.
In the professional culinary industry, we categorize these rimmed pans by their standardized sizes:
- The Full-Sheet Pan: Measuring a massive 26 by 18 inches, this is the absolute workhorse of commercial bakeries. Do not buy one of these unless you own a restaurant, because it will absolutely not fit inside a standard residential home oven.
- The Half-Sheet Pan: Measuring 18 by 13 inches, this is the gold standard for the home kitchen. If a modern recipe calls for a “sheet pan,” this is exactly what they are referring to.
- The Jelly Roll Pan: Measuring roughly 15 by 10 inches, this is an awkward, intermediate size originally designed for baking thin sponge cakes that are meant to be rolled up.
- The Quarter-Sheet Pan: Measuring 13 by 9 inches, this is a brilliant, compact pan perfect for roasting a small portion of nuts, baking two chicken breasts, or prepping ingredients.
Now that we know exactly what piece of equipment we are dealing with, let us examine why your rimmed half-sheet pan insists on sounding like a firecracker.
The Physics of the “Pop”: Demystifying Thermal Shock
To understand the “bang,” we have to take a brief detour into the fascinating world of material science. When you place a room-temperature metal pan into a 450-degree oven, it undergoes a physical process known as thermal expansion. As the metal absorbs the ambient thermal energy, its internal atoms begin to vibrate vigorously. These vibrating atoms push further apart from one another, causing the entire sheet of metal to physically grow in size.
If your pan were a perfectly flat, rimless piece of metal, and if your oven heated it with absolute, mathematical perfection, the pan would simply expand uniformly in all directions. But we live in the real world, and your sheet pan is not perfectly flat. It has that continuous, rolled rim we just talked about.
Here is where the physics turn into a battlefield. The wide, flat bottom of your sheet pan is the longest surface area, and it absorbs heat incredibly fast. As it heats up, it desperately tries to expand outward. However, the edges of the pan are folded up and tightly rolled, often encapsulating a thick steel wire for structural rigidity. This rolled rim is thicker, heats up at a slightly different rate, and acts like a rigid straightjacket, aggressively restricting the flat bottom from expanding.
This creates an immense amount of internal pressure, known in physics as thermal stress. Make no mistake, this is a severe structural battle. The varying temperature field across the baking tray results in local relative displacements, creating intense thermal stresses within the metal matrix. The flat bottom is pushing outward with hundreds of pounds of microscopic force, but the rim refuses to yield.
Eventually, the stress of the expanding bottom exceeds the structural integrity of the metal keeping it flat. Physics demands a release. Since the bottom cannot expand outward, it has no choice but to expand upward or downward. The loud popping sound you hear is the metal suddenly and violently giving in to the stress, buckling instantly to relieve the pressure.
Once the entire pan reaches a uniform, blazing hot temperature, the thermal expansion equalizes, and the pan will often magically flatten itself back out. But during that initial heat-up phase, the thermal shock is simply too much for cheap metal to handle.
The Gauge Game: Why Thickness Dictates Your Culinary Destiny
If you want to know why your specific pan is popping while a professional bakery’s pans remain perfectly flat, you need to understand the concept of sheet metal gauges. In the metal fabrication industry, the thickness of sheet metal is measured using a standardized gauge system.
Counterintuitively, the lower the gauge number, the thicker and heavier the metal. This system actually originated in the British wire industry centuries ago, where the gauge number referred to how many times a piece of metal had to be drawn through a sizing die to reach its final thinness. Therefore, a piece of metal drawn through a die 20 times (20-gauge) is significantly thinner than a piece drawn only 10 times (10-gauge).
When you buy a flimsy, eight-dollar baking sheet from a discount grocery store aisle, you are usually buying 20-gauge or even 22-gauge metal. To put that into perspective, 20-gauge aluminum measures a measly 0.0320 inches thick. It is practically heavy-duty tin foil. When you subject something that thin to 450 degrees of roaring oven heat, it stands absolutely zero chance against the brutal forces of thermal stress. The bottom of the pan lacks the physical mass and rigidity to fight back against the expanding pressure, so it buckles almost immediately.
If you are serious about cooking, upgrading your bakeware is one of the essential tools every beginner needs to invest in. You must step up to the commercial heavyweights. Let us look at the exact metallurgical thicknesses of aluminum baking sheets:
- 18-Gauge Aluminum (0.0403 inches thick): This is the absolute bare minimum you should accept in your kitchen. It is sturdy enough for light baking, roasting delicate vegetables, and standard cookie duty. However, if you blast it under a 500-degree broiler, it may still protest and warp.
- 16-Gauge Aluminum (0.0508 inches thick): This is a massive step up and the standard for most high-quality, consumer-grade bakeware. It offers excellent warp resistance while remaining relatively lightweight and easy to maneuver with one hand.
- 13-Gauge Aluminum (0.0720 inches thick): This is the sweet spot for the serious home cook who demands perfection. It has enough physical mass to violently resist thermal stress, ensuring a perfectly flat roasting surface for your meats and heavy root vegetables.
- 10-Gauge Aluminum (0.1019 inches thick): These are the absolute, undisputed tanks of the culinary world. At over a tenth of an inch thick, a 10-gauge baking sheet is virtually indestructible. You could probably use it to shield yourself from falling debris. It will never warp, pop, or buckle, no matter how much thermal shock you subject it to.
Thicker pans are more expensive, but they are a lifetime investment. A thick pan has the structural integrity to force the expanding metal to remain flat, entirely eliminating the terrifying oven jump scare.
Material Matters: The Good, The Bad, and The Absolutely Toxic
We need to have a serious, heart-to-heart conversation about my absolute least favorite thing in the culinary world: cheap, toxic kitchenware. I have a strict, uncompromising “No-Go” rule when it comes to mystery metals and peeling chemical coatings. If you truly want to banish toxic kitchen gear from your home, your baking sheets are the very first place you need to look.
The material your pan is made of dictates not only its warp resistance but its thermal conductivity—how fast and how evenly it transfers heat to your food.
The Bare Aluminum Advantage
Aluminum is the undisputed king of the commercial kitchen for a very specific scientific reason: it is an exceptional conductor of heat. According to thermal dynamics, aluminum has a thermal conductivity of approximately 100 W/m*K. This means it absorbs the oven’s ambient heat rapidly and distributes it flawlessly across the entire surface of the pan, eliminating hot spots and ensuring your cookies bake perfectly evenly.
Furthermore, aluminum cools down almost as fast as it heats up. When you pull a batch of delicate macarons or perfectly roasted asparagus out of the oven, the aluminum pan rapidly sheds its heat, preventing the carryover cooking that ruins delicate textures.
The Heavy-Duty Hybrid: Aluminized Steel
Aluminized steel is another brilliant option, particularly for professional bread factories and heavy-duty roasting. This material features a core of high-strength steel that has been hot-dip coated in an aluminum alloy. It combines the brute, warp-proof strength of steel with the superior heat conductivity of aluminum. While it is heavier than pure aluminum, an aluminized steel pan is practically immune to the popping and buckling we despise.
The Stainless Steel Trap
Many home cooks assume that stainless steel is the ultimate upgrade because it is heavy, shiny, and non-reactive. While stainless steel is fantastic for boiling pots of pasta water, it is actually a terrible material for a baking sheet. Stainless steel has a dismal thermal conductivity of under 20 W/m*K. It takes forever to heat up, it holds onto heat far too long, and it is highly prone to localized hot spots. Unless you are buying a wildly expensive, multi-clad stainless pan with a thick aluminum core, skip the stainless steel for baking.
The “No-Go” Rule: Toxic Non-Stick Coatings
Do not buy dark, non-stick baking sheets. Period. I do not care if they are on clearance at your local big-box store. First of all, the dark color absorbs radiant heat far too aggressively, causing the bottoms of your cookies and roasted vegetables to burn to a crisp before the insides are fully cooked.
More importantly, these cheap pans are coated in polytetrafluoroethylene (PTFE) or similar synthetic chemical compounds. When subjected to the high temperatures required for proper roasting (anything above 400°F), these flimsy coatings begin to chemically break down. They release invisible, toxic fumes—a phenomenon known to cause “polymer fume fever” or the “Teflon flu.” Over time, the thermal stress of the pan expanding and contracting causes this toxic coating to blister, peel, and flake directly into your food. There is absolutely nothing appetizing about garnishing your dinner with chemical paint chips. Stick to bare, heavy-gauge aluminum and use a sheet of parchment paper or a silicone baking mat.
Food Placement: The Hidden Culprit of Temperature Differentials
Let us assume you have listened to my advice. You have thrown away your flimsy, toxic pans and invested in a beautiful, heavy-duty, 13-gauge bare aluminum half-sheet pan. You put it in the oven, and to your horror, it still gives a slight pop! Why? Because you have ignored the physics of food placement.
Even the highest-quality metal can warp if you induce an extreme temperature differential across its surface. Food is a thermal mass. It contains water, density, and cold temperatures. When you place food on a baking sheet, it acts as a massive heat sink, absorbing the oven’s energy and keeping the metal directly beneath it significantly cooler than the exposed metal around it.
Imagine this scenario: You are roasting a small handful of frozen, dense appetizers. You place them all huddled together on the far right side of your massive half-sheet pan, leaving the entire left side completely bare. You slide the pan into a 450-degree oven.
The bare left side of the pan is fully exposed to the ambient heat. It rapidly reaches 450 degrees and expands aggressively. Meanwhile, the right side of the pan is trapped beneath a pile of 32-degree frozen food. The food absorbs the heat, keeping that localized section of the metal shielded and cool. The hot side is expanding, while the cold side is contracting. The pan is literally tearing itself in two different thermodynamic directions. This severe temperature differential is a primary cause of buckling.
If you want to stop eating soggy roasted veggies and prevent your pans from buckling, you must arrange your food properly. Spread your ingredients in an even, uniform layer across the entire surface of the pan. Ensure that the food covers the pan completely, leaving no massive bare spots. This ensures that the metal heats and expands at a consistent, unified rate. If you are only cooking a small amount of food, do not use a massive half-sheet pan; use a quarter-sheet pan instead so the food covers the available surface area.
The Broiler: The Ultimate Torture Test for Metal
If there is one setting on your oven that will absolutely destroy a baking sheet, it is the broiler. Baking and roasting rely on convective heat—hot air circulating around the food to cook it evenly. Broiling, however, relies on intense, direct, radiant infrared heat.
When you place a baking sheet under a broiler, the top surface of the metal is blasted with 500+ degrees of direct radiation, while the bottom of the pan remains shielded and relatively cool. This creates a massive top-to-bottom temperature gradient. The top layers of the metal matrix try to expand rapidly, while the bottom layers resist. This causes the pan to violently bow upwards or downwards.
If you must broil food, do not use your standard aluminum baking sheets. This is the one time you should reach for a heavy cast-iron skillet or a specialized, thick broiler pan designed specifically to withstand extreme, directional radiant heat.
The Thermal Mass Strategy: Outsmarting Your Oven
We need to talk about preheating and the brilliant concept of thermal mass. Throwing a cold, heavily loaded baking sheet into a screaming hot oven is a recipe for disaster. The sudden, violent blast of heat shocks the metal, causing rapid and uneven expansion.
Instead, try the preheated pan technique. This is a game-changer for weeknight dinners and a brilliant way to mitigate thermal shock. Place your empty, heavy-gauge aluminum baking sheet into the oven while it preheats. Let the empty pan slowly and evenly absorb the heat as the oven comes up to temperature.
When you are ready to cook, carefully remove the screaming hot pan, quickly toss your oiled and seasoned ingredients onto it, and immediately return it to the oven. Not only does this gradual heating process completely prevent the pan from popping, but it also jumpstarts the Maillard reaction. The moment your food hits the hot metal, it begins to sear aggressively. This ensures you achieve perfectly browned mushrooms, blistered green beans, and crispy potatoes rather than sad, steamed, watery mush.
The Cold Water Crime: Post-Bake Thermal Shock
You have successfully roasted your dinner. The chicken is golden, the vegetables are caramelized, and the pan remained perfectly flat. You pull the hot pan from the oven, plate your delicious food, and then you do the unthinkable: you toss the 400-degree baking sheet directly into the sink and turn on the cold water.
Hiss.
Congratulations, you have just murdered your baking sheet.
This is the ultimate rookie mistake, and learning how to avoid it will save you from having to rescue a ruined dinner or replace your expensive equipment in the future. In metallurgy, this process is known as quenching. When you hit a 400-degree piece of metal with 60-degree water, the metal violently and instantly contracts. The temperature differential is so extreme and so rapid that the metal cannot physically handle the stress.
It will warp instantly, and unlike the temporary warping that happens in the oven, this damage is often permanent. You have fatigued the metal matrix beyond repair. If a pan buckles or twists enough times due to this kind of severe thermal shock, it can actually crack. Metallurgical analysis of these cracks often reveals stress-induced fractures and microscopic fatigue striations on the crack surface.
Always, always let your baking sheets cool completely to room temperature on a wire cooling rack before you even think about letting them touch water. Patience is not just a virtue; it is a requirement for preserving your kitchenware.
How to Rescue a Warped Pan (And When to Say Goodbye)
Let us say the damage is already done. You inherited a cheap pan, or you made a mistake, and now you have a baking sheet that looks like a skateboard ramp. You are probably wondering if it can be saved. The good news is that if the metal is not permanently fatigued, you can often coax it back into shape. Understanding the mechanics of preventing pans from popping is only half the battle; knowing how to fix them is the other half.
Here is the foolproof method for flattening a warped pan, championed by the experts at America’s Test Kitchen:
- Heat the pan gently: Place the warped baking sheet in a 200-degree oven for about 10 minutes. You want the metal to be warm and pliable, not dangerously hot.
- Prepare your workspace: Lay a thick, heavy towel down on a hard, completely flat surface, such as a concrete garage floor or a heavy wooden workbench. Do not do this on your fragile granite kitchen counters.
- Position the pan: Carefully remove the warm pan from the oven using oven mitts and place it upside down on the towel.
- Protect the metal: Lay a second thick towel over the top of the upside-down pan to protect the aluminum surface from scratching.
- The Mallet Method: Take a rubber mallet (do not use a metal hammer, unless you want to add permanent dents to your warp) and gently but firmly tap the raised, warped areas of the pan until the original shape returns. Work your way around the surface, coaxing the metal back into its flat state.
If the pan returns to a flat state and stays that way, congratulations! You have saved it. However, if the pan immediately pops back into a warped shape the very next time you use it in the oven, the metal has suffered severe structural fatigue. The atomic bonds have been permanently stretched, and no amount of hammering will fix it. It is time to throw it in the recycling bin and upgrade your gear.
Cleaning and Maintenance: Protecting Your Investment
Once you have invested in high-quality, heavy-gauge aluminum baking sheets, you need to treat them with the utmost respect. Aluminum is a relatively soft metal, and it requires specific care to maintain its pristine, flat, highly conductive surface.
First and foremost, never put bare aluminum baking sheets in the dishwasher. The harsh, highly alkaline, caustic detergents used in commercial dishwasher pods will chemically react with the aluminum. This reaction causes the metal to oxidize, discolor, and develop a chalky, dark gray residue that will rub off on your hands, your dish towels, and your food. You must hand wash your pans with warm water, mild dish soap, and a non-abrasive sponge.
If you are dealing with stubborn, baked-on grease, do not reach for the aggressive steel wool, which will gouge the soft metal. Instead, make a thick paste of baking soda and hydrogen peroxide, spread it over the grime, and let it sit for a few hours before gently scrubbing it away. This method is incredibly effective, and it will save you from the absolute nightmare of cleaning greasy plastic containers and ruined metal alike.
Furthermore, if you want to stop ruining your nonstick pans and your bare aluminum alike, you must immediately stop using aerosol cooking sprays. Products like Pam contain soy lecithin and chemical propellants that bake onto the surface of your cookware at high temperatures. This creates a sticky, polymerized resin that is nearly impossible to remove. This resin builds up over time, creating dark, uneven surfaces that absorb heat differently and contribute to localized hot spots—which, as we know, leads to warping. Instead, use a silicone brush or a paper towel to apply a thin, even layer of high-quality cooking oil, or line your pan with a sheet of unbleached parchment paper.
The Sassy Sous-Chef’s Final Verdict
Cooking should be a joy, an art form, and a relaxing end to your day. It should never be a stressful battle against your own equipment. When you eliminate the cheap, flimsy, toxic variables from your kitchen, you free yourself up to focus entirely on the food. You do not need a culinary degree to roast a perfect chicken or bake a flawless batch of cookies, but you absolutely do need tools that respect the laws of thermodynamics.
Upgrading to heavy-gauge, bare aluminum baking sheets and learning how to manage temperature differentials will completely change your life. It will eliminate the jump scares, ensure your food cooks perfectly evenly, and help you cure cooking anxiety for good. So, do yourself a massive favor: march into your kitchen right now, take a hard, honest look at those blackened, peeling, warped metal tragedies hiding in your lower cabinet, and throw them away. Your weeknight dinners deserve better, and frankly, so do you. Now, pour yourself another glass of wine, preheat your oven, and get back to cooking like the absolute boss you are.


