
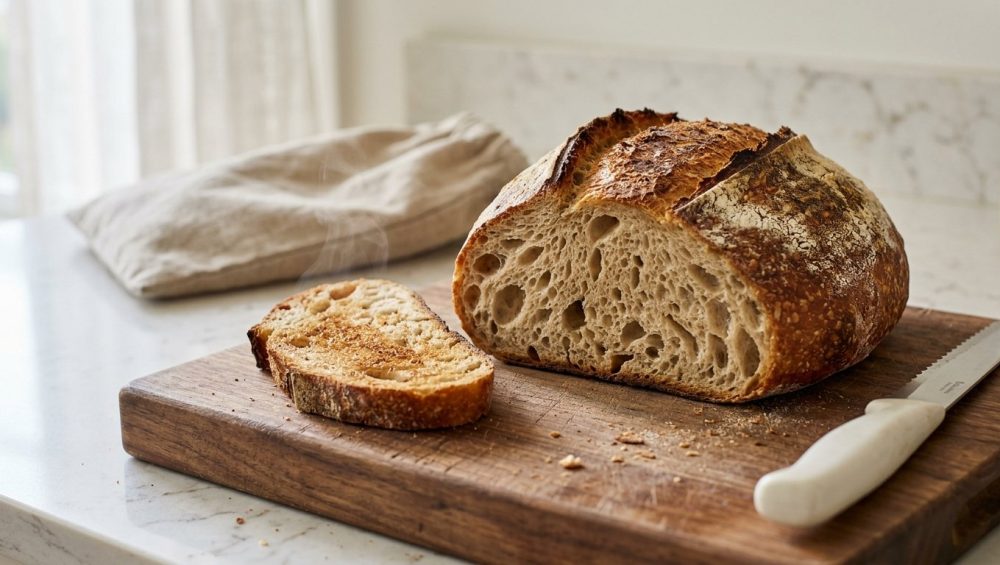
Picture this: It’s Saturday morning. You’ve just marched into your favorite local bakery and dropped twelve dollars on a gorgeous, flour-dusted, artisanal sourdough loaf. It is a thing of beauty. The crust shatters perfectly when you squeeze it, and the crumb is so tender and open it looks like a sponge made of clouds. You bring it home, slice off a couple of pieces for avocado toast, and leave the rest on the cutting board. By Monday morning, you go back for a quick weekday breakfast, and what do you find? A medieval weapon. A dense, leathery, rock-hard brick that could successfully be used to hammer nails into drywall.
If this sounds familiar, you are not alone, and you are not a bad cook. But you are definitely storing your bread incorrectly. As a home cook who values both time and money, throwing away premium groceries is a cardinal sin. We don’t have the luxury of baking a fresh loaf every single morning, nor do we have the budget to treat artisanal bread as a disposable commodity. The global statistics on this are frankly nauseating: approximately 15% to 20% of all bread produced worldwide ends up as waste,. In the United Kingdom alone, an estimated 20 million slices of bread are thrown into the garbage every single day. That is a staggering amount of wasted money and resources, and it happens mostly because people fundamentally misunderstand what is happening to their food.
Bread staling is not just a matter of your loaf “drying out.” It is a complex, relentless chemical transformation. And if you want to avoid making one of the classic seven rookie kitchen mistakes that plague weekend cooks, you need to understand the science of the crumb. Today, we are going to break down the exact molecular reasons your bread turns into a fossil, why your refrigerator is actively sabotaging your groceries, the non-toxic gear you actually need to store it, and a borderline-magical trick to resurrect a loaf that you thought was dead. Grab a cup of coffee, and let’s get into it.
The Science of Staling: Why Your Bread Turns into a Brick
To stop your bread from dying, you first need to understand how it lives. Most people assume that when bread goes stale, it is simply losing its moisture to the surrounding air, much like a puddle evaporating in the sun. This theory was actually disproved over 150 years ago. While moisture loss does play a minor role, you could seal a fresh loaf of bread inside an airtight, hermetically sealed titanium vault, and it would still go stale. Why? Because of a chemical process called starch retrogradation.
Meet Your Frenemy: Starch Retrogradation
Let’s put on our lab coats for a second (or just your favorite stained apron). Flour is primarily composed of starch, which is a carbohydrate. In its raw, unbaked state—before you stop scooping your flour incorrectly and start weighing it—that starch exists in a highly organized, rigid, crystalline structure.
When you mix that flour with water to make dough, and then subject it to the intense heat of your oven, magic happens. As the internal temperature of the dough rises above 185°F (85°C), the starch undergoes a process called gelatinization,. The rigid crystals melt, absorb the water, swell up, and transform into a tangled, chaotic, sponge-like polymer gel,. This gelatinized starch network traps water molecules inside it, which is exactly what gives a freshly baked loaf of bread its incredibly soft, fluffy, yielding texture,.
But nature loves order, and starch molecules are incredibly stubborn. The very second that beautiful loaf comes out of the oven and begins to cool down, the starch molecules (specifically amylose and amylopectin) start trying to revert back to their original, rigid, crystalline state,. As they slowly realign and recrystallize, they physically squeeze the trapped water out of the gel network. This process is starch retrogradation, and it is the primary engine of bread staling. The bread isn’t necessarily losing water to the air; the starch is just kicking the water out of its structure, turning the soft crumb back into a hard, crystalline solid.
Moisture Loss vs. Moisture Migration
So, if the water is being squeezed out of the starch, where does it go? It migrates. In a crusty loaf of bread, the moisture moves from the damp interior crumb outward toward the dry exterior crust. This is a double-whammy of culinary tragedy. The inside of the bread becomes dry, crumbly, and harsh, while the outside crust absorbs that migrating water and turns from beautifully shattered and crisp into a chewy, leathery mess.
This moisture migration is why a stale baguette feels like trying to chew through a garden hose. The texture is completely inverted. And while you cannot entirely stop this chemical march toward death, you can significantly slow it down. Or, if you are doing what 90% of home cooks do, you can accidentally hit the fast-forward button.
The Refrigerator: The Ultimate Bread Killer
Let’s address the elephant in the kitchen. For decades, well-meaning parents and roommates have been taking leftover bread and tossing it into the refrigerator. It makes logical sense, right? Cold temperatures preserve food. The fridge stops meat from spoiling, keeps milk from souring, and keeps lettuce crisp. Therefore, it should keep bread fresh.
Wrong. The absolute most important rule of bread storage is that you must stop putting bread in the fridge because it is literally the worst possible environment for a baked loaf.
Why Cold Temperatures Accelerate the Staling Process
Remember starch retrogradation? That pesky recrystallization process is highly temperature-dependent. Science has proven that the rate at which starch molecules crystallize accelerates rapidly as the temperature drops, peaking at temperatures just above freezing,.
The optimal temperature for maximizing the speed of bread staling is right around 39°F (4°C). Care to guess what temperature the average home refrigerator is set to? Exactly 39°F. By putting your bread in the fridge, you are placing it in a scientifically optimized staling chamber. Studies have shown that bread stored in the refrigerator will stale up to six times faster than bread stored at room temperature on your kitchen counter. You are taking a process that should take three to four days and compressing it into twelve hours.
The Exception to the Rule: When to Actually Chill Your Bread
There are only two highly specific scenarios where chilling your bread is acceptable. The first is if you are dealing with a loaf that has highly perishable ingredients baked into it—like a cheese-stuffed bread, a loaf with heavy meat inclusions, or certain heavily hydrated gluten-free breads that are highly prone to rapid mold growth. In these cases, food safety trumps texture, and you have to refrigerate it so you don’t give yourself food poisoning.
The second exception is the freezer. While temperatures just above freezing (the fridge) accelerate staling, temperatures well below freezing (the freezer, around 0°F or -18°C) halt the process entirely,. Freezing bread stops the starch molecules in their tracks, locking the moisture exactly where it is. If you want to preserve bread, you either keep it at room temperature, or you freeze it solid. There is no middle ground.
The Masterclass on Proper Bread Storage
Now that we know the science, let’s talk strategy. As busy professionals who cook on the weekends and survive on leftovers during the week, we need systems that actually work. Time is money, and nobody has time to bake a fresh loaf at 6:00 AM on a Tuesday. Here is how you should actually be storing your bread to maximize its lifespan.
The Countertop Strategy (For Daily Eaters)
If you plan to consume a loaf of bread within three to four days, the kitchen counter is your best friend. Room temperature (around 68°F or 20°C) is perfectly fine for slowing down retrogradation. But how you leave it on the counter matters.
If you have a crusty artisan loaf (like a sourdough boule or a French baguette), your goal is to protect the soft, exposed crumb while allowing the crust to breathe. If you seal a crusty loaf in an airtight plastic bag, the moisture migrating from the inside will become trapped in the bag, turning the crust into a soggy, rubbery skin.
The best method? Cut the loaf directly down the middle, rather than slicing from the end. When you are done taking your slices, push the two cut halves of the loaf back together so they sit flush against each other. This physical barrier protects the exposed interior from drying out, while leaving the crust exposed to the ambient air so it remains crisp. You can leave the pushed-together loaf wrapped loosely in a clean kitchen towel or inside a breathable linen bag.
The Freezer: Your Bread’s Best Friend (For the Long Haul)
If you know it will take you more than four days to get through a loaf, or if you bought three loaves at the farmer’s market because you have no self-control, the freezer is your ultimate preservation tool. As we established, freezing drops the temperature so fast that the starch molecules don’t have time to crystallize.
However, you must prep the bread properly. Never just throw a whole, unsliced loaf into the freezer. Why? Because when you inevitably want a single piece of toast for breakfast, you will have to thaw the entire loaf, which ruins the texture, and then you’ll be stuck trying to saw through it. Instead of dulling your knives on a rock-hard crust while half-asleep, pre-slice the entire loaf before you freeze it.
Slice the bread, place small pieces of parchment paper between the slices if it’s a very sticky or moist crumb, and place the slices into a heavy-duty, airtight, freezer-safe container. When you want toast, you simply pull out exactly what you need and drop the frozen slice directly into the toaster. The intense heat of the toaster rapidly thaws and re-gelatinizes the starch, giving you a piece of toast that tastes like it was baked that very morning.
Slicing Strategy: To Pre-Slice or Not to Pre-Slice?
To summarize the slicing rules:
- If the bread is staying on the counter, NEVER pre-slice it. Slicing exposes maximum surface area to the air, accelerating moisture loss and staling. Slice only what you need, right when you need it.
- If the bread is going in the freezer, ALWAYS pre-slice it. This is a non-negotiable efficiency hack for the weekday home cook.
Gear Check: Ditching the Toxic Junk for Real Storage Solutions
We need to have a serious talk about the equipment you are using to store your food. I have zero patience for cheap, toxic kitchenware. If you are buying beautiful, organic, naturally leavened bread, it makes absolutely no sense to shove it into a chemical-leaching plastic bag that you bought for two dollars. It’s time to start banishing toxic kitchen gear from your countertops once and for all.
The Truth About Plastic Bread Bags and Mystery Metals
The vast majority of commercial bread bags, cheap plastic storage containers, and especially black plastic takeout boxes are manufactured using a cocktail of hazardous chemicals. Recent studies and investigations have shown that many of these plastics contain PFAS (per- and polyfluoroalkyl substances), commonly known as “forever chemicals”,. These chemicals are linked to a host of severe health issues, including hormone disruption, thyroid dysfunction, and an increased risk of certain cancers,.
Furthermore, many flexible plastics contain phthalates (used to make the plastic pliable) and bisphenols like BPA, BPS, and BPF,. These act as endocrine disruptors and can leach directly into your food. The leaching process is accelerated by heat, acidity, and fats, but it still occurs at room temperature over time. When you store your food in cheap plastic, you are quietly marinating it in industrial toxins. It is essential to invest in safe materials to build a beautifully organized dream kitchen that won’t poison you or your family.
Bread Boxes That Actually Work (And Won’t Poison You)
So, what should you use? The traditional bread box is actually a brilliant piece of engineering, provided it is made from the right materials. A high-quality bread box creates a micro-environment for your loaf. It traps just enough moisture to keep the crumb soft, but allows enough air circulation to prevent the crust from turning rubbery and to stop mold spores from throwing a party.
When shopping for a bread box, strictly avoid cheap plastics. Look for:
- Untreated Wood or Bamboo: Wood naturally absorbs and releases moisture, making it an excellent humidity regulator. Just ensure it isn’t coated in toxic varnishes.
- Ceramic: Heavy, beautiful, and completely inert. Ceramic bread boxes often feature unglazed interior lids that help absorb excess moisture.
- Stainless Steel or Enamelware: Durable, non-toxic, and easy to clean. Just make sure the box has small ventilation holes to allow for airflow.
The Linen Bag and Beeswax Wrap Debate
If you don’t have the counter space for a bread box, you have two excellent, non-toxic alternatives.
For crusty artisanal breads (sourdough, baguettes, boules), a thick, 100% natural linen or cotton bread bag is ideal. Linen is highly breathable. It protects the bread from dust and pests while allowing the crust to maintain its crispness. It will not trap moisture like plastic, meaning your bread will dry out slightly faster than in a box, but the crust will remain pristine.
For soft breads (sandwich loaves, brioche, milk bread), where a soft crust is desired, beeswax wraps are the ultimate solution. These are pieces of cotton coated in a mixture of beeswax, jojoba oil, and tree resin. They are naturally antimicrobial, completely free of PFAS and BPA, and they mold to the shape of the loaf using the warmth of your hands. They trap moisture perfectly, keeping soft bread soft without suffocating it in toxic plastic.
The Lazarus Trick: How to Revive Rock-Hard Bread
Okay, let’s say you messed up. You left a baguette on the counter without covering it, or you pushed it to the back of the pantry and forgot about it. It is now day five. The bread is so hard you could use it as a baseball bat. Do you throw it away? Absolutely not. Assuming there is no visible mold (if it’s green and fuzzy, it belongs in the trash, no exceptions), you can perform a culinary resurrection.
The Water and Heat Method (The “Spa Treatment”)
This is the ultimate chef’s trick, and it feels incredibly wrong the first time you do it. Take your rock-hard, stale loaf of bread and take it to your kitchen sink. Turn on the faucet, and if you don’t want to run it under water directly, you can heavily mist it with a spray bottle, but honestly, just run the whole loaf quickly under the running tap,. You want the exterior crust to be visibly wet, but you don’t want to soak it so long that the water penetrates deep into the crumb.
Next, place the wet loaf directly onto the middle rack of a preheated oven set to 350°F (175°C). (Always ensure your oven is actually at 350°F by using a simple oven thermometer, as most home ovens lie about their internal temperature).
Bake the loaf for 10 to 15 minutes. When you pull it out, it will be soft, steaming, and incredibly crusty.
The Science of the Resurrection:
Why does this work? It’s all about heat and starch gelatinization. Remember that staling is the crystallization of starch. To reverse crystallization, you have to melt those crystals. Starch re-gelatinizes when it hits a temperature above 185°F (85°C). By putting the bread in a hot oven, you are forcing the internal temperature of the crumb past that threshold, melting the crystals and forcing them to absorb water again,.
The water you added to the crust is equally crucial. In the hot oven, that surface water rapidly turns into steam. This steam penetrates the crust, rehydrating it, while simultaneously preventing the intense heat of the oven from burning the exterior of the loaf before the interior has time to warm up. The result is a loaf that tastes remarkably close to freshly baked.
Warning: This trick only works exactly once. When the revived bread cools down again, the retrogradation process will happen almost instantly, and the bread will be even harder than it was before. You must eat the revived bread while it is still warm.
The Microwave Quick-Fix (For Weekday Emergencies)
If you are in a rush and don’t have 15 minutes to preheat an oven, the microwave can work in a pinch. Take a paper towel, run it under water, and wring it out so it is damp but not dripping. Wrap the stale slice of bread in the damp paper towel and microwave it on high for 10 to 15 seconds.
The microwave works by aggressively agitating water molecules, generating rapid heat. The heat from the microwave combined with the steam from the damp paper towel will instantly re-gelatinize the starches, resulting in a piping hot, incredibly soft piece of bread.
The downside? Microwaves heat unevenly and destroy crust texture. Your bread will be soft, but the crust will be chewy rather than crisp. And just like the oven method, the second this slice cools down, it will turn into an inedible piece of rubber. Eat it immediately.
When to Give Up (And Make Croutons Instead)
Sometimes, a loaf is just too far gone. If the bread is sliced and has been stale for a week, the water trick might just turn it into a soggy mess. But a stale loaf is never a useless loaf. In fact, many classic global dishes were invented specifically to use up stale bread.
If you cannot revive the loaf to eat fresh, you can easily rescue a ruined dinner by turning that stale loaf into an incredible side dish or garnish.
- Homemade Croutons: Cube the stale bread, toss generously with good olive oil, salt, pepper, and garlic powder. Bake at 375°F until golden and crispy. They will last for weeks in an airtight container.
- Panzanella: The classic Italian bread salad. The stale, dry bread acts as a sponge, soaking up tomato juices, olive oil, and vinegar without turning to mush.
- French Toast: The absolute best French toast is made with stale bread. Fresh bread falls apart when soaked in an egg custard; stale bread holds its structure beautifully.
- Breadcrumbs: Throw the rock-hard chunks into a food processor, pulse until fine, and freeze the crumbs in a non-toxic container for future breading stations.
Conclusion: Respect the Loaf
Great bread is a labor of love. Whether it was baked by a master artisan down the street or by you in a Dutch oven on a Sunday afternoon, it deserves to be treated with respect. Letting it turn into a flavorless brick because of improper storage is an insult to the ingredients and a waste of your hard-earned money.
Remember the golden rules of the crumb: Staling is a chemical crystallization, not just a loss of moisture. Your refrigerator is a high-speed staling machine—keep your bread far away from it. If you are eating it this week, leave it on the counter in a breathable, non-toxic container. If you are saving it for later, pre-slice it and freeze it solid. Ditch the toxic, chemical-leaching plastics that are poisoning your food. And if you do mess up, remember that a quick rinse under the faucet and a blast in a hot oven (being careful that no glass baking dish shattered from sudden temperature changes if you use one to hold the bread) can bring your loaf back from the dead.
You don’t need a culinary degree to master your kitchen. You just need a little bit of science, a few smart habits, and the refusal to ever eat a sad, stale sandwich again. Now go rescue that sourdough.






