
Listen, I love a good Sunday meal prep session just as much as the next weekend culinary warrior. You’ve spent hours meticulously roasting garlic, simmering down a beautiful San Marzano tomato base, and portioning out the perfect weekday lunches to save yourself time and money. You are feeling like an absolute domestic god or goddess. But then, Wednesday rolls around. You pull your leftover penne arrabbiata out of the fridge, pop it into the microwave, and enjoy a fantastic desk lunch.
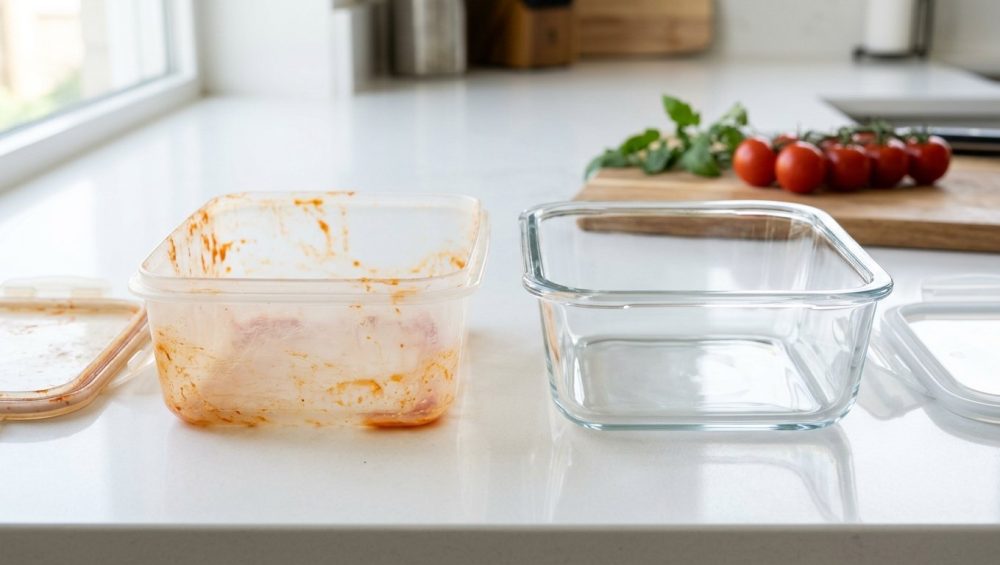
When you go to wash that once-pristine, crystal-clear plastic container, you are met with a horrifying reality. Your favorite meal prep vessel now looks like it just got a cheap, aggressive spray tan. It is permanently, stubbornly, aggressively orange. You scrub it with dish soap. Nothing. You run it through the hottest cycle of your dishwasher. Still orange.
If you are tired of throwing away ruined plastic containers, grab a glass of wine, pull up a stool, and let’s have a brutally honest chat. As someone who has zero patience for pretentious chef-speak but an absolute obsession with culinary science, I am here to tell you that you are not going crazy, and you are not bad at washing dishes. You are simply losing a microscopic chemical warfare battle.
Today, we are going to dive deep into the everyday food science of why this happens, the terrifying toxic reality of heating cheap plastics, and exactly how you can clean your stained containers using actual chemistry. More importantly, I am going to teach you how to stop it from ever happening again, because your time is money, and we do not have time to scrub plastic for twenty minutes on a Tuesday night.
The Chemistry of the Orange Stain (Why It Happens)
To understand how to defeat the enemy, you have to understand how the enemy operates. The orange staining phenomenon is not magic, and it is not a sign of cheap food. It is a highly predictable chemical reaction between the natural pigments in your food and the industrial polymers in your kitchenware.
Meet Lycopene: The Fat-Soluble Culprit
The primary antagonist in our story is a little organic molecule called lycopene. Lycopene is a naturally occurring carotenoid pigment found in high concentrations in tomatoes, red bell peppers, watermelon, and papaya. In nature, lycopene is an evolutionary masterpiece, providing that vibrant red color to signal to animals that the fruit is ripe and ready to be eaten. In your kitchen, however, it is a relentless staining agent.
From a molecular standpoint, lycopene is constructed with 11 conjugated double bonds. This specific chemical structure is what allows it to absorb most visible light while reflecting red and orange wavelengths back to our eyes. But here is the critical part you need to understand: lycopene is incredibly hydrophobic (water-fearing) and lipophilic (fat-loving).
When you make a tomato sauce, you are usually cooking those tomatoes down with olive oil, butter, or the rendered fat from ground beef or sausage. Because lycopene loves fat, it rapidly dissolves into the lipids in your sauce. This is actually a great thing for your body, as cooking tomatoes in fat makes the lycopene highly bioavailable for human digestion. However, it is a terrible thing for your plastic containers, because water—and by extension, water-based dish soap—cannot easily dissolve or wash away a fat-bound molecule.
The Polymer Matrix: Why Plastic Behaves Like a Sponge
Now, let’s look at the victim: your plastic container. Most affordable, lightweight food storage containers are manufactured using polypropylene (PP) or high-density polyethylene (HDPE). To the naked eye, these plastics look perfectly smooth, solid, and impenetrable. But if we put them under a powerful microscope, the reality is vastly different.
Plastics are made of long, repeating chains of hydrocarbon molecules called polymers. On a microscopic level, these polymer chains are not perfectly flush; they have tiny gaps, crevices, and microscopic pores. Furthermore, polypropylene and polyethylene are completely non-polar and hydrophobic—just like lycopene. In the world of chemistry, there is a golden rule: “like dissolves like.”
When you pour a warm, fat-rich, lycopene-loaded tomato sauce into a plastic container, the fat acts as a delivery vehicle. The lycopene molecules are naturally drawn to the similarly structured hydrocarbon chains of the plastic. They slip right into those microscopic pores, binding themselves to the plastic via hydrophobic entrapment and weak van der Waals forces. It is not a true covalent chemical bond, which is why the stain isn’t technically “permanent” in a structural sense, but the physical entrapment is so deep that a standard kitchen sponge simply cannot reach it.
The Microwave Catalyst: A Recipe for Permanent Damage
If simply storing cold tomato sauce in a plastic container causes a mild orange tint, putting that same container in the microwave is what triggers a full-blown, apocalyptic orange disaster. I firmly believe that anyone can master the art of cooking, but you have to understand the thermal dynamics of your tools.
Thermal Relaxation and Expanding Pores
Microwaves do not heat food evenly. They work by emitting oscillating electromagnetic fields that agitate polar molecules—primarily water and fat. Because fat molecules can reach temperatures significantly higher than the boiling point of water, the oil in your leftover pasta sauce can easily exceed 212°F (100°C) in a matter of seconds.
When your plastic container is subjected to this intense, localized heat, it undergoes a process called thermal relaxation. The kinetic energy causes the polymer chains in the plastic to literally loosen and expand. Those microscopic pores we talked about earlier? They stretch wide open.
The superheated fat in your food, carrying its dissolved payload of red lycopene, acts like a hot dye bath. It penetrates deep into the expanded polymer matrix of the plastic. When the microwave dings and you pull your food out, the container begins to cool. As the plastic temperature drops, the polymer chains contract, shrinking back to their original state and firmly locking the lycopene deep inside the walls of the container. You have essentially just tie-dyed your Tupperware from the inside out.
The Microplastic Nightmare
I have a strict “no-go” rule on toxic kitchen gear. I refuse to let you poison yourself just to save a few dollars on storage containers. While the orange stain is visually annoying, what is happening on a microscopic level when you microwave plastic is genuinely terrifying.
When you heat plastic, it doesn’t just absorb your food; it actively sheds its own chemical components into your meal. A groundbreaking July 2023 study published in Environmental Science & Technology by researchers at the University of Nebraska-Lincoln tested FDA-approved, “microwave-safe” plastic baby food containers. The results were staggering. They found that microwaving these containers for just three minutes released up to 4.22 million microplastics and 2.11 billion nanoplastics per square centimeter of plastic area directly into the food.
Let that sink in. Billions of invisible plastic particles are leaching into your dinner every single time you hit that +30 seconds button.
Furthermore, the researchers conducted an in vitro toxicity study to see what these particles do to the human body. They exposed human embryonic kidney cells to the extracted microplastics and nanoplastics at a concentration of 1000 μg/mL. After 48 to 72 hours of exposure, a shocking 76.70% to 77.18% of the human kidney cells died.
A separate 2025 systemic analysis confirmed that heating food in plastic packaging dramatically increases the levels of microplastics and endocrine-disrupting chemicals that leach into our diets. So, the next time you are worried about your container turning orange, remember that the stain is actually the least of your problems. It is time to banish toxic kitchen gear from your life entirely.
Stop the Staining Before It Starts: Preventative Kitchen Habits
If you are still using plastic containers for cold storage (which is perfectly fine, as long as you aren’t heating them), there are several clever, time-saving cooking hacks you can use to prevent lycopene from ruining your gear. You do not need a culinary degree to understand basic thermodynamics and barrier methods.
The Cool-Down Rule
The absolute golden rule of meal prep is to never, ever put piping hot food directly into a plastic container. Remember thermal relaxation? If you pour a boiling hot bolognese sauce straight from the stove into a room-temperature polypropylene tub, the heat of the food will immediately cause the plastic’s pores to expand, drawing the lycopene in before the food even hits the fridge.
Instead, practice proper thermal management. Let your food cool down in the pan or a glass mixing bowl until it reaches room temperature. Not only does this prevent the plastic from expanding and absorbing stains, but it also prevents condensation from building up inside the sealed container, which can lead to bacterial growth and soggy leftovers. If you want to master simple weeknight dinners, learning how to properly cool and store your food is step one.
The Strategic Fat Barrier
Another highly effective preventative measure is creating a physical barrier between the plastic and the lycopene. Since we know that lycopene is fat-soluble and binds to the hydrophobic plastic, we can pre-emptively saturate the plastic’s surface pores with a clear, neutral fat before adding the tomato sauce.
Take a paper towel and lightly rub a tiny drop of olive oil or neutral avocado oil along the inside walls of your clean plastic container. The clear oil will fill the microscopic voids in the polymer matrix. When you add your tomato sauce, the lycopene has nowhere to grip, as the pores are already occupied by the neutral oil barrier.
Now, a word of warning: do not use commercial aerosol cooking sprays for this. Just as I constantly warn you against the dangers of ruining your nonstick skillets, aerosol sprays contain emulsifiers like soy lecithin and chemical propellants that can degrade plastics over time and leave a sticky, impossible-to-remove residue. Stick to a tiny dab of pure, high-quality cooking oil.
Science-Backed Hacks to Remove Existing Tomato Stains
Alright, let’s say the damage is already done. Your partner or your kids microwaved the leftover chili, and now your expensive set of BPA-free plastic containers looks hideous. Do not throw them away just yet. We can use chemistry to reverse the damage, provided you use the right methods.
First, let’s establish what not to do. Do not soak your plastic in pure bleach (sodium hypochlorite). Yes, bleach will turn the stain white, but it also causes oxidative chain scission in polypropylene. A certified lab test showed that using bleach on PP plastics reduces their tensile strength by up to 37% after just three uses, causing microcracking and accelerating UV-induced yellowing. It essentially destroys the structural integrity of the container.
Instead, use these scientifically verified methods.
The Hydrogen Peroxide Soak
The most effective, equipment-safe method for removing deep lycopene stains is a targeted oxidation reaction using hydrogen peroxide. Hydrogen peroxide is a fantastic oxidizing agent that can penetrate the plastic matrix and chemically degrade the conjugated double-bond structure of the lycopene molecule without destroying the polymer chains of the plastic itself.
Here is exactly how to do it:
- Wash the container normally with dish soap to remove any surface grease.
- Fill the stained container with a solution of warm water (around 104°F/40°C) and 3% hydrogen peroxide. You want a ratio of about 2 parts water to 1 part hydrogen peroxide.
- Let it soak for 12 to 15 minutes.
- Dump the solution and gently scrub the interior with a soft cellulose sponge.
- Rinse thoroughly.
This method has been shown to restore over 98% of stain removal in FDA-compliant swab assays because it actively breaks down the pigment’s chemical structure rather than just trying to scrub it away.
The Baking Soda and Vinegar Pulse
If you don’t have hydrogen peroxide on hand, you can leverage a rapid acid-base reaction to lift the stain out of the pores. Vinegar (acetic acid) alone will not work because it lacks the oxidative capacity to break down lycopene. Baking soda alone fails because it is merely a mild abrasive that scratches the surface without reaching the embedded pigment. But together, with a tiny burst of heat, they perform miracles.
This method works by utilizing the effervescence of the acid-base reaction to physically lift the residue away from the plastic matrix.
- Fill the stained container halfway with standard white vinegar.
- Add exactly 1 tablespoon of baking soda. It will immediately begin to fizz.
- Place the container in the microwave on high for a maximum of 60 seconds.
- Carefully remove it and let it sit for 2 minutes without stirring.
The brief microwave pulse raises the internal temperature just enough to slightly expand the plastic pores (without hitting the deformation threshold of 105°C where the plastic begins to warp). The rapid bubbling action of the carbon dioxide gas created by the vinegar and baking soda physically lifts the lycopene out of the newly opened pores. Pour the mixture down the drain, rinse with warm water, and wipe it dry.
This is incredibly useful if you want to perfectly microwave weeknight vegetables in a container that doesn’t smell like last month’s vindaloo.
Photodissociation (Letting the Sun Do the Work)
If you prefer a completely hands-off approach and have a bit of patience, you can use the raw power of the sun. Ultraviolet (UV) light is incredibly destructive to organic pigments.
Simply wash the container, rub a thin layer of lemon juice over the stained areas (the citric acid helps chelate iron-based pigment compounds), and set the container outside in direct, bright sunlight for 24 to 48 hours. The high-energy UV photons from the sun will trigger a process called photodissociation (or photooxidation). The UV light literally breaks the chemical bonds of the lycopene chromophore, altering its structure so that it no longer absorbs visible light.
The stain doesn’t actually “wash” away; it is chemically bleached into a colorless state by the sun. It is a brilliant, zero-effort hack for the busy home cook.
Debunking the TikTok Sugar and Ice Shake
If you spend any time on social media, you have undoubtedly seen the viral TikTok hack where someone puts dish soap, warm water, a handful of ice cubes, and a torn-up paper towel into a stained container, seals the lid, and shakes it vigorously for thirty seconds.
Does it work? Yes and no. This method is fantastic for removing surface-level grease. The ice cubes act as a mechanical agitator (like the agitator in a washing machine), smashing the paper towel against the walls of the container to physically wipe away the fat, while the dish soap traps the lipids.
However, this method only works for surface stains. If you have already microwaved the container and the lycopene has fully bonded with the polymer matrix via thermal relaxation, shaking ice cubes at it will do absolutely nothing. It is the exact same concept as sticking to stainless skillets; once a polymer bond is formed at a high temperature, mechanical scrubbing is practically useless. You must rely on chemistry (oxidation or UV light) to break the bond.
The Brutal Truth: It’s Time to Upgrade Your Food Storage
We have covered the science, the prevention, and the cleaning hacks. But as your sassy culinary cheerleader, I have to give you some tough love. If you are constantly battling orange stains, melting lids, and warped containers, you are playing a losing game.
The global food container market is currently undergoing a massive shift. In 2025, the market size reached a staggering $184.10 billion, and while cheap plastic still holds a large share, consumer trends are rapidly pivoting. People are waking up to the health hazards of microplastics and the sheer frustration of disposable-quality kitchenware. Approximately 34% of newly launched containers in 2024 were manufactured using recycled or biodegradable materials, and the demand for premium, non-toxic alternatives is skyrocketing.
It is time to elevate your kitchen game. You do not need to spend a fortune, but you do need to invest in materials that respect the food you spent your precious time cooking.
Borosilicate Glass: The Gold Standard
If you want to completely eliminate staining, chemical leaching, and flavor retention, you need to upgrade to glass. But not just any glass—you need borosilicate glass.
Unlike plastic, glass is an amorphous solid. It is completely non-porous. There are no microscopic voids for lycopene to hide in, meaning you can store the most vibrant, acidic metallic tasting pasta sauce in a glass container for a month, and it will wash perfectly clean with a quick swipe of a sponge.
Furthermore, borosilicate glass is engineered to withstand extreme thermal shock. Standard tempered glass (which many cheaper brands use) can shatter if you take it from a cold fridge directly to a hot microwave. Borosilicate glass contains boron trioxide, which gives it an incredibly low coefficient of thermal expansion. This means it barely expands or contracts when exposed to rapid temperature changes, preventing exploding glass dishes and keeping your kitchen safe.
Yes, glass is heavier than plastic, and yes, it costs a little more upfront. But a high-quality set of borosilicate glass containers will literally last you a lifetime if you don’t drop them on a tile floor. They are microwave safe, oven safe, dishwasher safe, and 100% microplastic-free.
The Rise of High-Grade Silicone
If the weight and fragility of glass are dealbreakers for you—perhaps you commute on the subway or need lightweight containers for your kids’ lunchboxes—your best alternative is platinum-grade food silicone.
Silicone is a synthetic polymer made from silica (sand), oxygen, carbon, and hydrogen. It is highly flexible, incredibly durable, and boasts a much higher heat tolerance than polypropylene plastics. High-grade silicone does not contain BPA, BPS, phthalates, or other endocrine disruptors, and it does not break down into microplastics when heated in the microwave.
Silicone can occasionally hold onto strong odors if washed with heavily fragranced dish soaps—if you’ve ever dealt with soapy tasting silicone tools, you know exactly what I mean—but it is vastly superior to cheap plastic when it comes to resisting deep lycopene stains. Many premium food storage brands are now utilizing silicone-sealed lids on glass containers, which improves airtight performance by 31% compared to traditional plastic snap lids.
Market Trends: Why Everyone is Ditching Cheap Plastic
The writing is on the wall for cheap plastic food storage. The industry is projected to expand to $275.2 billion by 2035, and the fastest-growing segment within that massive market is glass. Consumers are demanding better.
In North America alone, the consumption of food storage units expanded from 520 million in 2018 to 790 million in 2025. With the rise of the meal-prep movement and the increasing awareness of food safety, households are realizing that buying a $10 pack of flimsy plastic containers every three months is a terrible economic and environmental strategy.
By investing in stackable, eco-friendly, durable glass or stainless steel containers, you are not just making your fridge look like a perfectly organized Pinterest board. You are protecting your food from chemical degradation, safeguarding your family from microplastics, and saving yourself the endless frustration of scrubbing orange stains on a weeknight.
The Final Word
Cooking beautiful food at home should be a joyful, rewarding experience. You shouldn’t want to cry while chopping onions because your knife is dull, and you certainly shouldn’t dread doing the dishes because your containers are chemically bonded to your dinner.
Understanding the science behind your kitchen tools is the ultimate shortcut to becoming a better cook. Now that you know the fat-soluble nature of lycopene, the thermal expansion of polymers, and the terrifying reality of microwaved microplastics, you hold the power.
Treat your plastic containers with respect—keep them out of the microwave, let your food cool before storing, and use peroxide or UV light when accidents happen. But ultimately, do yourself a massive favor and start transitioning your kitchen to glass. Your pasta sauce, your sanity, and your cellular health will thank you. Now get out of here, go portion out that beautiful meal prep, and pour yourself that glass of wine. You’ve earned it.






