
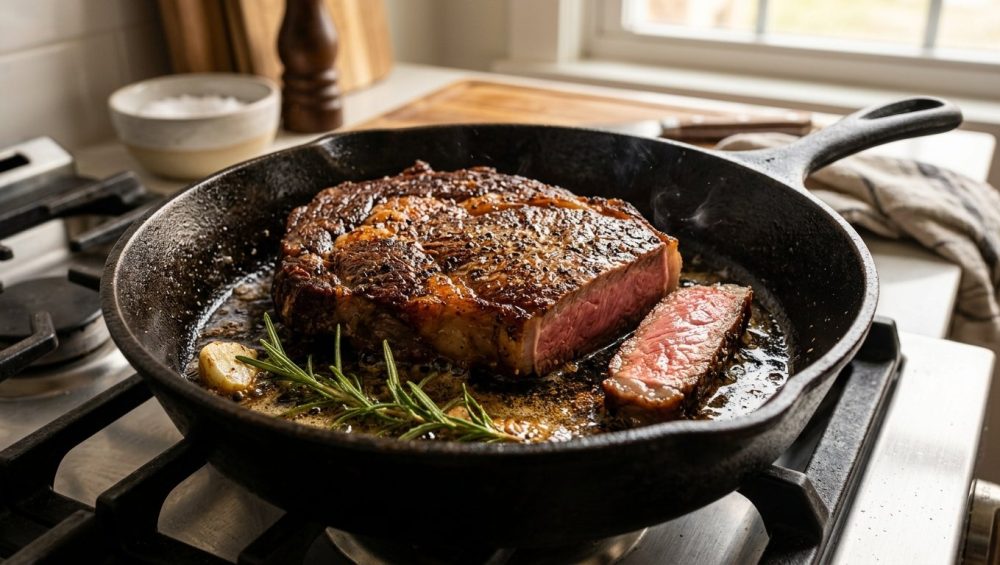
Listen up, weekend warriors. We need to have a serious talk about what is happening in your kitchen on Friday nights. You just went to the butcher, dropped thirty dollars on a beautifully marbled, thick-cut, dry-aged ribeye, and brought it home with dreams of a steakhouse-quality dinner. You heated up your pan, you seasoned the meat, and you dropped it in.
But instead of being greeted by the aggressive, glorious, room-filling sizzle of a professional kitchen, you heard a sad, bubbling hiss. The meat immediately turned the color of a cloudy winter sky. Liquid pooled around the edges. You watched in horror as your expensive cut of beef boiled, steamed, and curled into a rubbery, gray puck.
You probably blamed your stove for not being hot enough. You might have blamed the pan. You might have even blamed the butcher. But I am here to serve you a healthy portion of tough love: it is entirely your fault. More specifically, it is your complete disregard for the laws of physics.
As a home cook, you absolutely do not need a culinary degree to make mind-blowing, restaurant-quality food. What you do need, however, is a basic understanding of the science happening inside your cookware. Today, we are going to fix your steak forever. We are going to dive deep into the thermodynamics of cooking, the chemical reactions of flavor, and why surface moisture is the ultimate enemy of a good meal.
The Tragedy of the Gray Steak
Every home cook knows the visual difference between a perfectly executed steak and a steamed disappointment. The difference is obvious from across the room. One possesses a deep, mahogany, shattered-glass crust that releases cleanly from the pan and fills the entire house with the intoxicating aroma of roasted meat. The other is soft, pale, wet, and tastes like regret.
The culinary world has a lot of pretentious jargon, but the mechanics behind a good crust are actually incredibly straightforward. The issue is that most amateur cooks treat searing as a game of chance rather than a scientific process. You cannot simply throw a wet piece of protein into a hot pan and expect a miracle. Physics does not care about your cravings. If you do not set up the correct environmental conditions in your skillet, the chemical reactions required for browning simply will not trigger.
The Science of the Sear: Meet the Maillard Reaction
When chefs talk about getting a “good sear” on a piece of meat, they are not just talking about making the food hot. They are talking about a very specific, highly complex chemical process known as the Maillard reaction.
Named after the French chemist Louis-Camille Maillard, who first documented the phenomenon in 1912 while attempting to reproduce biological protein synthesis, this is a form of non-enzymatic browning. In the simplest terms, the Maillard reaction occurs when the reactive carbonyl group of a reducing sugar reacts with the nucleophilic amino group of an amino acid under high heat.
This initial collision forms an unstable intermediate structure, which then undergoes a massive cascade of subsequent changes. The result is the production of hundreds of brand-new, highly complex flavor and aroma compounds called melanoidins. These compounds are the sole reason why a browned steak tastes rich, savory, and complex, while a raw or boiled steak tastes metallic and bland. The Maillard reaction is the exact same chemistry that gives us the crust on a loaf of artisanal bread, the dark color of roasted coffee beans, and the golden exterior of a toasted marshmallow.
Here is the catch, and it is the most important rule of this entire masterclass: The Maillard reaction is heavily temperature-dependent. It does not even begin to occur at a noticeable rate until the surface temperature of your food reaches approximately 280°F to 330°F (140°C to 165°C).
If the surface of your meat never hits that temperature threshold, the Maillard reaction will not happen. You will not get a crust. You will not get those hundreds of complex flavor compounds. You will just end up with hot, wet protein.
The Physics of Failure: Why Wet Meat Steams
So, if your stove is cranked to high, and your pan is preheated to 500°F, why wouldn’t the surface of your steak reach the 300°F required for the Maillard reaction?
Enter the greatest enemy of the home cook: the latent heat of vaporization.
To understand why your steak is turning gray, you have to understand how water behaves when it is heated. Under normal atmospheric pressure, liquid water cannot exceed 212°F (100°C). When water reaches its boiling point, it undergoes a phase change, turning from a liquid into a gas (steam).
However, this phase change does not happen for free. It requires an absolutely massive amount of thermal energy. In physics, the specific heat capacity of water is 4.18 Joules per gram to raise its temperature by a single degree Celsius. But to actually convert that boiling water into steam, it requires a staggering 2,260 Joules per gram. This is known as the latent heat of vaporization.
The Energy Thief in Your Skillet
Let’s translate that math into your frying pan. When you take a steak out of its vacuum-sealed packaging, it is covered in surface moisture. If you drop that wet steak directly into a hot skillet, the thermal energy of the pan is immediately hijacked.
Instead of that heat energy transferring into the meat to trigger the Maillard reaction, the energy is entirely consumed by the water. The pan is forced to spend all of its BTUs fighting to evaporate the surface moisture. And because water cannot exceed 212°F, the surface temperature of your steak is essentially locked at 212°F until every single drop of that water has boiled away.
Remember our golden rule? The Maillard reaction requires at least 280°F to 330°F. While your pan is desperately trying to boil off the surface water, your meat is literally steaming in its own juices. By the time the water finally evaporates and the surface temperature is allowed to climb high enough to begin browning, five or ten minutes have passed. The heat has already penetrated to the center of the steak, completely overcooking the interior. You have successfully boiled the outside and ruined the inside.
The Paper Towel Mandate: Your First Line of Defense
This brings us to the most crucial, non-negotiable step of cooking any piece of meat. Before your protein gets anywhere near a heat source, you must physically remove the moisture from its surface.
You do not need fancy gadgets for this. At the absolute minimum, if you want a crust that shatters under your knife, you must utilize the magic of a paper towel to blot away every last drop of surface moisture.
Do not just lightly dab the meat. You need to be aggressive. Press the paper towels firmly into the top, the bottom, and the sides of the steak. If the paper towel gets saturated, throw it away and grab a fresh one. Keep blotting until the surface of the meat feels completely dry and slightly tacky to the touch. By manually removing that water, you are saving your pan from having to waste its thermal energy boiling it off. The moment that dry meat hits the hot oil, the surface temperature will immediately shoot past 300°F, bypassing the steam phase entirely and instantly triggering the Maillard reaction.
Leveling Up: The Magic of the Dry Brine
If paper towels are the amateur’s quick fix for a gray steak, dry brining is the culinary professional’s ultimate secret weapon. If you have the time—even just a few hours—dry brining will fundamentally transform the texture, flavor, and searing potential of your food.
Dry brining is incredibly simple: you generously salt the exterior of the meat and leave it uncovered in the refrigerator on a wire rack. No water, no messy bags of liquid, just salt, cold air, and time.
The Osmosis and Diffusion Dance
When you first apply kosher salt to the surface of a raw steak, a biological process called osmosis begins. Because the concentration of salt (the solute) is much higher on the outside of the meat than on the inside, water is drawn out from the muscle cells through the semi-permeable cell membranes. If you look at a salted steak after ten minutes, you will see beads of liquid pooling on the surface.
Many rookie cooks panic at this stage, assuming the salt is drying out their expensive steak. But you just have to be patient.
As that liquid pools on the surface, the salt dissolves into it, creating a highly concentrated liquid brine. Over the next hour, a second process called diffusion takes over. The salty brine is slowly reabsorbed deep into the muscle tissue, moving from an area of high concentration to an area of low concentration.
As this salt penetrates the meat, it begins to denature the protein strands—specifically myosin. It loosens the tightly wound muscle fibers, which actually allows the meat to retain more of its natural moisture during the cooking process. A dry-brined steak will be significantly juicier and more tender than an un-brined steak.
The Formation of the Pellicle
While the salt is working its magic on the interior, the environment of your refrigerator is working on the exterior. Refrigerators are essentially giant dehumidifiers; they constantly circulate cold, incredibly dry air.
By leaving the steak uncovered on a wire rack for 12 to 24 hours, that dry air acts like a wind tunnel, evaporating the surface moisture of the meat entirely. The exterior of the steak will darken and form a dry, tacky, slightly leathery skin known as a pellicle.
The pellicle is the holy grail of searing. Because it contains absolutely zero surface water, the latent heat of vaporization is completely eliminated from the equation. When a pellicle-coated steak hits a hot pan, the Maillard browning is instantaneous, violent, and perfect.
Pan Selection: Ditch the Toxic Non-Stick
Now that your meat is perfectly dry, we have to talk about your equipment. I have zero patience for cheap, peeling cookware. If you are serious about leveling up your weekend dinners and protecting your health, banishing toxic kitchen gear should be your very first priority.
You absolutely cannot sear a steak in a traditional non-stick pan. Standard non-stick cookware is coated with polytetrafluoroethylene (PTFE), commonly known by the brand name Teflon. While PTFE is biologically inert and generally safe at low cooking temperatures (like scrambling eggs), it becomes highly dangerous at the temperatures required for a proper sear.
To trigger a rapid Maillard reaction, your pan needs to be preheated to well over 450°F. When PTFE is heated above 500°F (260°C), its chemical bonds begin to break down and decompose. This thermal degradation releases invisible, toxic pyrolysis fumes into the air.
Inhaling these fumes causes a condition known as polymer fume fever, informally called “Teflon flu.” Symptoms include severe chills, headaches, chest tightness, and a high fever that typically sets in a few hours after exposure. Furthermore, these fumes are notoriously lethal to pet birds, whose highly efficient respiratory systems cannot filter out the toxins. Searing in a non-stick pan will not only ruin your steak by failing to hold enough heat, but it will also destroy the pan’s coating and potentially poison your household. Throw them away.
The Heavyweight Champions of the Kitchen
For a flawless, restaurant-quality crust, you need cookware with massive thermal capacity. You need a pan that holds onto its heat so stubbornly that when a large, cold piece of meat is dropped into it, the temperature of the metal barely drops.
Cast iron is the traditional favorite for this exact reason. It is thick, heavy, and absorbs heat like a battery. Once a cast iron skillet gets screaming hot, it stays screaming hot, delivering a continuous, punishing sear to the surface of the meat.
If you find cast iron too heavy or cumbersome, look to the restaurant industry standard. Many professional kitchens rely exclusively on carbon steel pans because they offer the perfect balance of heat retention, lighter maneuverability, and a naturally built, polymerized non-stick seasoning.
Heavy-clad stainless steel is another phenomenal option, especially if you plan to deglaze the pan to make a rich fond-based sauce afterward. If you are intimidated by stainless steel, you can easily prevent your food from cementing to the metal by mastering the water drop test before adding your cooking fat. Simply heat the dry pan until a flicked drop of water beads up and dances across the surface like a mercury marble (the Leidenfrost effect). Once you see that, your pan is perfectly heated and ready for oil.
The Fat Factor: Choosing the Right Oil
You cannot sear a steak in a dry pan. Even if the meat is perfectly dried and the pan is perfectly heated, the surface of the meat and the surface of the metal are both microscopically jagged. If you place dry meat on dry metal, they will only make contact at the highest microscopic peaks, resulting in an uneven, patchy sear.
You need a heat transfer medium—a liquid fat to fill in those microscopic valleys and conduct the thermal energy evenly across the entire surface of the protein.
However, not all fats are created equal. Every cooking oil has a specific “smoke point,” which is the temperature at which the fat begins to break down, oxidize, and burn, releasing acrid, bitter smoke that will ruin the flavor of your food.
Standard butter has a highly fragile smoke point of around 302°F (150°C) because it contains milk solids that burn rapidly. Extra virgin olive oil breaks down around 350°F to 410°F. Neither of these can survive the brutal heat of a proper sear.
You must choose a fat with a high smoke point. Avocado oil is the undisputed king of high-heat cooking, boasting a smoke point of 520°F (271°C). It is neutral in flavor and can take an absolute beating. Beef tallow (rendered beef fat) is another spectacular choice, with a smoke point around 400°F (205°C), and it actively contributes to the rich, beefy flavor profile of the crust. Clarified butter or ghee (which has had the milk solids removed) is also excellent, holding strong up to 450°F.
Whatever you do, avoid using aerosol cooking sprays, as their chemical propellants will bake into a sticky, impossible-to-remove lacquer on your high-quality cookware. Stick to pure, high-quality liquid fats.
Temperature Control: The Searing Sweet Spot
Preheating your pan correctly requires patience. Place your cast iron or carbon steel skillet on medium-high heat and let it sit for at least five full minutes. You want the heat to fully saturate the metal.
Add your high-smoke-point oil. You will know the pan is ready when the oil begins to shimmer violently and you see the very first wisps of white smoke rising from the surface. That is your cue.
Gently lay your perfectly dried, dry-brined steak into the pan, laying it away from you so you do not splash hot oil onto your forearms. Press it down firmly for just a few seconds to ensure maximum contact with the metal.
Managing the Smoke
Let’s address the elephant in the room: searing meat properly is going to generate smoke. When rendered beef fat and oil hit 450°F, it is going to get hazy in your kitchen. Turn on your exhaust hood to its maximum setting and open a window.
To save your stovetop from looking like a greasy crime scene, invest in a heavy-duty stainless steel splatter screen before you drop the meat. It allows the steam to escape (which we know is crucial) while keeping the popping oil contained. Do not let a little smoke scare you away from greatness; it is simply the price of admission for a flawless crust.
The Flip, The Baste, and The Rest
For decades, culinary dogma dictated that you should only ever flip a steak once. This is complete nonsense. Modern food scientists and chefs have exhaustively proven that flipping your steak frequently—every 30 to 60 seconds—actually cooks the interior of the meat much more evenly while building an equally impressive, if not superior, crust. Frequent flipping prevents either side of the meat from absorbing too much heat at once, minimizing the dreaded gray band of overcooked meat just beneath the surface.
Once your crust is deeply browned and beautiful, and your internal temperature is about 15 degrees away from your target doneness, it is time for the baste.
Drop the heat to medium-low. Toss in a generous knob of butter, a few crushed cloves of garlic, and a sprig of fresh thyme or rosemary. When you are prepping your aromatics, scoop up your crushed garlic and herbs with a bench scraper to transfer them effortlessly to the pan.
As the butter melts and foams, tilt the skillet slightly toward you. Use a wide spoon to continuously scoop the foaming, aromatic butter and baste it over the top of the steak. This classic French technique, known as arroser, rapidly transfers heat to the top of the meat while coating the crust in rich, nutty, browned butter flavors.
When your meat thermometer reads about 5 to 10 degrees below your desired final temperature (for example, pull it at 125°F for a perfect 135°F medium-rare), immediately remove the steak from the pan and place it on a clean cutting board.
Do not touch it. Do not slice it. Do not even look at it too closely. You must let it rest.
During the cooking process, the muscle fibers contract and squeeze the internal juices toward the center of the cut. If you slice into the meat immediately, all of that flavorful liquid will spill out onto your cutting board, leaving the steak dry and stringy. By resting the meat for 10 to 15 minutes, you allow the temperature to equalize (carryover cooking) and the muscle fibers to relax, which redistributes the juices evenly throughout the entire steak.
When it is finally time to slice, always use a wooden or soft plastic cutting board, because dragging a sharp edge across glass or stone is exactly how kitchen knives get dull long before their time. Slice against the grain, and marvel at the edge-to-edge pink interior surrounded by a dark, shattering crust.
Beyond Beef: Drying Other Proteins
The mandate to aggressively dry your proteins is not a rule reserved exclusively for premium cuts of beef. Moisture is the universal enemy of browning, regardless of what you are cooking.
This exact same thermodynamic principle applies if you are trying to achieve a perfectly seared fish with crackling, golden-brown skin. If you place a wet salmon fillet skin-side down in a skillet, it will steam, turn gummy, and inevitably stick to the metal, tearing into pieces when you try to flip it.
The same goes for chicken thighs, pork chops, and scallops. Scallops are notorious for holding excess water, especially if they have been treated with sodium tripolyphosphate (always buy “dry” scallops). If you do not thoroughly pat them dry with paper towels before searing, they will release a flood of milky liquid into the pan, boiling themselves into rubbery, flavorless erasers. Dry your meat. Every single time.
The Cleanup: Treat Your Gear Right
Once you have enjoyed your masterpiece, you have to deal with the aftermath. If you used cast iron or carbon steel, do not ruin your hard work by soaking the pan in soapy water for three days.
While the pan is still slightly warm, wipe out the excess fat. To remove those stubborn, caramelized bits without stripping away decades of hard-earned seasoning, simply use a chainmail scrubber under some warm running water. It will effortlessly knock off the stuck-on food without gouging the polymerized oil layer. Dry the pan completely on the stove, wipe it down with a microscopic layer of neutral oil, and it will be ready for your next culinary adventure.
Conclusion: Trust the Process, Respect the Physics
Cooking is not magic. It is just applied physics and chemistry that you get to eat at the end. You do not need to be a Michelin-starred chef to make incredible food at home; you just need to stop fighting the science.
The next time you bring home a beautiful piece of meat, do not disrespect it by tossing it wet into a lukewarm, toxic non-stick pan. Give it the time it deserves. Dry brine it. Let the pellicle form. Heat up a heavy, high-quality skillet, use the right fat, and manage your temperatures. By simply removing water from the equation, you will unlock the Maillard reaction, banish the gray band of disappointment forever, and finally achieve the legendary crust you have been chasing. Now get into the kitchen and start drying your meat.






