Picture this: It is a Tuesday evening. You have managed to survive the soul-crushing commute, you have successfully chopped your vegetables without losing a finger, and your weeknight stir-fry is sizzling beautifully in the pan. You are feeling like a culinary genius. Then, you confidently lift the lid off your saucepan to serve the foundation of your meal, only to be greeted by a solid, gelatinous brick of starch.
Instead of the light, fluffy, distinct grains you were promised, you are staring at a gummy paste that could easily double as industrial spackle.
Listen, I have been there. I have set off the smoke detector more times than I care to admit, and I have certainly served my fair share of gluey rice to polite but visibly disappointed dinner guests. But here is the brutal truth: you do not need a culinary degree, a pretentious chef’s vocabulary, or a three-hundred-dollar imported smart cooker to make perfect rice. You just need to understand a little bit of fundamental kitchen science and be willing to spend exactly sixty seconds at your kitchen sink.
The primary reason your rice is turning into a sticky, unappetizing clump is not because you bought the wrong brand or because your stove is broken. It is because you skipped the most crucial prep step in the entire process. You didn’t wash your grains. If you are serious about fixing the rookie kitchen mistakes that are sabotaging your weeknight dinners, it is time to face the music. We are going to dive deep into the chemistry of starch, the brutal reality of the commercial milling process, and exactly how a simple cold-water rinse will permanently banish gummy rice from your kitchen.
The Anatomy of a Rice Grain: A Crash Course in Starch Chemistry
Before we can fix your gummy rice problem, we have to strip away the pretentious culinary jargon and talk about what rice actually is on a molecular level. I promise to keep the science tight, relevant, and free of fluff.
A grain of white rice is essentially a tiny, densely packed energy storage unit for a plant, made almost entirely of carbohydrates. Specifically, it is packed with starch. But not all starch is created equal. The starch inside a grain of rice is divided into two distinct types of molecules: amylose and amylopectin. Understanding the relationship between these two molecules is the absolute foundation of mastering the art of the home kitchen.
Amylose: The Fluffy Factor
Amylose is a long, straight, linear molecule. Because of its straight physical structure, amylose molecules do not tangle up with one another easily. They pack tightly together, meaning they do not dissolve or break down as quickly when exposed to hot water. Rice varieties that contain a high percentage of amylose—like Basmati or long-grain Carolina rice—tend to cook up incredibly fluffy, with distinct, separate grains that refuse to stick together.
Amylopectin: The Sticky Situation
Amylopectin, on the other hand, is a highly branched, bushy molecule. Picture a microscopic tumbleweed. Because of its sprawling, branched structure, amylopectin molecules easily tangle up with one another and absorb massive amounts of water. When heated, amylopectin breaks down quickly and turns into a sticky, viscous gel. Rice varieties with high levels of amylopectin—like sushi rice (short-grain) or glutinous “sticky” rice—are genetically designed to clump together. In fact, true glutinous rice contains almost zero amylose; it is entirely amylopectin.
When you are cooking a standard long-grain or medium-grain rice for a Tuesday night dinner, you are dealing with a grain that has a balanced ratio of these two starches. The inside of the grain is perfectly fine. The problem, as we are about to discover, lies entirely on the outside.
The Commercial Milling Process and the Dust of Doom
To understand why your rice turns out mushy, we have to look at how that pristine white grain arrived in your pantry in the first place. Rice does not grow looking like that.
When rice is harvested, it is encased in a tough, inedible outer hull. The first step in commercial processing is to remove this hull, which leaves us with brown rice. Brown rice still has its nutrient-dense bran layer and germ attached. To turn brown rice into the shelf-stable white rice we all know and love, it has to go through an aggressive, highly abrasive mechanical process called milling.
The Friction Polishing Problem
In massive commercial milling facilities, the brown rice is sent through heavy machinery equipped with abrasive stones and friction whiteners. These machines violently rub the grains against each other and against the machinery to strip away the bran layer. Some facilities even use a mist-polishing step where water and friction are combined to give the grains a glossy, pearl-like finish.
While this process successfully produces beautiful white rice, it leaves behind a microscopic disaster: starch dust. The intense friction causes the surface of the grains to shatter on a microscopic level, coating every single grain in a fine layer of free-floating starch debris.
When you pour a cup of rice straight from the bag into your cooking pot, you are not just cooking the rice grains. You are also dumping in a massive concentration of this highly refined, pulverized starch dust. And when that dust hits hot water, the chemistry of your dinner is fundamentally altered for the worse.
The Thermodynamics of Gelatinization: Why Your Rice Becomes Glue
Let us look at exactly what happens inside your saucepan when you skip the rinse and aggressively boil unwashed rice. This is the exact chemical reaction that is ruining your meals.
When you mix unwashed rice with cold water, the starch dust just floats there, making the water look milky. But as you apply heat, the thermodynamics of the kitchen take over. As the water temperature approaches 140°F to 150°F (60°C to 65°C), a process called starch gelatinization begins.
The Swelling and Bursting of Starch
At these elevated temperatures, the hydrogen bonds holding the starch molecules together begin to weaken. The pulverized starch dust on the outside of the unwashed grains acts like a microscopic sponge, rapidly absorbing the surrounding hot water. The starch granules swell to many times their original size.
As the temperature continues to climb toward a simmer, these swollen starch granules literally burst open, violently spilling their sticky amylopectin contents directly into your cooking water. You are no longer boiling rice in water; you are now boiling rice in a rapidly thickening carbohydrate gel.
The Cementing Phase
As the rice cooks, the grains absorb the water they need to become tender. But as the liquid level drops and the water evaporates, that thick, viscous starch gel is left behind. It coats the outside of every single grain. As the pot cools slightly when you take it off the heat, this gel undergoes retrogradation, firming up and acting as a literal culinary cement.
This is exactly why your grains refuse to separate. They have been glued together by the surface debris from the milling process. If you want to effortlessly transform your daily meals without buying expensive equipment, you have to eliminate this free starch before the heat is ever applied.
The Masterclass on Rinsing: How to Wash Rice Like a Pro
Now that we understand the enemy—surface starch dust—the solution is beautifully simple: wash it away. But as a busy home cook who values efficiency, you need to do this quickly, effectively, and safely.
Recent food science studies have confirmed that while washing rice does not change the internal structural stickiness of the grain (which is dictated by its genetic amylose-to-amylopectin ratio), it absolutely removes the free starch generated by the milling process. Furthermore, studies have shown that a thorough rinse can wash away up to 40% of microplastics introduced by modern packaging, as well as significantly reduce naturally occurring inorganic arsenic.
The Golden Rule: Always Use Cold Water
You must strictly use cold tap water to rinse your rice. If you use warm or hot water, you will prematurely trigger the starch gelatinization process we just discussed. The warm water will cause the surface starches to swell and become sticky before you can even wash them down the drain, defeating the entire purpose of the exercise.
Choosing the Right Gear: The “No-Go” Rule
This brings me to a crucial point about your kitchen equipment. I have a zero-tolerance policy for cheap, toxic kitchenware. If you are currently rinsing your food in a peeling, degrading plastic colander from a discount store, throw it in the trash immediately. You are actively shedding microplastics into your family’s food. When it comes to banishing toxic kitchen gear, replacing cheap plastic strainers with high-quality, food-grade stainless steel is non-negotiable.
To wash your rice efficiently, you have two professional-grade options:
Method 1: The Japanese Wash Bowl
If you eat rice multiple times a week, investing in a proper Japanese wash bowl is a game-changer. These bowls are specifically engineered for this exact task. They feature a solid bottom for soaking and swirling, with a series of precision-cut drainage slits along the side or the spout.
- Place your measured rice in the bowl.
- Fill it with cold water.
- Form your hand into a claw and vigorously agitate the grains in a circular motion for about 10 seconds. You will immediately see the water turn a cloudy, opaque white. This is the enemy.
- Tilt the bowl to drain the milky water through the side slits, keeping the rice safely inside.
- Repeat this process 3 to 4 times. You do not need the water to run perfectly, crystal clear—that is a myth that wastes time and water. You just want it to be significantly less cloudy than the first rinse.
Method 2: The Mesh Strainer
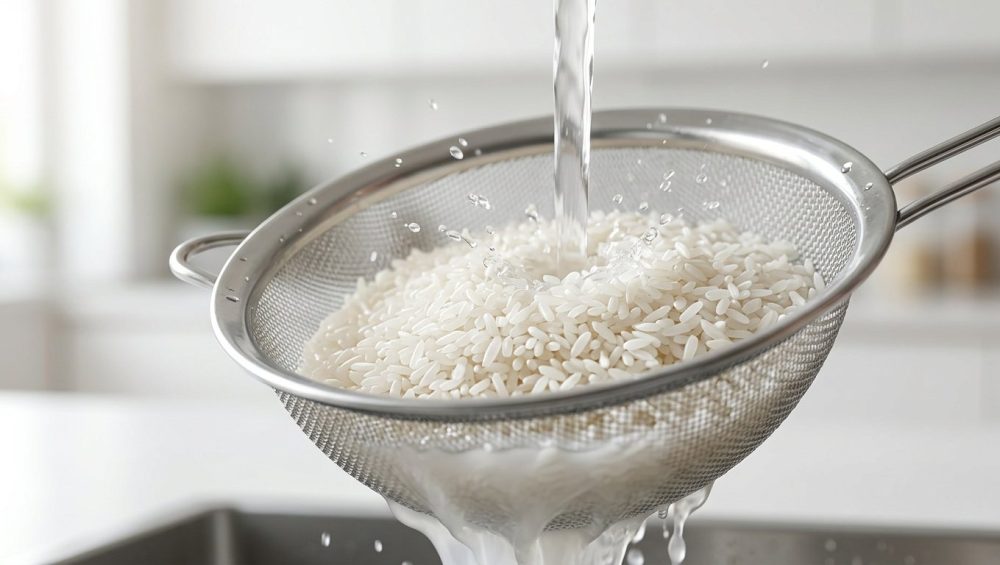
If you do not want a dedicated wash bowl, a high-quality stainless steel micro-perforated strainer is your best friend. Do not use a standard pasta colander; the holes are too large, and you will spend the next ten minutes picking swollen rice grains out of your sink drain.
- Place your rice in the fine mesh strainer.
- Hold it under a steady stream of cold running tap water.
- Use your fingers to constantly shuffle and agitate the rice, ensuring the water hits every grain.
- Continue for about 30 to 45 seconds until the water running out of the bottom of the strainer looks mostly clear.
- Give the strainer a few firm taps against the sink basin to knock out the excess trapped water.
The Sneaky Second Culprit: Perfecting the Water-to-Rice Ratio
Here is where the tragedy usually strikes. A home cook reads an article, learns to wash their rice, executes the rinse perfectly, and still ends up with a pot of mush. Why? Because they failed to account for the water absorption during the washing phase.
When you wash rice, the grains act like tiny sponges. Even a quick 45-second rinse will cause the rice to absorb water, increasing its weight and moisture content by roughly 10% to 15%. Furthermore, water gets trapped between the grains and in the mesh of your strainer.
If you take freshly washed, water-logged rice and cook it using the standard package directions (which almost always blindly recommend a 1:2 ratio of one cup of rice to two cups of water), you are going to drown your grains. The rice will over-hydrate, the internal structure will rupture, and the internal starches will bleed out into the pot.
To truly harness the magic of a quick rinse, you must aggressively adjust your cooking liquid.
The Adjusted Golden Ratios for Washed Rice
Throw the instructions on the back of the bag in the trash. When cooking on a standard stovetop with a tight-fitting lid (the absorption method), use these adjusted ratios for washed rice:
- Jasmine Rice: Jasmine is a naturally softer long-grain rice that requires significantly less water than people realize. For one cup of washed Jasmine rice, use exactly 1 to 1.25 cups of water.
- Basmati Rice: Basmati is a firmer, longer grain that expands beautifully. For one cup of washed Basmati rice, use 1.5 cups of water.
- Standard Medium-Grain White Rice: For your standard supermarket white rice, use 1.25 cups of water for every one cup of washed rice.
Note: If you are using a dedicated electric rice cooker, simply fill the water to the corresponding etched line inside the pot after you have added the washed rice. The engineers who designed the machine have already accounted for the water ratio for you.
The Exceptions to the Rule: When NOT to Rinse Your Rice
As with everything in the culinary world, context is king. I advocate fiercely for the home cook, which means I need you to know the rules, but I also need you to know exactly when to break them. There are specific, deliberate scenarios where you actually want that surface starch to create a gel.
If you apply the rinsing rule to these specific dishes, you will ruin them.
Risotto (Arborio and Carnaroli Rice)
When you are making a classic Italian risotto, the entire goal of the dish is to create a rich, velvety, creamy sauce bound together by starch. You achieve this by slowly ladling hot broth into unwashed Arborio or Carnaroli rice and stirring constantly. The mechanical action of your spoon rubs the unwashed grains together, shearing off the surface starch directly into the broth to form an emulsion. If you wash risotto rice, you are washing away your sauce.
Paella (Bomba Rice)
Authentic Spanish paella relies on a short-grain rice like Bomba. You want the natural starches to interact with the rich cooking broth and the olive oil to help form the socarrat—that highly prized, deeply caramelized, crispy crust of rice at the bottom of the pan. Rinsing your grains before making paella will interfere with the texture and the crust formation.
Rice Pudding
Whether you are making a baked rice pudding or a stovetop version, the dish relies on the rice’s free starch to thicken the milk and cream into a custard-like consistency. Unwashed medium-grain or short-grain rice is essential here.
(A quick note on Sushi Rice: You absolutely MUST wash sushi rice. It is a short-grain rice with a very high amylopectin content, meaning it is naturally very sticky. If you do not wash off the milling dust, it will turn into an inedible paste rather than the beautifully seasoned, cohesive-but-distinct grains required for nigiri and maki).
Troubleshooting: Can You Salvage a Gummy Batch?
Let us say you are reading this article a little too late. You were rushing, you skipped the cold-water rinse, you used a 1:2 water ratio, and now you have a saucepan full of starchy glue. You are staring at it, contemplating throwing the entire pot out the window.
Can you fix it? Can you magically un-gelatinize the starch and separate the grains?
No. You cannot reverse the laws of thermodynamics. Once a starch granule has burst and formed a gel network, it is permanent. Adding oil will just make it greasy mush. Adding more water will just make it soup. But as a resourceful home cook, you do not throw away perfectly safe food. You pivot.
The Fried Rice Rescue
If your rice is slightly gummy but still holds some shape, the refrigerator is your best friend. Spread the hot, gummy rice out onto a wide, bare aluminum baking sheet in a thin, even layer. Place it in the fridge uncovered overnight. The cold, dry air of the refrigerator will pull the excess moisture out of the starch gel, causing the amylose molecules to undergo severe retrogradation (they crystallize and harden). By the next afternoon, that gummy mess will be a tray of hard, dry grains.
This dry, day-old texture is the absolute mandatory requirement for a wok toss. If your fried rice is always mushy, it is because you are using fresh, warm rice instead of cold, retrograded rice. You have just accidentally prepped tomorrow’s dinner.
The Congee Pivot
If your rice is a completely lost cause—a literal paste that you can stand a spoon upright in—you are going to make congee (rice porridge). Transfer the gummy mass to a larger pot. Pour in several cups of high-quality chicken or vegetable broth. Add a smashed knob of fresh ginger, a splash of soy sauce, and a drizzle of toasted sesame oil. Bring it to a simmer and vigorously whisk it until the gummy rice breaks down entirely into the broth. Let it cook for another twenty minutes until it becomes a thick, savory, comforting porridge. Top it with a soft-boiled egg, some sliced scallions, and chili crisp. You have just turned a kitchen disaster into a gourmet comfort meal, and nobody has to know you messed up.
The Final Word
Cooking professional-quality food in a standard home kitchen does not require magic, and it certainly does not require putting up with the pretentious gatekeeping of the culinary elite. It requires a basic understanding of how your ingredients react to heat, water, and friction.
Your rice is gummy because commercial milling machinery beat it up, covered it in starch dust, and you boiled that dust into glue. By simply taking sixty seconds to run cold water over your grains in a high-quality strainer, and adjusting your water ratios to account for the hydration, you are taking complete control over the chemistry of your dinner.
Stop settling for mediocre, sticky clumps. Wash your rice, respect the ratios, and enjoy the flawless, fluffy grains you actually deserve.