
The Tragedy of the Exploding Taco
Picture this entirely preventable disaster. You have just spent the last hour meticulously crafting the perfect weeknight dinner. Your carnitas are beautifully caramelized with crispy edges, your homemade salsa verde is zippy and bright, and your guacamole is flawlessly seasoned with just the right amount of lime and salt. You reach into a plastic bag, pull out a store-bought corn tortilla, pile it high with your culinary triumphs, and confidently go in for that first glorious bite.
And then, tragedy strikes.
The tortilla shatters in your hands like a piece of cheap glass. A jagged fault line rips straight down the middle of your taco, dumping a cascade of hot meat, salsa, and guacamole directly onto your plate—and inevitably, right into your lap. You are left holding two sad, dry half-moons of corn while your dinner looks like a crime scene. There is nothing that ruins a relaxed taco night faster than a structural failure on your plate.
If you have ever found yourself cursing the grocery store gods because your tortillas refuse to fold, bend, or behave, take a deep breath. It is not your fault, and you certainly do not need a culinary degree to fix it. As a home cook, you have likely been told that store-bought tortillas are just inherently terrible and that you must make them from scratch every single time if you want them to be pliable. That is pretentious, gatekeeping nonsense. While homemade masa is a beautiful thing, nobody has the time to press fresh tortillas on a random Tuesday night after working a nine-to-five.
You can absolutely achieve professional-level, restaurant-quality pliability with a standard package of grocery store tortillas. You do not need magic; you just need to understand a little bit of basic food science. We are going to dive deep into the molecular structure of your flatbreads, explain exactly why they dry out on the shelf, and teach you the foolproof heat-and-moisture methods required to bring them back to life. Grab your apron, pour yourself a glass of wine, and let’s banish the broken burrito from your kitchen forever.
The Cold, Hard Science: Why Your Store-Bought Tortillas Hate You
To understand how to fix a broken tortilla, you have to understand why it breaks in the first place. Food is just edible chemistry, and if you want to without ordering takeout every time a recipe gets frustrating, you need to learn what is happening on a molecular level. The enemy of your taco night has a name, and it is called starch retrogradation.
The Culprit: Starch Retrogradation Explained
Whether you are dealing with corn or wheat, tortillas are fundamentally built on a network of starches. Starch is composed of two main types of molecules: amylose (which is a straight, linear chain of glucose) and amylopectin (which is a highly branched, bushy chain of glucose).
When a tortilla is first cooked at the factory or in a tortilleria, the heat and moisture cause these starch granules to swell up, absorb water, and eventually burst. This process is called starch gelatinization. The amylose molecules leach out and form a flexible, hydrated gel network that traps the water inside. This is why a tortilla fresh off a hot comal is incredibly soft, stretchy, and pliable. It is essentially a warm, hydrated sponge of carbohydrates.
However, the moment that tortilla leaves the heat and begins to cool down on the factory conveyor belt, a sinister process begins. The expanded starch molecules do not want to stay in their relaxed, gelatinized state. As the temperature drops, the amylose and amylopectin chains begin to realign and re-associate with one another. They form tight hydrogen bonds, crystallizing and returning to a rigid structure. This reversal is known as starch retrogradation. As these molecules tightly bind together, they physically squeeze the trapped water out of the gel network—a process scientifically referred to as syneresis.
By the time that package of tortillas makes it onto a delivery truck, sits in the grocery store aisle, and eventually lands in your pantry, the starch has fully retrograded. The structure is locked, rigid, and brittle. When you try to fold it, the crystallized starch matrix simply snaps.
Moisture Loss and the Grocery Store Shelf Purgatory
You might be thinking, “But wait, my tortillas don’t feel dry in the bag. They feel slightly damp!” You are not wrong, but you are being deceived by the illusion of moisture migration.
When a fresh commercial corn tortilla is made, its moisture content is typically somewhere between 35% and 50%. That is a massive amount of water. But remember the syneresis we just talked about? As the starch retrogrades and crystallizes, it expels that water from the internal cellular matrix. The water does not magically disappear; it just migrates. It moves from the inside of the starch network to the surface of the tortilla, and eventually evaporates into the ambient air trapped inside the plastic packaging.
This is why you will often see condensation inside a bag of store-bought tortillas. The water is technically still in the bag, but it is no longer actively hydrating the starches. You’ve already diced your onions perfectly using your trusty bench scraper to scoop them up, but if you try to wrap them in a tortilla straight out of the bag, it will fail. The tortilla might feel soft to the touch because the surface is damp, but the internal core is a crystallized brick. To make the tortilla pliable again, you cannot just rely on the ambient moisture in the bag. You have to force that water back inside the starch molecules, and you can only do that by breaking those crystalline bonds with heat.
The Difference Between Corn and Flour Flatbreads at a Molecular Level
While both corn and flour tortillas suffer from starch retrogradation, they behave very differently due to their distinct chemical makeups.
Corn tortillas are a marvel of ancient food science. They rely entirely on a process called nixtamalization. Field corn is dried, then soaked and cooked in an alkaline solution (usually limewater, or calcium hydroxide). This highly alkaline bath breaks down the tough hemicellulose in the corn’s hull, frees up bound nutrients like niacin, and alters the protein structure so the corn can be ground into a cohesive dough called masa. Because corn contains absolutely zero gluten, a corn tortilla relies 100% on its gelatinized starch matrix to hold itself together. When that starch retrogrades, there is no backup structural support. It becomes incredibly brittle and will shatter instantly if folded cold.
Flour tortillas, on the other hand, are made from wheat. Wheat contains gluten—a complex network of elastic proteins that gives bread its chew and stretch. Furthermore, commercial flour tortillas are usually made with a significant amount of fat (like lard, vegetable shortening, or oil). The combination of the stretchy gluten network and the lubricating fat helps to mask the effects of starch retrogradation. A cold flour tortilla might feel a bit stiff and rubbery, but it will generally fold without shattering into a dozen pieces. However, eating a cold, retrograded flour tortilla is still a culinary sin. It will be gummy, tough to chew, and completely lack the pillowy softness that makes a burrito so comforting.
The Fix: How to Re-Gelatinize Your Tortillas Like a Pro
Now that we understand the science of why our flatbreads are failing us, the solution becomes incredibly obvious. We have to reverse the retrogradation. We need to re-gelatinize the starch.
To do this, we need two things in perfect harmony: Heat and Moisture.
According to food scientists, the gelatinization temperature for corn starch falls roughly between 144°F and 162°F (62°C to 72°C). You must heat the tortilla past this threshold to melt those crystallized hydrogen bonds. But heat alone is not enough. If you throw a stale tortilla into a dry oven or a hot, dry pan without any moisture, you will simply evaporate whatever residual water is left on the surface. The heat will break the bonds, but without water to re-swell the starch granules, you will just end up baking a giant, hard tortilla chip.
Conversely, moisture without heat is equally useless. If you just spray a cold tortilla with water, the starch crystals remain locked. The water will just sit on the surface, turning your tortilla into a soggy, disintegrating piece of wet cardboard.
You must introduce heat to break the crystalline structure, while simultaneously trapping or introducing moisture so the starch can re-absorb it. Here are the four definitive, foolproof methods to achieve this in a home kitchen. You know the drill: you pack up the leftover barbacoa (which is exactly why your plastic containers stain orange, by the way), but the real secret to leftovers is knowing how to heat the wrap properly the next day.
Method 1: The Skillet Sizzle (For the Purists)
If you have a few extra minutes and want to achieve the absolute best flavor and texture, the stovetop method is the undisputed king. This method not only rehydrates the starch but also triggers the Maillard reaction—a chemical reaction between amino acids and reducing sugars that gives browned food its distinctive, complex flavor. A few slightly charred, toasted spots on a tortilla elevate a good taco to a great one.
Ditching the Toxic Non-Stick for Carbon Steel or Cast Iron
Before we talk technique, we need to talk hardware. I am a firm believer in banishing toxic kitchen gear from your home, and this is exactly where cheap, scratched Teflon pans fail miserably.
To properly heat a tortilla, you need a cooking surface that can hold onto heat and deliver it aggressively. Flimsy aluminum non-stick pans lose their heat the second you drop a cold, damp tortilla onto them. Furthermore, heating a dry Teflon pan over medium-high heat can cause the chemical coating to degrade and release toxic fumes.
Instead, you need thermal mass. A well-seasoned cast iron skillet or a carbon steel pan (like a traditional comal) is the perfect tool for the job. These materials absorb heat, retain it, and radiate it evenly into the dough. They can withstand the high, dry heat required to toast the exterior of the tortilla while the interior steams.
The Step-by-Step Stovetop Hydration Technique
Just like preheating the pan is non-negotiable for a good sear on a steak, it is mandatory for heating tortillas. Place your cast iron or carbon steel skillet over medium-high heat and let it get thoroughly hot. You want the pan hot enough that a drop of water sizzles and dances immediately upon contact.
Now, here is the crucial step: hydration. Take your stiff, store-bought corn tortilla and quickly run it directly under your kitchen faucet. Yes, you heard me correctly. Turn the tap on a light trickle, and quickly pass both sides of the tortilla under the water. You do not want to soak it until it falls apart; you just want a thin, even layer of surface water.
Immediately slap the wet tortilla onto the screaming hot skillet. The water on the surface will instantly flash into steam. This creates a localized micro-climate of high-heat moisture right against the surface of the dough. The steam penetrates the exterior, rapidly raising the internal temperature past that magical 144°F mark, melting the retrograded starch crystals and forcing the moisture back into the network.
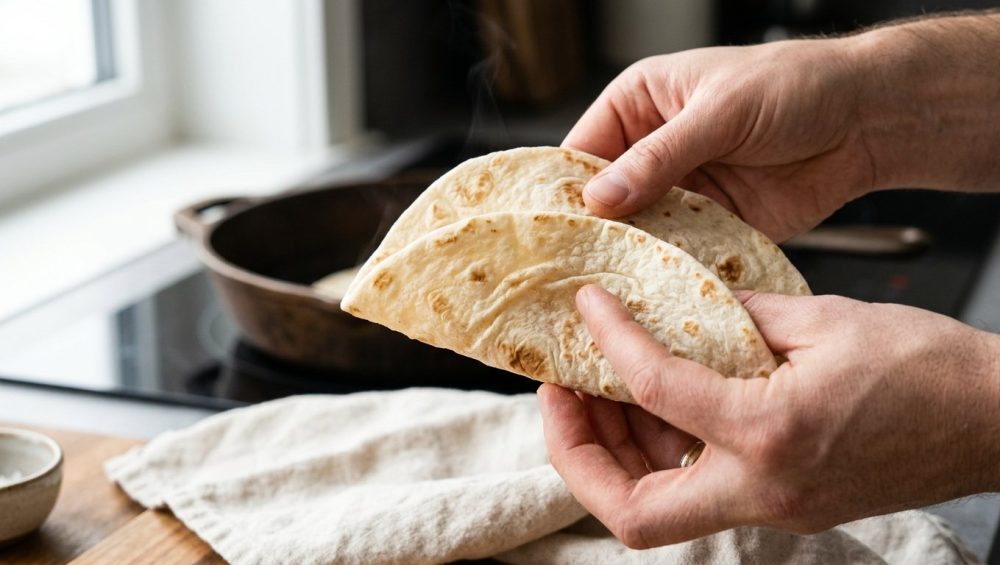
Let it sit for about 20 to 30 seconds. You will see the edges start to curl slightly, and the tortilla may even puff up beautifully (a sign that the trapped steam is expanding the layers of masa). Flip it over with a spatula or your fingers, and give the other side another 20 seconds. You are looking for a soft, incredibly pliable texture with a few dark, toasted spots. Remove it from the pan and immediately wrap it in a clean, dry dish towel to trap the residual heat and moisture until you are ready to eat.
Method 2: The Microwave Hack (For the Weeknight Warrior)
I get it. Time is money, and sometimes you are just trying to get dinner on the table on a chaotic Wednesday night. You do not have the time or the burner space to stand over a hot stove flipping tortillas one by one. The microwave is often vilified by culinary snobs, but when it comes to starch retrogradation, the microwave is actually a scientifically brilliant tool.
Microwaves work by emitting electromagnetic waves that specifically target and agitate water molecules, causing them to vibrate rapidly and generate thermal energy (heat). Because we need to drive hot moisture into our stale tortillas, the microwave can accomplish this in a fraction of the time it takes on a stovetop.
The Damp Paper Towel Trick (Done Right)
Please, do not reach for that aerosol cooking spray; you are actively ruining your nonstick pans with that sticky residue, and spraying oil on a tortilla in the microwave will just make a greasy, stiff mess. We need pure water.
The damp paper towel method is legendary, but most people do it wrong. They either use a soaking wet towel that turns the tortillas into a gummy paste, or a bone-dry towel that just absorbs the tortilla’s remaining moisture.
Here is the precise method: Take two paper towels and run them under the tap. Wring them out aggressively. You want them to be barely damp—just enough moisture to create steam, but not enough to drip.
Take a stack of no more than four or five tortillas. If you stack ten of them, the ones in the middle will not heat evenly. Wrap the small stack completely in the damp paper towels, forming a neat little package. Place the package on a microwave-safe plate and microwave on high for 30 to 45 seconds.
The microwave energy vaporizes the water in the paper towel, creating an intense, pressurized steam bath that forces its way through the stack. The heat breaks the crystalline starch bonds, and the steam provides the hydration needed to re-swell the granules. When the timer goes off, carefully unwrap the towels (watch out for the blast of hot steam) and you will find perfectly soft, floppy, re-gelatinized tortillas ready for your fillings.
Tortilla Warmers: A Worthy Investment?
If you find yourself relying on the microwave often, do yourself a favor and invest in a dedicated tortilla warmer. There are generally two types: insulated cloth pouches and ceramic/plastic containers with tight-fitting lids.
The cloth pouches are fantastic for the microwave. You simply slide a stack of dry tortillas into the pouch and microwave it for 45 seconds. The insulated fabric traps the tortillas’ own internal moisture as it escapes, reflecting the steam back into the dough without the need for a damp paper towel.
If you are using a ceramic warmer, heat the tortillas first (using the damp towel method), then place them into the pre-warmed ceramic container. The thermal mass of the ceramic will keep the tortillas piping hot and perfectly pliable at the dinner table for up to an hour. Never leave your freshly heated tortillas sitting exposed on a plate; they will cool down, retrograde, and turn back into brittle frisbees within five minutes.
Method 3: The Oven Steam Bath (For Feeding a Crowd)
Heating tortillas one by one in a skillet is fine for a romantic dinner for two, and microwaving a stack of five works for a quick family meal. But what happens when you are hosting a dinner party, a neighborhood potluck, or a massive game-day feast? You cannot spend your entire evening chained to the stove while your guests are mingling.
This is the ultimate hack for hosting a mindful fajita bar for a dozen hungry guests: The Oven Steam Bath.
The Foil Packet Method
The oven is generally a terrible place for tortillas because it is an inherently dry heat environment. A standard oven will suck the moisture right out of your food. To use the oven successfully, we have to artificially create a sealed, high-humidity environment.
Preheat your oven to 350°F (175°C). Take a clean, lint-free kitchen towel (a flour sack towel works beautifully) and dampen it under the sink. Again, wring it out completely so it is only slightly moist.
Take a large stack of tortillas—you can easily do 15 to 20 at a time with this method. Wrap the entire stack tightly in the damp kitchen towel. Next, take a large sheet of heavy-duty aluminum foil and wrap it securely around the towel-wrapped stack. Crimp the edges of the foil tightly to ensure absolutely no steam can escape.
Place this foil packet directly onto the middle rack of your preheated oven. Leave it alone for 15 to 20 minutes.
What is happening inside that packet is a slow, gentle, and incredibly thorough re-gelatinization process. The heat of the oven turns the moisture in the towel into steam. Because the foil is sealed, the steam has nowhere to go but into the tortillas. The slow, ambient heat ensures that the entire stack—from the outer edges to the dead center—reaches the critical 150°F mark evenly.
When you pull the packet out of the oven, do not unwrap it until you are ready to serve. The foil will keep them hot for a remarkably long time. When you finally open it, you will have a mountain of perfectly soft, steaming hot tortillas ready to feed an army.
Method 4: The Open Flame Char (For the Fearless)
For those who want to live dangerously and crave that authentic, rustic, slightly smoky flavor, the open flame method is the way to go. This method skips the cookware entirely and relies on the raw power of your gas stove’s burner.
Achieving Restaurant-Quality Char Without Drying Them Out
If you are using stainless steel, perform the water drop test to ensure it is adequately heated, but here, we are bypassing the pan entirely. You are going to place the tortilla directly onto the metal grates over a low, open gas flame.
This method requires your undivided attention. You cannot walk away to check your phone or stir a pot of beans. The intense, direct heat of the flame will toast the exterior of the tortilla in a matter of seconds, creating beautiful, blackened blisters that add an incredible depth of flavor to your tacos.
However, there is a massive risk here. An open gas flame is an incredibly dry heat source. If you leave the tortilla over the fire for too long, you will evaporate all of its internal moisture, and it will turn into a brittle, burnt cracker.
To prevent this, you must work fast and employ a hybrid hydration strategy. First, give the cold tortilla a very quick, light mist of water (or a fast flick of wet fingers) before it hits the flame. Turn your gas burner to medium-low. Using a pair of long metal tongs, lay the tortilla directly on the grate. Let it sit for about 10 to 15 seconds until you see the edges begin to char and the center puff slightly. Immediately flip it and give the other side 10 seconds.
The moment it comes off the flame, it must go directly into a sealed tortilla warmer or be wrapped tightly in a damp cloth. The tortilla will likely still feel a bit dry on the surface right off the fire, but by trapping it in a closed container, the residual heat will draw out the internal steam and soften the charred exterior. After sitting in the warmer for two minutes, it will emerge soft, pliable, and gorgeously blistered.
Advanced Tortilla Triage: Storage and Revival
Even with all of these masterful heating techniques, you are fighting an uphill battle if you are storing your tortillas incorrectly. The way you handle your flatbreads between the grocery store and the skillet dictates how aggressively the starch will retrograde.
How You’re Storing Them Wrong
Let’s get one thing straight: the refrigerator is the absolute worst place to store your tortillas.
I know it seems counterintuitive. We are conditioned to put all of our perishable foods into the fridge to extend their shelf life. But remember the science of starch retrogradation? The recrystallization of amylose and amylopectin molecules is heavily temperature-dependent. Cold temperatures (specifically the 35°F to 40°F range of a standard refrigerator) dramatically accelerate the retrogradation process. Storing your tortillas in the fridge is practically begging them to turn into stiff, rubbery discs of cardboard.
If you are going to consume a package of tortillas within a few days of opening them, leave them in your pantry at room temperature. Just make sure the plastic bag is sealed tightly, pressing out as much excess air as possible to prevent ambient evaporation.
If you buy in bulk or know you will not finish the package before they run the risk of molding, the freezer is your best friend. Freezing halts the staling process entirely because it drops the temperature so fast that the starch molecules do not have time to slowly realign and crystallize. When you are ready to use frozen tortillas, let them thaw at room temperature for a few hours, or wrap them in a damp towel and microwave them directly from frozen.
Reviving the Truly Stiff and Ancient Tortillas
Sometimes, despite our best efforts, a package of tortillas gets pushed to the back of the pantry and forgotten. You pull them out a week later, and they are so stiff they feel like vinyl records. Even a damp paper towel in the microwave isn’t going to save them from cracking.
Do not throw them in the trash! In traditional Mexican cuisine, there is no such thing as a wasted tortilla. When they are too far gone to be folded into a taco, they are simply repurposed into dishes where their brittle texture is an asset, not a liability.
When dinner is done, grab your chainmail scrubber to clean up the cast iron, but save those stale tortillas for breakfast the next morning. Cut the stiff tortillas into wedges, fry them in a shallow layer of hot oil until they are golden and crispy, and you have just made the best homemade tortilla chips of your life. Toss those freshly fried chips in your leftover salsa verde, simmer them until they just begin to soften, top with a fried egg and some queso fresco, and you have a spectacular plate of chilaquiles. Alternatively, tear the stale tortillas into small pieces and scramble them directly into your eggs with some onions and jalapeños for classic migas.
Stale tortillas are not garbage; they are just waiting to be transformed.
The Final Wrap-Up: No More Broken Burritos
Cooking at home should never be a source of stress, and you should never have to eat your dinner with a fork because your taco shell disintegrated in your hands. The culinary world is full of variables, but armed with a little bit of food science, you can control them all.
You now understand the molecular betrayal of starch retrogradation. You know that moisture migration is the enemy, and that the refrigerator is a trap. Most importantly, you know that heat and moisture are the keys to unlocking the crystallized starch matrix of any store-bought flatbread.
Whether you choose the high-heat sizzle of a well-seasoned carbon steel skillet, the weeknight efficiency of the microwave steam bath, the crowd-pleasing oven foil packet, or the rustic char of an open flame, you possess the knowledge to re-gelatinize your tortillas flawlessly every single time.
So, the next time you are wandering down the grocery store aisle, do not fear the mass-produced corn tortilla. Buy the pack, bring it home, and show it who is boss in the kitchen. Here is to perfect pliability, structurally sound burritos, and a taco night that ends with clean laps and full stomachs. Now get in the kitchen and start cooking!






