
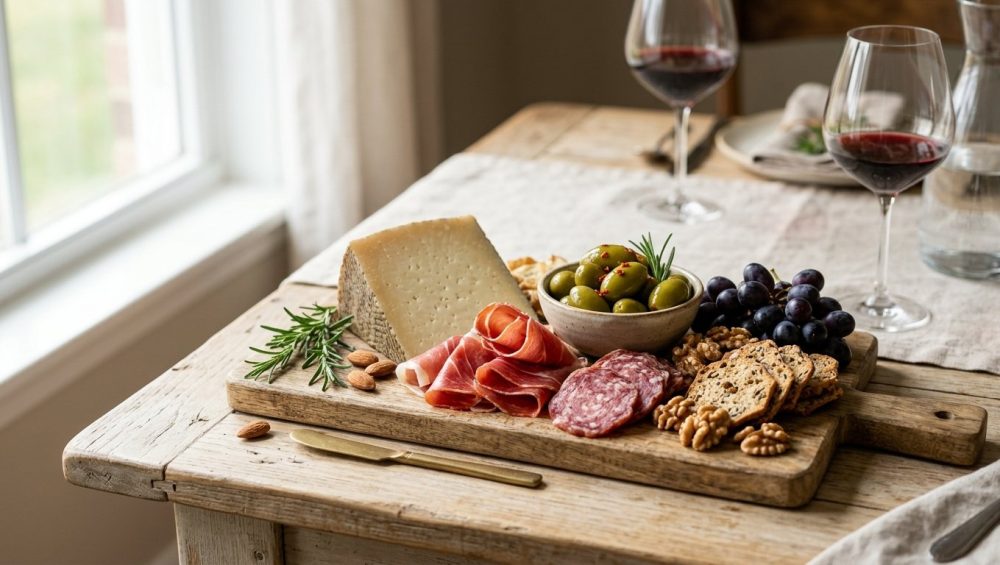
Picture this: You’ve just spent a small fortune at the artisanal deli. You’ve painstakingly arranged delicate rosettes of prosciutto, fanned out slices of aged gouda, and scattered organic berries across a massive platter. You step back, admire your Pinterest-worthy masterpiece, and open the front door to welcome your guests. But an hour later, you walk past the dining table and witness a culinary tragedy.
Your beautiful hard cheeses are glistening with a disturbing layer of grease, looking like they just ran a summer marathon. Your vibrant pink cured meats have morphed into a sad, oxidized gray that belongs in a gas station sandwich. Your crisp apple slices have turned the color of a rusty penny, and your guests are nervously picking at the crackers to avoid the sweaty dairy.
Listen, we have all been there. Entertaining is stressful enough without your appetizers actively deteriorating in front of your eyes. But here is the brutally honest truth: you do not need a culinary degree, a professional catering license, or a walk-in refrigerator to fix this. You just need to understand a little bit of basic food science and thermodynamics.
As a home cook who has made every entertaining mistake in the book, I have zero patience for pretentious chef-speak. I firmly believe that anyone can execute a flawless weekend gathering by simply outsmarting their ingredients. Today, we are going to break down the exact biological and chemical reasons why your charcuterie board is having a meltdown, and I am going to give you the definitive, no-nonsense masterclass on staging a grazing spread that stays fresh, safe, and gorgeous all night long.
The Anatomy of a Meltdown: Why Your Cheese Sweats
Let’s address the elephant in the room: sweaty cheese. There is nothing less appetizing than reaching for a slice of sharp cheddar and coming away with greasy fingers. To stop this from happening, you have to understand what cheese actually is.
At its core, cheese is a beautifully complex emulsion of water, proteins (specifically casein), and butterfat. During the cheesemaking process, enzymes like rennet cause the milk proteins to coagulate, forming a tight structural matrix that traps the moisture and the fat inside. When cheese is chilling happily in your refrigerator, that butterfat is in a solid state, held firmly in place by the protein matrix.
But when you take that cheese out and let it sit in a 72-degree dining room, thermodynamics takes over. Butterfat has a relatively low melting point. As the internal temperature of the cheese rises, the fat begins to transition from a solid to a liquid. Because liquid takes up more space and is more mobile than solid fat, it begins to seep out of the microscopic pores in the protein matrix and pool on the surface. This process is known as fat exudation.
Simultaneously, a process called syneresis can occur, especially in higher-moisture cheeses. As the protein matrix relaxes and shifts with the changing temperature, it literally squeezes out trapped water. So, that “sweat” on your cheese is actually a highly unappetizing mixture of liquid butterfat and expelled moisture.
Hard vs. Soft Cheeses: The Moisture Spectrum
Not all cheeses sweat equally, and knowing the difference is crucial for your board-building strategy.
Hard, aged cheeses like Parmigiano-Reggiano, aged Gouda, and sharp Cheddar have very low moisture contents. Because they lack water, the “sweat” you see on them is almost entirely pure, liquid butterfat. This is why aged cheeses look incredibly greasy when left out too long. Unlike the powdery nightmare of pre-shredded cheese you might melt into a lazy weeknight dinner, these artisanal blocks are living, breathing emulsions that demand thermal respect.
On the other end of the spectrum, soft cheeses like Brie, Camembert, and fresh goat cheese have incredibly high moisture contents. They don’t typically “sweat” fat in the same visible way. Instead, their entire structural integrity collapses. A wheel of Brie left in a warm room will turn into a runny, unmanageable puddle. While a slightly gooey Brie is delicious, a completely liquefied one that is bleeding into your salami is a hosting disaster.
The Tragedy of Gray Meat: Oxidation and Myoglobin
Now that we’ve solved the mystery of the sweaty cheddar, let’s talk about your meats. You bought beautiful, bright pink prosciutto and ruby-red salami. Why does it look like dreary, gray mush two hours into your party?
The answer comes down to a protein called myoglobin and its arch-nemesis: oxygen.
Myoglobin is the protein responsible for storing oxygen in muscle tissue, and it is what gives raw meat its red color. When meat is cured to make charcuterie, it is treated with salts and curing agents that contain nitrates and nitrites. These nitrites break down into nitric oxide, which binds to the myoglobin in the meat to form a compound called nitrosylmyoglobin. This specific compound is what gives cured meats their signature, highly desirable bright pink or red hue.
However, nitrosylmyoglobin is highly unstable when exposed to the elements. When you take your prosciutto out of its vacuum-sealed packaging and drape it across your board, you are exposing it to a massive influx of oxygen and ambient light.
The Chemical Betrayal of Oxygen and Light
When light and oxygen hit that beautiful pink nitrosylmyoglobin, a rapid chemical oxidation process occurs. The compound breaks down and transforms into metmyoglobin nitrite, which is a brown or gray pigment. This is why the top layer of your folded meats turns an unappetizing gray, while the meat hidden underneath the folds remains pink. You might think you need a culinary degree to manage this, but even if you have absolutely zero cooking skills, understanding this chemistry is foolproof.
Furthermore, cured meats are packed with specialized fats that are highly susceptible to lipid oxidation. When left at room temperature, the fats in salami and prosciutto react with the air and begin to turn rancid. Not only does the meat look gray and sad, but it also develops a slightly sour, metallic, or “off” flavor.
The “No-Toxic-Gear” Warning: Your Serving Ware Matters
Before we get into the staging strategies to prevent these chemical meltdowns, we need to have a serious conversation about the physical board you are using. I am completely ruthless when it comes to banishing toxic kitchen gear from my home, and your serving platters are no exception.
I do not care if that glitter-infused, epoxy-resin-coated plastic board was on sale at a discount home goods store. I do not care if that fake metallic tray matches your dining room curtains. Cheap plastics, mystery metals, and peeling synthetic coatings have absolutely no place touching the food you serve to your loved ones. Acidic foods (like cornichons, citrus, and certain cheeses) can actually leach toxic chemicals from cheap resin and plastic boards directly into your expensive appetizers.
If you want to host like a pro, you must invest in safe serving ware made from dense, natural materials. But beyond safety, the material of your board plays a massive role in the thermodynamics of your food.
Understanding Volumetric Heat Capacity (Thermal Mass)
To keep your cheese from sweating and your meat from oxidizing, you need to utilize materials with a high Volumetric Heat Capacity (VHC), commonly referred to as thermal mass. Thermal mass is a material’s ability to absorb, store, and slowly release temperature.
While a beautifully maintained wooden cutting board is perfect for chopping vegetables in the kitchen, wood is actually an insulator. It does not hold onto cold temperatures effectively. If you put cold cheese on a room-temperature wooden board, the cheese will rapidly warm up to match the room.
Instead, you should be serving your charcuterie on natural stone, such as slate or marble. Marble and slate have incredibly high thermal mass. If you place a slate or marble board in your refrigerator for an hour before your party, the dense stone will absorb the cold. When you take it out and arrange your food on it, the board will act like a giant, elegant ice pack, actively pulling heat away from your cheeses and meats and keeping them in the safe, cool zone for significantly longer.
The Masterclass Staging Strategy: Timing is Everything
Now that you have the right equipment, let’s talk about execution. The biggest rookie mistake home entertainers make is building their entire charcuterie board three hours before the party and leaving it sitting on the dining table.
Not only does this guarantee sweaty cheese and gray meat, but it is also a massive food safety hazard. The FDA strictly advises that perishable foods—including cured meats and soft cheeses—should never be left at room temperature for more than two hours. If your house or patio is above 90°F, that window shrinks to a mere one hour. After that time, bacteria can multiply to dangerous levels, turning your lovely gathering into a potential foodborne illness nightmare.
To avoid this, you need to master the art of strategic staging.
The 30-Minute Sweet Spot
Cheese actually tastes terrible straight out of the refrigerator. The cold mutes the complex flavor compounds and makes the texture rubbery. Cheese needs to be served at room temperature to fully express its flavor profile, but it needs to reach room temperature safely and slowly.
The golden rule is the 30-Minute Sweet Spot. You should pull your hard and soft cheeses out of the fridge exactly 30 to 40 minutes before your guests arrive. This gives the cheese enough time to take off the chill and allow the butterfat to soften slightly, unlocking the flavor without crossing the threshold into sweaty, greasy territory.
The “A-Team” and “B-Team” Method
Instead of cramming three pounds of meat and cheese onto one massive board, divide your ingredients into the “A-Team” and the “B-Team.”
Build a moderately sized, beautifully curated board (the A-Team) to set out when guests arrive. Meanwhile, have your B-Team ingredients pre-sliced and waiting in airtight containers in the refrigerator. When the two-hour mark hits—or when the A-Team board starts looking a little picked over and sweaty—you simply remove the old board, wipe down the area, and bring out a freshly assembled, perfectly chilled B-Team board.
By rotating smaller boards, you ensure that no perishable item ever sits out long enough to violate the FDA’s two-hour rule, and your guests are always greeted with fresh, vibrant food. Truthfully, this staging method is the ultimate secret to flavor pacing throughout a long evening, preventing palate fatigue and keeping the visual presentation impeccable.
Temperature Control Tricks for the Everyday Host
If you are hosting a long, lingering grazing party and you really want to keep a single large board out for an extended period, you have to get clever with ambient temperature control. You don’t have to freeze your guests out by blasting the AC, but you can create micro-climates directly on your serving table.
The Ice Pack Elevation Method
If you are using a large, elevated wooden board or a platter with a slight lip, you can create a hidden refrigeration system. Take a few flexible gel ice packs (the kind you use for lunch boxes) and lay them flat on your table. Drape a beautiful linen cloth or a rustic tea towel completely over the ice packs to hide them. Then, place your slate or marble charcuterie board directly on top of the hidden, cloth-covered ice packs.
The cold from the ice packs will transfer through the cloth and into the thermal mass of the stone board, effectively creating a refrigerated surface that will keep your meats pink and your cheeses sweat-free for hours. Mastering this thermal trick is the foundation of the art of effortless hosting, allowing you to actually enjoy your own party instead of constantly hovering over the food.
Strategic Clustering and Moisture Management
Temperature isn’t the only enemy on your board; moisture migration is a silent killer. Have you ever bitten into a water cracker only to find it has the texture of wet cardboard? That happens because you placed dry, porous items (like crackers and bread) directly next to high-moisture items (like sweaty cheese, cut fruit, or pickles).
You must practice strategic clustering. Create distinct “wet zones” and “dry zones” on your board.
- Wet Zones: Olives, cornichons, marinated artichokes, and fresh berries should be contained in small, safe ceramic or glass ramekins. Never let their juices touch the flat surface of the board.
- Buffer Zones: Use your cured meats as a barrier. The high fat content in salami can act as a slight moisture barrier between a soft cheese and a drier element.
- Dry Zones: Keep all crackers, crostini, and breadsticks on a completely separate plate or in a designated basket. Never put crackers on the main board if it will be sitting out for more than 30 minutes. The moisture in the air, combined with the syneresis of the cheese, will ruin them instantly.
Preventing Enzymatic Browning and Wilting
We’ve saved the cheese and the meat, but what about the produce? A charcuterie board isn’t complete without the sweet, acidic crunch of fresh fruit to cut through all that heavy dairy and fat. But sliced apples and pears are notorious for turning brown within minutes of hitting the air.
This happens due to an enzyme called polyphenol oxidase (PPO). When you slice an apple, you damage its cellular structure, exposing the PPO to oxygen in the air. The enzyme reacts with the oxygen to produce melanin, the exact same brown pigment that colors human skin.
To stop this, let’s talk about preventing enzymatic browning so your apples stay crisp, bright, and visually appealing all night.
The Acidulated Water and Honey Tricks
The most common way to inhibit polyphenol oxidase is to lower the pH on the surface of the fruit. You can do this by creating acidulated water: a mixture of one cup of cold water and one tablespoon of fresh lemon juice. Briefly dunk your apple and pear slices in this bath before putting them on the board. The citric acid denatures the enzyme, stopping the browning process in its tracks.
If you don’t want your apples tasting like lemons, use the honey water trick. Mix one tablespoon of honey into one cup of warm water until dissolved, then let it cool. Soak the fruit slices for two minutes. Honey contains a natural peptide compound that deactivates the browning enzyme without altering the flavor of the fruit.
The Importance of a Razor-Sharp Blade
Here is a kitchen secret most people don’t realize: the tool you use to cut your fruit dictates how fast it rots. Using a dull knife crushes the delicate cell walls of the fruit rather than slicing cleanly through them. Crushed cells release significantly more polyphenol oxidase, leading to much faster, deeper browning. Always use a freshly honed, razor-sharp chef’s knife or paring knife to prep your board ingredients.
And if you want those expensive fresh berries to survive the night without turning into a fuzzy, weeping mess, do not wash them until the absolute last second. Washing berries introduces excess moisture that encourages rapid mold growth and structural breakdown. Wash them gently, dry them completely with a paper towel, and place them in their designated ramekins just before the doorbell rings.
The Grazing Board Flow: Mindful Entertaining
At the end of the day, a charcuterie board is not just a pile of food; it is an interactive dining experience. The way you structure your board dictates how your guests will interact with it, and more importantly, how they will interact with you.
If you leave a massive, intimidating wedge of hard cheese on the board without a proper cheese knife, your guests will be too polite to hack at it. They will constantly interrupt your conversations to ask, “How do I cut this?” or “What is this one?”
To be a truly mindful, stress-free host, you must eliminate the bottlenecks.
- Pre-slice the difficult items: Always crumble a portion of the blue cheese, pre-slice a few pieces of the aged cheddar, and fan them out. This gives guests “permission” to dive in without feeling like they are ruining your beautiful presentation.
- Provide designated tools: Every single cheese and dip needs its own designated knife or spoon. Do not make your guests use the jam spoon to cut the Brie.
- Label the obscure items: If you sprang for a fancy truffle-infused pecorino or a spicy nduja spread, write it down on a small, elegant place card. This saves you from answering “What is this?” forty-five times in one evening.
When you manage the thermodynamics of your food, utilize safe and effective serving ware, and structure the board for easy grazing, you completely change the dynamic of your party. You stop being a frantic caterer running back and forth to the kitchen, and you start being a relaxed, present host who can actually enjoy a glass of wine and a meaningful conversation.
Final Thoughts from the Sassy Sous-Chef
You don’t need to be a Michelin-starred chef to put together a mind-blowing charcuterie board, but you do need to stop treating your expensive ingredients like indestructible plastic props. Cheese sweats because it’s a delicate emulsion of fat and protein. Cured meat turns gray because its chemical structure is actively fighting the air.
By respecting the science of your food—chilling your stone boards, staging your ingredients in shifts, managing your moisture zones, and strictly adhering to the two-hour safety rule—you elevate your weekend gatherings from amateur hour to absolute perfection.
So throw away that toxic plastic tray, sharpen your knives, and go build a board that stays as gorgeous at midnight as it was at sunset. You’ve got this, and your guests (and their stomachs) will thank you.






