
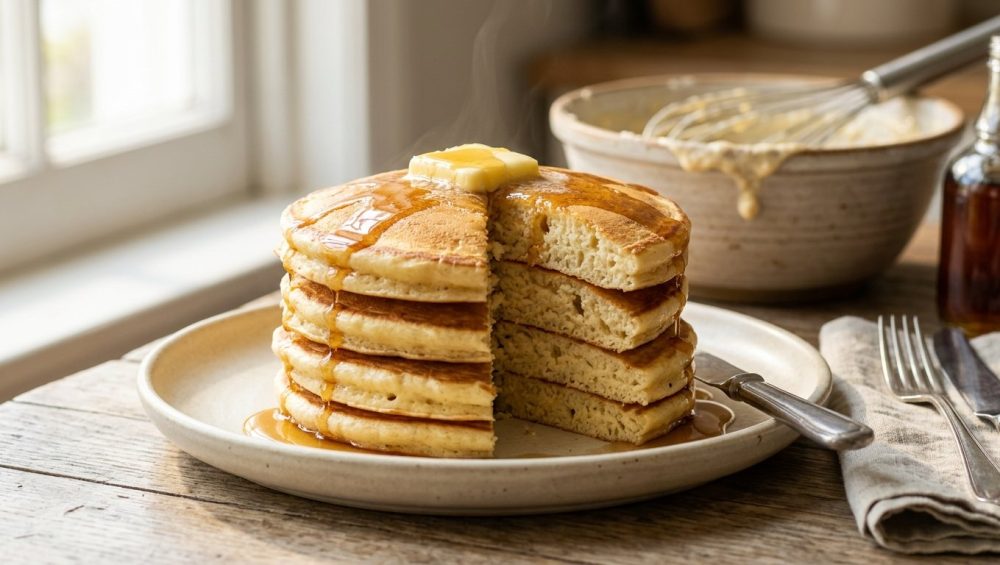
Listen, we need to have a serious talk about your weekend breakfast routine. You wake up, you’re optimistic, you brew a fresh pot of coffee, and you decide you are going to treat yourself to a towering stack of golden, fluffy pancakes. You mix the wet into the dry, grab your whisk, and you start beating that batter like it owes you money. You whisk, and you whisk, and you whisk until every single microscopic lump is obliterated into a perfectly smooth, silky vortex.
And then? You pour it into the pan, and instead of rising into majestic, diner-style clouds of joy, your pancakes spread out into sad, rubbery discs that have the structural density of a drink coaster. You chew them, and they fight back.
Sound familiar? I thought so.
As a home cook who has made every mistake in the book so you don’t have to, I am here to deliver a hard culinary truth: your relentless pursuit of a smooth batter is exactly what is ruining your breakfast. You are falling into the ultimate rookie trap, and it is time to stop. Today, we are going to dive deep into the kitchen science of quick breads, the biochemistry of wheat proteins, and the sheer magic of leaving well enough alone. By the time we are done here, you will have the confidence to step away from the whisk, respect the lump, and achieve mind-blowing, professional-level fluffiness in your own kitchen without a culinary degree.
The Anatomy of a Perfect Pancake
Before we can fix what is going wrong in your mixing bowl, we need to understand what we are actually trying to achieve. A perfect pancake is not just a flat cake; it is a delicate feat of culinary engineering.
When you bite into a top-tier pancake, you should experience a slight, buttery crispness on the exterior—a golden-brown crust courtesy of the Maillard reaction. But the interior? The interior should be impossibly tender, airy, and light. It should melt in your mouth, acting as a delicate sponge that eagerly absorbs maple syrup without turning into a heavy, soggy brick.
Achieving this texture relies on three primary factors working in perfect harmony:
- Aeration: The creation and expansion of gas bubbles in the batter, primarily driven by chemical leaveners like baking powder and baking soda.
- Hydration: The absorption of liquid by the starches in the flour, which provides structure and moisture.
- Minimal Gluten Development: The absolute restriction of protein bonds that cause chewiness and toughness.
It is that third factor where almost everyone goes completely off the rails. You can have the freshest baking powder in the world, the most expensive organic flour, and the perfect cast iron griddle, but if you mishandle the gluten, you are doomed.
The Gluten Trap: A Tale of Two Proteins
To understand why your pancakes are dense, we have to take a quick trip back to high school chemistry—but I promise I will make it painless and highly relevant to your breakfast.
When you look at a scoop of all-purpose flour, you are mostly looking at starch. However, hiding among those starch granules are two very important proteins: gliadin and glutenin. In their dry state, sitting in your pantry, these proteins are completely inactive. They are just minding their own business.
But the second you add a liquid—like milk, buttermilk, or water—these two proteins wake up, find each other, and bond together to form a brand-new super-protein called gluten.
Why Gluten is Great (Sometimes)
Gluten is an incredibly strong, elastic network of microscopic strands. If you are baking a crusty loaf of artisanal sourdough bread or tossing a New York-style pizza dough, gluten is your best friend. You want that chewiness. You want that elasticity. In bread making, bakers spend ten to fifteen minutes aggressively kneading dough specifically to develop and align these gluten strands so the bread has a sturdy, chewy structure.
Why Gluten is the Enemy of the Pancake
Pancakes are not bread. They belong to a category of baking known as “quick breads,” which also includes muffins, scones, and biscuits. In a quick bread, chewiness is a structural flaw.
When you pour your wet ingredients into your dry ingredients, gluten begins forming instantly. If you gently fold the batter just until the wet and dry ingredients are combined, the gluten network remains weak, fragile, and disorganized. This is exactly what you want. A weak gluten network allows the gas bubbles produced by your baking powder to expand easily when the batter hits the hot pan, resulting in a tall, fluffy interior.
But when you grab a whisk and start vigorously beating the batter to stir out the lumps, you are essentially kneading the batter. You are mechanically forcing those gluten proteins to cross-link, align, and strengthen. The longer and harder you whisk, the tighter and more elastic that gluten network becomes.
When you finally pour that overmixed, super-smooth batter onto the griddle, the heat activates the baking powder, which tries to create gas bubbles to lift the pancake. But the gluten network is now so tight and strong like a rubber band that the gas bubbles cannot expand. The batter refuses to rise. The result? A flat, dense, chewy disc that requires a steak knife to cut through.
The “Smooth Batter” Lie and the Muffin Method
So, why do we all instinctively want to whisk our batter until it is perfectly smooth? We have been conditioned by cake batter and brownie box mixes. When we make a cake, we are told to beat the batter until it is silky and uniform. We associate lumps with failure, raw flour pockets, and culinary incompetence.
You need to unlearn this immediately.
For pancakes, you must embrace what culinary professionals call “The Muffin Method.” The Muffin Method is a standard mixing technique used for quick breads that prioritizes tenderness above all else.
How to Execute the Muffin Method
- Whisk the Dry: In one large bowl, aggressively whisk together your flour, sugar, baking powder, baking soda, and salt. You want these thoroughly combined so you don’t get a random mouthful of pure baking soda later. (Side note: please stop blindly scooping your flour straight from the bag with a measuring cup. Spoon it into the cup and level it off, or better yet, use a digital scale. Compacted flour equals heavy pancakes).
- Whisk the Wet: In a separate bowl, thoroughly whisk your milk, buttermilk, eggs, melted butter, and vanilla until completely homogenous.
- The Gentle Merge: Pour the wet ingredients into the dry ingredients.
- The 15-Second Rule: Using a silicone spatula or a Danish dough whisk, gently fold the wet and dry together. You are not stirring. You are folding. Scrape the bottom of the bowl, lift, and fold over. Do this for a maximum of 15 to 20 seconds.
What Your Batter Should Actually Look Like
When you stop folding, your batter should look ugly. It should be lumpy, bumpy, and thick. There might even be a few tiny, dry streaks of flour visible. This is the hardest part for a home cook to accept, but you must put the spatula down and walk away. Those lumps are not your enemy; they are little pockets of un-developed gluten that will bake into tender, melt-in-your-mouth perfection.
The Magic of the Rest Period
If you take your lumpy, ugly batter and immediately throw it onto a hot griddle, you might actually end up with a few dry pockets of flour in your finished pancake. This is why the next step is the most critical, yet most frequently skipped, secret in the breakfast universe.
You must let your batter needs to rest for at least 10 to 15 minutes before you cook it.
The Science of Resting
When you leave the batter alone on the counter, three magical things happen:
- Hydration Without Agitation: Remember those scary dry lumps of flour? During the resting period, the starches in the flour slowly absorb the liquid on their own. They swell and hydrate naturally without you needing to mechanically whisk them. The lumps soften and dissolve into the surrounding batter without triggering any additional gluten development.
- Gluten Relaxation: Even with the gentlest folding technique, you inevitably created a little bit of gluten. Resting the batter gives those protein strands time to relax and slacken. Think of it like a tense muscle finally releasing. Relaxed gluten means a tender pancake.
- Leavening Activation: Most modern baking powders are “double-acting.” This means they release a little bit of leavening gas when they touch liquid, and a second, larger burst of gas when they hit the heat of the pan. Resting the batter allows that first chemical reaction to fully develop, aerating the batter with millions of tiny carbon dioxide bubbles before it even touches the stove.
If you look at your batter after 15 minutes, you will notice it has transformed. It will look puffier, thicker, and slightly bubbly on the surface. The lumps will have mostly smoothed themselves out. Do not stir it again! If you stir it now, you will punch out all those beautiful gas bubbles you just waited for. When it is time to cook, gently scoop the batter from the top.
Leavening Agents: The Engine of Fluff
We cannot talk about fluffy pancakes without addressing the chemical engines that make them rise: baking soda and baking powder. I see so many weeknight warriors confusing these two or using expired powders, which completely sabotages their weekend brunch.
Baking Soda vs. Baking Powder
Baking soda (sodium bicarbonate) is a base. In order to create the carbon dioxide gas needed to lift your pancakes, it requires two things: moisture and an acidic ingredient. If your recipe includes buttermilk, yogurt, lemon juice, or even a splash of vinegar, baking soda will react violently and beautifully with that acid to create lift.
Baking powder, on the other hand, is a complete package. It contains baking soda, plus a powdered acid (like cream of tartar), and a starch to keep them from reacting in the jar. It only needs moisture and heat to activate.
Most top-tier pancake recipes use a combination of both. The baking powder does the heavy lifting for the rise, while a small amount of baking soda reacts with the acidic buttermilk to provide a little extra kick and, crucially, to neutralize the acid so your pancakes brown beautifully in the pan.
The Freshness Test
Chemical leaveners lose their potency over time, especially if your kitchen is humid. If your baking powder has been sitting in the back of your pantry since the last presidential election, it is dead, and your pancakes will be flat regardless of how perfectly you mixed the batter.
To test baking powder, drop a half-teaspoon into a small bowl of hot water. It should fizz vigorously and immediately. To test baking soda, drop a half-teaspoon into a small bowl of white vinegar. Again, it should erupt instantly. If either reaction is weak or delayed, throw it in the trash and go to the grocery store.
The Right Tools: A Sassy Sous-Chef Gear Intervention
Okay, we need to pause the science lesson for a moment because we have to talk about your hardware. You can have the most scientifically perfect, gently-folded, well-rested batter on the planet, but if you are pouring it into a toxic, scratched-up, peeling non-stick pan you bought at a discount store five years ago, I am going to lose my mind.
I have a strict “no-go” rule on cheap, toxic kitchenware. When you heat cheap Teflon (PTFE) pans past a certain temperature, the chemical coating begins to degrade, releasing toxic fumes that can literally kill pet birds and cause flu-like symptoms in humans. Furthermore, when that coating starts peeling and flaking into your food, you are ingesting mystery chemicals. It is time to start banishing toxic kitchen gear from your life forever.
The Griddle Upgrade
If you want diner-quality pancakes, you need a pan that retains heat beautifully and offers a safe, naturally non-stick surface.
- Carbon Steel: This is the holy grail of pancake cooking. Carbon steel seasons like cast iron but is lighter and more responsive to temperature changes. It develops a naturally slick, polymerized oil surface that releases pancakes effortlessly without a single drop of synthetic chemicals.
- Cast Iron: The classic choice. A well-seasoned cast iron skillet holds heat like a thermal battery, ensuring an even, edge-to-edge golden brown crust on your pancakes.
- Heavy-Bottomed Stainless Steel: If you master temperature control, a high-quality, multi-clad stainless steel pan can cook beautiful pancakes. Just make sure the pan has a thick aluminum core to prevent hot spots, because thin frying pans keep warping under high heat and will cook your food unevenly.
The Oil and the Spatula
Please, for the love of all things culinary, stop spraying aerosol cooking spray onto your pans. Those sprays contain chemical propellants and emulsifiers like soy lecithin that bake onto your pans at high heats, creating an invisible, sticky residue that will eventually ruin the pan’s surface. That is exactly why cooking spray is the enemy of a good breakfast. Use real butter or a high-quality neutral oil.
And finally, check your spatula. If you are using a cheap silicone or nylon spatula that has melted edges, throw it away. Cheap silicone absorbs odors and flavors from your dishwasher and previous meals. If your spatulas taste like soap or smell like last week’s garlic stir-fry, it’s time for an upgrade. Invest in a thin, flexible stainless steel fish spatula (if using carbon steel or cast iron) or a high-grade, heat-resistant, platinum-cured silicone turner.
Temperature Control and the Maillard Reaction
You have the perfect batter. You have the right pan. Now, we face the final boss of pancake making: temperature control.
The ideal temperature for cooking pancakes on a griddle is 375°F. At this temperature, the exterior of the pancake undergoes the Maillard reaction—a complex chemical reaction between amino acids and reducing sugars that gives browned food its distinctive, rich flavor.
If your pan is too hot, the exterior will burn to a bitter, dark brown crisp before the interior has a chance to set, meaning your pancakes will stay raw inside. If your pan is too cold, the batter will sit there soaking up the cooking fat, resulting in a pale, greasy, flat pancake that lacks any textural contrast.
The Water Drop Test
If you don’t have an infrared thermometer to check the exact surface temperature of your pan, you must rely on the water drop test.
Preheat your pan over medium heat for several minutes. Flick a few drops of water onto the surface.
- If the water just sits there and slowly bubbles, the pan is too cold.
- If the water instantly vaporizes into a puff of steam, the pan is too hot.
- If the water droplets immediately sizzle, dance, and skitter across the surface of the pan before evaporating, you have hit the sweet spot.
The Butter Conundrum
Butter gives pancakes an incredible, rich flavor and helps create a beautiful, lacy, crispy edge. However, the milk solids in butter burn at a relatively low temperature (around 350°F). If you are cooking multiple batches of pancakes, the butter in the pan will eventually turn black and bitter.
To solve this, you have two options:
- Wipe the pan clean with a paper towel between every single batch and add fresh butter.
- Use clarified butter (ghee) or a mix of regular butter and a neutral, high-smoke-point oil (like avocado oil). The oil helps buffer the milk solids, raising the overall smoke point of the fat in the pan.
The Foolproof Fluffy Pancake Protocol
Alright, let’s put all of this science, snark, and strategy into a definitive, step-by-step masterclass protocol. Print this out, tape it to your fridge, and never eat a rubbery pancake again.
Step 1: Prep the Dry. In a large bowl, aggressively whisk together your flour, sugar, baking powder, baking soda, and salt. Make sure the leavening agents are evenly dispersed.
Step 2: Prep the Wet. In a separate bowl, whisk your buttermilk, eggs, melted butter, and vanilla. Make sure the melted butter isn’t so hot that it scrambles the eggs.
Step 3: The Gentle Fold. Pour the wet into the dry. Using a spatula, gently fold the mixture together for no more than 15 to 20 seconds. Stop when there are still visible lumps and a few streaks of flour.
Step 4: The Mandatory Rest. Walk away. Leave the bowl on the counter for 15 minutes. Use this time to preheat your carbon steel or cast iron skillet over medium heat.
Step 5: The Heat Check. Perform the water drop test. Adjust your burner accordingly. Once the pan is ready, add a small pat of butter and let it melt and foam.
Step 6: The Scoop. Do not stir the rested batter. Using a measuring cup or a spring-loaded ice cream scoop, gently portion the batter into the pan. Leave plenty of room between the pancakes so they have space to expand and you have room to maneuver your spatula.
Step 7: The Patience Phase. Do not touch them. Do not press down on them with your spatula (you are just squeezing out the air bubbles!). Watch the surface of the batter. You will see bubbles form, rise to the surface, and pop. When the bubbles pop and leave little open craters that don’t immediately fill back in with wet batter, and the edges of the pancake look dry and matte, it is time to flip. This usually takes about 2 to 3 minutes.
Step 8: The Flip. Slide your thin spatula entirely under the pancake. With a confident, swift motion of your wrist, flip the pancake over. It should be a beautiful, even golden brown. Cook the second side for about 1 to 2 minutes, just until set. The second side never looks as pretty as the first side, and that is completely normal.
Step 9: The Hold. If you are cooking for a crowd, do not stack the finished pancakes on a plate while you cook the rest. The steam will make them soggy. Place them in a single layer on a wire cooling rack set inside a baking sheet, and keep them in a 200°F oven until you are ready to serve.
The Sassy Sous-Chef Troubleshooting Guide
Even with the best intentions, things can go sideways in the kitchen. Here is a quick, no-nonsense troubleshooting guide to diagnose your pancake failures:
- Symptom: Pancakes are dense, chewy, and tough.
- Diagnosis: You overmixed the batter and developed too much gluten. Next time, fold gently and embrace the lumps.
- Symptom: Pancakes are flat and didn’t rise at all, even though the batter wasn’t overmixed.
- Diagnosis: Your baking powder or baking soda is dead. Test them before you bake, and replace them if they don’t fizz.
- Symptom: Pancakes are dark brown/burnt on the outside but gooey and raw in the middle.
- Diagnosis: Your pan was way too hot. The outside cooked before the heat could penetrate the center. Turn the burner down to medium-low and let the pan cool for a minute before trying again.
- Symptom: Pancakes are pale, greasy, and took forever to cook.
- Diagnosis: Your pan was too cold. The batter absorbed the butter instead of searing in it. Turn the heat up and wait for the pan to properly preheat.
- Symptom: Pancakes have a weird, metallic, or soapy aftertaste.
- Diagnosis: You either used too much baking soda (which tastes metallic if there isn’t enough acid to neutralize it), or your cheap silicone spatula is leaching dishwasher detergent flavors into your food. Measure carefully and upgrade your gear.
Final Thoughts from the Kitchen
Cooking is not magic; it is applied science with a dash of intuition. You don’t need to be a Michelin-starred pastry chef to make an incredible breakfast. You just need to understand the basic rules of the ingredients you are working with.
Flour wants to make gluten. Baking powder wants to make gas. Your job is simply to manage that relationship. By learning to stop whisking, by giving your batter the time it needs to rest and hydrate, and by cooking on safe, high-quality gear at the right temperature, you are taking control of the process.
So the next time you wake up craving a stack of flapjacks, remember this masterclass. Put down the whisk, respect the chemistry, and let the lumps do their job. Your weekend breakfast will never be the same. Now go put on an apron, fire up the griddle, and show that batter who is boss. Happy cooking!






