
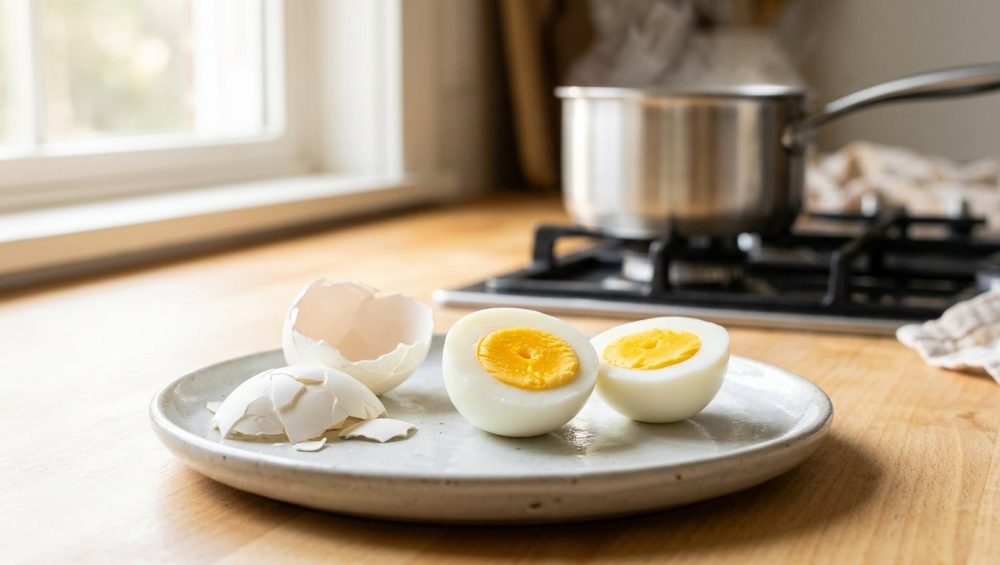
The Daily Breakfast Tragedy: Why We Are All Suffering
Let’s cut right to the chase. You are standing over your kitchen sink at seven in the morning, aggressively picking microscopic shards of shell off a mangled, pitted egg that looks like it just survived a meteor shower. You followed the instructions. You bought the eggs. You boiled the water. You set the timer. And yet, your hard-boiled eggs refuse to peel cleanly. Half the egg white is permanently fused to the shell, and your dreams of a beautiful, Instagram-worthy deviled egg platter have been reduced to a sad, crumbly egg salad.
If this scenario raises your blood pressure, take a deep breath. You are not alone, and more importantly, it is not your fault. The culinary world is absolutely littered with terrible advice, old wives’ tales, and pseudo-science that does nothing but set the everyday home cook up for failure. We are told to add baking soda to the water, to pour in a glug of white vinegar, to violently shake the eggs in a mason jar, or to perform a minor surgical procedure with a thumbtack before boiling.
None of these gimmicks address the actual root cause of the problem. If you want to permanently banish the frustration of the sticky shell, we need to stop treating cooking like a superstitious ritual and start treating it like the accessible, logical food science that it is. Making a flawless, easy-peel egg does not require a culinary degree or a ridiculously overpriced single-use egg cooker taking up prime real estate on your countertop. It requires a basic understanding of protein coagulation and a willingness to unlearn the biggest lie you were ever taught in the kitchen.
The Hidden Trap of the Cold Water Start
Think back to the first time someone taught you how to boil an egg. Whether it was your grandmother, a home economics teacher, or a basic cookbook from the 1990s, the instructions were almost certainly identical: place the raw eggs in an empty pot, cover them with cold tap water, place the pot on the stove, and slowly bring the whole thing to a rolling boil.
It sounds so gentle. So logical. It gives the eggs time to acclimate to the heat, preventing the shells from cracking due to sudden thermal shock.
It is also the exact reason your boiled eggs won’t peel.
The cold-water start is a hidden trap. Historically, this method became popular for a very practical, yet outdated, reason. Decades ago, stovetops were highly inconsistent, and eggs were often pulled straight from an ice-cold icebox. Dropping a freezing egg into boiling water caused the calcium carbonate shell to fracture violently, leaking wispy trails of egg white into the water. To avoid this messy cracking, cooks compromised. They started with cold water to gently ease the egg up to temperature. They prioritized an intact shell during the cooking process over an easy peeling process later.
But we don’t live in the 1950s anymore. We have precise heat control, and we value our time. By starting eggs in cold water, you are subjecting the delicate proteins inside the shell to a slow, gradual increase in temperature. As we are about to discover, this slow heating process is the absolute worst thing you can do if you want the shell to release cleanly.
The Food Science: Why Your Eggs Are Chemically Fusing to Their Shells
I have zero patience for pretentious chef-speak, but if we want to solve this problem permanently, we need to put on our lab coats for a few minutes. Understanding the anatomy of an egg and how it reacts to heat is the key to culinary liberation.
The Anatomy of an Egg
An egg is a marvel of biological engineering. On the outside, you have the shell, which is made primarily of calcium carbonate. It looks solid, but it is actually semi-permeable, covered in anywhere from 7,000 to 17,000 microscopic pores.
Immediately inside the shell are two vital layers: the outer shell membrane and the inner shell membrane. These membranes are made of keratin—the exact same tough, structural protein that makes up your hair and fingernails. Their job is to defend the egg against bacterial invasion.
Inside those membranes sits the albumen, which is the scientific term for the egg white. The albumen is roughly 90% water and 10% protein. Finally, suspended in the center by two twisted, stringy cords called chalazae, is the yolk.
When you struggle to peel an egg, you are not fighting the calcium shell. You are fighting that inner keratin membrane.
Protein Coagulation and the Keratin Bond
The egg white is packed with different types of proteins, but the two heavy hitters are ovotransferrin (which makes up about 12% of the white) and ovalbumin (which makes up a massive 54%). In a raw egg, these proteins are folded up like microscopic balls of yarn, floating peacefully in water.
When you introduce heat, these proteins begin to denature. They uncoil, stretch out, and bump into each other, forming a complex, three-dimensional web that traps the water. This process is called coagulation, and it is what turns a clear, runny liquid into a firm, opaque solid.
Here is where the cold-water trap ruins your morning. Ovotransferrin is highly sensitive to heat and begins to coagulate at exactly 144°F (62°C). Ovalbumin, on the other hand, is stubborn; it doesn’t fully coagulate until the temperature reaches about 180°F (80°C).
When you put an egg in cold water and slowly bring it to a boil, the temperature inside the egg rises at a sluggish pace. The proteins in the egg white uncoil lazily. Because they are heating up so slowly, they have ample time and opportunity to chemically bond with the keratin in the inner shell membrane. The egg white literally fuses to the membrane on a molecular level. By the time the water finally reaches a boil, that bond is permanent. You have essentially glued the egg white to the shell, making it impossible to peel without tearing chunks of the delicate white away.
The Hot Start Solution: Denaturing for a Clean Peel
The solution to the sticky shell is not vinegar. It is not baking soda. It is not a thumbtack. The definitive, scientifically proven solution is the “Hot Start.”
Extensive double-blind testing by food science giants—most notably J. Kenji López-Alt in his exhaustive culinary experiments—has conclusively proven that the temperature of the environment the moment the egg hits the pan is the single most important factor in peelability.
When you plunge a cold egg directly into a violently hot environment (like boiling water or hot steam), the outermost layer of the egg white experiences massive thermal shock. The temperature spikes instantly, bypassing that slow, lazy uncoiling phase. The proteins denature and coagulate in a fraction of a second, forming a firm, solid barrier on the outer edge of the albumen before they have a chance to chemically bond with the keratin membrane.
You are essentially searing the outside of the egg white, creating a distinct physical separation between the cooked egg and the inner shell membrane.
The Boiling Water Method
The most traditional application of the hot start is dropping your eggs directly into a pot of rapidly boiling water. Because the water is already at 212°F (100°C), the heat transfer is immediate and aggressive. The outer proteins instantly lock into place.
However, the boiling water method does have a slight drawback for the weekend culinary hobbyist: the aggressive, rolling bubbles bounce the eggs around the pot. If you are not careful, this physical agitation can cause the shells to crack against the heavy metal bottom, resulting in those dreaded egg-white blowouts. You can mitigate this by lowering the heat to a gentle simmer immediately after adding the eggs, but there is an even better, faster, and more reliable way.
The Steaming Method (The Ultimate Weeknight Hack)
If you want to know my absolute favorite weeknight trick for flawless eggs, it is steaming. Time is money, especially on a Tuesday evening when you are trying to meal-prep salads without ordering takeout. Waiting for a massive stockpot of water to come to a rolling boil can take fifteen agonizing minutes.
Steaming only requires about an inch of water in the bottom of a saucepan. That shallow pool of water comes to a furious boil in less than three minutes. You drop a steamer basket into the pot, place your cold eggs right out of the fridge into the basket, and cover it with a tight-fitting lid.
Why is steam superior? First, steam carries an incredible amount of latent heat energy, meaning it transfers heat to the eggshell just as fast, if not faster, than boiling water. You still get that instant protein denaturation that prevents sticking. Second, the eggs remain stationary in the steamer basket. They aren’t violently crashing into each other or the walls of the pot, which virtually eliminates the risk of cracked shells. Finally, steam provides a slightly gentler overall cooking environment because the temperature tops out at 212°F, reducing the risk of rubbery, overcooked egg whites.
Does Egg Age Actually Matter? The pH Factor
If you spend enough time reading food blogs, you will inevitably stumble across the advice that you should only use “old” eggs for boiling. Is this a myth, or is there actual science behind it?
There is truth to it, and it all comes down to the pH scale.
When a hen lays a fresh egg, the albumen is packed with dissolved carbon dioxide, giving it a slightly cloudy appearance and a relatively neutral pH of about 7.6. As that egg sits in your refrigerator for a week or two, the carbon dioxide slowly escapes through the thousands of microscopic pores in the shell. As the CO2 leaves, the pH of the egg white rises, becoming more alkaline (eventually reaching a pH of around 9.2).
Why does this matter? Because a highly alkaline environment weakens the chemical bond between the egg white proteins and the inner keratin membrane. The higher the pH, the less likely the egg is to stick to the shell. This is why farm-fresh eggs laid that very morning are notoriously a nightmare to peel, while a carton that has been sitting in your fridge for two weeks peels beautifully.
However, here is the brilliant reality: if you use the Hot Start method, egg age becomes practically irrelevant. The instant denaturation of the hot start is so effective at preventing the protein-keratin bond that it overrides the pH factor almost entirely. You don’t need to consult a calendar before making breakfast. Even if you suspect your meat thermometer is lying about the temperature of your fridge, as long as you start your eggs in steam or boiling water, they will peel cleanly.
The Green Ring of Death: Overcooking and Iron Sulfide
We cannot talk about mastering the boiled egg without addressing the most offensive culinary crime of all: the chalky, sulfurous, gray-green ring surrounding an overcooked yolk.
This unappetizing discoloration is the result of a chemical reaction. Egg whites contain sulfur-rich amino acids. When the egg is heated past a certain point, these proteins break down and release hydrogen sulfide gas. This gas naturally migrates toward the center of the egg, where the yolk resides. The yolk, meanwhile, contains iron. When the hydrogen sulfide from the white meets the iron in the yolk at a high temperature, they react to form ferrous sulfide.
Ferrous sulfide is what causes that sickly green color and that overwhelming, cafeteria-style sulfur smell. It is perfectly safe to eat, but it is an absolute tragedy for your palate and your presentation.
To prevent the green ring, you must control your time and your temperature with precision. You cannot just walk away from the stove and hope for the best. Consider a digital kitchen timer your essential kitchen survival guide. Furthermore, you must stop the cooking process immediately the second that timer goes off.
The Ice Bath: Thermal Shock and Stopping the Clock
The moment you pull your eggs out of the boiling water or the steamer basket, they are still cooking. The residual heat trapped inside the shell will continue to drive the temperature of the yolk upward, leading straight to the green ring of death.
You must plunge the cooked eggs immediately into an ice bath—a bowl filled with cold tap water and a generous handful of ice cubes.
The ice bath serves two critical functions. First, it instantly halts the cooking process, locking in that perfectly creamy, vibrant yellow yolk. Second, the rapid temperature drop causes the egg white to physically contract and shrink ever so slightly away from the shell. This thermal shock creates a microscopic gap between the albumen and the membrane, making the peeling process even more effortless. Leave the eggs in the ice bath for at least ten to fifteen minutes before you even attempt to peel them. A fully chilled egg is a structurally sound egg.
The “No-Go” Gear Warning: Stop Boiling in Toxic Pots
As an advocate for the home cook, I have a strict, uncompromising “No-Go” rule when it comes to toxic kitchenware. If you are boiling your water in a cheap, lightweight aluminum pot coated in scratched, flaking Teflon from 2012, we need to have a serious intervention about banishing toxic kitchen gear from your life forever.
Non-stick coatings (like PTFE) are incredibly delicate. When exposed to high heat over time, these coatings degrade, scratch, and eventually flake off into your food and your cooking water. Furthermore, heating empty or low-water non-stick pans (like when you are setting up a shallow steam bath) can cause the temperature of the metal to spike dangerously high, releasing toxic fumes that can actually cause flu-like symptoms.
You wouldn’t subject your food to cheap plastics that make your silicone spatulas taste like soap, so why would you subject your daily breakfast to degraded mystery metals?
For boiling and steaming, you only need safe, durable, non-reactive materials. A heavy-bottomed, fully clad stainless steel saucepan or a high-quality enameled cast iron Dutch oven are the only vessels you should be using. They hold heat beautifully, they will never leach forever-chemicals into your kitchen, and they will last outlast you. Stop buying cheap pans that need to be replaced every two years. Buy a good stainless steel saucepan once, and treat it right.
The Definitive, Foolproof Step-by-Step Guide to Easy-Peel Eggs
Now that we have dismantled the myths, exposed the food science, and trashed your toxic cookware, it is time to execute. Here is the definitive masterclass on boiling eggs, tailored for both your frantic weekdays and your leisurely weekends.
Weekday Efficiency: The Quick Steam
When you are rushing out the door on a Wednesday morning, the steaming method is your best friend.
- Prep the Pot: Place a stainless steel steamer basket into a high-quality stainless steel saucepan. Add exactly one inch of water to the bottom of the pot. Ensure the water line sits just below the bottom of the steamer basket.
- Bring to a Boil: Place the pot on the stove over high heat and cover with a tight-fitting lid. Because there is so little water, it will reach a furious, rolling boil in just two to three minutes.
- The Hot Start: Once steam is aggressively escaping from the lid, carefully open the pot (watch your face) and use tongs to gently place your cold eggs directly from the refrigerator into the steamer basket.
- Set the Timer: Replace the lid immediately to trap the steam. Lower the heat to medium-high to maintain a vigorous steam without boiling the pot dry.
- 6 Minutes: Liquid, runny yolk with barely set whites (perfect for ramen).
- 7 Minutes: Jammy, custard-like yolk with firm whites.
- 9 Minutes: Firm but creamy yolk (the sweet spot for eating plain).
- 11 to 12 Minutes: Fully hard-boiled, opaque yolk (ideal for deviled eggs or egg salad).
- The Ice Bath: The second your timer goes off, immediately transfer the eggs into a waiting bowl of ice water. Let them chill completely for at least 15 minutes.
Weekend Perfection: The Large Batch Boil
If you are meal-prepping two dozen eggs on a Sunday afternoon for a massive potato salad, steaming in batches can get tedious. For high-volume cooking, the traditional boiling method works beautifully, provided you do it right.
- The Big Boil: Fill a large stainless steel stockpot or Dutch oven with enough water to completely submerge all your eggs by at least an inch. Bring the water to a rapid, rolling boil over high heat. (And please, stop scrubbing stainless steel pans with abrasive steel wool later—if you get hard water stains from boiling, a quick wipe with white vinegar will instantly dissolve them).
- The Gentle Drop: Using a large slotted spoon or a spider skimmer, gently lower the cold eggs into the boiling water one by one. Do not just dump the bowl in, or the eggs will crash against the bottom and shatter.
- The Simmer: As soon as all the eggs are in, the temperature of the water will drop slightly. Wait for the water to return to a boil, then immediately reduce the heat to a gentle simmer. You want small, lazy bubbles, not a violent, churning cauldron that will bounce the eggs around.
- The Timer: Use the exact same timing metrics as the steaming method above.
- The Ice Bath: Transfer to a massive ice bath and let them cool entirely.
Troubleshooting the Stubborn Peel: Techniques for Success
Even with the perfect hot start and a rigorous ice bath, the physical act of peeling requires a little bit of finesse. Do not resort to using bizarre kitchen gadgets that end up ruining your knives just to crack a shell.
First, tap the chilled egg gently on the countertop to crack it. Do not smash it. Roll the egg back and forth under the palm of your hand with light, even pressure. You want to create a web of hundreds of tiny, interconnecting cracks all over the entire surface of the shell.
Next, find the wide, fat end of the egg. This is where the air cell is naturally located. Pinch the shell at the fat end and peel away the first piece. Because of the air pocket, you are almost guaranteed to grab the inner membrane along with the shell.
Finally, peel the egg under a gentle stream of cold running water, or keep it submerged in the ice bath while you peel. The water will actively seep under the membrane, acting as a natural lubricant and helping the shell slide right off the coagulated egg white. If you encounter a stubborn patch, flip a standard teaspoon upside down, slip the curve of the spoon under the membrane, and gently glide it around the contour of the egg to lift the shell away.
Conclusion: Reclaiming Your Breakfast
Cooking should never be an exercise in frustration. The kitchen is a place for creativity, nourishment, and empowerment, not a battleground where you are forced to fight with your own ingredients.
By understanding the simple, undeniable science of protein coagulation, you can permanently eliminate the daily tragedy of the sticky, pitted egg. Stop listening to outdated myths. Ditch the cold water start. Embrace the aggressive heat of boiling water or steam, lock those proteins into place instantly, and rely on the thermal shock of an ice bath to finish the job.
You don’t need a culinary degree to cook like an expert; you just need to know the rules of the game. Now go reclaim your breakfast, boil with confidence, and enjoy the flawless, easy-peel eggs you actually deserve.






