
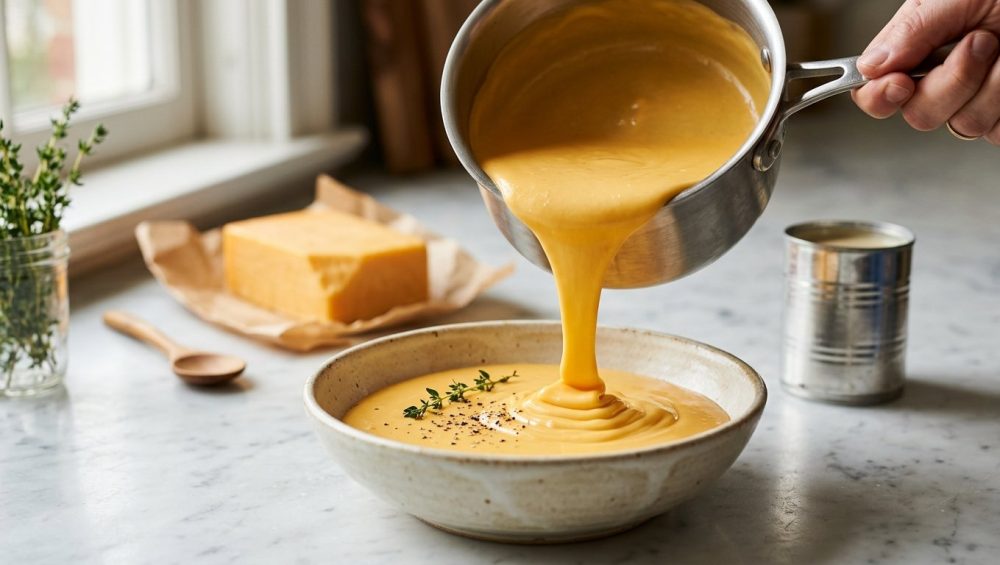
Picture this: It’s a Tuesday night. You’re exhausted, your patience is thinner than cheap parchment paper, and all you want is a comforting bowl of homemade macaroni and cheese. You’ve boiled the pasta, you’ve grated the cheddar, and you stir it all together. But instead of a glossy, velvety cascade of liquid gold, you look down into your pot and see a culinary tragedy. Your sauce has completely separated. You are now staring at a depressing puddle of yellow grease, floating with gritty, sand-like clumps of dairy protein.
Congratulations, you’ve just broken your cheese sauce.
If you’ve ever found yourself aggressively whisking a split sauce while frantically Googling how to save it, take a deep breath. Put down the whisk. You are not a bad cook; you are simply a victim of thermodynamics and a lack of proper emulsifiers. As your resident sassy sous-chef, I am here to tell you that you don’t need a fancy culinary degree or a Michelin star to achieve perfectly smooth, restaurant-quality cheese sauces. You just need to understand a little bit of food science, ditch the outdated techniques, and embrace the absolute magic of evaporated milk.
We are going to completely dismantle the pretentious chef-speak surrounding cheese sauces. We are going to throw out the exhausting, time-consuming flour roux. And most importantly, we are going to ensure that you never, ever serve a gritty, greasy, broken cheese dish again. Welcome to your definitive masterclass on the science of melted cheese.
The Anatomy of a Cheese Sauce Disaster
Before we can fix the problem, we have to understand why the problem exists in the first place. Cheese is not just a solid block of deliciousness; it is a complex, delicate chemical matrix.
The Thermodynamics of Melting Cheese
To understand why your sauce breaks, you have to understand what cheese actually is. At its core, cheese is an emulsion of milk fat and water, held together by a microscopic net of casein proteins and calcium ions. When cheese is sitting in your fridge, this protein net is tight and stable.
When you apply heat, things start to change. At around 90°F (32°C), the milk fat trapped inside that protein net begins to soften and melt. This is when the cheese starts to sweat. As the temperature climbs toward 150°F (66°C)—which is the critical melting point for a standard cheddar—the protein molecules begin to break apart and disperse, allowing the cheese to become fluid and gooey.
But here is where the disaster happens. If you heat the cheese too aggressively, pushing it past its melting point and closer to a boil, you trigger a violent chemical reaction. The casein proteins begin to denature and tightly coagulate, essentially squeezing together so hard that they forcefully expel all the moisture and fat they were holding.
The Visual Tragedy: Grainy, Gritty, and Greasy
When those proteins squeeze together, they form those rubbery, gritty little clumps that feel like wet sand in your mouth. Because the protein net has collapsed, the fat has nowhere to go but out. It pools on the surface, creating that disgusting, unappetizing oil slick.
Once a cheese sauce reaches this stage of separation, it is incredibly difficult to rescue. The emulsion is broken. You have essentially un-made the cheese. This is why tossing a handful of shredded cheddar directly into a bubbling pot of hot pasta water or milk is a guaranteed one-way ticket to Ruined Dinner Town.
The Traditional Roux Trap
For centuries, classical French culinary training has dictated that the only way to make a stable cheese sauce (specifically, a Mornay sauce) is to start with a roux. A roux is a paste made by cooking equal parts flour and butter, into which you slowly whisk milk to create a béchamel, and then finally stir in your cheese.
The starch molecules in the flour swell up and act as a physical barrier, preventing the cheese proteins from clumping together and stabilizing the fat. It works, sure. But let’s be brutally honest: making a proper roux is a tedious, finicky chore. If you don’t cook the flour long enough, your sauce tastes like raw paste. If you cook it too long, it loses its thickening power. If you add the milk too fast, you get dumplings.
Furthermore, flour inherently mutes flavors. A roux-based mac and cheese always tastes a little bit duller and a little bit heavier than the cheese itself. When I am trying to get dinner on the table on a Wednesday night, the last thing I want to do is stand over a stove babying a flour paste. We need maximum flavor with minimum effort. Time is money, people.
The Pre-Shredded Cellulose Conspiracy
Let’s address the elephant in the kitchen. If you are trying to make a smooth cheese sauce using cheese that came out of a plastic bag, you are sabotaging yourself before you even turn on the stove.
Commercially pre-shredded cheese is coated in anti-caking agents like cellulose (wood pulp) or potato starch to prevent the shreds from clumping together during shipping and storage. While these powders are perfectly food-safe, they are the mortal enemy of a smooth emulsion. When heated, these starches behave unpredictably, often causing the sauce to thicken unevenly and contributing to a chalky, gritty texture. If you want a flawless result, you must grate your own cheese from a solid block. It is a non-negotiable rule in my kitchen. The fact that pre-shredded bags ruin a perfect melt is a hill I am absolutely willing to die on.
Enter Evaporated Milk: The Culinary Magic Trick
If we are ditching the flour roux, how do we keep the cheese proteins from clumping and the fat from separating? The answer is sitting in a little tin can in the baking aisle of your grocery store.
What Exactly Is Evaporated Milk?
Do not confuse evaporated milk with sweetened condensed milk. If you use sweetened condensed milk for your mac and cheese, you will end up with a horrifyingly sweet dairy dessert, and I cannot help you.
Evaporated milk is exactly what it sounds like: fresh cow’s milk that has been gently heated in a vacuum to remove about 60% of its water content. What remains is a highly concentrated, shelf-stable liquid that is packed with milk sugars, milk fats, and—most importantly for our purposes—an incredibly dense concentration of milk proteins.
The Power of Casein Proteins: Nature’s Emulsifier
The secret to evaporated milk’s magical stabilizing power lies in those concentrated casein proteins. Casein proteins act as natural emulsifiers. On a molecular level, emulsifiers are the diplomats of the food world. They have one end that loves water (hydrophilic) and one end that loves fat (lipophilic).
When you introduce evaporated milk into melted cheese, you are flooding the environment with millions of these microscopic diplomats. They surround the fat droplets from the melting cheese, holding onto the fat with one hand and the water with the other. This prevents the fat from pooling together into an oil slick, and it provides a flowy, internal structure that keeps the cheese proteins suspended and separated.
The result? A perfectly emulsified, glossy, pourable sauce that refuses to break, even under less-than-ideal temperature conditions. It is food science at its most practical and delicious.
The Science of Starch and Liquid Ratios
While evaporated milk provides the protein structure, a tiny bit of starch helps seal the deal. Food science legend J. Kenji López-Alt famously popularized a brilliant three-ingredient stovetop mac and cheese method that relies entirely on evaporated milk and the natural starches released by the pasta.
By cooking the macaroni in just enough water to cover it, the water reduces into a highly concentrated, starchy liquid. When you add the evaporated milk and the cheese directly to this starchy pasta water, the starch molecules swell and work in tandem with the casein proteins. The starch absorbs the excess water and oil, while the evaporated milk proteins bind everything into a creamy suspension. It eliminates the need for a roux entirely, delivering a pure, undiluted cheese flavor in a fraction of the time.
The Sassy Sous-Chef’s Guide to Selecting the Right Cheese
You can have all the evaporated milk in the world, but if you choose the wrong cheese, you are still going to struggle. Not all cheeses are created equal when it comes to melting.
Moisture Content and Melting Points
The meltability of a cheese is directly correlated to its moisture content and its age. Young, high-moisture cheeses have a loose, elastic protein network that breaks down easily and smoothly when heated.
As a cheese ages, it loses moisture. The protein network becomes tighter, denser, and more rigid. A five-year-old aged cheddar might taste like a complex, nutty slice of heaven on a cracker, but if you try to melt it into a sauce, those rigid proteins will stubbornly refuse to relax. Instead, they will instantly seize up, expel their fat, and turn your sauce into a gritty nightmare.
The A-List: Best Cheeses for Smooth Sauces
When building a cheese sauce, you want to rely on the heavy hitters of the melting world. These cheeses strike the perfect balance of moisture, fat, and elastic proteins:
- Mild to Medium Cheddar: The undisputed king of mac and cheese. It offers that classic, comforting flavor and melts beautifully at around 150°F (66°C).
- Gruyère: A staple in traditional Swiss fondue, Gruyère brings a sophisticated, nutty flavor and a flawless, stringy melt.
- Fontina: Incredibly rich and creamy, Fontina is a high-moisture cheese that practically melts if you just look at it warmly.
- Monterey Jack: While a bit mild on its own, Jack cheese is a structural powerhouse. It melts into a perfect liquid and is ideal for blending with sharper, more temperamental cheeses.
- Gouda (Young): Stay away from the aged, crystalline Goudas for sauces, but a young Gouda will give your sauce a beautiful, velvety texture.
The Blacklist: Cheeses to Avoid or Use Sparingly
- Extra-Aged Cheddars and Parmesans: As discussed, their lack of moisture makes them highly prone to breaking. If you must have the flavor of Parmesan, grate it finely and stir it in at the very end, off the heat.
- Acid-Set Cheeses: Cheeses like feta, ricotta, paneer, and halloumi are coagulated using acid (like lemon juice or vinegar) rather than rennet. Because of this chemical difference, their protein structures will not melt into a liquid, no matter how much heat you apply. They will just get hot and rubbery.
The Art of the Grate
I’ve already yelled at you about pre-shredded cheese. When grating your own block, the size of the shred matters. Large, chunky cubes of cheese take longer to melt. The longer they sit in the hot pan, the more likely the sauce is to overheat and break. You want fine, even shreds that will melt instantly upon hitting the warm liquid. If you are struggling with softer cheeses crumbling while you prep them, using a wire slicer or a sharp box grater is essential for maintaining the integrity of the dairy before it hits the pan.
Banishing Toxic Gear: The Right Equipment for the Job
I have a strict “no-go” rule when it comes to cheap, toxic kitchenware. You cannot execute a perfect, science-backed recipe if you are cooking in a pan that is actively peeling mystery chemicals into your food.
The Non-Stick Nightmare
Far too many home cooks rely on cheap, lightweight, non-stick aluminum pans for their sauces. These pans are notorious for developing hot spots. A hot spot will scorch your milk proteins instantly, ruining the flavor and breaking the emulsion. Furthermore, the delicate coatings on these cheap pans degrade rapidly, especially if you use aerosol sprays, which contain propellants that polymerize and ruin the finish. The reality of ruining nonstick pans is a lesson most beginners learn the hard way. Throw them out.
The Superiority of Stainless Steel and Carbon Steel
For a flawless cheese sauce, you need cookware with heavy, dense thermal mass that distributes heat evenly and gently. A high-quality, fully clad stainless steel pan is your best friend here. If you are terrified of food sticking to stainless steel, you simply need to learn proper temperature control. Utilizing the water drop test ensures your pan is at the precise thermodynamic temperature to create a natural non-stick surface before you start cooking.
Even better than a standard saucepan is a saucier. A saucier has sloped, rounded sides rather than sharp, 90-degree angles. This means your whisk can reach every single square inch of the pan, preventing any milk proteins from hiding in the corners, scorching, and ruining your dish. Investing in a curved saucier pan will instantly elevate your sauce game.
Essential Utensils
When incorporating the cheese into the evaporated milk, you need to be gentle. A frantic, aggressive whisking motion can actually incorporate too much air and cool the sauce down unevenly. I prefer to use a gentle folding motion. A sturdy, flat-edged wooden spoon is perfect for scraping the bottom of the pan to ensure nothing is sticking, while gently folding the melting shreds of cheese into the warm liquid. And when it comes to cleaning up the gooey mess on your cutting board after grating a mountain of cheddar, a stainless bench scraper is the most efficient tool in your arsenal, saving your expensive chef’s knives from unnecessary dulling.
If you are just starting to build your kitchen arsenal and feeling overwhelmed by the sheer volume of gimmicky gadgets on the market, don’t panic. You don’t need a drawer full of single-use plastics. Sticking to a core set of high-quality, versatile beginner kitchen tools is the smartest way to set yourself up for culinary success without cluttering your space.
The Foolproof, 10-Minute Evaporated Milk Cheese Sauce Method
We’ve covered the science. We’ve selected the cheese. We’ve gathered the proper, non-toxic gear. It is time to execute the easiest, most reliable cheese sauce of your life.
The Ingredient Golden Ratio
The beauty of this method is the ratio. For a standard stovetop mac and cheese, the ratio is 1:1:1 by weight.
- 6 ounces of dry pasta (macaroni, shells, or cavatappi)
- 6 ounces of evaporated milk (about half a standard can)
- 6 ounces of high-quality, block-grated melting cheese
Notice I said by weight. Volumetric measurements (like cups) are wildly inaccurate for oddly shaped items like pasta and grated cheese. If you pack a cup of shredded cheese tightly, it contains vastly more cheese than a loosely packed cup. To ensure the chemical ratio of starch, casein, and fat is perfectly balanced, you must weigh your ingredients. Using a digital kitchen scale is the single easiest way to instantly improve your cooking and baking consistency.
Step-by-Step Execution
- The Cold Water Start: Place your 6 ounces of dry pasta in your stainless steel skillet or saucier. Add just enough cold water to barely cover the pasta, along with a generous pinch of kosher salt.
- The Starch Extraction: Turn the heat to high and bring the water to a boil, stirring frequently. Because you are using a minimal amount of water, the starches released by the pasta will not be diluted. As the water evaporates and the pasta cooks (about 6 minutes), you will be left with perfectly al dente pasta suspended in a thick, concentrated, starchy syrup. Do not drain this liquid! This starch is the structural backbone of your sauce.
- The Emulsifier Addition: Immediately lower the heat to the lowest possible setting. Pour in your 6 ounces of evaporated milk. Stir gently to combine the milk with the starchy pasta water. The liquid will look thin at first, but the casein proteins are now in position.
- The Cheese Fold: Add your 6 ounces of freshly grated cheese. Do not dump it all in at once in a giant clump. Sprinkle it over the pasta in handfuls. Using your flat-edged wooden spoon, gently fold the cheese into the warm liquid.
- The Magic Moment: Watch as the cheese melts instantly into the liquid. It will not clump. It will not release an oil slick. The evaporated milk proteins and the pasta starches will catch the melting fat and water, binding them into a glossy, velvety, thick sauce that coats every single noodle perfectly.
The “Low and Slow” Temperature Mandate
I cannot stress this enough: once the cheese hits the pan, the heat must be virtually non-existent. Boiling an unstabilized cheese sauce will instantly denature the casein proteins and ruin the emulsion. The residual heat from the pasta and the pan is usually more than enough to melt the finely grated cheese. If your stove runs hot, take the pan completely off the burner while you fold in the cheese. You can always put it back on a low flame for ten seconds if it needs a little nudge, but you can never un-boil a broken sauce.
Troubleshooting and Customizing Your Liquid Gold
Even with the foolproof evaporated milk method, the reality of weeknight cooking is that distractions happen. The dog barks, the phone rings, and suddenly your pan has gotten a little too hot. Understanding how to pivot and fix beginner cooking mistakes on the fly is what separates a stressed cook from a confident one.
Rescuing a Sauce on the Brink
If you notice your sauce starting to look a little grainy or oily around the edges, immediately pull it off the heat. Do not panic.
First, try adding a splash of cold evaporated milk or heavy cream. The cold liquid will rapidly drop the temperature of the sauce, halting the protein coagulation, while introducing a fresh batch of emulsifying proteins to help bind the rogue fat molecules back into the matrix. Whisk vigorously.
If the sauce has severely separated, you can employ the nuclear option: the immersion blender. Transfer the broken liquid to a narrow container and blitz it with an immersion blender for 10 seconds. The sheer mechanical force of the spinning blades can often sheer the fat droplets down to a microscopic size and force them back into the protein emulsion. It might not have the perfect silky texture it started with, but it will be perfectly edible and far better than a greasy puddle.
Flavor Bomb Add-Ins
The beauty of the evaporated milk method is that it creates a pure, unadulterated cheese flavor. Because there is no flour roux to mask the taste, the cheese shines. But we can always make it better.
- Acidity is your friend: Cheese is rich and heavy. A tiny splash of acid cuts through that richness and brightens the entire dish. A dash of hot sauce (like Frank’s RedHot) or a squeeze of fresh lemon juice stirred in at the end works wonders.
- The Mustard Secret: Adding a half teaspoon of dry mustard powder does two things. First, it adds a subtle, earthy tang that enhances the “cheesiness” of the cheddar. Second, mustard contains natural emulsifying properties, providing just a little bit of extra structural insurance for your sauce.
- Sodium Citrate (The Pro Move): If you want to get deeply nerdy, you can purchase a small tub of food-grade sodium citrate online. This is the alkaline salt used in commercial processed cheeses (like American cheese or Velveeta) that makes them melt so flawlessly. Adding just half a teaspoon of sodium citrate to your evaporated milk liquid before adding the cheese will create an emulsion so stable you could practically boil it without it breaking. It is a fun food science trick, but for everyday cooking, the evaporated milk alone is usually sufficient.
Reheating Without Separation
The tragedy of traditional roux-based mac and cheese is that it turns into a solid, rubbery brick in the refrigerator, and reheating it usually causes the fat to separate and pool.
Because the evaporated milk method creates such a stable emulsion, it reheats beautifully. The trick is to add a splash of milk (or leftover evaporated milk) to the cold pasta before heating it. Microwave it on 50% power, stirring every 30 seconds. The gentle, incremental heat combined with the extra moisture will coax the casein proteins back into a relaxed state, restoring the sauce to its original glossy glory.
Beyond Mac and Cheese: Expanding Your Repertoire
Once you master the evaporated milk cheese sauce, you will realize that this technique unlocks an entire universe of comfort food possibilities. You are no longer bound to the box.
Restaurant-Quality Queso Dip
Have you ever wondered how Mexican restaurants achieve that impossibly smooth, liquid queso dip that stays perfectly melted even as it cools? It’s not magic; it’s emulsifiers.
To make the ultimate game-day queso, skip the pasta entirely. In your saucier, gently heat one can of evaporated milk until it is just steaming. Toss 12 ounces of freshly grated Monterey Jack and 4 ounces of sharp cheddar with a tablespoon of cornstarch (the cornstarch replaces the pasta starch in our previous ratio).
Gradually fold the cheese into the steaming milk until melted and glossy. Stir in a drained can of diced tomatoes and green chiles (like Ro-Tel), a pinch of cumin, and a dash of hot sauce. You now have a hyper-stable, outrageously flavorful queso dip that will absolutely destroy anything you can buy in a jar.
Smothered Vegetables That People Actually Want to Eat
If you are trying to convince picky eaters (or yourself) to consume more vegetables, a flawless cheese sauce is the ultimate Trojan horse.
Steam a head of broccoli or roast a tray of cauliflower. Using the exact same evaporated milk and cornstarch base from the queso recipe, create a sharp cheddar sauce. Because there is no heavy flour roux, the sauce is surprisingly light on the palate, allowing the flavor of the roasted vegetables to shine through the rich, cheesy coating. It transforms a boring side dish into the star of the dinner table.
Next-Level Nachos and Fondue
Building a plate of nachos by sprinkling dry shredded cheese over tortilla chips and baking them usually results in a greasy mess, with the top chips burning and the bottom chips remaining completely bare.
Instead, build your nacho mountain and pour your evaporated milk cheese sauce over the top. The sauce cascades down, coating every single chip in a stable, liquid layer of cheese that will not congeal into a rubbery mat after five minutes.
This same science applies to fondue. If you have ever hosted a fondue night only to have the cheese separate into a stringy, oily nightmare in the pot, evaporated milk is your savior. Replacing a portion of the traditional white wine with evaporated milk ensures that the Gruyère and Emmental remain perfectly emulsified, no matter how long the pot sits over the warming flame.
Your New Weeknight Weapon
Cooking should not be a source of stress. You shouldn’t have to cross your fingers and pray to the culinary gods every time you want to melt some cheddar. By ditching the outdated, labor-intensive roux and embracing the incredible food science behind evaporated milk, you are taking control of your kitchen.
You now understand the delicate thermodynamics of casein proteins. You know the exact melting points of your favorite cheeses. You know why toxic, cheap pans are ruining your food, and you know exactly how to leverage a simple can of concentrated milk to bend dairy to your will.
So the next time you are craving a bowl of rich, velvety mac and cheese on a chaotic weeknight, leave the boxed stuff on the supermarket shelf. Grab your trusty stainless steel pan, a block of good cheddar, and a can of evaporated milk. In less than ten minutes, you can create a culinary masterpiece that proves, once and for all, that the best cooking hacks aren’t shortcuts—they are just highly efficient science. Now get out there and melt some cheese. You’ve got this.






