
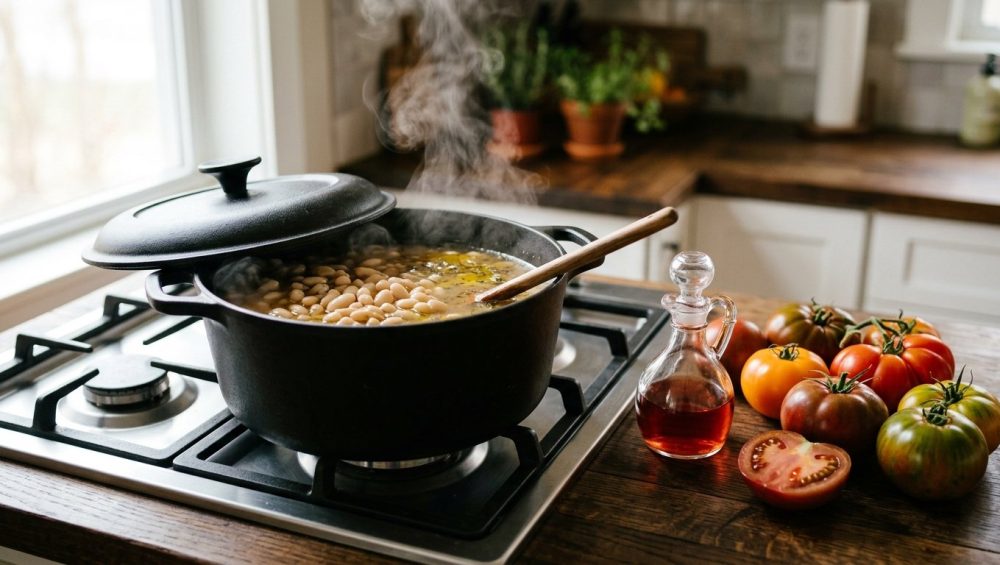
Listen up, weekend culinary warriors. We need to have a serious, sit-down chat about the absolute heartbreak of ruined chili. You know exactly the scenario I am talking about. You decided to be a domestic god or goddess this weekend. You bought the expensive, beautiful heirloom beans. You expertly diced your aromatics, safely avoiding the danger of dull knives, and you set your heavy pot on the stove to simmer. The kitchen smells like a rustic Tuscan farmhouse. You pour yourself a glass of wine, feeling incredibly proud of your from-scratch cooking.
Two hours later, you dip a spoon in to taste your masterpiece. You take a bite, and… crunch.
Your beans are hard. Not “al dente.” Not “toothsome.” Hard. Like gravel. Like tiny, spiteful pebbles that want to break your molars.
You panic. You add more water. You simmer them for another hour. You simmer them for two more hours. You start to wonder if your dried beans never soften because the universe is actively punishing you for that time you ordered takeout four nights in a row. But let me assure you, the universe doesn’t hate you. Chemistry does.
Specifically, the chemistry of your canned tomatoes.
As a busy professional who learned to cook through sheer stubbornness, trial, error, and setting off the smoke detector more times than I care to admit, I have been exactly where you are. I have chewed through crunchy minestrone and pretended it was fine. But you don’t have to live like this. Anyone can cook like an expert without a culinary degree, provided you understand the basic rules of the kitchen. And the golden rule of cooking legumes is this: acid is the enemy of a tender bean.
Today, we are diving deep into the food science of why acidic ingredients like tomatoes, vinegar, and wine harden the skins of your beans, trapping them in a state of perpetual crunchiness. We are going to fix your timing, optimize your weeknight efficiency, and ensure you never serve a bowl of gravel to your dinner guests again. Put down the takeout menu, pour another glass of wine, and let’s get to work.
The Biochemistry of the Bean: Understanding Pectin
To understand why your dinner is ruined, we have to put on our lab coats for a minute. Don’t worry, I despise pretentious chef-speak and overly dense jargon as much as you do, but a little food science is the secret weapon of every great home cook.
Beans are essentially tiny packages of starch and protein, encased in a fibrous seed coat and held together by a cellular “glue.” That glue is a complex carbohydrate called pectin. Pectin is what gives plant cell walls their structure. Think of the cells of the bean as bricks, and the pectin as the microscopic mortar holding those bricks together.
When you cook beans in plain, neutral water, the heat transfers energy into the bean. As the temperature rises, that pectin mortar begins to break down, dissolve, and gelatinize. The cell walls weaken and separate. Water rushes into the cells, hydrating the starches inside, which swell and turn beautifully creamy. This is the magical transformation from a rock-hard dried seed to a luscious, tender bite.
However, pectin is highly sensitive to its chemical environment. It reacts dramatically to the pH level of the cooking liquid. The pH scale measures how acidic or alkaline a liquid is, from 0 (battery acid) to 14 (liquid drain cleaner), with 7 being perfectly neutral (pure water).
When you boil beans in a neutral environment (pH around 7), the heat easily breaks the pectin down. But when you lower the pH by introducing acidic ingredients, everything changes. In a low-pH environment, pectin molecules undergo a process called cross-linking. Instead of dissolving, the pectin strands bind tightly to one another, tightening into an incredibly rigid, heat-resistant network. You are essentially turning that easily dissolvable mortar into waterproof, high-strength cement.
Once that pectin network cross-links and locks up, the damage is done. The cell walls become impermeable. The water cannot rush in to hydrate the starches. It doesn’t matter if you boil those beans for another six hours; they will remain stubborn, crunchy little pebbles. You have fundamentally altered the structural mechanics of the bean.
The Hidden Trap: Why Acid is the Ultimate Enemy
So, where is this acid coming from? It’s coming from your favorite flavor-builders.
Canned tomatoes are the most notorious offenders. Tomatoes are naturally acidic, usually sitting somewhere between 4.0 and 4.5 on the pH scale. When you are making a chili, a hearty minestrone, or a baked bean stew, the recipe almost always calls for a rich tomato base. The rookie mistake—and it’s a mistake we have all made—is throwing the raw or partially cooked beans into the pot at the same time as the crushed tomatoes, tomato paste, or diced tomatoes.
You think you are being efficient. You think you are letting the beans soak up all that delicious tomato flavor as they simmer. What you are actually doing is dropping an acid bomb on your dinner, instantly locking the pectin in the bean skins.
And it’s not just tomatoes. Many classic recipes call for a splash of wine to deglaze the pan, or a squeeze of lemon juice to brighten the dish. If you find that your homemade soup tastes flat, your first instinct might be to reach for a splash of apple cider vinegar or a dash of hot sauce. Those are brilliant culinary moves—acid is crucial for balancing flavors—but if you add them before the beans are fully tender, you have sabotaged the entire pot.
You must respect the timeline of the bean. The acid can only be introduced when the structural transformation of the bean is already complete. If you want to achieve creamy perfection, you must stop adding tomatoes too early in the cooking process. It is a non-negotiable rule of the kitchen.
The Double Whammy: Calcium Chloride in Canned Tomatoes
If you thought the natural acidity of tomatoes was bad, wait until you hear about the industrial additives hiding in your pantry.
When you buy canned diced tomatoes, the manufacturer wants those little red cubes to look pretty and hold their shape inside the can, even after months of sitting on a grocery store shelf. To prevent the tomatoes from turning to mush, food processors add a firming agent called calcium chloride.
Calcium is a mineral that acts as a structural reinforcer for pectin. Just like acid, calcium ions bind to pectin molecules and cross-link them, creating a rigid, hardened cellular wall. When you dump a can of commercial diced tomatoes into your bean pot, you are hitting your beans with a double whammy of destruction: the low pH of the tomato acid AND the firming power of the calcium chloride.
This is why a chili made with canned diced tomatoes will often result in the crunchiest, most unforgiving beans you have ever encountered. The calcium chloride doesn’t just keep the tomatoes firm; it aggressively hardens the beans right alongside them.
If you are making a recipe that requires tomatoes to break down into a smooth sauce, always opt for whole peeled tomatoes (like San Marzanos) and crush them yourself by hand. Whole peeled tomatoes rarely contain calcium chloride because they aren’t expected to hold a sharp, diced shape. It takes an extra thirty seconds of your time, but it saves your beans from the calcium trap.
The Ideal Bean-Cooking Timeline: A Step-by-Step Masterclass
Time is money, especially when you are trying to feed yourself on a busy Tuesday without resorting to a microwave dinner. But great cooking is about staging. You have to know when to introduce ingredients to the pot. Here is the definitive, foolproof timeline for cooking beans from scratch.
Step 1: The Sort and Rinse
Do not skip this. Pour your dried beans onto a baking sheet and pick through them. You are looking for shriveled beans, discolored beans, and literal rocks. Yes, rocks. Beans are agricultural products harvested from the dirt, and occasionally a small stone makes it into the bag. Breaking a tooth on a rock is a great way to ruin a dinner party. Rinse them thoroughly in a colander under cold water to remove the field dust.
Step 2: The Soak (Optional but Recommended)
If you have the time, soak your beans overnight in a large bowl with plenty of water (they will expand massively). Soaking hydrates the beans evenly, reducing the cooking time by up to 25%. If you forgot to soak them—because you are a busy human being with a life—you can do a “quick soak.” Put the beans in a pot, cover with water, bring to a rolling boil for two minutes, then turn off the heat, cover, and let them sit for an hour. Drain the soaking liquid before cooking.
Step 3: The Neutral Simmer
Place your soaked, drained beans in a heavy pot. Cover them with at least two inches of fresh, neutral water or low-sodium chicken or vegetable broth. Now is the time to add your non-acidic aromatics: a halved onion, smashed garlic cloves, a bay leaf, a sprig of rosemary, or a parmesan rind. Bring the pot to a boil, then immediately drop the heat to a gentle, lazy simmer. Cover the pot with a lid slightly ajar.
Do not boil them aggressively. Agitation will cause the skins to blow out and the beans to turn to mush. You want a gentle, bubbling jacuzzi, not a raging rapid.
Step 4: The Salt Debate
Old wives’ tales claim that salting beans early makes them tough. Science has thoroughly debunked this. Salt (sodium chloride) actually helps tenderize the beans. The sodium ions swap places with the calcium ions in the bean skins, weakening the pectin just enough to allow water to penetrate more easily. Salt your bean water generously, like the sea, right from the beginning. It flavors the beans from the inside out.
Step 5: The Acid Drop (The Golden Rule)
Simmer the beans until they are completely, 100% tender. How do you know? Take out three beans and eat them. If even one of them has a chalky, firm center, keep simmering. They must be perfectly creamy.
Only when they have reached their final, glorious texture do you add your canned tomatoes, your splash of wine, your squeeze of lime, or your vinegar. Once the acid is in, simmer for another 15 to 20 minutes to allow the flavors to meld. Because the beans are already fully cooked, the acid will not harden them; it will simply flavor the broth.
The Alkaline Advantage: The Baking Soda Hack
If acid is the ultimate enemy of the tender bean, then alkaline is your best friend. This is where we bring in the heavy artillery: baking soda (sodium bicarbonate).
If you are dealing with notoriously stubborn beans (like chickpeas or old kidney beans), or if you just want to shave 30 minutes off your weeknight cooking time, baking soda is a scientific miracle. By adding a tiny amount of baking soda to your soaking water or cooking water, you raise the pH of the environment, making it alkaline (around 8.0 to 8.5 on the pH scale).
This alkaline environment does the exact opposite of acid. It rapidly cleaves the ester bonds in the protopectin, converting it into highly soluble pectic acid. It literally forces the cell walls to relax and let the water in. According to USDA legume texture trials, adding baking soda can reduce your cooking time by 37% to 50%.
But there is a catch. You must use it with surgical precision. The correct dosage is 1/8 to 1/4 teaspoon of baking soda per cup of dried beans. If you heavy-hand the baking soda, two terrible things will happen. First, your beans will taste like a bar of soap. Second, highly alkaline environments destroy the B-vitamins (specifically thiamin and folate) naturally present in the beans, robbing you of their nutritional value.
Measure carefully, let the alkaline magic do its work, and enjoy the fastest, creamiest beans of your life.
Hard Water and Ancient Beans: The Other Culprits
Let’s say you followed the rules. You didn’t add the tomatoes early. You didn’t add any vinegar. But your beans are still crunchy. What gives? We need to interrogate two other suspects: your tap water and the age of your beans.
The Hard Water Problem
If you live in an area with hard tap water, you are fighting an uphill battle. Hard water is packed with dissolved minerals, specifically calcium and magnesium. Remember our discussion about the calcium chloride in canned tomatoes? The calcium in your tap water does the exact same thing. It binds to the pectin in the bean skins, cross-linking the molecules and creating a rigid, impenetrable fortress.
If you have hard water, no amount of simmering will yield perfectly creamy beans. The solution? Use filtered water, bottled spring water, or distilled water for cooking your legumes. Alternatively, adding that generous pinch of salt (as mentioned earlier) or a tiny dash of baking soda can help displace those pesky calcium ions and allow the beans to soften.
The “Hard-To-Cook” Defect of Ancient Beans
Dried beans are shelf-stable, but they are not immortal. They are agricultural products, and they have a lifespan. As beans sit in a warehouse, on a grocery store shelf, and then in the back of your pantry for three years, they undergo biological changes.
Over time, beans lose their internal moisture. More importantly, they undergo enzymatic changes and lipid oxidation that lead to something food scientists literally call the “Hard-To-Cook” (HTC) defect. The cellular structure undergoes lignification—it turns woody.
If your beans are older than 12 to 18 months, they are going to fight you. They will take twice as long to cook, and in severe cases, they will never fully soften, regardless of how perfectly you manage the pH of the water. When buying dried beans, try to source them from high-turnover grocery stores or directly from reputable heirloom bean purveyors who sell the current year’s crop. Store them in airtight glass jars in a cool, dark place, not in the flimsy plastic bags they came in.
Equipment Check: Safe, Non-Toxic Gear for Long Simmers
As your sassy sous-chef, I am relentlessly passionate about banishing toxic kitchen gear from your culinary space. I have zero tolerance for cheap, peeling, mystery-metal cookware, and you should too.
Cooking beans from scratch requires a long, slow, steady simmer. This means your food is going to be in direct contact with your cookware at high temperatures for hours at a time. Do not—I repeat, do not—simmer your beautiful, organic, carefully sourced heirloom beans in a cheap, scratched Teflon pot. Simmering acidic broths for hours is a surefire way of ruining your nonstick pans, as the coating will degrade, blister, and potentially leach forever chemicals (PFAS) into your family’s dinner.
You need cookware that offers real durability, safety, and superior thermal mass. Heavy-bottomed, fully clad stainless steel pots are fantastic. If you are terrified that starches will stick to your stainless steel cookware, you just need to manage your heat. Once the pot comes to a boil, drop it immediately to a low simmer. The heavy aluminum or copper core in a quality stainless steel pot will distribute the heat evenly, preventing hot spots that cause beans to scorch to the bottom.
My absolute favorite vessel for a long bean simmer is an enameled cast iron Dutch oven (like a Le Creuset or Staub). The heavy cast iron provides unparalleled thermal mass, holding a gentle, even heat that coaxes the beans to tenderness without boiling them to pieces. The glass-enamel coating is completely non-reactive, meaning it won’t interact with acidic ingredients (when you finally add them at the end). Plus, you can scrub out the pot without ruining your cast iron seasoning by using the right tools, since the enamel protects the raw iron.
When you are relying on slow cooker meals to survive the weekday grind, efficiency is everything. If you use a crockpot for your beans, ensure the ceramic insert is high-quality, lead-free, and free of hairline cracks. Slow cookers are great for beans because they naturally maintain that low, gentle simmer that prevents the skins from blowing out.
Damage Control: Can You Rescue Crunchy Beans?
Alright, let’s deal with reality. You are reading this article because you already messed up. You dumped the canned tomatoes in at the beginning, your chili has been on the stove for four hours, and it’s full of crunchy bullets. Your dinner guests are arriving in thirty minutes. What do you do?
First, take a deep breath. Just like when your beef stew is tough from a rolling boil, you have to know how to pivot.
Can you reverse the pectin cross-linking? From a strict chemistry standpoint, no. Once the acid has locked the cell walls and the calcium has cemented them shut, it is incredibly difficult to undo the damage. However, you can salvage the meal with a few clever kitchen hacks.
Rescue Strategy 1: The Pressure Cooker Hail Mary
If you own an electric pressure cooker (like an Instant Pot), now is the time to use it. Transfer the entire crunchy, acidic, tomato-laden mess into the pressure cooker. Lock the lid and set it to high pressure for 20 to 30 minutes.
While normal boiling water maxes out at 212°F (100°C), a pressure cooker traps the steam, raising the boiling point of the liquid to around 240°F to 250°F. This intense, superheated environment can sometimes brute-force the moisture through the locked cell walls, softening the beans despite the acidic environment. It’s not guaranteed to yield perfectly creamy beans, but it will make them edible.
Rescue Strategy 2: The Puree Pivot
If you don’t have a pressure cooker, or if the beans are just slightly too firm for comfort, it is time to change the definition of the dish. Grab your immersion blender (stick blender) and hit the pot.
You don’t have to puree the entire thing into a smoothie. Just pulse the blender a few times to break up the crunchy beans. The mechanical action of the spinning blades does what the thermal energy couldn’t: it physically shatters the rigid cell walls. You will transform a failed, chunky chili into a thick, rustic, incredibly hearty bean stew. Serve it with a drizzle of high-quality olive oil, a sprinkle of flaky sea salt, and some crusty sourdough bread. Your guests will think you planned it that way all along.
Rescue Strategy 3: The Extended Bake
If you have the luxury of time, transfer the pot (assuming it’s an oven-safe Dutch oven) into a 300°F oven. Leave the lid on. The ambient, surrounding heat of the oven cooks the beans more evenly and gently than the direct, bottom-up heat of a stovetop burner. Let them bake for another hour or two. The prolonged exposure to steady heat can eventually wear down the pectin, though it will take significantly longer than it would have in a neutral environment.
Conclusion
Cooking phenomenal, restaurant-quality food at home does not require a magical touch or a culinary degree. It simply requires a basic understanding of what is happening inside your pot. You are the master of your kitchen, and you dictate the terms of the chemistry experiment happening on your stove.
The next time you set out to make a beautiful batch of from-scratch beans, remember the golden rule: hold the acid. Let the heat and neutral water do their job, coaxing those stubborn little seeds into creamy, luxurious submission. Only when they have fully surrendered do you introduce the bright, acidic punch of tomatoes, wine, or vinegar.
Master this simple timeline, and you will never suffer through a bowl of crunchy chili again. Now, get back in the kitchen, check your pH levels, and cook something amazing. You’ve got this.






