
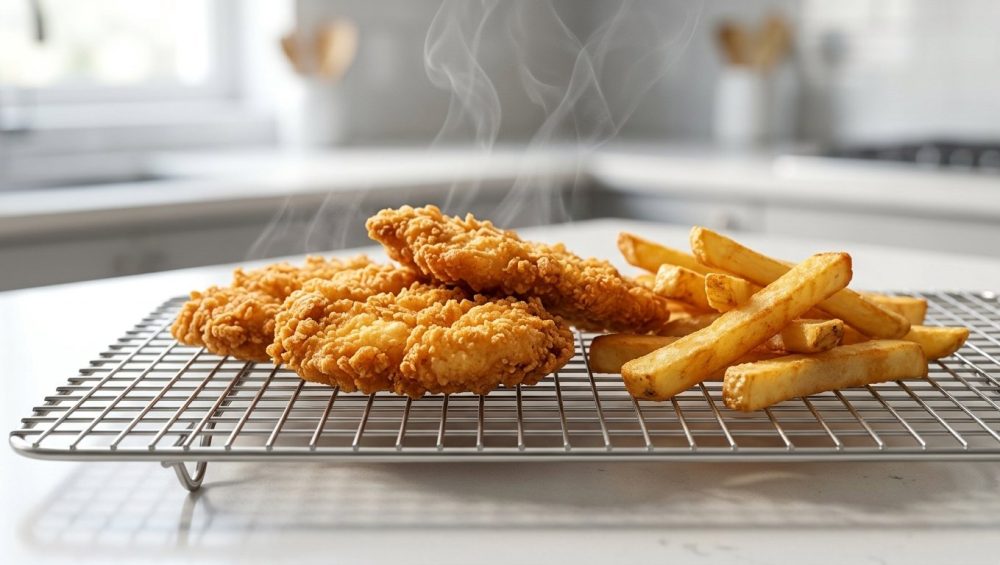
Pour yourself a glass of whatever gets you through a Tuesday evening, grab a stool, and let’s have a brutally honest chat about your fried food. You know exactly what I’m talking about. You spend your precious weekend hours meticulously dredging, breading, and frying chicken cutlets or a mountain of french fries. You pull them out of the hot oil, marveling at that gorgeous, golden-brown crust. You feel like an absolute culinary deity. But then, tragedy strikes. By the time you get the plates to the dining table, that shatteringly crisp exterior has mutated into a sad, limp, soggy sponge.
It is one of the most soul-crushing experiences in the home kitchen. You didn’t go to culinary school, but you know you did the frying part right. So why is your food betraying you?
The answer isn’t in your batter, your oil temperature, or your technique. The culprit is your landing zone. If you are pulling hot, fried food out of a skillet and dropping it directly onto a flat plate lined with a mountain of paper towels, you are actively sabotaging your own dinner.
Today, we are going to geek out on the science of condensation, completely dismantle the paper towel myth, and introduce you to the cheapest, most effective piece of equipment you will ever buy: the uncoated, heavy-duty stainless steel wire cooling rack. This isn’t just about saving your fried chicken; it’s about fixing the rookie kitchen mistakes that we need to banish right now.
The Physics of the Fry: Why Your Food is Actually Getting Soggy
To understand why your food is getting soggy, we have to ditch the pretentious chef-speak and look at the basic thermodynamics of frying. When you drop a piece of breaded chicken into 350°F oil, you aren’t just cooking the meat; you are violently dehydrating the surface. The intense heat of the oil causes the moisture inside the crust to rapidly turn into steam, which bubbles out and creates a barrier that prevents the oil from seeping in. This rapid dehydration is what creates that beautiful, rigid, crunchy exterior.
But here is the catch: even after you pull the food out of the oil, the internal temperature of that chicken is still piping hot, and it is still aggressively pumping out steam.
If you place that hot, steaming piece of food onto a flat surface—like a dinner plate or a cutting board—that steam has absolutely nowhere to go. It hits the cold, flat surface, immediately condenses back into liquid water, and is reabsorbed directly into the crust you just spent twenty minutes trying to dehydrate. The scientific term for this is a suction pressure gradient, which pulls moisture from the hot interior back to the cooling exterior. In layman’s terms? You are literally steaming your fried food from the bottom up.
Water vapor migrates significantly faster through unrestricted air than it does through stagnant boundaries. If you block the bottom of your food from breathing, you are trapping it in a humid microclimate. The crust swells, the starches turn gummy, and the crunch is gone forever.
The Paper Towel Trap: A Culinary Crime
“But wait!” I can hear you yelling. “I don’t put my fried food on a bare plate! I put it on a plate lined with paper towels, just like my grandmother taught me!”
I say this with all the love in my heart: your grandmother was wrong.
Let’s be real for a second. We all grew up watching people pull bacon or fried chicken out of a pan and drop it onto a triple-layered bed of paper towels to “drain the grease.” It feels intuitive. Paper towels are absorbent, so they should suck up the oil, right? Yes, they do absorb oil. But they also absorb water.
When you place hot fried food onto a paper towel, a few disastrous things happen simultaneously. First, the paper towel quickly becomes saturated with hot oil, meaning your food is now just sitting in a warm, greasy puddle. If you want to prevent greasy fried food, letting it marinate in its own runoff is the worst possible strategy.
Second, and more importantly, the paper towel acts as a physical barrier that traps the escaping steam. The steam hits the paper towel, turns into liquid condensation, and wets the paper. Now, your beautifully fried food is resting on a hot, damp, oily sponge. The cellulose fibers in regular paper towels swell when wet, creating a dense mat that completely blocks airflow. The moisture has no escape route, so it goes right back into your crispy breading. This is why the bottom of your fried chicken is always mushy while the top stays somewhat crisp.
Enter the Wire Cooling Rack: The 360-Degree Airflow Miracle
The solution to this heartbreaking texture loss is so incredibly simple it almost feels like cheating. You need to elevate the food and let it breathe. You need a wire cooling rack.
When you place freshly fried food onto a wire rack set over a baking sheet, you are giving it the gift of 360-degree airflow. Because the food is suspended above the pan, the steam escaping from the bottom can dissipate harmlessly into the air rather than condensing against a flat surface. Convection cooling takes over. The crust remains dry, rigid, and perfectly crunchy.
Simultaneously, gravity is doing the grease-draining work that you previously relied on paper towels for. The excess oil drips off the food, through the wire grid, and lands safely on the baking sheet below. (Pro tip: line that bottom baking sheet with foil or paper towels for easy cleanup, but never let the food itself touch the paper).
This isn’t just a restaurant trick; it is a fundamental rule of kitchen physics. If you want to stop steaming your meat and start preserving your crust, elevation is mandatory.
The “No-Go” Zone: Toxic Racks You Need to Trash Immediately
Now, before you run to the nearest discount home goods store and buy the first wire rack you see, we need to have a serious talk about materials. If you’ve read any of my articles before, you know my strict “No-Go” rule. I have zero patience for cheap, toxic kitchenware that poisons your food and falls apart after three uses. We are banishing toxic kitchen gear from our lives for good.
When it comes to wire racks, there are two common materials that you must avoid like the plague: chrome-plated steel and non-stick (PTFE) coated racks.
The Chrome-Plated Nightmare
Most cheap cooling racks are made of a low-grade steel core dipped in a shiny chrome plating. They look great on the shelf, but they are a disaster waiting to happen. The problem with chrome plating is that it wears unevenly and chips incredibly easily. The moment you scrub it with a slightly abrasive sponge, or run it through the dishwasher, that thin chrome layer starts to flake off, exposing the raw iron core underneath.
Once that core is exposed, it rusts almost immediately. Do you really want microscopic flakes of cheap chrome and rusty iron transferring onto your hot, fresh food? No, you do not. Chrome-plated racks are disposable garbage masquerading as kitchen tools.
The Non-Stick (PTFE) Trap
Then we have the dark, non-stick coated cooling racks. Manufacturers love to slap a PTFE (Teflon-style) coating on wire racks, claiming it will stop your cookies from sticking. Here is the reality: wire racks have hundreds of sharp intersecting angles and joints. It is physically impossible to keep a fragile non-stick coating intact on a wire grid.
Just like you risk ruining your non-stick pans by using metal utensils, sliding a metal spatula across a non-stick wire rack will instantly scratch the coating. Once it scratches, it begins to peel and flake. While ingesting tiny flakes of PTFE is generally considered chemically inert by health authorities (it passes through your system), it is still absolutely disgusting to find synthetic plastic flakes on your fried chicken.
Furthermore, if you ever decide to use that non-stick rack in the oven for roasting (which you will want to do, as I’ll explain later), you run the risk of overheating it. PTFE coatings can begin to break down and release toxic fumes if heated past 500°F (260°C). Why bring that stress into your kitchen? Trash the non-stick racks.
Stainless Steel or Bust: How to Buy the Right Rack
If we are ditching the cheap chrome and peeling plastics, what is the holy grail of wire racks? You need uncoated, 304-grade (also known as 18/8) stainless steel.
Not all stainless steel is created equal. You will often see cheap racks labeled simply as “stainless,” which usually means they are made from lower-grade 430 or 201 steel. These lower grades are highly susceptible to pitting and rust when exposed to salt, acids, or dishwasher detergents.
Grade 304 stainless steel contains chromium and nickel, which form a passive, self-healing oxide layer on the surface. This makes it incredibly resistant to rust, corrosion, and the harsh environment of a hot oven or a humid kitchen. It is the exact same material used in professional restaurant kitchens, and it will literally outlive you.
When shopping for your forever rack, look for these three non-negotiable features:
- 100% 304 (18/8) Stainless Steel: Verify the material in the product description. If it doesn’t specify the grade, assume it’s cheap.
- A Tight Grid Pattern: You want a cross-wire grid (squares), not parallel bars. Parallel bars allow smaller foods like fries or chicken nuggets to slip right through the cracks. A tight grid provides maximum support while maintaining airflow.
- The Right Dimensions: Buy a rack that is specifically sized to fit snugly inside a standard “Half Sheet” pan (usually around 12×17 inches for the rack, to fit a 13×18 pan). This turns your cooling rack and baking sheet into an unstoppable, interlocking culinary system. And if your baking sheets keep warping in the oven, upgrading to a heavy-duty aluminum half sheet pan alongside your new rack will change your life.
Beyond the Fry: 10 Genius Ways to Use Your Wire Rack
I am a busy professional, and I know you are too. We do not have the kitchen space or the patience for “unitaskers”—tools that only do one specific job. The beauty of a heavy-duty stainless steel wire rack is that it is one of the most versatile workhorses in your entire kitchen.
If you think this tool is only for cooling fried food or resting chocolate chip cookies, prepare to have your mind blown. Here are ten ways this rack will revolutionize your daily cooking routine:
1. The Ultimate Oven-Baked Bacon
Stop frying bacon in a skillet. It’s messy, it splatters grease all over your stove, and the bacon ends up swimming in a pool of its own rendered fat. Instead, lay your bacon strips flat on your stainless steel wire rack, set it over a foil-lined baking sheet, and bake it at 400°F. The fat drips away, the hot oven air circulates around the meat, and you are left with perfectly flat, shatteringly crisp bacon every single time.
2. Dry-Brining Your Meats
If you want a restaurant-quality sear on your steaks or pork chops, you must dry your meat first. Moisture is the enemy of the Maillard reaction (browning). Salt your meat heavily and place it on your wire rack in the fridge uncovered overnight. The rack allows the cold fridge air to circulate entirely around the cut, drying out the surface perfectly while the salt works its magic on the interior.
3. Extra Crispy Baked Wings
Want the crunch of deep-fried chicken wings without the mess of a vat of hot oil? Toss your wings in a little baking powder and salt, then arrange them on your wire rack over a baking sheet. The rack keeps them out of their own rendered fat, and the elevated airflow results in extra crispy baked chicken skin that will rival your favorite sports bar.
4. Fixing Soggy Roasted Veggies
If you are tired of pulling mushy, steamed broccoli or carrots out of the oven, the wire rack is your savior. While tossing vegetables directly on a hot pan is standard, using a rack for particularly moisture-heavy vegetables (like zucchini or eggplant) allows the water vapor to escape downward, fixing soggy roasted vegetables by promoting genuine roasting rather than steaming.
5. The Reverse Sear Resting Station
When you cook a thick steak using the reverse sear method (baking it low and slow before searing it in a ripping hot skillet), you need a place for the meat to rest. Resting it on a flat plate ruins the crust you just built. Resting it on a wire rack keeps the exterior dry and ready for the final sear.
6. Perfect Glazing and Drizzling
Making a chocolate glaze for a cake or icing some homemade donuts? Set your baked goods on the wire rack with a sheet pan underneath. Pour your glaze over the top. The excess drips cleanly away instead of pooling at the bottom and making the base of your cake soggy.
7. Smoking and Barbecuing
Did you know you can put a 304-grade stainless steel cooling rack directly on a pellet smoker? It lifts the food into the open airflow, improving smoke circulation around every side of the meat. It also stops smaller items, like jerky or sausage links, from falling through the wide cast-iron grates of your grill.
8. Reviving Stale Bread and Pizza
Reheating leftover pizza on a plate in the microwave yields a soggy, rubbery mess. Reheating it in the oven on a flat sheet pan often burns the bottom before the cheese melts. Place your leftover slices on a wire rack in a 350°F oven. The heat circulates evenly, crisping the bottom crust perfectly while gently melting the top.
9. Dehydrating Herbs
If you have leftover fresh herbs that are about to go bad, lay them out on a wire rack in a cool, dry place (or in an oven set to its absolute lowest temperature with the door cracked). The airflow will dry them out evenly, giving you homemade dried herbs without a fancy dehydrator.
10. Cooling Baked Goods (The Right Way)
Of course, it is a cooling rack. But the science applies here, too. If you leave a hot muffin or cookie on a hot baking sheet, the residual heat continues to bake the bottom, leading to burnt bases. Moving them to a wire rack immediately halts the cooking process and prevents condensation from forming on the bottom of your baked goods.
Cleaning Your Wire Rack Without Losing Your Mind
I know what you are thinking. “This all sounds great, but cleaning a wire grid covered in baked-on grease and fried chicken breading sounds like an absolute nightmare.”
I hear you. But remember, we don’t do stressful chores in this kitchen. We use our brains. Because you bought a high-quality 304 stainless steel rack, you don’t have to baby it. Here is the foolproof, zero-scrubbing method to get your rack sparkling clean.
If you have stubborn, baked-on grime, do not waste your elbow grease scrubbing it over the sink. Instead, take the baking sheet that you used under the rack, fill it with warm water and a generous squirt of grease-cutting dish soap, and turn your wire rack upside down into the soapy water. Let it soak for 20 minutes. The water will soften all the hardened bits.
For incredibly stubborn burnt grease, sprinkle the rack with baking soda, spray it with white vinegar, and let the foaming action lift the debris for 30 minutes before hitting it with a soft brush.
Because it is 304 stainless steel, you can put it in the dishwasher. However, a word of caution: the combination of high heat, alkaline dishwasher detergents, and prolonged moisture can eventually cause microscopic etching even on premium steel. If you want your rack to last a lifetime, hand washing is best. And if you are terrified of food sticking to stainless steel, simply give the rack a very light brush with cooking oil before placing your food on it for baking or roasting.
Crucially, whether you hand wash or use the dishwasher, dry the rack thoroughly with a microfiber towel immediately after washing. Do not let it air dry. Standing water is the enemy of all metal in the kitchen.
The Final Verdict
Cooking at home shouldn’t be an exercise in frustration. You don’t need a culinary degree to make mind-blowing, perfectly crispy fried food. You just need to understand a little bit of kitchen physics and equip yourself with the right tools.
Stop suffocating your beautiful fried chicken on a pile of greasy paper towels. Stop letting condensation steal your crunch. Invest fifteen dollars in a heavy-duty, uncoated, 304-grade stainless steel wire cooling rack, and give your food the 360-degree airflow it deserves.
Your weekday dinners will be more efficient, your weekend frying projects will yield restaurant-quality crunch, and you will never have to apologize for a soggy-bottomed cutlet ever again. Now, go pour yourself another glass of wine, preheat that oil, and fry with absolute confidence. You’ve got this.






