
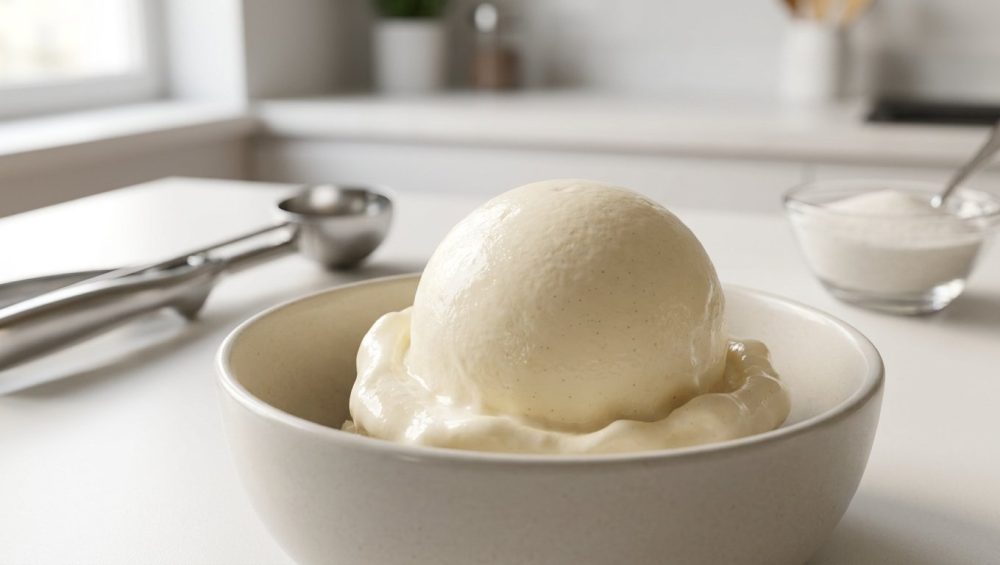
Listen, we need to have a serious talk about the brick of frozen dairy currently residing in your freezer. You spent your precious weekend separating eggs, scalding cream, and whisking until your arm felt like it was going to fall off. You churned it, you froze it, and you waited patiently. But when you finally went to serve it, you didn’t get smooth, luxurious, shop-quality gelato. You got a block of sweet ice so impenetrable that you practically need a masonry chisel to get a single scoop.
Making a homemade frozen dessert that freezes rock-hard is one of those classic rookie kitchen mistakes that drives weekend culinary hobbyists absolutely insane. I know this because I used to do it. I’d stand in my kitchen, violently hacking at a pint of vanilla bean, wondering why my homemade version was weaponized while the store-bought stuff scooped like a dream. Before you stop bending your spoons in a fit of dessert-deprived rage, take a deep breath. You don’t need a culinary degree to fix this. You just need a little bit of science, a few pantry tweaks, and some tough love about your chilling methods.
The Cold, Hard Truth: The Science of Ice Crystals
To fix your icy dessert, you first have to understand what ice cream actually is. It is not just frozen milk. Scientifically speaking, ice cream is a miracle of physics. It is simultaneously an emulsion (fat droplets suspended in water), a solution (sugars and proteins dissolved in water), and a frozen foam (air bubbles trapped in a semi-solid matrix).
When you put water into a freezer, it turns into ice. That’s great for your cocktail, but terrible for your dessert. The entire game of ice cream making is a battle against water. Specifically, it is a battle to control the size of the ice crystals that form when that water freezes.
According to food scientists, the texture we perceive when we eat ice cream is a direct sensory manifestation of its microstructure. If you want your ice cream to feel smooth and creamy on the palate, the vast majority of the ice crystals need to be microscopic—specifically around 10 to 20 microns in size. To put that in perspective, a human hair is about 70 microns thick. If your ice crystals grow to 50 microns or larger, your tongue will detect them, and you will perceive the texture as coarse, crunchy, and icy.
Ice crystal formation happens in two distinct stages: dynamic freezing and static freezing.
Dynamic Freezing (The Churn)
This happens inside your ice cream maker. As the liquid base hits the freezing cold walls of the machine’s bowl, rapid nucleation occurs—meaning millions of tiny ice crystals are born. The dasher (the spinning blade inside the machine) constantly scrapes these crystals off the wall and chops them up, incorporating air at the same time. The goal here is to freeze the base as quickly as possible while keeping the ice crystals incredibly small.
Static Freezing (The Hardening)
When you pull the ice cream out of the machine, it is only partially frozen (usually around -5°C). It has the consistency of soft serve. To firm it up, you put it in the freezer. This is the static freezing stage, and this is where most home cooks completely ruin their hard work. Because the mixture is no longer being agitated, the existing ice crystals will naturally try to grow and merge together (a process called Ostwald ripening). If your freezer is too warm, or if it takes too long to freeze the core of the container, those 20-micron crystals will rapidly swell into 50-micron shards of ice.
The Holy Trinity of Smooth Ice Cream: Fat, Sugar, and Speed
If you want to defeat the ice crystals, you have to deploy the holy trinity of frozen desserts. You cannot skimp on these if you want professional results in a standard home kitchen.
Fat: Your First Line of Defense
I am all for healthy, time-saving weekday meals, but the weekend is for indulgence. Ice cream is not the place to count calories. Fat is your primary weapon against ice. Butterfat physically coats the ice crystals, preventing them from growing larger, and it traps the air bubbles that make the ice cream light and scoopable.
In the US and much of Europe, a frozen dessert must legally contain at least 10% fat to even be called ice cream. Premium, shop-quality ice creams usually sit between 14% and 18% butterfat. If you try to make ice cream with skim milk or almond milk without heavily modifying the base, you are essentially just making a block of flavored ice. Stick to heavy whipping cream and whole milk. The fat physically gets in the way of the water molecules, stopping them from bonding together into massive, spoon-bending sheets of ice.
Sugar: The Magic of Freezing Point Depression
Here is where we get into the really nerdy stuff, and it is the absolute secret to why your favorite artisanal gelato is so soft. Sugar does not just make your ice cream sweet. Sugar is a structural ingredient.
When you dissolve a solute (like sugar) into a solvent (like water), it lowers the temperature at which that water freezes. This is a phenomenon known as Freezing Point Depression. It is the exact same science behind why cities salt the roads in the winter to melt the ice. The dissolved sugar molecules physically disrupt the water molecules, making it much harder for them to organize into a tight, solid crystal structure.
Not all sugars are created equal when it comes to Freezing Point Depression. The ability of a sugar to lower the freezing point is tied to its molecular weight. The lower the molecular weight, the more molecules there are in a given gram of that sugar, and the more it depresses the freezing point.
- Sucrose (Standard Table Sugar): Has a molecular weight of roughly 342. It offers a baseline sweetness and a standard freezing point depression.
- Dextrose: Has a molecular weight of 180. Because it is a smaller molecule, it is practically twice as effective at lowering the freezing point as sucrose. It is also less sweet than table sugar (about 70% as sweet).
- Glucose/Corn Syrup: Liquid invert sugars and corn syrups (like a standard Light Corn Syrup) contain high amounts of glucose and maltose. Replacing a portion of your table sugar with liquid corn syrup adds viscosity, binds free water, and lowers the freezing point, resulting in a delightfully chewy, scoopable texture.
If your ice cream is freezing into a solid brick, the easiest and most effective fix is to swap out 25% of your standard granulated white sugar for dextrose or light corn syrup. This simple pantry hack will dramatically lower the freezing point of your base, meaning that even at -18°C (the standard temperature of a home freezer), a portion of the water in your ice cream will remain completely unfrozen. That unfrozen water is what makes the ice cream soft enough to scoop.
Speed: Freeze It Like You Mean It
Time is money during the week, but speed is texture on the weekend. The faster you freeze water, the smaller the ice crystals will be. If your ice cream maker takes 45 minutes to churn a batch, your machine is underpowered and your ice cream will be icy. A good churn should take 15 to 25 minutes tops.
To speed up the churn, your base must be aggressively cold before it goes into the machine. Don’t just chill it in the fridge until it feels cool. Chill it until it is practically hovering just above freezing (around 4°C or 39°F).
Furthermore, when you transfer the soft ice cream from the machine to the freezer, it needs to harden instantly. Do not put it in a deep, thick ceramic bowl that retains heat. Spread it into a wide, shallow, pre-chilled metal pan. The increased surface area allows the cold air of the freezer to penetrate the center of the ice cream rapidly, locking in those microscopic 20-micron crystals before they have a chance to grow.
The Secret Weapons: Stabilizers and Emulsifiers
If you are a purist, you might turn your nose up at the word “stabilizer.” Get over it. I have zero patience for pretentious chef-speak that demonizes completely natural, functional pantry ingredients. Stabilizers are not toxic chemicals; they are natural carbohydrates and proteins extracted from plants, seeds, and seaweeds. They are the secret weapons that commercial artisans use to give their ice cream that impossibly silky, chewy texture that lasts for weeks in the freezer.
Stabilizers work like microscopic sponges. They absorb and bind the free water in your ice cream base. If the water is bound by a stabilizer, it cannot move around, which means it cannot attach to other water molecules to form large ice crystals. This is especially crucial for preventing your ice cream from turning icy after a few days in the freezer (a process called heat shock, which happens when your freezer runs its automatic defrost cycle and slightly melts and refreezes your dessert).
Here is a breakdown of the most accessible natural stabilizers for the home cook:
Locust Bean Gum (LBG)
Extracted from the seeds of the carob tree (Ceratonia siliqua), Locust Bean Gum is arguably the king of ice cream stabilizers. It is a galactomannan polysaccharide that is incredibly effective at holding water and preventing ice crystal growth during storage. It gives ice cream a beautiful, slow meltdown. There is one catch: LBG must be heated to at least 75°C (167°F) to properly hydrate and activate. If you are making a cooked custard base anyway, LBG is your best friend. Use about 0.1% to 0.2% of the total weight of your base.
Guar Gum
Also a seed gum, Guar has a distinct advantage over LBG: it hydrates in cold liquids. This makes it perfect for Philadelphia-style (eggless, uncooked) ice cream bases. However, Guar gum is incredibly powerful. It has eight times the water-absorption capacity of cornstarch. If you use too much, your ice cream will turn into a sticky, gummy, chewy disaster. Stick to a tiny amount—around 0.1% to 0.2% by weight.
Xanthan Gum
You can find Xanthan gum in almost any grocery store these days. It is produced by microbial fermentation and is highly effective at thickening liquids. While it is great in a pinch, relying solely on Xanthan can give your ice cream a slightly slimy or “snotty” texture. It is best used in a very small ratio, often blended with gelatin or LBG.
Pro Tip: Always mix your dry powdered stabilizers thoroughly into your granulated sugar before adding them to your liquid base. If you dump raw stabilizer powder directly into wet milk, it will instantly clump into un-dissolvable fish-eyes.
Gear Talk: Ditch the Toxic Junk and Invest in Quality
We need to have a serious talk about your equipment. I absolutely despise cheap, toxic kitchenware. If you are using a $20 discount-store ice cream maker with a mystery-metal freezing bowl that has a peeling non-stick coating, throw it in the trash immediately. Not only is it leaching who-knows-what into your food, but it is also ruining your ice cream.
Cheap machines are terribly underpowered. Their bowls lose their chill too quickly, and their motors are too weak to churn through a thickening base. This means your ice cream spends 45 minutes slowly sloshing around, developing massive ice crystals because the bowl isn’t cold enough to freeze it quickly.
If you are serious about this hobby, invest in a compressor ice cream maker. These machines have built-in freezers. They get aggressively cold (often down to -30°C) and stay that way, freezing your base in 15 to 20 minutes flat. They are heavy, they are expensive, but they are worth their weight in gold for the weekend perfectionist.
If a compressor model isn’t in your budget, buy a high-quality pre-freeze bowl machine from a reputable brand. Look for thick, heavy bowls lined with food-grade stainless steel or safe, BPA-free hard plastics. And for the love of all things culinary, invest in a proper heat-conductive ice cream scoop. Throw out that cheap aluminum tool, especially if your scoop turned gray in the dishwasher. A solid, liquid-filled scoop uses the heat from your hand to glide through the ice cream without tearing the structure.
The Step-by-Step Masterclass: The Perfect Ice Cream Workflow
Let’s put all this science together into a foolproof, step-by-step workflow that will guarantee smooth, scoopable ice cream every single time.
Step 1: The Base Camp (Prep and Formulation)
Start by balancing your recipe. A standard premium base should be roughly 15% fat, 15% sugar, 10% non-fat milk solids, and 60% water. Instead of using 100% granulated sugar, replace a quarter of it with dextrose or light corn syrup to lower the freezing point. Weigh your ingredients using a digital scale. Baking and ice cream making are precise sciences; volume measurements (cups and spoons) are for amateurs.
Step 2: The Heat and Hydration
Combine your milk and heavy cream in a stainless steel saucepan. In a separate bowl, thoroughly whisk your sugar, dextrose, and stabilizer (like Locust Bean Gum) together. Whisking the dry ingredients prevents the stabilizer from clumping. Slowly whisk the dry mixture into the cold dairy. Place the pot over medium heat and bring the mixture to 75°C (167°F). This temperature is critical—it pasteurizes the eggs (if you are using a custard base), dissolves the sugars completely, and fully hydrates the Locust Bean Gum.
Step 3: The Big Chill (Aging the Base)
Do not immediately churn hot ice cream base. You must chill it rapidly and then let it age in the refrigerator for at least 4 to 12 hours. Aging does three critical things:
- It cools the base down completely, ensuring a fast churn.
- It gives the stabilizers time to fully hydrate and swell, soaking up all the free water.
- It allows the liquid butterfat to crystallize. Crystallized fat traps air much more efficiently during the churn, resulting in a smoother, lighter texture.
Store your base in a high-quality glass or stainless steel container. Don’t store your pristine sweet cream base in the same tupperware you used for leftover chili; we all know how those plastic containers stain orange and hold onto savory odors.
Step 4: The Dynamic Churn
Turn your machine on before you pour the base in. If you pour liquid base into a stationary freezing bowl, it will instantly freeze to the sides and jam the dasher. Pour the aged, ice-cold base into the running machine. Let it churn until it looks like thick soft serve and pulls away from the sides of the bowl. Do not over-churn! If you let it run too long, the mechanical agitation will cause the fat droplets to clump together, and you will literally churn your ice cream into sweet butter.
Step 5: The Static Freeze (Hardening)
Get the ice cream out of the machine and into a pre-chilled, shallow metal container as fast as humanly possible. Press a piece of parchment paper or plastic wrap directly against the surface of the ice cream to prevent ice crystals from forming on top. Place it in the absolute coldest part of your freezer (usually the very back, away from the door). Just like you wouldn’t bake a cake without a simple oven thermometer, you shouldn’t freeze ice cream without checking your freezer temp. Ensure your freezer is set to at least -18°C (0°F).
Troubleshooting Common Ice Cream Disasters
Even with the best science, things can occasionally go sideways. Here is how to diagnose and fix the most common homemade ice cream failures.
The Ice Cream is a Solid Brick
If you followed the freezing steps and it is still rock hard, your Freezing Point Depression is off. Your recipe doesn’t have enough sugar, or it doesn’t have the right kind of sugar. Next time, increase the total sugar slightly, or swap more of the sucrose for dextrose or light corn syrup. Also, check your freezer temperature. If your freezer is set to -25°C, everything will be a brick.
It Feels Greasy or Leaves a Film in Your Mouth
You over-churned it, or your fat content is too high. When ice cream is over-churned, the fat emulsion breaks, and the butterfat clumps together. It literally coats your tongue in butter. Stick to a 15% fat ratio and pull the ice cream from the machine the second it resembles soft serve.
It Turned Gummy or Slimy
You were too heavy-handed with the stabilizers. Guar gum and Xanthan gum are incredibly potent. If you use a heavy pinch instead of precisely weighing out 0.1% on a jeweler’s scale, your ice cream will stretch like mozzarella cheese. Dial back the stabilizers next time.
The Mix-Ins Ruined the Texture
You made a beautiful vanilla bean base, but when you added a fudge swirl, the whole thing became an icy, gritty mess. Moisture is the enemy of mix-ins. If you are adding a stracciatella drizzle, be careful, because if your melted chocolate turns clumpy before it hits the cold base, it will form waxy shards. Nothing is worse than pouring a beautiful topping only to watch as your hot fudge seizes into a grainy mess. Ensure your mix-ins are high in fat and low in water.
It Tastes Weirdly Savory or Soapy
This isn’t a recipe problem; it’s an equipment hygiene problem. Dairy absorbs odors and flavors like a sponge. Unless you want your vanilla bean to taste like dish detergent because your silicone spatulas taste soapy, use a dedicated, meticulously clean stainless steel whisk and spatula for your ice cream making.
It Melts Immediately in the Bowl
If you’ve ever wondered why your ice cream melts too fast at room temperature, it usually means your recipe lacks sufficient stabilizers or has too much overrun (air). Air acts as an insulator; ice cream with very little air (like a dense gelato) melts faster than airy commercial ice cream. Adding a touch of Locust Bean Gum will dramatically improve the meltdown rate, allowing the scoop to hold its shape in the bowl rather than instantly collapsing into soup.
Making flawless, shop-quality ice cream at home is entirely within your grasp. It doesn’t require magic, and it certainly doesn’t require a culinary degree. It just requires a basic respect for the thermodynamics of water, a willingness to utilize functional pantry ingredients like dextrose and natural gums, and the good sense to throw out your cheap, toxic equipment. Control your fat, control your sugars, and freeze that base like your life depends on it. Now go forth, conquer the churn, and enjoy a dessert that actually yields to your spoon.






