
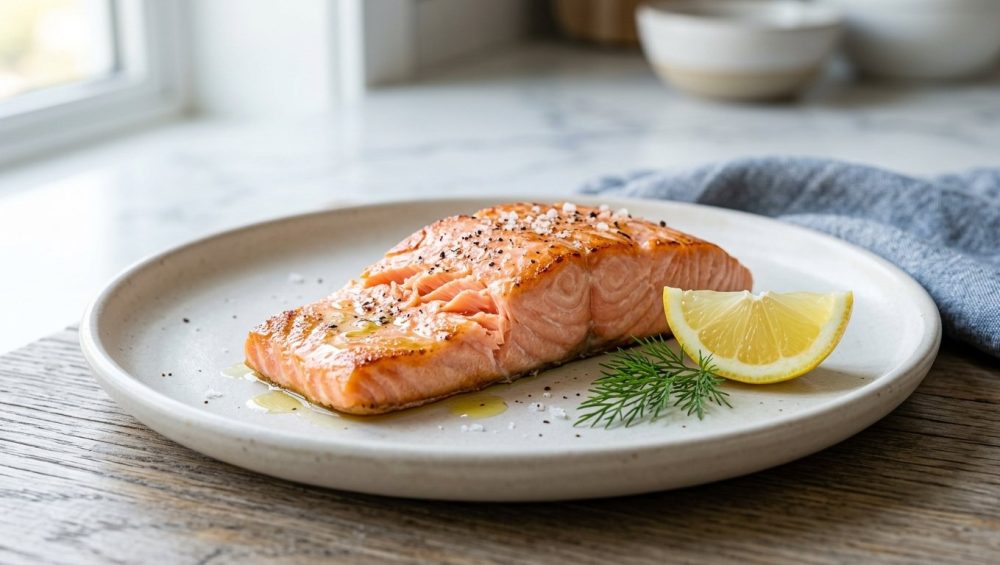
Listen, we have all been there. You have just finished a long, exhausting day at the office, and you decided to treat yourself. You stopped by the seafood counter and dropped entirely too much of your hard-earned money on a gorgeous, ruby-red fillet of wild-caught King salmon. You envisioned a restaurant-quality weeknight dinner—a little crispy skin, a perfectly flaky, medium-rare center, and maybe a glass of chilled Sauvignon Blanc to wash away the stress of your 9-to-5. You toss that beautiful, expensive piece of fish into your skillet, and within minutes, absolute disaster strikes.
Out of nowhere, mysterious white blobs start oozing out of the sides of the fillet. As the fish cooks, this white sludge coagulates into a rubbery, unappetizing film that makes your premium seafood look like it is breaking out in culinary hives. Your picture-perfect dinner is ruined before it even hits the plate, and you are left wondering what on earth you did wrong.
If you are nodding your head in sheer frustration right now, pour yourself a glass of wine and pull up a stool. I am here to tell you that you are not a bad cook. You are simply missing one incredibly easy, ten-minute prep step that will stop ruining your salmon for good. In 2025 alone, global end-consumer spending on salmon pushed past €30 billion. We are eating more of this pink, omega-3-rich fish than ever before, yet a shocking number of home cooks are fundamentally terrified of cooking it because of this exact issue.
Today, we are going to break down the science of your seafood. We are going to eliminate the guesswork, banish the white ooze to the shadow realm, and prove that you can execute flawless, professional-level food in a standard home kitchen without a culinary degree.
The Culprit: What Exactly Is That White Stuff?
Before we can fix the problem, we need to understand the enemy. Let’s get one massive myth out of the way right now: that white stuff is not fat. I hear this constantly from weekend hobbyists who look at the ooze and assume it is the rich, healthy Omega-3 fatty acids melting out of the fish. It is not. Fat renders clear and bastes the fish as it cooks. The white stuff is a completely natural, biologically necessary protein called albumin.
Albumin is a water-soluble, liquid protein found in the muscle fibers of all fish, poultry, and meat. Yes, it is closely related to the albumen found in egg whites. In a raw piece of salmon, albumin is completely invisible. It exists in a fluid state, happily hanging out in the spaces between the muscle fibers, serving a physiological purpose for the fish when it is swimming around in the ocean as a structural constituent and a transport protein.
But here is the kicker: when you expose albumin to heat, its molecular structure changes irreversibly. The protein denatures, meaning its tightly folded amino acid chains unravel and bond together into a solid, opaque mass. This is the exact same chemical process that turns a clear, snotty raw egg white into a firm, white cooked egg.
Different types of salmon will display albumin differently. A wildly expensive, high-fat King (Chinook) salmon has so much intramuscular fat (marbling) that it is slightly more forgiving. The fat acts as an insulator and a buffer against sudden temperature changes. However, leaner wild varieties like Sockeye or Coho, which have spent their lives swimming vigorously against strong currents, have highly developed, incredibly tight muscle fibers. These leaner fish are notorious for violently squeezing out albumin the second they hit a hot pan. Farmed Atlantic salmon, which makes up the vast majority of supermarket seafood, falls somewhere in the middle but is still highly susceptible to the white ooze.
Nutritionally speaking, albumin is perfectly safe to eat. It is pure protein. It will not hurt you, it does not taste like much of anything, and its presence certainly does not mean your fish has gone bad. But we eat with our eyes first, and frankly, it looks gross. When you are trying to serve a beautiful meal to your family or guests, a fillet covered in white sludge screams “amateur hour.”
The Science of the Squeeze: Why Salmon Leaks When Cooked
To understand why albumin ends up on the outside of your fish, we need a quick lesson in food thermodynamics. Do not panic, there will not be a quiz at the end of this, but understanding the “why” is how you stop blindly following recipes and start actually cooking with intuition.
Think of a raw salmon fillet as a sponge filled with water. The sponge represents the muscle fibers (made primarily of actin and myosin proteins), and the water inside represents the liquid albumin. When you apply heat to that sponge, the muscle fibers begin to contract. The higher the heat, the more violently those fibers seize up. As they shrink and tighten, they literally wring out the sponge, forcing the liquid albumin out of the muscle tissue and up to the surface of the fish.
Once the liquid albumin is forcefully expelled to the surface, it is exposed to the direct, intense heat of your pan or the hot air of your oven. According to culinary science, albumin begins to coagulate heavily when it crosses the 140°F (60°C) temperature threshold. It instantly solidifies upon hitting that hot exterior, forming those unsightly white blobs.
If you are seeing an absolute explosion of white goo on your salmon, it is a glaring neon sign that you are overcooking your fish. But wait, you say! “I like my salmon cooked through, and I always get the white stuff even when I try to be gentle!”
That is because even moderate heat causes muscle contraction. The primary trigger for this violent squeeze is extreme temperature differentials. If you take a 35°F piece of fish straight from the refrigerator and throw it into a 400°F pan, the thermal shock causes a massive, immediate spasm in the outer muscle fibers. The outside of the fish seizes up, squeezing the albumin out before the center has even begun to warm up.
This is where the frustration lies for the everyday home cook. You want a great, crispy sear, but high heat causes the squeeze. You want it cooked through, but extended cooking time causes the squeeze. It feels like a no-win scenario. But what if I told you there was a way to chemically alter the muscle fibers so they do not contract when heated?
The Magic Bullet: Enter the 10-Minute Quick Brine
Here is the secret weapon that high-end restaurants use to serve picture-perfect, deeply seasoned, wildly tender fillets every single time: the quick saltwater brine.
I know the word “brining” usually conjures up stressful Thanksgiving memories of wrestling a 20-pound raw turkey into a bucket of saltwater while having a mild panic attack. But I promise you, brining fish is an entirely different ballgame. It requires zero cooking, takes exactly ten minutes, and uses a vessel no larger than a standard Tupperware container. Time is money on a weeknight, and this step practically does the work for you while you chop your vegetables.
The Chemistry of the Brine
Why does soaking fish in saltwater stop the white stuff? It comes down to the brilliant magic of osmosis and protein denaturation.
When you submerge a piece of salmon in a concentrated salt solution, the brine has a higher salinity than the cells of the fish. Nature loves equilibrium, so a process of diffusion begins. The chloride ions from the salt penetrate the outer layers of the fish’s flesh. Once inside, these ions wedge themselves between the muscle filaments (specifically the myosin molecules). Because these ions carry a negative charge, they repel each other. This electrostatic repulsion causes the tightly bound muscle fibers to literally push apart from one another. The fibers swell, separate, and partially dissolve.
In plain English? The salt chemically relaxes the muscle fibers.
Because the fibers on the exterior of the fish have been relaxed and loosened by the salt, they lose their structural ability to contract violently when they hit the hot pan. If the fibers do not contract, they do not wring out the sponge. If they do not squeeze the sponge, the liquid albumin stays safely trapped inside the fish where it belongs. This not only eliminates the visual flaw of the white ooze, but it keeps the meat incredibly moist and tender.
The Ultimate Quick Brine Formula
You do not need fancy aromatics, boiled water, or a culinary degree to pull this off. You just need a digital kitchen scale or some basic measuring spoons, kosher salt, and cold tap water.
The Golden Ratio: 1 Tablespoon of Kosher Salt per 1 Cup of Cold Water.
(A quick, sassy note on salt: If you are still cooking with iodized fine table salt, please stop. Table salt is incredibly dense, fine, and often contains anti-caking agents and iodine, which can impart a bitter, metallic taste to delicate seafood. Kosher salt has large, flaky crystals that dissolve beautifully and provide a clean, pure salinity. If you absolutely must use table salt for this brine, you have to cut the volume measurement in half, or you will ruin your dinner).
The Method:
- The Setup: Grab a shallow glass or stainless steel container.
- The Mix: Measure your cold tap water. For two standard fillets, 2 cups of water and 2 tablespoons of kosher salt is usually perfect. Whisk vigorously until the water is completely clear and the salt is fully dissolved. Do not use warm water; you want to keep the fish cold for food safety reasons.
- The Soak: Gently place your salmon fillets into the brine, ensuring they are completely submerged. If the fish is floating, you can weigh it down with a small plate.
- The Clock: Let the fish soak for exactly 10 to 15 minutes. Do not walk away and start watching an hour-long TV show. Fish flesh is delicate, and over-brining will turn your expensive salmon into a hyper-salty, mushy disaster.
- The Rinse and Dry: Remove the fillets from the brine. Give them a very quick rinse under cold running water to remove excess surface salt, then—and this is crucial—pat them aggressively dry with paper towels.
If your fish is wet when it hits the pan, it will steam instead of sear. Moisture is the ultimate enemy of a good crust. Get that fish bone-dry before you even think about turning on the stove.
The “No-Go” Rule: Stop Cooking on Toxic Gear
We need to have a serious talk about the pan you are about to put that beautifully brined salmon into. I have zero patience for pretentious chef-speak, but I have even less patience for cheap, toxic kitchenware.
If you are still cooking your weeknight dinners on a scratched, peeling, mystery-metal non-stick pan that you bought at a discount store five years ago, throw it in the garbage immediately. I mean it. Go to your kitchen right now and throw it away.
Those flimsy pans are coated with synthetic polymers (like PTFE) that degrade over time, especially when exposed to the high heat required to get a decent sear on a piece of fish. Once that coating starts flaking off, it ends up directly in your food. Not only is it a massive health hazard, but cheap non-stick pans have terrible thermal mass. Thermal mass is a material’s ability to absorb and store heat energy. The moment you place a cold, dense piece of salmon into a flimsy aluminum non-stick skillet, the temperature of the pan plummets. Instead of searing, your fish ends up boiling in its own lukewarm juices, causing the exact rapid muscle contraction and albumin leakage we just worked so hard to prevent.
Furthermore, relying on aerosol sprays to keep your fish from sticking is a rookie mistake. The propellants and emulsifiers in those cans build up into a polymerized, sticky resin that defeats the entire purpose of the pan. Over time, cooking spray ruins nonstick pans permanently, leaving you with a gummy surface that grabs onto delicate fish skin and rips it to shreds.
What You Should Be Using Instead:
If you want professional-level results, you need safe, high-quality, durable equipment that retains heat. Stop treating your cookware as disposable.
- Carbon Steel: My absolute favorite for searing fish. It is lighter than cast iron, builds a natural, non-toxic, non-stick patina over time, handles screaming high heat without warping, and lasts for generations.
- Stainless Steel: The undisputed workhorse of a real kitchen. Yes, fish can stick to stainless steel if you don’t know what you are doing, but if you master temperature control and the water drop test (heating the pan until a drop of water beads up and dances across the surface like mercury before adding oil), your salmon will release effortlessly.
- Cast Iron: Heavy, indestructible, and holds heat like an absolute furnace. It is perfect for getting that restaurant-quality blackened crust. Just make sure you clean it properly—and yes, you should absolutely be using a chainmail scrubber to knock off the burnt bits without destroying your hard-earned seasoning.
The Weeknight Hustle: Integrating the Brine into Your Routine
I can already hear the complaints through the screen. “But Sassy Sous-Chef, I work full time! I do not have an extra 15 minutes to soak my fish on a Tuesday night! I just want to eat and go to bed!”
Nonsense. Time is money, and efficiency is the name of the game in my kitchen. The brine does not add 15 minutes to your total cooking time; it seamlessly absorbs into your existing prep workflow.
Think about how you currently cook. You probably pull the fish out of the fridge, stare at it, and then spend 15 minutes chopping onions, mincing garlic, and washing vegetables while the fish just sits there on a plate doing absolutely nothing. Let’s optimize this chaos into a streamlined system.
The Optimized 30-Minute Workflow:
- Minute 0: Walk into the kitchen. Do not take off your shoes. Immediately mix your salt and water in a container. Drop the salmon into the brine.
- Minutes 1-10: While the fish is soaking, this is your golden window to prep. Wash your asparagus. Whisk together your vinaigrette. Get your side dishes moving. (Side note: if you are still prepping your veggies on cheap bamboo cutting boards, please reconsider—they are notoriously hard on knife edges and will dull your chef’s knife in weeks. Swap to a good end-grain wood board, and always use a stainless steel bench scraper to scoop and transfer your chopped ingredients to the pan so you don’t drag your sharp blade across the wood).
- Minute 11: Pull the salmon out of the brine, rinse it quickly, and pat it aggressively dry.
- Minute 12: Preheat your heavy-bottomed skillet.
- Minute 15: Sear the fish.
By multitasking, the brining process takes zero extra active time. You are simply reordering your steps to let culinary chemistry work in the background while you handle the knife work. This is how you survive weeknight cooking without giving up and ordering expensive takeout.
Beyond the Brine: Foolproof Cooking Techniques to Banish Albumin
The quick brine is your first and best line of defense, but it is not a free pass to abuse your seafood. If you blast a brined piece of salmon over maximum heat for twenty minutes, you are still going to squeeze out whatever albumin is left, and you will end up with fish that tastes like fishy sawdust.
To achieve a perfectly seared fish, you need to combine your brining prep with smart, gentle cooking techniques.
1. The Skin-Side Down Strategy
Always, always, always start your salmon skin-side down in the pan. Yes, even if you do not plan on eating the skin. The skin acts as a natural, highly effective protective thermal barrier between the delicate flesh of the fish and the intense heat of the metal.
Cook the salmon 80% to 90% of the way through on the skin side. Watch the side of the fillet closely; you will see the color slowly change from translucent raw pink to an opaque, cooked pale pink, creeping its way up from the bottom. Once that color change reaches just past the middle of the fillet, flip the fish, turn off the heat completely, and let the residual heat of the pan gently finish cooking the flesh side for 30 to 60 seconds.
To execute this flip without massacring your beautiful fillet, you need the right tool. A bulky silicone spatula will not cut it; it will just bulldoze the delicate meat. You need a flexible fish spatula. The thin, angled, slotted metal edge slides effortlessly under the crispy skin without tearing it, giving you total control.
2. The Cold Pan Technique
If you are still terrified of searing on stainless steel and causing a massive albumin leak, there is an alternative method that works wonders for fatty fillets. Starting the fish skin-side down in a cold pan and slowly bringing the heat up to medium allows the fat beneath the skin to render out gently. This gradual heating prevents the sudden, violent muscle spasms that squeeze out albumin, resulting in incredibly tender meat and shatteringly crisp skin.
3. Mind the Temperature
Remember that albumin coagulates aggressively at 140°F (60°C). For the best texture, flavor, and visual presentation, you really want to pull your salmon off the heat before the internal temperature reaches that point.
The ideal temperature for a luscious, medium-rare to medium salmon is between 125°F and 130°F. Do not guess. Do not poke it with your finger and pretend you know what “medium” feels like based on the firmness of your palm. Use a high-quality, instant-read meat thermometer to check the thickest part of the fillet. Precision is what separates the amateurs from the pros.
4. Beware of Carryover Cooking
When you pull a piece of meat or fish out of a hot pan, it does not magically stop cooking. The residual heat trapped inside the outer layers of the flesh will continue to travel inward, raising the internal temperature by another 5 to 10 degrees as it rests on the plate.
If you leave your salmon in the pan until the thermometer reads 145°F, it will easily hit 155°F on the plate. At that point, the muscle fibers will violently contract, the albumin will erupt, and your fish will be bone dry. Pull the fish early, transfer it to a room-temperature plate, and let it rest for three to five minutes before serving.
Troubleshooting Your Salmon: Common Pitfalls and Smart Fixes
Even with the best intentions and a solid grasp of culinary science, things can occasionally go sideways in the kitchen. If you tried the quick brine and still ended up with a culinary disaster, let’s diagnose the problem so you can fix it next time.
Problem: My salmon tasted like a literal salt lick.
The Fix: You either over-brined it, or you forgot to rinse it. Ten to fifteen minutes is the absolute maximum time a standard weeknight fillet should sit in a highly concentrated 5-10% saltwater solution. Any longer, and the salt penetrates too deeply, curing the fish rather than just relaxing the surface fibers. Also, do not forget that quick rinse under cold water before patting it dry. You want the salt in the muscle fibers, not crusted heavily on the outside.
Problem: The fish got mushy and fell apart in the pan.
The Fix: Again, this is a symptom of over-brining. Salt breaks down proteins. A short soak relaxes them; a long soak destroys them. Set a timer on your phone the second the fish hits the water. Do not rely on your internal clock.
Problem: I brined it perfectly, but I still got white stuff!
The Fix: Your heat was entirely too high, or you cooked it too long. The brine is a buffer, not an invincible magical forcefield. If you blast the fish at 500 degrees for twenty minutes, the laws of thermodynamics will override the chemistry of the brine. Lower your heat to medium, let the pan do the work, and pull the fish at 130°F.
Problem: My skin did not get crispy.
The Fix: Because the fish was brined in a liquid, it absorbed a small amount of surface water. If you do not pat it aggressively dry with paper towels, that surface moisture turns to steam in the pan. Steam cannot exceed 212°F (100°C), but the Maillard reaction (the chemical browning of proteins) does not begin until roughly 285°F (140°C). If there is water on the skin, it will never brown. It will just boil and turn flabby. Dry your fish!
Problem: My fish curled up into a U-shape in the pan.
The Fix: When fish skin hits a hot pan, it shrinks faster than the flesh, causing the fillet to curl up at the edges. To prevent this, use a sharp knife to score the skin lightly (just a few shallow, diagonal slashes) before cooking. This severs the connective tissue and allows the fillet to lay perfectly flat against the hot metal.
The Final Bite
Cooking seafood at home should not induce a mild panic attack, and it certainly should not result in a dinner that looks like a science experiment gone wrong. Understanding the “why” behind your food—knowing that albumin is just a harmless protein reacting to heat and muscle contraction—is the very first step in taking total control of your kitchen.
By implementing a simple, ten-minute saltwater brine, you are utilizing basic culinary chemistry to outsmart the muscle fibers. You are guaranteeing a moist, perfectly seasoned, beautifully clean fillet of fish that looks like it came out of a high-end restaurant kitchen.
You do not need a culinary degree to cook like an expert. You just need a little bit of science, a refusal to use toxic, garbage cookware, and the confidence to try something new. So go buy a beautiful piece of salmon, mix up some saltwater, and pour yourself that glass of wine. You’ve got this.






